strathmoredesigns
-
Posts
145 -
Joined
-
Last visited
Content Type
Profiles
Forums
Events
Blogs
Gallery
Store
Everything posted by strathmoredesigns
-
Getting A Clicker Press Custom Made?
strathmoredesigns replied to DavidL's topic in How Do I Do That?
Does anyone actually know how to contact Noya/get a price on their press. I can't seem to figure that out. -
Where do you guys get your machinery? Things like splitter/skivers, clickers, presses etc.? I keep hearing about the Cowboy and Osborne brands (for example), and I can find their websites, but I can't seem to figure out who really sells the stuff. I'm familiar with the larger retailers like Tandy, Springfield, and Weaver and I've noticed that some of them carry a few of these items. Then I've heard about Solar and Toledo, but they don't seem to list their full ranges online. I'd really like to find a website where I can browse the full range and actually see prices. Does such a creature exist?
-
Would something like Javelina work? Tandy's carrying it these days. I bought one in brown and black and I think it's beautiful. https://www.tandyleather.com/en/product/javelina-pigskin-brown
-
How versatile is the Craftool Pro Hand Press?
strathmoredesigns replied to strathmoredesigns's topic in Leather Tools
Thanks everybody, some really helpful information and some stuff to think about! -
How versatile is the Craftool Pro Hand Press?
strathmoredesigns replied to strathmoredesigns's topic in Leather Tools
Thanks guys. For those of you with this press, are you only able to use Tandy Are you able to use non-Tandy brand hardware with it? Most of my hardware at this point is from Tandy, but I don't want to be limited in the future. My general assumption is that a 3/16 eyelet should more or less be a 3/16 eyelet, regardless of whether Tandy made it or someone else did.... -
How versatile is the Craftool Pro Hand Press?
strathmoredesigns replied to strathmoredesigns's topic in Leather Tools
Ok, that was one thing I was definitely wondering. I get it that the dies would be specific to the Tandy press, but how specific is the hardware? Will I need also use hardware I buy from Tandy or is there enough standardization in things like rivets and snaps that I could use just about anybody's and still set that with that press? I've seen the arbor presses done and thought about that a little, but I'd have to get someone to do it for it so I was thinking this might be a ready-made solution. -
I'm looking at buying Tandy's Craftool Pro Hand Press and it's associated accessories. I haven't gotten far beyond rivets thus far, but I can definitely see myself doing eyelets and snaps and such in the near future. So I wanted to get a sense of whether or not anyone had any experience with this tool and how useful/versatile they found it and the different dies/accessories to be. Here's a list of the dies/accessories they offer for it: Wide Double Cap Rivets Stamp set for: 1/8" (3 mm), 1/4" (6 mm) and 3/8" (10 mm) stamps and 2D/3D series, 1/2" (13 mm), 3/4" (19 mm) and 1" (25 mm) alphabet stamps Round Tube Punches Adapter 1/4" Round Spots 3/8" Round Spots 3/16" Eyelets 1/4" Eyelets Line 20 Snaps Line 24 Snaps Rapid & Double Cap Rivets Tubular Rivets Multipurpose Snaps for Segma Type Snaps Thanks guys.
-
Random Flat Stitches in Saddle Stitch
strathmoredesigns replied to strathmoredesigns's topic in Sewing Leather
Thanks. Looks like I've got some more unpicking to do! -
Random Flat Stitches in Saddle Stitch
strathmoredesigns replied to strathmoredesigns's topic in Sewing Leather
This is entirely possible! I've started and stopped stitching a few times and then come back to it. I still haven't figured out a good way to remember which way I was going or where I left off. I particularly have trouble when I unpick a few stitches and have to start again midway through. Thanks for pointing out the slant. For some reason I think I interpreted something Ian or Nigel said as suggesting I wanted to stitch like in image A (may have had something to do with their hands being in front of the camera ), but are you saying I should be doing it like in image B? I did gather from Nigel and Ian that doing the same exact movement each time was important so I've been following their lead and placing my second needle in a cross shape behind the first and then pulling the first thread backwards in the hole so that the second needle always goes in front of it as it passes through the hole and then casting my thread over the second needle. Hopefully I'm getting that right? Thanks guys!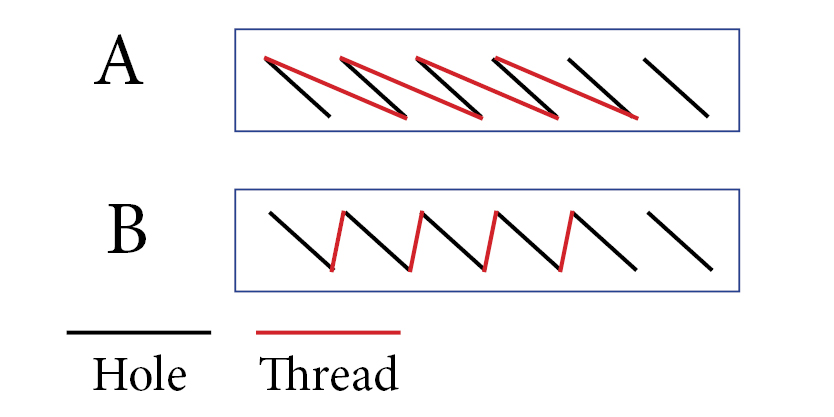
-
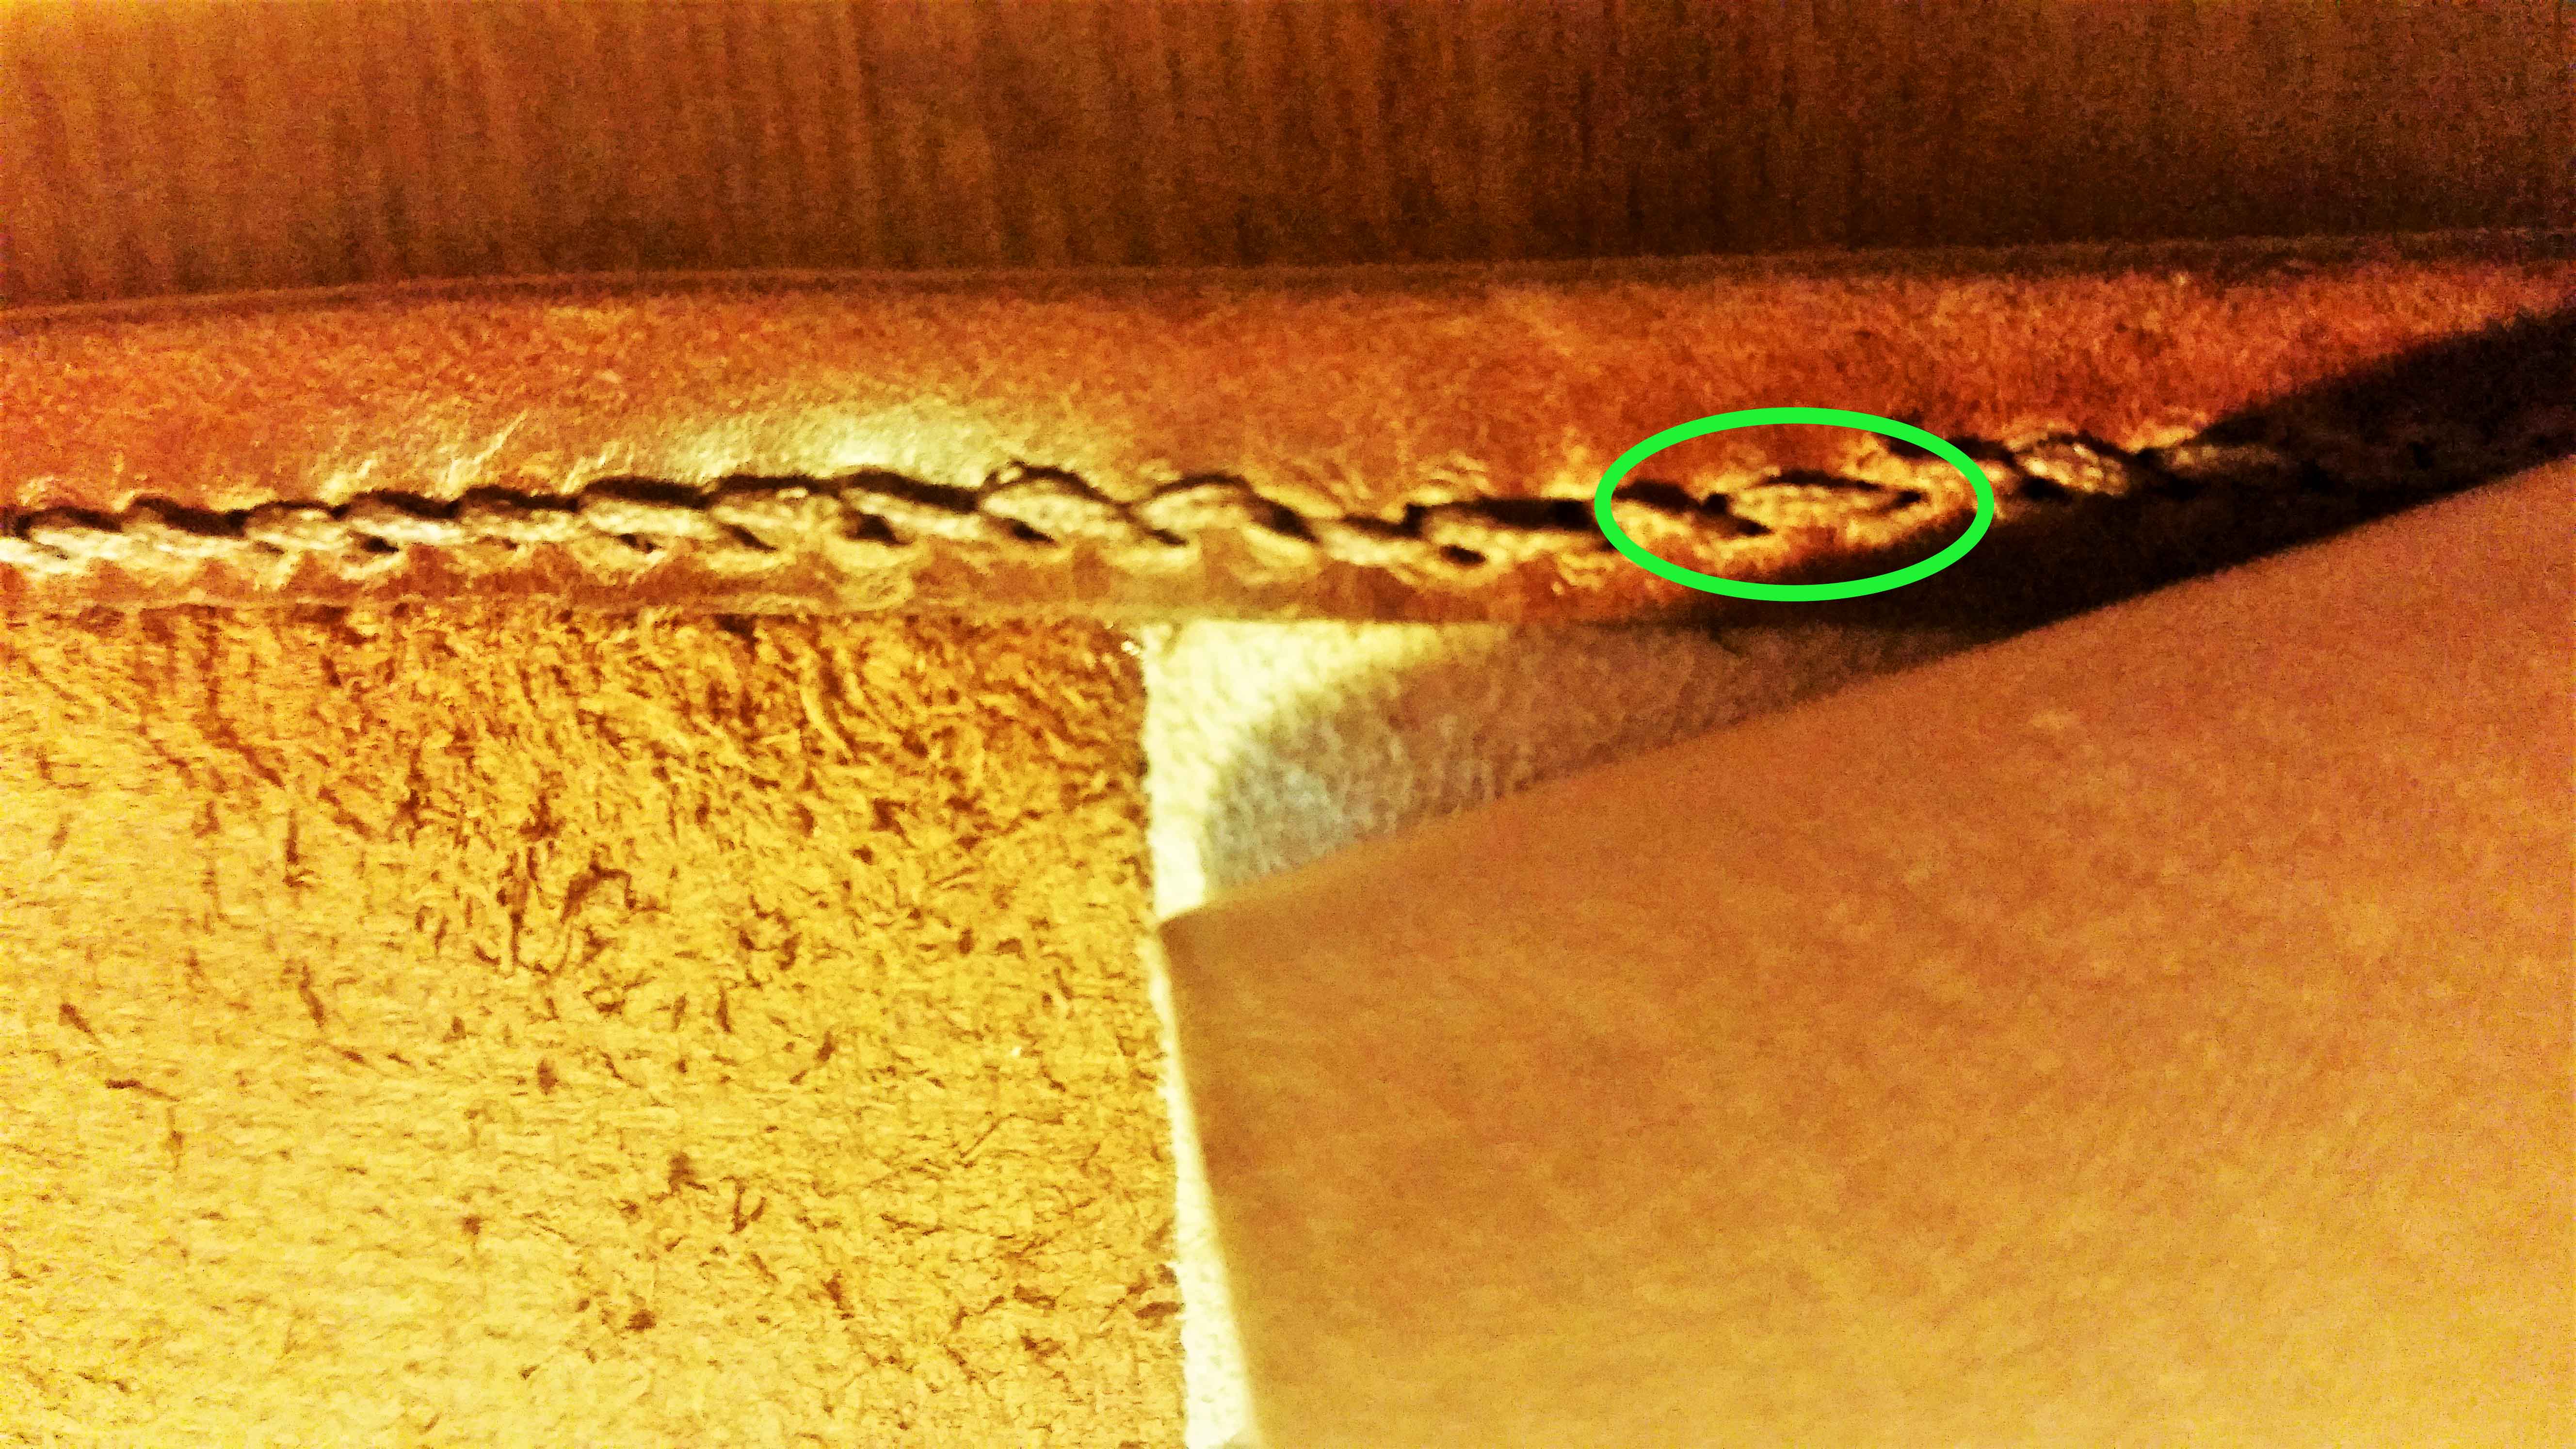
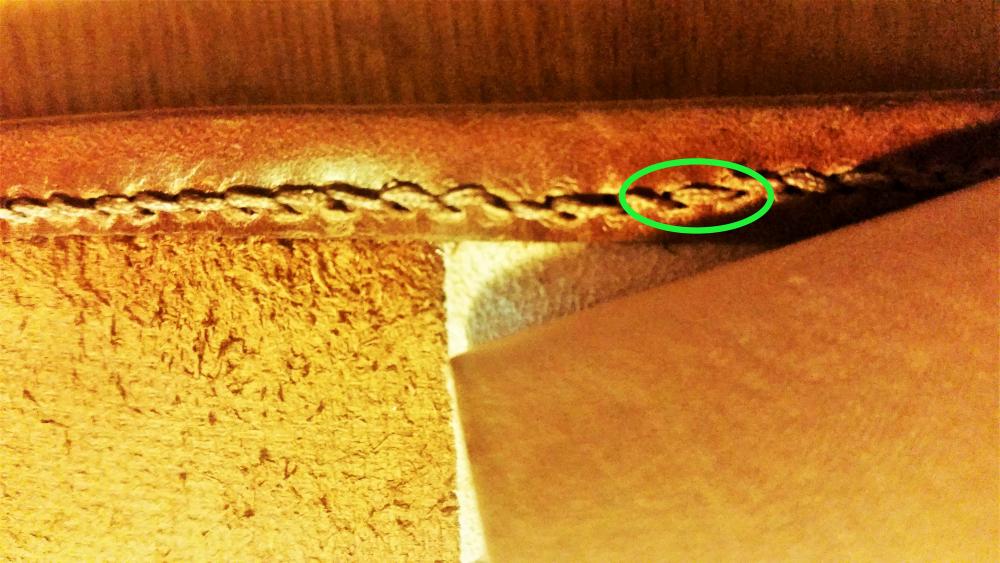
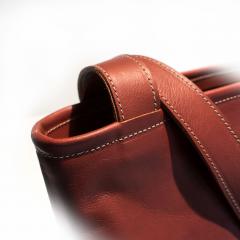
Hi all, Working on my first large scale saddle stitching project (a tote bag) and I'm really trying to do a good job. It's going pretty well and looks nice and slanted on the front. I'm doing a decent job of carrying that slant on the backside too, but every once in a while I'm getting a random flat stitch in the middle of my slanted stitches. When I find these stitches, I'm unpicking my way back to them and redoing them (mostly successfully), but I can't figure out what I'm doing to create them in the first place. Does anybody have any ideas? I've circle one such stitch in the attached photo.
-
I bought a Tiger thread sampler and a full roll of .8 mm thread from him - very satisfied. He also pops up on this forum once in a while, if you wanted to try and ask him any questions. I think he goes by Egyptian Leather. Per Nigel and Ian's recommendation, I bought the #2 John James needles. Note that there are two versions of the #2's. There's 002 and 2 (I think). You'd want the 002 Saddler's Harness Needles (product L3912-2). I found that it was most cost effective just to buy them directly from John James and ship them to the US, which only took about a week at the cheapest shipping speed. I got 6 packs of needles and paid for shipping and it cost $18 something, whereas at the time I saw 2 packs of needles and free shipping on Amazon for about $16. After watching Nigel and Ian a bit, I included in that order a pack each of 003 and 004 in case I want to mix things up at some point. Thus far, I've been using my .8 mm roll of Tiger thread with the 002 John James needles and I've used it with the 3.5 mm Craftool chisels (as well as with the 3 mm and 4 mm Seiwas). Like the others, I also use a wing divider to mark my stitching line. In case it helps, Nigel also gives thread and needle recommendations in his chisel reviews, including for the 3.5 mm Craftools. I know I didn't go with the .6 mm Tiger thread because Egyptian Leather wasn't offering full rolls of that at the time (maybe it's changed?) and he had the best prices I could find.
-
20161121-Tall-Bag-2741-No-1b.jpg
strathmoredesigns commented on pierrecook's gallery image in Gallery- Our Leatherwork
 This is really nice. What are you sewing with?
 -
Just a suggestion, but if you've been away from sewing machines for a while, it might not be a bad idea just to do a refresher on those first? I've been hand stitching for a bit now, but never really learned how to use a sewing machine, so I'm going to take a class at my local JoAnn's to get familiar with how they work in general before I try to figure out what I'd want in a leather sewing machine. Thanks @Wizcrafts for calling out a good entry level machine (Consew P1206RB) for me to look at. I've read the big sewing chains, but have been still trying to figure that one out for a while!
-
I know someone mentioned checking out a maker space, that's a great idea. I've also found a laser to practice on at a local library (Epilogue Zing 60 watt, retails for about $14K, so pricey but top of the line). It's free and they offer some training and I've been able to pick their brains a little about the laser itself as the library is on its second machine (first was an early Full Spectrum), and these guys made the purchasing decision. As for my experiences to date.... as others have said, a fan is a must, as the leather does smell and the fumes generated by the laser in general can be intense. Laser cut leather can also sometimes get a little brittle and the laser will leave permanent dark burn marks both on the edges it cuts and on anything it engraves (though it's easily the most precise cutting and engraving I can get on leather so far). It doesn't take much experience to quickly learn to ID anything (leather or otherwise) that a laser cutter has touched because of these marks (example 1, example 2). I tried using masking tape and painters tape on some veg tan to limit the burn marks, but that didn't come off very cleanly and in some cases took the top layer of the leather with it - so don't bother. Corel Draw is similar to Adobe Illustrator (though significantly cheaper), if your familiar, but if you're not, expect a little bit of a learning curve. You'll need to learn about raster and vector images, and line thickness, which is is really important in terms of the laser reading a marking as a direction to cut or engrave. I believe the cutting lines in Corel also need to be set to "hairline" or they'll just engrave. If like me, you're trying to design in Illustrator and import to Draw, it can be kind of a pain, as the two softwares sometimes interpret things differently. I've found it's easier to bring an Illustrator-generated PDF file into Draw than an .EPS or .SVG file (I forget which Draw uses). Though if you're designing directly in Draw and you're not working with a machine that will lock you out after an hour (thanks, library), then you shouldn't have that problem. In terms of buying one... sometimes you'll see the real professional brands like Epilogue available used, but they're aren't usually a ton, and they're still pretty expensive. The Chinese imports are definitely the cheapest and my sense is that they're getting better, but you still need to be pretty capable as there's not really any support, the software can be wonky, and they don't always arrive (or stay) in working order. I've noticed though that there's another class emerging which are intended for home use, run about $3K to $5K and are coming from places where you might expect a little more quality control. These include Glowforge (US), Full Spectrum (US), Fabool (Japan), Emblaser (Australia), and Mr. Beam (Germany). Most of these are in at least their second generation and while they're not "professional", they are coming with at least 30 to 40 watt lasers, and in some cases more. I've been researching them for a few months now, and it seems like the major limitations (aside from Glowforge being massively delayed) is that you can't run the lasers non-stop like you could with something like an Epilogue and the beds tend to be smaller. Though I haven't bit the bullet yet, I'm sort of hovering between the Emblaser 2 and the Fabool 2. The Emblaser has a different type of laser (diode, I think?) which can run longer than the about 30 minutes most of the home lasers can safely run, but the bed is sized to non-US paper sizes (A3, I think) and thus a little small. The Fabool has the biggest bed and a stronger laser, but it has the type of laser that needs rest time. I also like the idea of buying a machine that comes with software written by native English speakers, as non of these companies are really "global" yet. As you seem to have noticed, it's also never as simple as "just buy this laser and you're good to go". You'll also need to buy a handful of accessories (fans, guides, etc.) in order to operate it safely and effectively. I'd estimate you could easily spend an extra $500 on relatively important accessories. Anyway, those are my two cents. There are a number of Facebook groups out there where users are talking about these machines. It might be worth joining and seeing what they're saying.
-
Diamond Chisel Recommendation Needed
strathmoredesigns replied to ZATARA's topic in How Do I Do That?
Both Nigel and Ian Atkinson recommend the Seiwa chisels for people just starting out. I have the 3 mm and 4 mm (2 prong and 6 prong) versions and I like them so far. You can get them from Goods Japan, but you'll have a bit of a wait. First you have to get on the waiting list (by submitting your email and asking them to tell you when they're in stock) and then once you do order it takes about 3 weeks for them to arrive (though the shipping is free). Nigel also recommended the Crafttool 3.5 mm set which I bought from Tandy while I was waiting for my Seiwas to arrive. That set's pretty good (I have a 2 and an 8) for someone just starting out too and they're on sale this month at Tandy (https://www.tandyleather.com/en/product/craftool-fine-diamond-chisel-3-5-mm). -
I have a Pro Edge Burnisher too. I use one of these https://www.dremel.com/en_US/products/-/show-product/tools/2500-01-multi-vise. I don't have an actual Dremel brand dremel, so the hook part doesn't fit on mine, but I just use the clamp to hold it. Works well for me.
-
Are Prongs Different Sizes Seiwa Stitching Chisel?
strathmoredesigns replied to Docott's topic in Leatherwork Conversation
Ok, I remembered. Here's the 3 mm and 4 mm Seiwa chisel side by side. This must be the first time I've really compared them, because I was pretty surprised at how much wider the 4 mm is than the 3 mm. As for the prongs themselves, I don't know if the picture conveys it, but the 4 mm prongs are slightly larger than the 3 mm. Not huge, but just a little bit. Most of the size difference is in the spacing of the prongs. Anyway, hope that helps!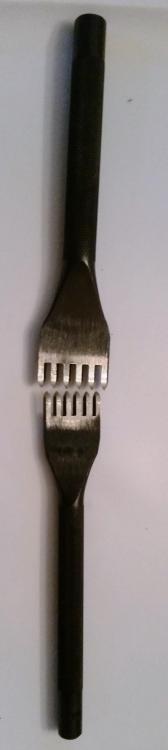
-
Pricking iron vs stitching chisel vs lacing chisel
strathmoredesigns replied to Markwell's topic in Leather Tools
@ContactCement I agree. The product descriptions are all over the place and there's not much standardization. When I was picking out my chisels, I found Nigel Armitage's reviews to be really helpful. He does YouTube demos and reviews of a bunch of the more popular chisels or if you don't have the attention span to watch a video, he's also summarized his findings on his website. I also sort of ran with Ian Atkinson's recommendation that a 3 mm and 4 mm set would cover just about anything I needed (I have a 3 mm, 3.5 mm, and 4 mm). Also, note that Ian's made a mistake in his list and says 6tx3mm twice, but he links to the correct products. @Markwell thanks for putting this together. It's a great resource! -
Are Prongs Different Sizes Seiwa Stitching Chisel?
strathmoredesigns replied to Docott's topic in Leatherwork Conversation
I have two sets of Seiwa chisels. I can't recall if the prongs themselves are different sizes (they're very close, if they are, and I'll try to remember to look tonight), but obviously the spacing between the prongs vary. Personally, I own three sets of chisels, two by Seiwa and one by Craftool (Tandy). For each set I have a two prong and then either a six prong (Seiwa) or an eight prong (Craftool). I don't have any single prongs. One thing that was pointed out to me as I was selecting my chisels was that if you just need to add a single hole, or a couple of holes, and you don't have a chisel with exactly that amount of holes is that you can place the prongs you don't need into a hole you've already punched and only leave out the number of prongs you do need to create new holes. (In case that was hard to follow: I can punch 12 holes with my Craftool 8 prong chisel by first punching a full set of 8, and then sticking 4 of the prongs back into holes I've already punched and leaving 4 prongs out to punch new holes). I find doing this also makes it easier to ensure you're punching in a straight line and so I pretty much always put about half of the prongs in old holes and only leave half out to create new holes. If you really want to be able to create a single hole, but don't like my method or want to invest in two single punch chisels, you could also use and awl to create a hole. One thing I would caution also about the Seiwa chisels, as I've seen others make this mistake, is that in addition to varying SPI, they also make a couple of different styles, European and Diamond. They are different, so you wouldn't want to get a 2 x 3 European and a 6 x 3 Diamond and expect them to be a set. And if you're planning to purchase them from GoodsJapan you'll need to actually get on the waiting list... I spent like 3 months checking their site daily before I figured that one out. To get on the waiting list you have to submit your email where it asks if you want to be notified when the item is back in stock and you have to do it for each product you want. Eventually, they'll send you an email and tell you when you can purchase it. Finally, in response to @ContactCement's comment about it being easier to pull out fewer prongs, while I agree that this is true, you can also make the larger ones easier to pull out by polishing and bees waxing them (and using something like a bone folder or piece of wood to hold down the leather while you pull). Nigel Armitage goes through the process in his review of the Craftool 3.5 mm chisels. -
Why didn't I think of Ian? I'm making one of his bag build alongs right now! Ian's channel is a great place to start to learn about leather working in general. He sells patterns and detailed instructions on what tools and types of leather you'll need on his Etsy page and then his YouTube channel has videos where you can watch him make the piece and work along with him. Here are a couple of his wallet/wallet-esqe "build alongs": https://www.etsy.com/listing/186830794/build-along-leather-pattern-2-coin-and?ref=shop_home_active_18 https://www.etsy.com/listing/256113947/build-along-leather-pattern-5-compact?ref=shop_home_active_21 On his personal page he also includes a list of beginner tools. You probably won't need all of these if you're just planning to start with a wallet, but you can see exactly which versions of tools Ian recommends. It's helped me a lot. Here's his tool guide: http://ianatkinson.net/leather/toolset.htm There's also always the option of buying a wallet kit from someplace like Tandy or Springfield. A lot of kits come with some of the work done already (cutting, punching) so you can try your hand without having to commit all the way or to all of the tools up front. Leather working is a fun hobby, but between the tools and supplies, it can get expensive fast. https://www.tandyleather.com/en/search/?sSearch=wallet http://springfieldleather.com/search?keywords=wallet If you do decide to invest in the hobby a lot of places (Tandy and Springfield, included) offer pricing memberships/tier levels where you can either qualify for better pricing based on military, first responder, or business owner status or you can pay a membership fee for a better level of pricing. If you think think is something you're going to want to stick with, you should try to get yourself signed up for a better class of pricing ASAP (it was worth it for me to purchase a Gold membership at Tandy the first time I went). Also, you may not have to be the person with the status to get the pricing. I got my Elite pricing at Tandy because my dad was in the military in the 1970s and he still had his discharge papers, so it pays to ask. Anyway, good luck!
-
You might try starting with something like this and just picking out the materials and tools you'd need for the wallet. http://www.instructables.com/class/Beginning-Leatherworking-Class/
-
Thanks guys, that helps!
-
Ok, here's a leather 101 question for you. It's frequently said that we need to "buff till your arm's ready to fall off." But as a relative newby, I have to ask, aside from feeling like I need a new arm, what other indicators can I look for to help figure if I've buffed enough? Right now I'm dealing with a piece of tannery oil tanned that I've sprayed four coats of 1:1 water:resolene on. So the color is holding fine, no issues there. What else can I look for to tell me if I'm done buffing?
-
First Axe Mask completed
strathmoredesigns replied to KurseD's topic in Gun Holsters, Rifle Slings and Knife Sheathes
I ran a test that I posted about it another feed and I found that the resolene kept the water on top of the leather for a bit, but did ultimately allow it to be absorbed (I did it on my lunch break, so my comparison windows were about 10 minutes and 3 hours), so my goal isn't water proofing, it's just adding some water resistance to it. I'll give the multiple coats a try and see where we get! -
First Axe Mask completed
strathmoredesigns replied to KurseD's topic in Gun Holsters, Rifle Slings and Knife Sheathes
This is really helpful, thanks. How many coats of thinned Resolene would you add to get a decent layer of water resistance? (I'm making a tote bag and I just want to be able to get caught in the rain and not instantly ruin the thing, if possible).