azrider
-
Posts
450 -
Joined
-
Last visited
Content Type
Profiles
Forums
Events
Blogs
Gallery
Store
Everything posted by azrider
-
Attempt at seats based on a sprung pan
azrider replied to azrider's topic in Motorcycles and Biker Gear
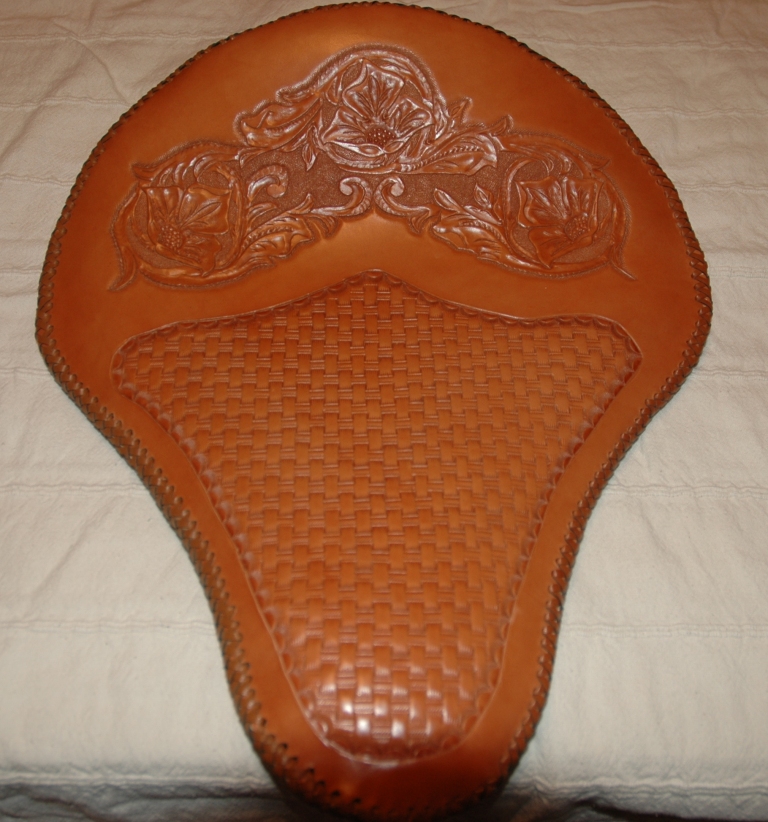
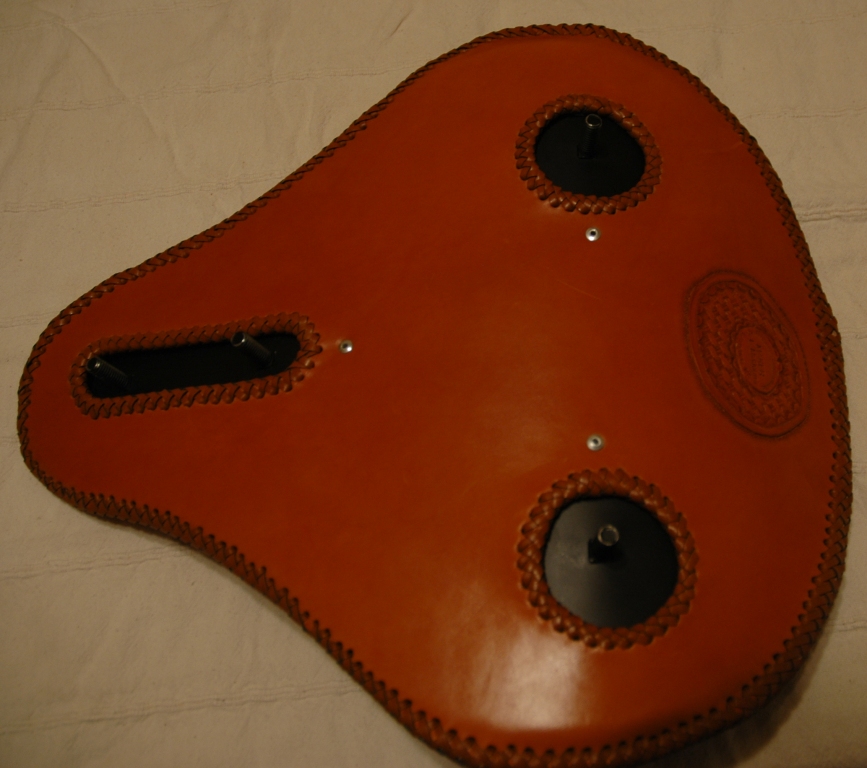
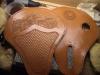
Here's the finished seat. It is my second motorcycle seat, and the first one using this type of pan. I put it together, and learned a lot from it. I won't be putting together the other one, my pattern is off by about a half inch, so the lacing folded under the back of the pan more than I wanted. I am also going to spend a lot of time on the next seat getting the holes completely even, because that will make things look quite a bit better. I am not totally happy with the way it came out, but I think I learned enough that my next one will be much better. Critques welcome.

-
I have two of Bearman's Mauls, and they are awesome to use and look nice too. What type of wood is the handle on that one?
-
So what I am getting from this so far is that an inkjet will allow you to transfer the ink directly to the leather, wipe off and reuse the transparancy sheet. A laserjet will create a permaent pattern that you can trace onto multiple pieces of leather. Does that sound right?
-
That's nice.
-
Thanks for sharing that, Kate. I have not had a chance to pick up the transparency film yet, so haven't done this. Any idea if it will work with a Laser printer?
-
Attempt at seats based on a sprung pan
azrider replied to azrider's topic in Motorcycles and Biker Gear
Thank you for the reply, David. I figured out how to walk a wing divider to get better spacing on the holes after most of them were already punched. I really struggle with the spacing of holes, and getting them even. If I can start to get the holes even that will help my lacing a lot. I didn't realize the lacing will cause the bottom piece to pucker. I think you had mentioned before that you don't use any glue either. When I got this pan originally, I was trying to figure out how to attach the leather. I may get a drill press so I can get the pan drilled easier, because my hand drill is going to struggle to make that many holes in metal this thick. It is a learning process for me. This whole seat is practice for designing the layout, lacing, and assembly. I am hoping to learn enough from it that anything I do in the future will look better. -
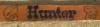
Thanks Kate! I used a strap cutter to cut an inch and a half strap, and then an inch strap. Once I figured out where the holes needed to be for the hardware on the 1 inch strap, (I only ordered 1 inch buckles and dee rings,) I used it as a template to cut the ends down on the thicker strap. I think it was actually easier to carve the letters rather than stamp them. I got exactly the size I wanted, not the 3/4 inch size. And if you carve them the letters don't bounce!!!
-
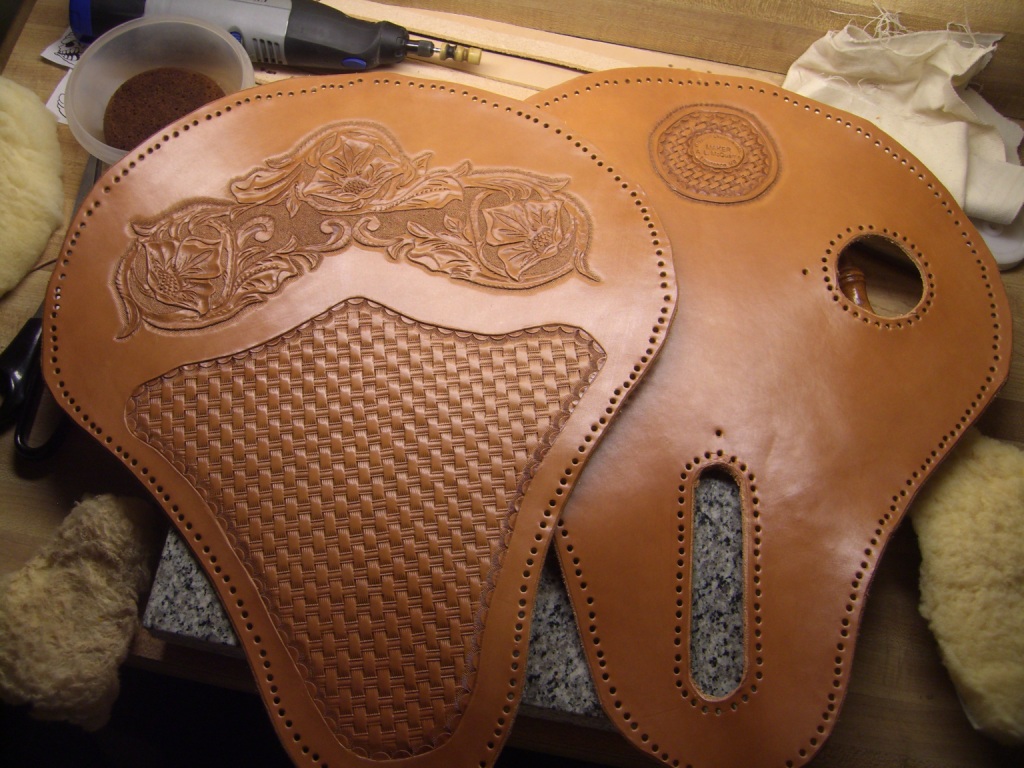
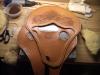
I ordered a seat pan, not because I want to put it on my bike, but just because I wanted to try making one. This site will do that to you... The first picture will be done with brown lace. It was my second attempt tooling this design, which I modified out of a Tony Laier pattern. This is the one I will lace first. The second picture are my screw ups from the first attempt. I cut out the places I messed up, and will be inlaying some black leather with a texture background stamp. I had slipped with the knife when cutting it out, but I don't think its too noticible. (I am ordering two more pans this week.) I plan on using three rivets to attach the back to the pan, then using the mexican basket weave to lace them together. I am not sure if I should use the basketweave or double loop to cover the edges on the cut outs on the bottom. I am planning on one or two layers of exersize mat for padding, depending on what fits. Any tips or suggestions from the pros on here?
-
I couldn't touch that kind of layout and art work. I like.
-
I have an 80 pound dog thats afraid of his own shadow. I thought it would be fun to give him a collar with skulls on it. Critiques welcome.

-
Enough oil?
azrider replied to azrider's topic in Dyes, Antiques, Stains, Glues, Waxes, Finishes and Conditioners.
The chalkyness came back a little, but I had done a few smaller projects out of the same hide, so I knew that it would dissapear once the Bee Natural finish went on. I just had never put six coats of oil on something before to get it to where it seemed saturated. Mainly I was just looking for infomation on what could be causing it. I am in the process of buffing these now, and they look fine. The good news is there is not much of this hide left, and I will be ordering some better quality stuff soon. -
I am working with a double shoulder I purchased that I have no idea where it is from. Imported or what. Anyways, I noticed as I tooled it, that the areas that dried out the fastest turned a chalky white. The pieces were slicked before tooling. When I finished tooling and let the leather dry completely, I put a coat of extra vergin olive oil on the pieces with shearling. This took all of the chalkyness off. I then attached them to a board and put them in the sun for about six hours. When I pulled them out of the sun, all of the pieces were more chalky than they were when they where oiled before. I have since put five coats of oil on them, the first four were absorbed completely within about 10 minutes each. The last coat I put on seems to be staying put for a bit, so I am thinking they should have enough oil on them now. I am leaving them inside, and hopefully they will completely even out in color by morning. So it this the right way to handle this leather? I am assuming because they wicked the oil up so fast they were just dry, and the coat that is not being absorbed as fast means there is enough and to stop. What causes the chalky look? Will this leather hold up well?
-
Filling in structure of cruiser seat
azrider replied to MADMAX22's topic in Motorcycles and Biker Gear
Pictures? -
Filling in structure of cruiser seat
azrider replied to MADMAX22's topic in Motorcycles and Biker Gear
I have a V-Star with a seat that I re-did. I used two layers of an exersize mat. Its more comfortable than the stock seat, and it makes me sit lower in the bike, which lowered the center of gravity on the bike. Here's mine. http://leatherworker.net/forum/index.php?showtopic=14742 If that doesn't work, I still have the stock foam for the rider's seat. Postage, and its yours. -
I feel like this on most projects! I have spent about four hours today trying to come up with a design for a project that hopefully I can sell. I usually end up doing something I haven't tried before. For this one, none of my stuff I had worked, so I took a bit of this, and an bit of that, and I hope it comes out well. We will see. To get started on stuff, sometimes I just start googling.
-
I have a few thousand miles on the seat I made, and can give you a few things not to do. On the advice of a leather shop, I sealed my seat with a spray on acrylic finish. With in a month, the places where the leather was under the most stress had cracked and were flaking. I have been researching alot on what I will use next time for a finish/ sealer, and it will be something that is not acrylic based, and will be absorbed into the leather rather than sitting on top. Right now I am thinking the Bee Natraul finish but am not completely sure. I also will be going with a stricly brown seat colored with olive oil and a suntan. I can't see that rubbing off, and more exposure to the elements will probably just make it look better.
-
All in one nice neat place. Now I only need to go to one thread to steal your methods... Thanks for putting this together.
-
The pan I am working with is 12 inches wide. Is that about the same size as yours? I have two bolts for the spring, and two down the center of the nose for the hinge to go around.
-
I bought a seat pan just to see if I could make something nice. As I am looking at many of the seats built on pans, it looks like the bottom piece of leather is riveted to the pan. So the pan is drilled for the rivets, the bottom piece is attached, and then the top piece is laced to the bottom piece?
-
Other people can probably give a better answer, but what I saw was that the leather seemed denser, and more solid feeling. It took more pressure to use tools or a swivel knife, but the impressions seemed crisper. It also smoothed the imperfections in the leather quite a bit. Can anyone else comment?
-
One of the members at the last guild meeting demonstrated a glass slicker for me. I really liked it, but need to slow down on buying anymore tools right now. I saw a candle in a square jar this weekend... What is the best method for using a slicker?

-
Those are nice. I like the dye job to make the design stand out.
-
So does anyone think a leather braid or wrap would be worth doing, or just go with some type of rubber or plastic?
-
I use clear packing tape on the back of the leather to prevent streaching. No glue, no problem.
-
Thanks for the ideas! I have some fuel hose in the garage I could use, but might try something with the leather mache too. Are the dips hard to get?