


kgg
-
Posts
3,378 -
Joined
-
Last visited
1 Follower

Recent Profile Visitors
21,821 profile views


kgg's Achievements
Leatherworker.net Regular (4/4)
-
Depending on the thickness of leather you may want to considered adding some 180 (#24) needles, if you can find them. A 200 (#25) is really meant for V277. Something to be aware off when using a sewing needle that's too large for the thread size in thinner stuff could cause: i) oversized holes ii) loose stitches iii) fraying iv) skipped stitches as a result of to much needle eye and groove space that could cause inconsistent forming of the thread loop. kgg
-
That thread is from a reseller in Texas and do not list where it actually comes from. If I were too guess probably from China. If so I have never had any luck with thread out of China. My problems main problems with Chinese thread has been: i) inconsistent winding tension on the spool ii) broke needles because the spool wasn't one continuous thread as the two ends were tied together and the knot didn't fit through the eye of the needle iii) fraying I would suggest you purchase some thread from a reputable supplier or manufacturer before you drive yourself nuts. Your woes could be as simple as poor quality thread. Yes the good thread will be more expensive but eliminated that element from the equation. As a minor note I have found the smaller spools 8 oz to be worst for problems then the 1 lb spools. Also what size of needle and manufacturer of needles are you using??? kgg
-
I think the treading is incorrect on your machine when I compared yours to this video. That would probably cause the the twisting??? kgg
-
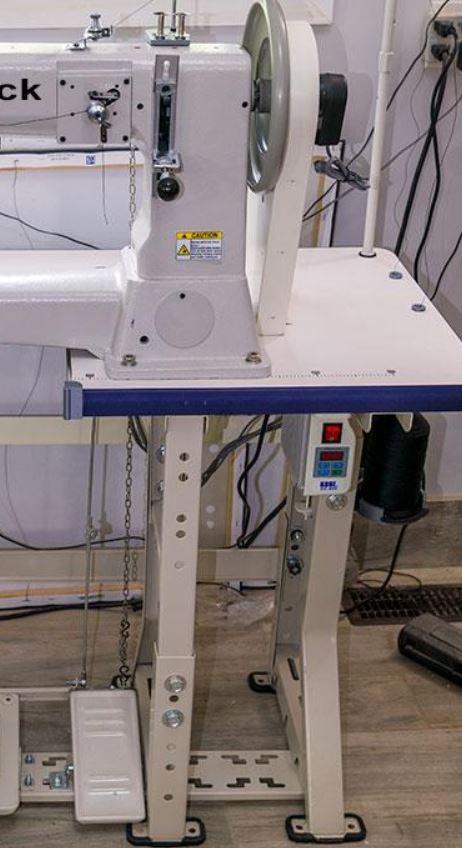
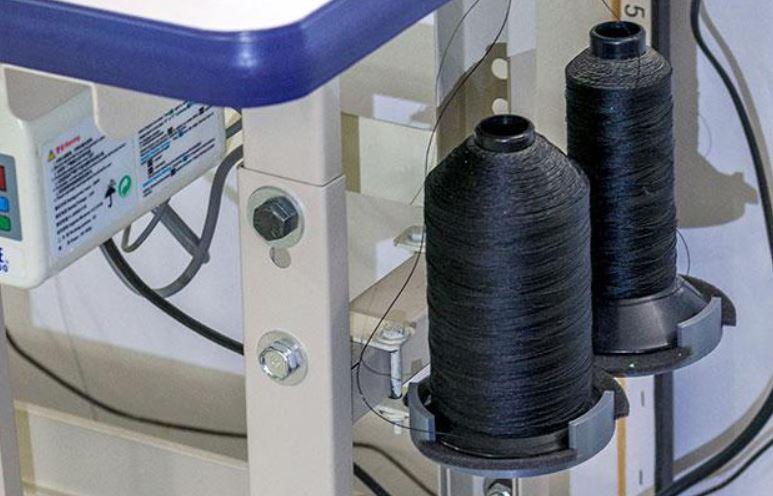
Here is my 2 cents worth: Yes how the thread is taken off the spool of thread will change tensions. Things like thread angles between the spool guide and the top pin, the amount of force required to unwind the thread, spooling tensions consistency by the manufacturer all will contribute to possible sewing problems. The spool of thread will react better if you follow the 2 1/2 rule as it will allow the thread to properly relax / uncoil. The thread should exit from the top of the spool of thread and enter the top pin of the machine as close to horizontal as possible. On cheaper thread where the constancy can be questionable reducing thread angles and allowing the thread to breath can be noticeable. The top thread guide on the spool stand for most industrial machines is usually mounted to the top of the table top and should have the horizontal guide arm placed at about 2 1/2 times the length of the thread spool above the base that the thread spool rests on. This is usually difficult when using 1 lb or larger thread spools and keeping in mind that the thread should enter the top pin of the machine horizontally. That leaves one option, place the thread below the table top. With your thread spool stand I would either put the spool of thread under the table or make up a thread spool plate with a bearing to keep the force required to unwind the thread as constant as possible. As the thread unwinds from the spool the tension will vary as the amount thread reduces on the spool which may require thread tension adjustments. An example of under table mounting be it on a motorized class 441: kgg
-
Singer double needle thread snagging and skipped stitch on one side
kgg replied to DMH's topic in Leather Sewing Machines
That is good information. kgg -
Singer double needle thread snagging and skipped stitch on one side
kgg replied to DMH's topic in Leather Sewing Machines
@DMH you may want to consider thread from Coats their Tristar line. From their website ( https://www.coats.com/en/products/threads/tristar/tristar/ ) they say : Tristar cuts cleanly without separation of the plies at thread trimming. Its low friction finish reduces the effects of needle heat and abrasion. It is perfect for multi-directional sewing and it also eliminates the need for right-twist thread for twin needle lockstitch applications, simplifying thread ordering and inventory. As a note: Kava as a house brand for Quebec produced in Canada by Kava Inc. also known as Cansew Inc., a Montreal-based company with its own factory and dyeing facilities at 7609 St. Hubert St., Montreal, Quebec. I haven't used thread from the Cansew or Kava manufacturer, that I can remember, but have been very satisfied with the results of American & Efird bonded nylon threads. As I am starting to run low on V92 and V138 I am planning on giving the Coats Nylbond and the Cansew bonded nylon thread CB138 a try in the near future. -
Singer double needle thread snagging and skipped stitch on one side
kgg replied to DMH's topic in Leather Sewing Machines
A couple of questions: i) what size of thread are you using with what size of needle????? ii) Which tension are you adjusting, the top tensions or the bobbin tensions??? iii) To set the bobbin thread tensions are you doing a drop test???? iv) Have you checked all the guides / feed dogs / needle plates to ensure one hasn't got a rough spot??? v) Have you replaced the needles with new ones??? vi) Are the needles going down in the center of the presser feet / feed dog / needle plate??? vii) Needles installed all the way up into the guage and the gauge is set / originated properly??? kgg -
This would definitely not be my choice for sewing upholstery or canvas. You really need at least a walking foot machine. My understanding this machine is really only designed for thin fabric. An #18 needle is only rated for V69 (T70) max thread. Here is a good reference chart for needle size vs thread size ( https://www.tolindsewmach.com/thread-chart.html ). kgg
-
Those are for mounting the upper belt cover and they are 15/64-28 L=10. My understanding is that machine is a high speed drop feed zig zag machine for fabric installing a larger needle will probably cause problems. What are you planning on sewing???? kgg
-
Not that this is going to be overly helpful as I'm in Canada but I have only once tried to buy leather online. My experience may differ from others but I opened the package up, examined it and promptly return it. Unless you are dealing with a very reputable company I figure you are going to get a much poorer grade of leather, probably someone's returned piece. I now only buy leather that I can eye, touch, feel and compare pieces. Yes it is slightly more costly per piece with travel (3 -4 hour drive) but at least I get decent quality. kgg
-
Dyeing leather
kgg replied to Samalan's topic in Dyes, Antiques, Stains, Glues, Waxes, Finishes and Conditioners.
In think they just gave up doing retakes. Title says it all " Tandy Skills Dying " Example at 0:44 clean area between spilled dye and the jar of dye and a patch of leather with the person dunking the brush in the bottle then at 0:46 there is dye around the leather patch before he gets the first brush of dye to the leather patch. By the end there is more dye on the sheet of paper covering the table then on the leather pieces. My real beef is they show no prepping of the leather. kgg -
I agree with @AlZilla not overly a great deal. Personally I would go with a Juki DNU-1541S or clone say something like a Cowboy CB-1541S rather then the Consew 206RB-5. My experience is that I had for a very short period of time a Consew 206RB-5 in hopes it would replace my walking foot Juki DU-1181n since it was a compound feed. In the end I kept the Juki DU-1181N and got rid of the Consew. kgg
-
Yes and No. Depends on what you need. Chain Stitch i) more flexible which helps the seam from breaking under stress ii) the seam will unravel if thread breaks from wear or being cut Lockstitch i) more secure as each stitch is locked into place ii) you will not loss the seam if a section of the seam becomes damaged from wear or a cut The chainstitch is more cost effective labour wish as there is no bobbin that has to be rewound. Once you got the spool hooked up that's it it until it runs out. kgg
-
Dyeing leather
kgg replied to Samalan's topic in Dyes, Antiques, Stains, Glues, Waxes, Finishes and Conditioners.
You should put a link to the video. I need a chuckle. kgg -
The 12 oz is roughly 3/16" (4.78mm) thick so two layers would only give you about 1/16" ( 1.6mm ) of max sewing thickness left. Depending on how tough/dry the veg tan leather is, needle selection and thread size a class 341 may Not work. My experience with a Techsew 2750 Pro (Juki LS-341 clone) with a speed reducer using 6.5 oz chrome tan, V138 and a #25 needle it will happily chug along doing 3 layers and says NO to 4 layers. For me this is the cross over to the Warlock Class 441 clone. Since you are going to do flat articles like wallets a flatbed attachment is going to be a must have item. My rule of thumb is buy a new machine that will do 90 percent of your items and a good used machine to cover off the other 10 percent. In your case buy a new Class 341 / 1341 clone unless you can afford a new Juki LS-1341 ($6,000 USD) that will cover off your items and for the heavy stuff buy either a motorized or manual "one armed bandit" Class 441. Here is a link to a good needle size to thread size chart ( https://www.tolindsewmach.com/thread-chart.html ). kgg