


Garyak
-
Posts
361 -
Joined
-
Last visited
Content Type
Profiles
Forums
Events
Blogs
Gallery
Posts posted by Garyak
-
-
Not the one you want, but the drawer that came on my machine was useless. Thrift store and 10$ later, looks like it was planned. There were several different treadles in one shop.just gotta deal with the grumpy fella that owns it.
-
7 hours ago, chuck123wapati said:
Awesome!! You have a great technique figured out for sure and it does show on your work. Thank you for the answer to my questions! I may have to ask Mrs. Clause for one now.
As with any patcher, slow is the key.
-
56 minutes ago, chuck123wapati said:
so basically you are just using it to put the thread through pre-punched holes and not really using it for the whole process? Can you explain why or is it because it doesn't do a good enough job? "Nobodies paying hard cash for something with shoddy looking stitches."
I'm not knocking your process your work is awesome but if it wont actually do a good job of sewing the whole process just like the expensive ones can do then folks should know what this machine can really do.
I lay out a stitch pattern, where they will run, tie in, and dead end. I use the stitch groove and punch to ensure my stitch length is as uniform as possible, doesn’t matter to me what rig I’m stitching on. I’ve always done this , it’s what I was taught and I’ve never had a problem or complaint so I keep doing what works. Again, if someone doesn’t have sewing skills I wouldn’t recommend it. In fact, I recommend sewing classes, specifically in leather if someone can be found willing to teach. For 100$ and a 30$ servo i can’t see a down side. It paid for itself first time it was used. I purchased it to see what the mass confusion was all about. It wasn’t the machine. Besides Claes 20-30, I’ve never had another patcher that sews 207, and sews it like it was made too. All my machines are an extension of my hands. If I get a machine and I can’t make it do what I want it to do, I don’t keep that machine. Tools that don’t do what you want aren’t tools, they’re door stops. Same thing I thought the patcher would be. It proved me wrong. I now use it solely when 207 is needed.

-
52 minutes ago, RockyAussie said:
This what @kgg says I believe to be true. I have had many years of experience using patching machines of one sort or another and they are not a machine I would recommend to start off with if you are doing leather work. Shoe repairs yes.
I should point out that at 3 minutes 58 seconds into the video above you can see the stitching average that a patcher is normally capable of. (Not good enough for my work)
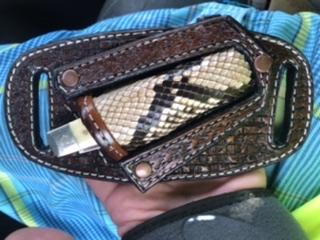
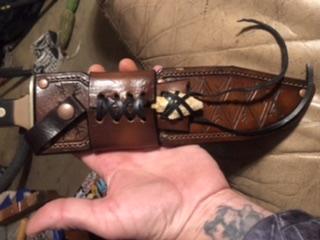
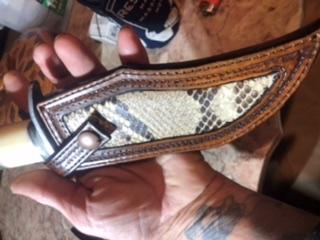
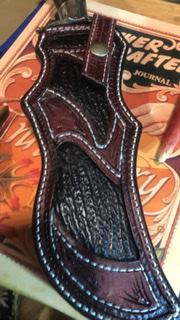
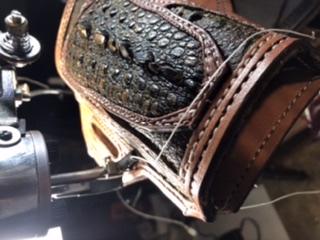
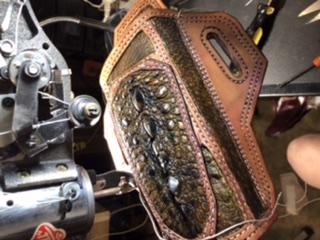
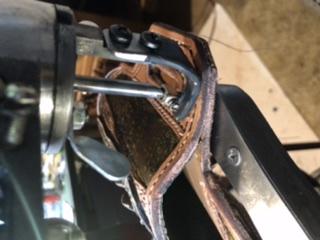
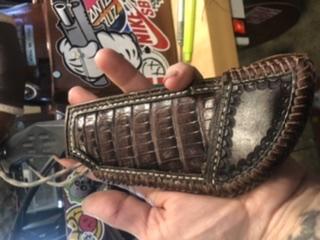
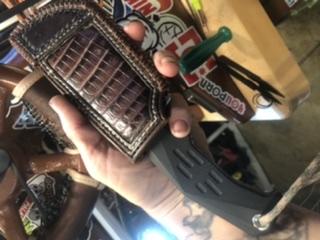
Your skills with a patcher are very high indeed, so much so that I had to check your profile and see the pictures in your albums. I am curious to know what method you used to make the holes and grooves ahead of the patcher needle. Is this done by a laser or have the leather been stitched ahead first with a heavy weight machine or what? Here a a few of the pictures I am curious about.
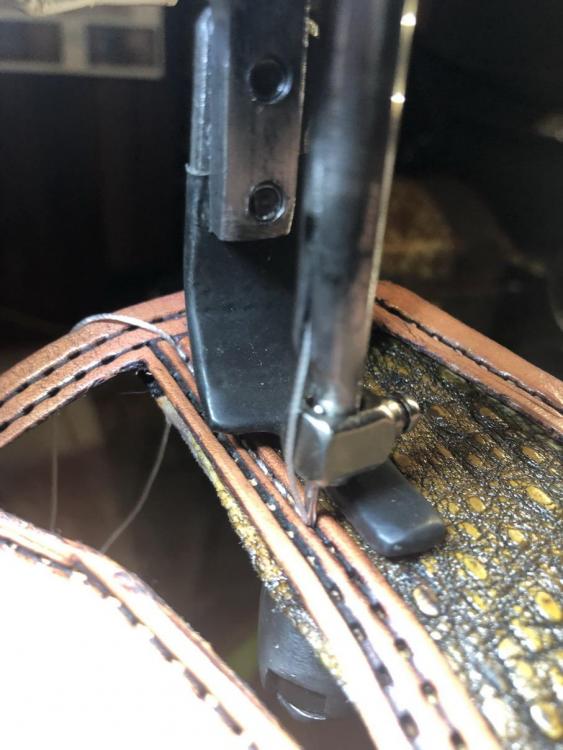
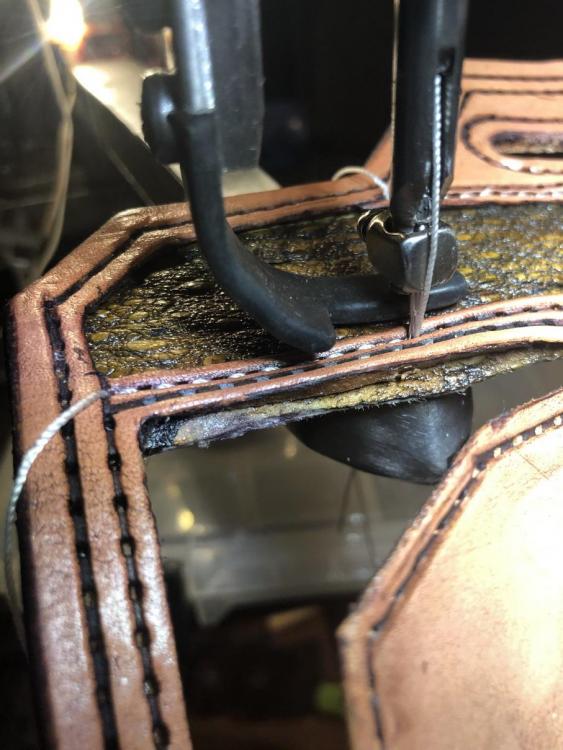
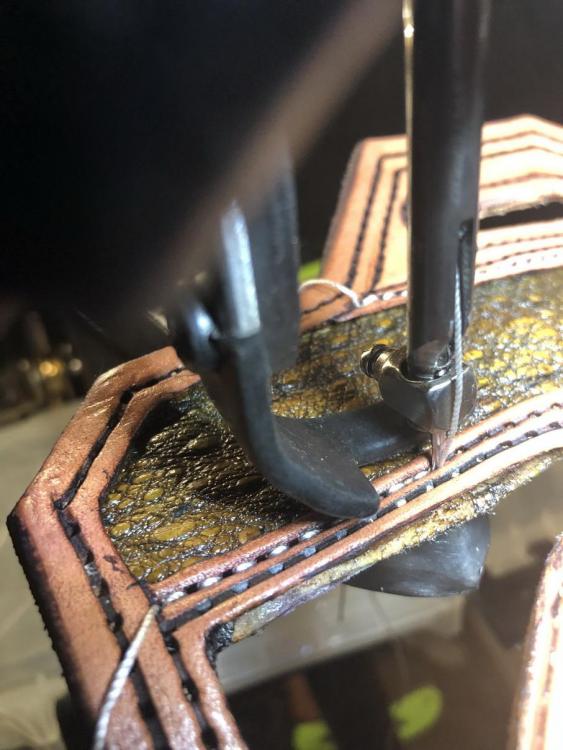
Nothing but a stitch groove and 3/32 punch. Once pattern is cut, I lay out my stitch pattern and punch the holes before airbrush and antique. This keeps the holes from showing like they would if they were punched after dye. When using white thread I like the stitch grooves to to be antiqued before sewing. The antique in the grooves really makes the stitching shine. Stitching is the most important part of a build to me. Nobodies paying hard cash for something with shoddy looking stitches.

-
On 11/10/2021 at 12:35 PM, chuck123wapati said:
My two cents, i have tried about four different home style machines, a couple would sew ultralight leather, 1 mm or so thick but with great difficulty and a lot of tinkering your wife wouldn't like. I've went down that road wasted a bunch of time, leather and money and found out what others already knew.
I'm sure more knowledgeable will chime in but as far as any real leather work the answer is no. The leather machines costs thousands for a reason.
Thing continues to make cents. Outshining the best patchers in some areas


-
If a person has some serious sewing skills and uses the machine within the limits it’s designed for, it’ll make money, and believers outta the nay sayers…. I’ve shut down more threads with proof the haters can’t deny.
-
I made a killing with a china patcher. I have a cobra 29-18 also. I can do things with the china patcher the cobra could never do.
-
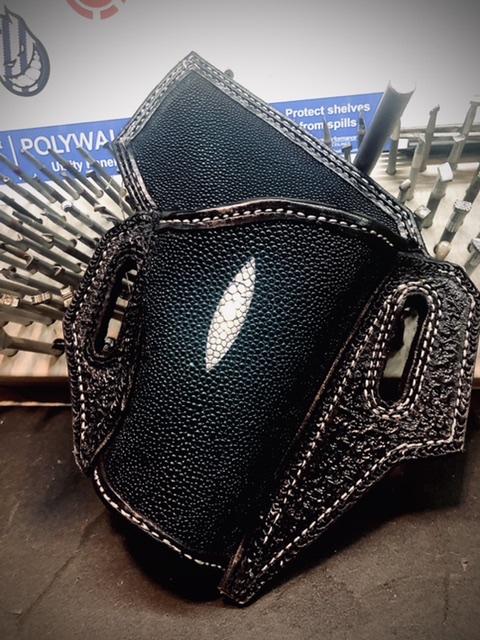
That’s exactly what I do. I use 1” plywood and with the tracing, widest measurements on the gun, and a picture I 3-D print it with a jig saw and chisel. I don’t go real fancy. I got a little trick I use in case the gun is loose fitting. Fake (decretive) stitch grooves that I stitch. Guns to loose, pull the stitches on the fake stitch’s not carrying a load, restitch this time going all the way thru to the back taking up an I/8. Do both sides you just got 1/4 of a$& saving holster shrinkage. Not a tear apart. Had to use that safety stitch on this turtle holster. My only send back. Man never could tell how i fixed it. Stingray your gonna have to sand edges and pre punch. My machines have no problem with it, but I still prefer punch. It’s tuff enough to flex needles striking needle plates and breaking
-
On 10/27/2021 at 9:59 AM, Northmount said:
Many motors have been damaged due to under voltage. They run hot, have low power output, run slow, cooling fans not as effective due to running slow, etc. Depends on your definition of "fry". As motor winding insulation breaks down due to running hotter than design, internal shorts may occur, and your motor could "fry".
If you only use the motor on lower than design voltage for a few minutes now and then, like many hobbyists, you may get away with few problems, just slow and weak output.
None of the above is happening. I run them daily and have for a couple years now. I’m guessing my two water Wells and their electric pumps that are rated 110v or 220v, and I’ve been running 110 for 15 years now, 365 days a year will burn out now. It was a good 15 year run…….
-
Again thanks guys. The guy I’m building for lives on the other side of Texas and I’ve been doing a lot of work for his wounded Warriors program he runs. I’ve been building holsters with nothing but a paper tracing to work with. So far everything has fit like a glove. 10 more to go…. Hope my lucky streak continues. Mailing back and forth is a pain.
-
Thanks guys.!
-
-
Select the pic, befoe you submit it hit the button at the bottom of the pic and select medium or small
-
-
On 10/19/2021 at 12:05 PM, Garyak said:
Bought mine in 93. Still use them. Never stropped neither.
Same here, Same year. Bought two. Only used one. Still have the other, as well as The extra needle for my badger airbrush gun. I’ve never used the extra of either. Never had to strop or “sharpen”, and it’s never chipped on me. Crazy, when you take care of stuff it last, like the edge of a ceramic blade…….
-
I have a couple thousand craftaids, patterns, single and multiple pattern packs, and other related Tandy stuff. Most is from 50-70’s and some dates back to the 30’s. My grandfather worked for Tandy then and went on to teach leather craft at the college level at Texas A&I. If anyone’s interested I can post, but it’s many many many, photos. Is there a way to gather them all and upload or is that too much. Yes, I don’t know what I’m doing when it comes to the Internet. Thanks.
-
I have issues back to 94.
-
On 8/5/2020 at 2:27 PM, Jerdav73 said:
Got a Landis 25 in very good condition for sale Sarasota FL $500
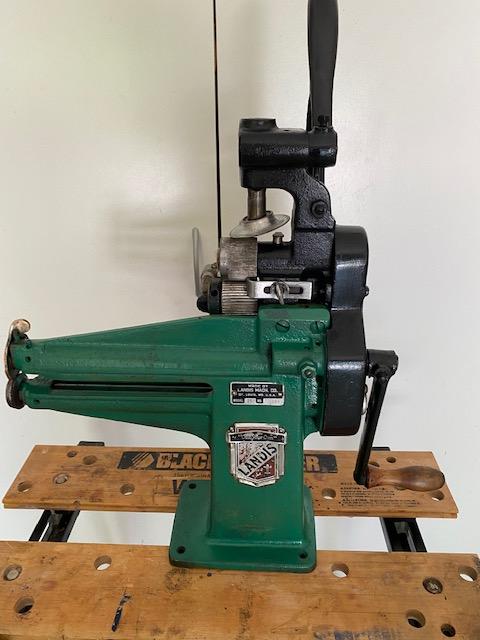
Is this still available? Do any surf fishing over there? Padre island here.
-
I appreciate it fellas. Best purchases I’ve made.
-
Way late to the thread, sorry about that. The axis patcher is made at the same plant as consew. The axis will use the same parts as the consew, and if I were going to purchase one from Amazon it would be only one I’d buy. They run around 1000$, but drop to 500$ every once in a while.
-
My 29-18 showed up about a week ago. Surprisingly it had a manual/parts catalog, and a nice, detailed exploded schematics. The only other machine that had a better user manual than this was my Thompson mini walker. Before it arrived I had been searching for anything that had to do with the cobra specifically. I found a whopping minute and a half if watched on slo-mo video dealing with threading the machine. If you were a first time buyer, the manual included would be a better help in getting started than nothing, but If a person had never used a machine before i can see a mental breakdown and a patcher thrown out a window. It did have a bobbin winder and I happy to say, it’s very functional and seems to work better than the afterthought winders on most stitcher. I give the entire purchase from start to finish 5 stars and a heck yeah.
-
I’m running the SM645B enduro pro 220v. I’ve done nothing but put a 110v plug on the cord. They sound like exactly the same running on 220v as 110v. 110v cannot fry the 220v motor. You’d have to more than 220v to burn it up. There is no noticeable loss in power by running it 110v. I use them daily, I buy and sell them often, and there’s a lot of people out there doing the same. Like I said, directions are in the box. Look at the schematics and parts list. It covers both. Down to the last screw, exactly the same. My water well pump is the same way. 220 ran 110. Just in case, you cannot rum a 110 on 220. They we’re cooking.
-
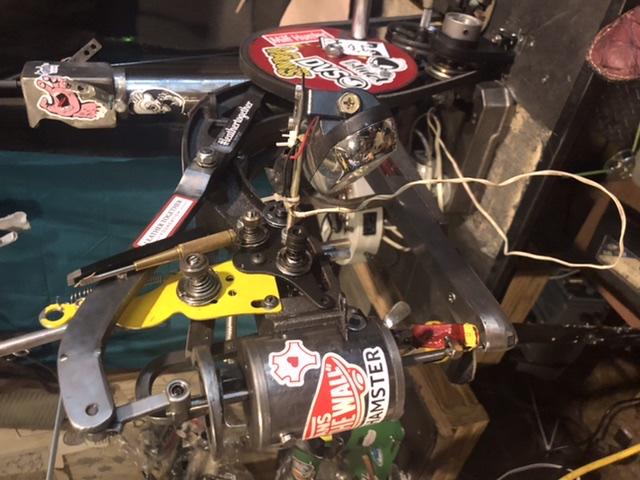
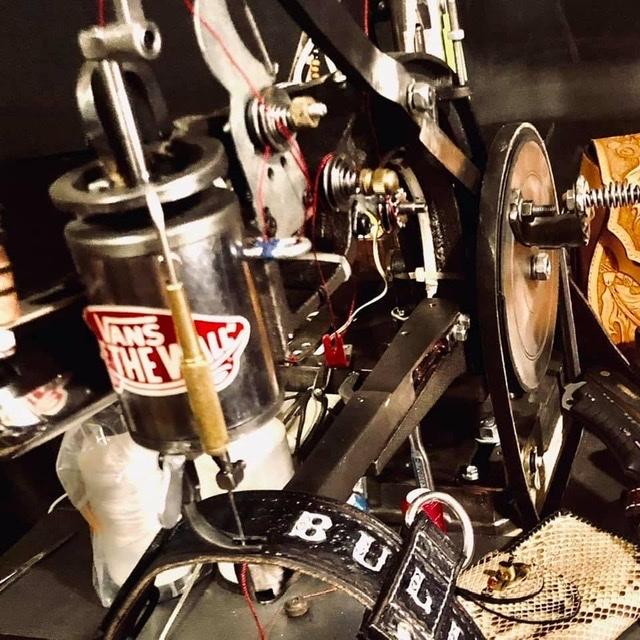
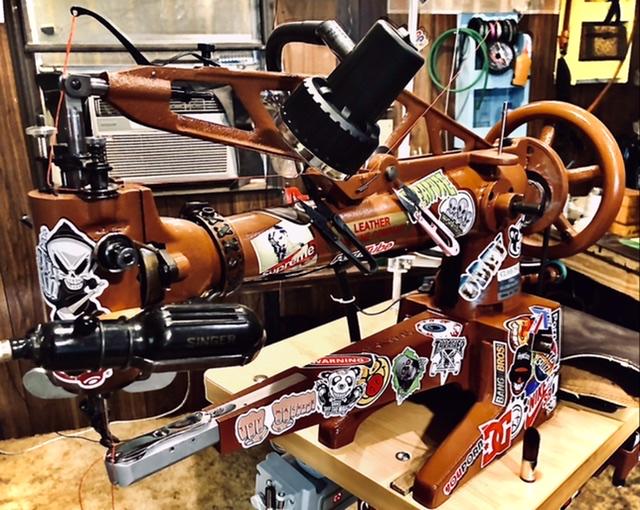
6 hours ago, trash treasure said:
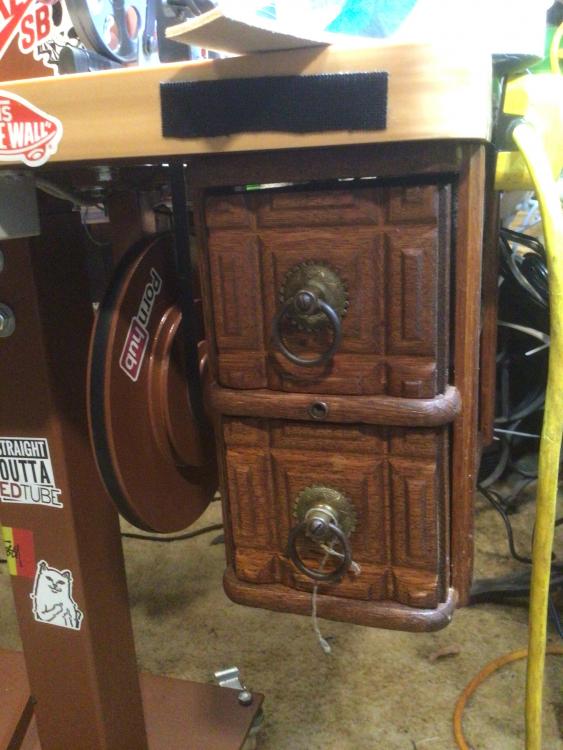
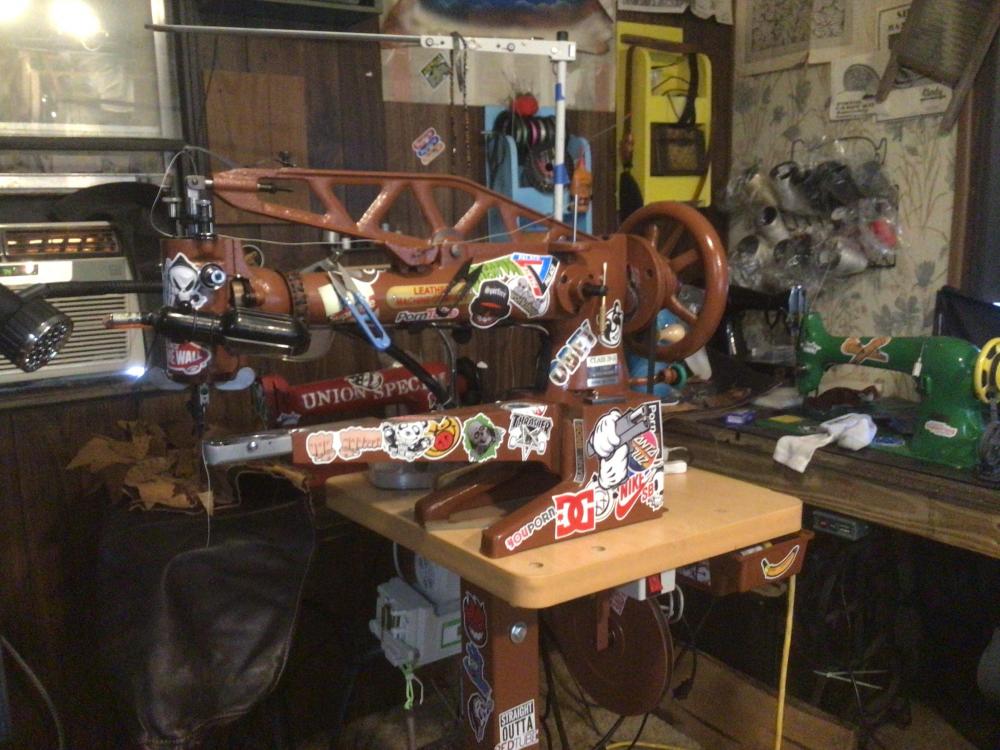
A most colorful shop, Garyak :~)
Plenty of broken toes in there.
-
I am currently running 5 enduro pro 220v at 110v. I’ve had them for a couple years and they are ran daily. I’m ordering 3 more. 30$ for 220v, 125$ for 110. They’re both the same motor. If you look at the schematics for there’s only one schematic for both. Exactly the same.


Will my sewing machine work well with leather?
in Leatherwork Conversation
Posted
eBay, again, here goes the 30$ 220v motor on eBay. I’m running 5 of them now. They run 220 and 110. Running them daily for a couple years now. eBay enduro pro 220v is the search. That’s the motor in the picture. Everything I used to make that set up I got out of trash at work…. I got 0 dollars in it. Can’t beat that price.