


Tequila
-
Content Count
212 -
Joined
-
Last visited
Posts posted by Tequila
-
-
You can do one like this without stitching, or you can hand stitch the buttplate piece

-
25 minutes ago, Wizcrafts said:There are different configurations of presser feet to handle particular jobs better than the standard double or split single foot. If you need to sew very close to the right edge, use a left toe foot. If you need to sew close to a raised surface on the left, use a right toe foot. Zippers are usually sewn with a left toe foot that misses the teeth on the right. Edge guide feet eliminate the need to fit a moving edge guide. They come in several spacings from 1/8 through 3/8 inches from the spring. Most have the spring on the right but some are on the left. Piping feet are sold in sets of matching curvature on the inside and outside foot (walking foot machines). They let you sew extremely close to the piping inside the raised material on the left. There are also double sided piping feet that sew two pipes at the same time.
This is just a sample of what is available. Necessity is the mother of invention (Help, I'm A Rock!). As new needs are encountered by the sewists, manufacturers fill those needs.
Thanks Wiz for the simple concise answer

-
Beautiful work! I don’t like myself to do that much work for me
")
-
@suzelle I really did mean thanks to you, as you see you’re the only person to even respond to my question. You’ve mentioned about what I’m doing to know what I need and that’s where my question comes from. Like what’s the difference between left and right zipper feet? Do you need both to sew a zipper? Same thing with an edge guide foot (I never even heard of that one). And left and right narrow feet what’s their purpose and does a right foot get the stitch closer to the piece on the right or left side.

-
23 hours ago, suzelle said:I have walking foot machines that take one type of foot and needle feed machines that take another type of foot. Then I have a walking foot Pfaff that takes yet another type of foot. LOL. So.... I'd figure out which machine(s) you want to buy for, what type of operation(s) you will be doing, what material(s) you will be using... then bring that info to your Dealer who should be able to help educate you, even if you are not ready to buy a foot from that Dealer quite yet. you may buy a set or many sets from them in the future. I personally used Wiz's information that he had posted previously on the type of feet he owns for a walking foot machine. I didn't own too many feet and wanted to begin doing some more Auto Upholstery work. I think I onlly had the regular straight stitch foot and also right & left toe feet sets. So Wiz's post on feet was really helpful. Also, read what Whiz says about smooth bottom feet, that's good info too!
")
Thanks
-
On 5/20/2022 at 2:28 PM, RemingtonSteel said:Tequila, it's hard to summarize in a paragraph, but I tried my best. My SASS alias is Remington Steel, as my first single action revolver was a 44 cal. Steel frame Remington 1858 New Model Army revolver. Unless you have been out to CA to compete I doubt we have meet, but another new interest is RVingl, so maybe one day we will meet.
Probably should have also mentioned CAS is lot of fun, if you can find primers and powder so you can reload, as you typically go through 120 rounds (not counting shotgun shells or reloads) at a match.
RS - nope haven’t been to Cali. I’ll shut up now I don’t want to take this thread off topic.
-
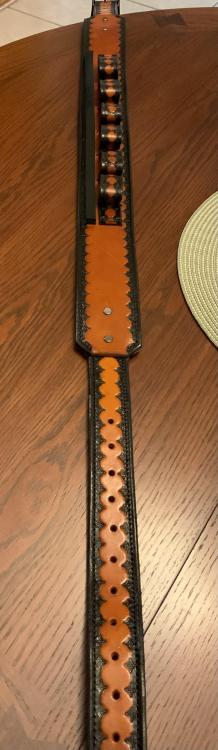
On 3/19/2022 at 9:46 PM, blue62 said:Cowboy action rig with shotshell belt and bullet slide.
HO leather, copper hardware and conchos
I
Looks great!
. Did you make the rig for a SASS shooter?
1 hour ago, RemingtonSteel said:PastorBob, Cowboy Action Shooting (CAS) is considered a three-gun sport consisting of 2 single action revolvers, 1 lever action rifle and 1 shotgun . So, yes, you are limited to 10 rounds for revolvers, but not in the way you are visualizing. Each stage in CAS is comprised of 10 rounds in revolvers (5 rounds in each with hammer down on empty cylinder), 10 rounds rifle, and anywhere from 2-6 for shotgun. All three weapons are fired on a stage, and your are timed. Each miss adds 5 seconds to your stage time, and without going into a great amount of detail, time is also added if you don't shoot the targets in the correct order for that stage. So speed, accuracy, and a clear mind rule the day. There are usually 6 stages to a match, and a stage may require a single round reload in either the rifle, a revolver, or both, so this is where the bullet slide comes into play. If interested in finding out more, I suggest you check out the Single Action Shooting Society (SASS) here: SASS - Home of Cowboy Action Shooting (sassnet.com).
blue62, I would be proud to wear that rig at a match. Well done. I agree, although not traditional of the old west, I think the blue stitching makes a great accent against the black leather. Great stamp job on the gun belt. QUESTION: Why the single loop on one holster, and a double loop on the other? Different length barrels?
I’m a SASS shooter and you nailed it, my alias is Tequila Shooter, I wonder if we might’ve met somewhere?
-
Let me start off by apologizing, this has probably been asked and answered before.
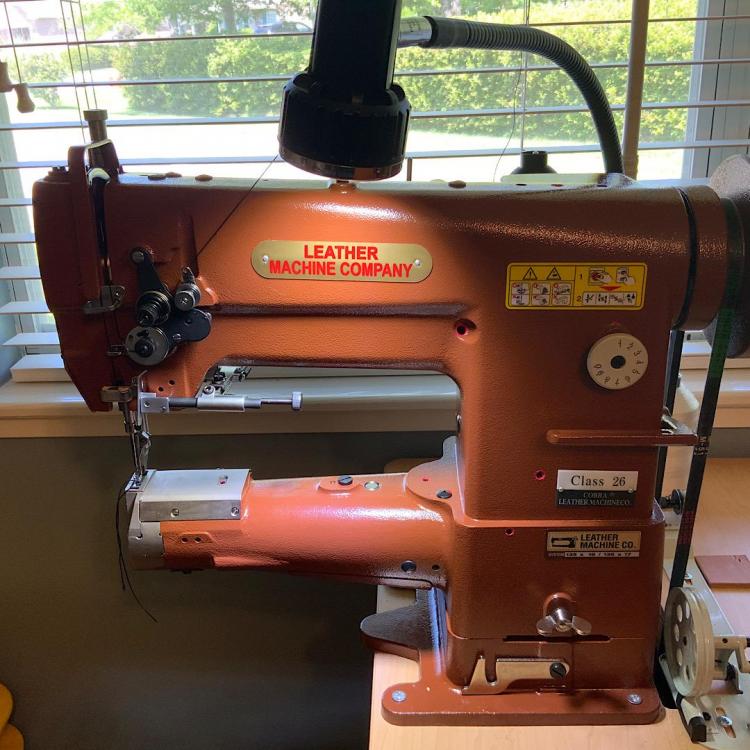
I’ve got a Juki LS341 clone, a Cobra 26, and I’m new to machine sewing, but I’d like to get the most out of my machine as I can.
Can someone explain what the other presser feet do, i.e. left or right toe, upholstery feet, welting foot, etc. I’ve also been reading a thread on this forum about narrow needle needle plate/feed dog set which I’m slowly starting to figure out (I’m only on page 2 of 7)
Also if you know a good source of supply for the feet besides Leather Machine Co. I’d greatly appreciate it.
Thanks
-
Very nice looking, excellent craftsmanship
-
@suzelle I only have what came with the machine for now, but I’ll be looking for others just not sure where to look.

-
@MtlBiker ok as you can see it’s going to take some trial and error to get the stamping the way you want it. Now on to your other questions. If your using veg-tanned leather the first step is to dye it to the desired color, if you’re using pre-dyed leather you can skip that step. About resist, you put a coat on to keep the antiquing from penetrating the leather. Resist can be any number of products, things like Resolene, Pro Resist, are just a couple. Here’s a link to Fiebing’s finishes: Fiebing After whichever product you decide on dries you apply a coat of antique, the Fiebing website has the colors that are available.
LOOKS LIKE FREDK BEAT ME TO THE PUNCH
Here’s a video that should help Don G is very talented
-
@suzelle here you go nothing fancy but there’s plenty of light in the room and the LED light really brightens up the workspace. Oops looks like I forgot to close the latch

-
-
I just went through the owners manual and the engineers manual and I couldn’t find any reference for that adjustment, sorry. Hopefully someone will chime in with a good answer.
-
I found this video helpful. Instead of buying canvas I use some denim that was cut off pants, works just as well.
-
Here’s a couple of things to keep in mind:
1. Keep your chisels sharp. It’s good practice to strop them before you use them
2. Use smaller chisels, in that I mean don’t go at it with a 4 or 5 prong use a 2 prong instead
3. When doing a saddle stitch be consistent, as a general rule my first needle goes in from the front, then once the needle and thread are through the hole pull back on that thread while doing that push the back needle through the hole, you won’t catch the first thread doing it that way. Repeat on the next stitch front side first then back side.
4. Make sure that your thread is waxed. If you see it’s starting to get dry or dragging through the hole simply re-wax it.
5. On really really thick pieces it may come down to 2 choices either very carefully chisel each piece separately or use a very small drill bit and drill through the leather (only had this happen to me once).
Hope this helps a little and with practice it’ll get easier.
-
2 hours ago, TheDavidLeathermanShow said:Thanks tequila that’s great idea I will have to try that on the next one
You’re welcome, if you want a picture just let me know.
-
-
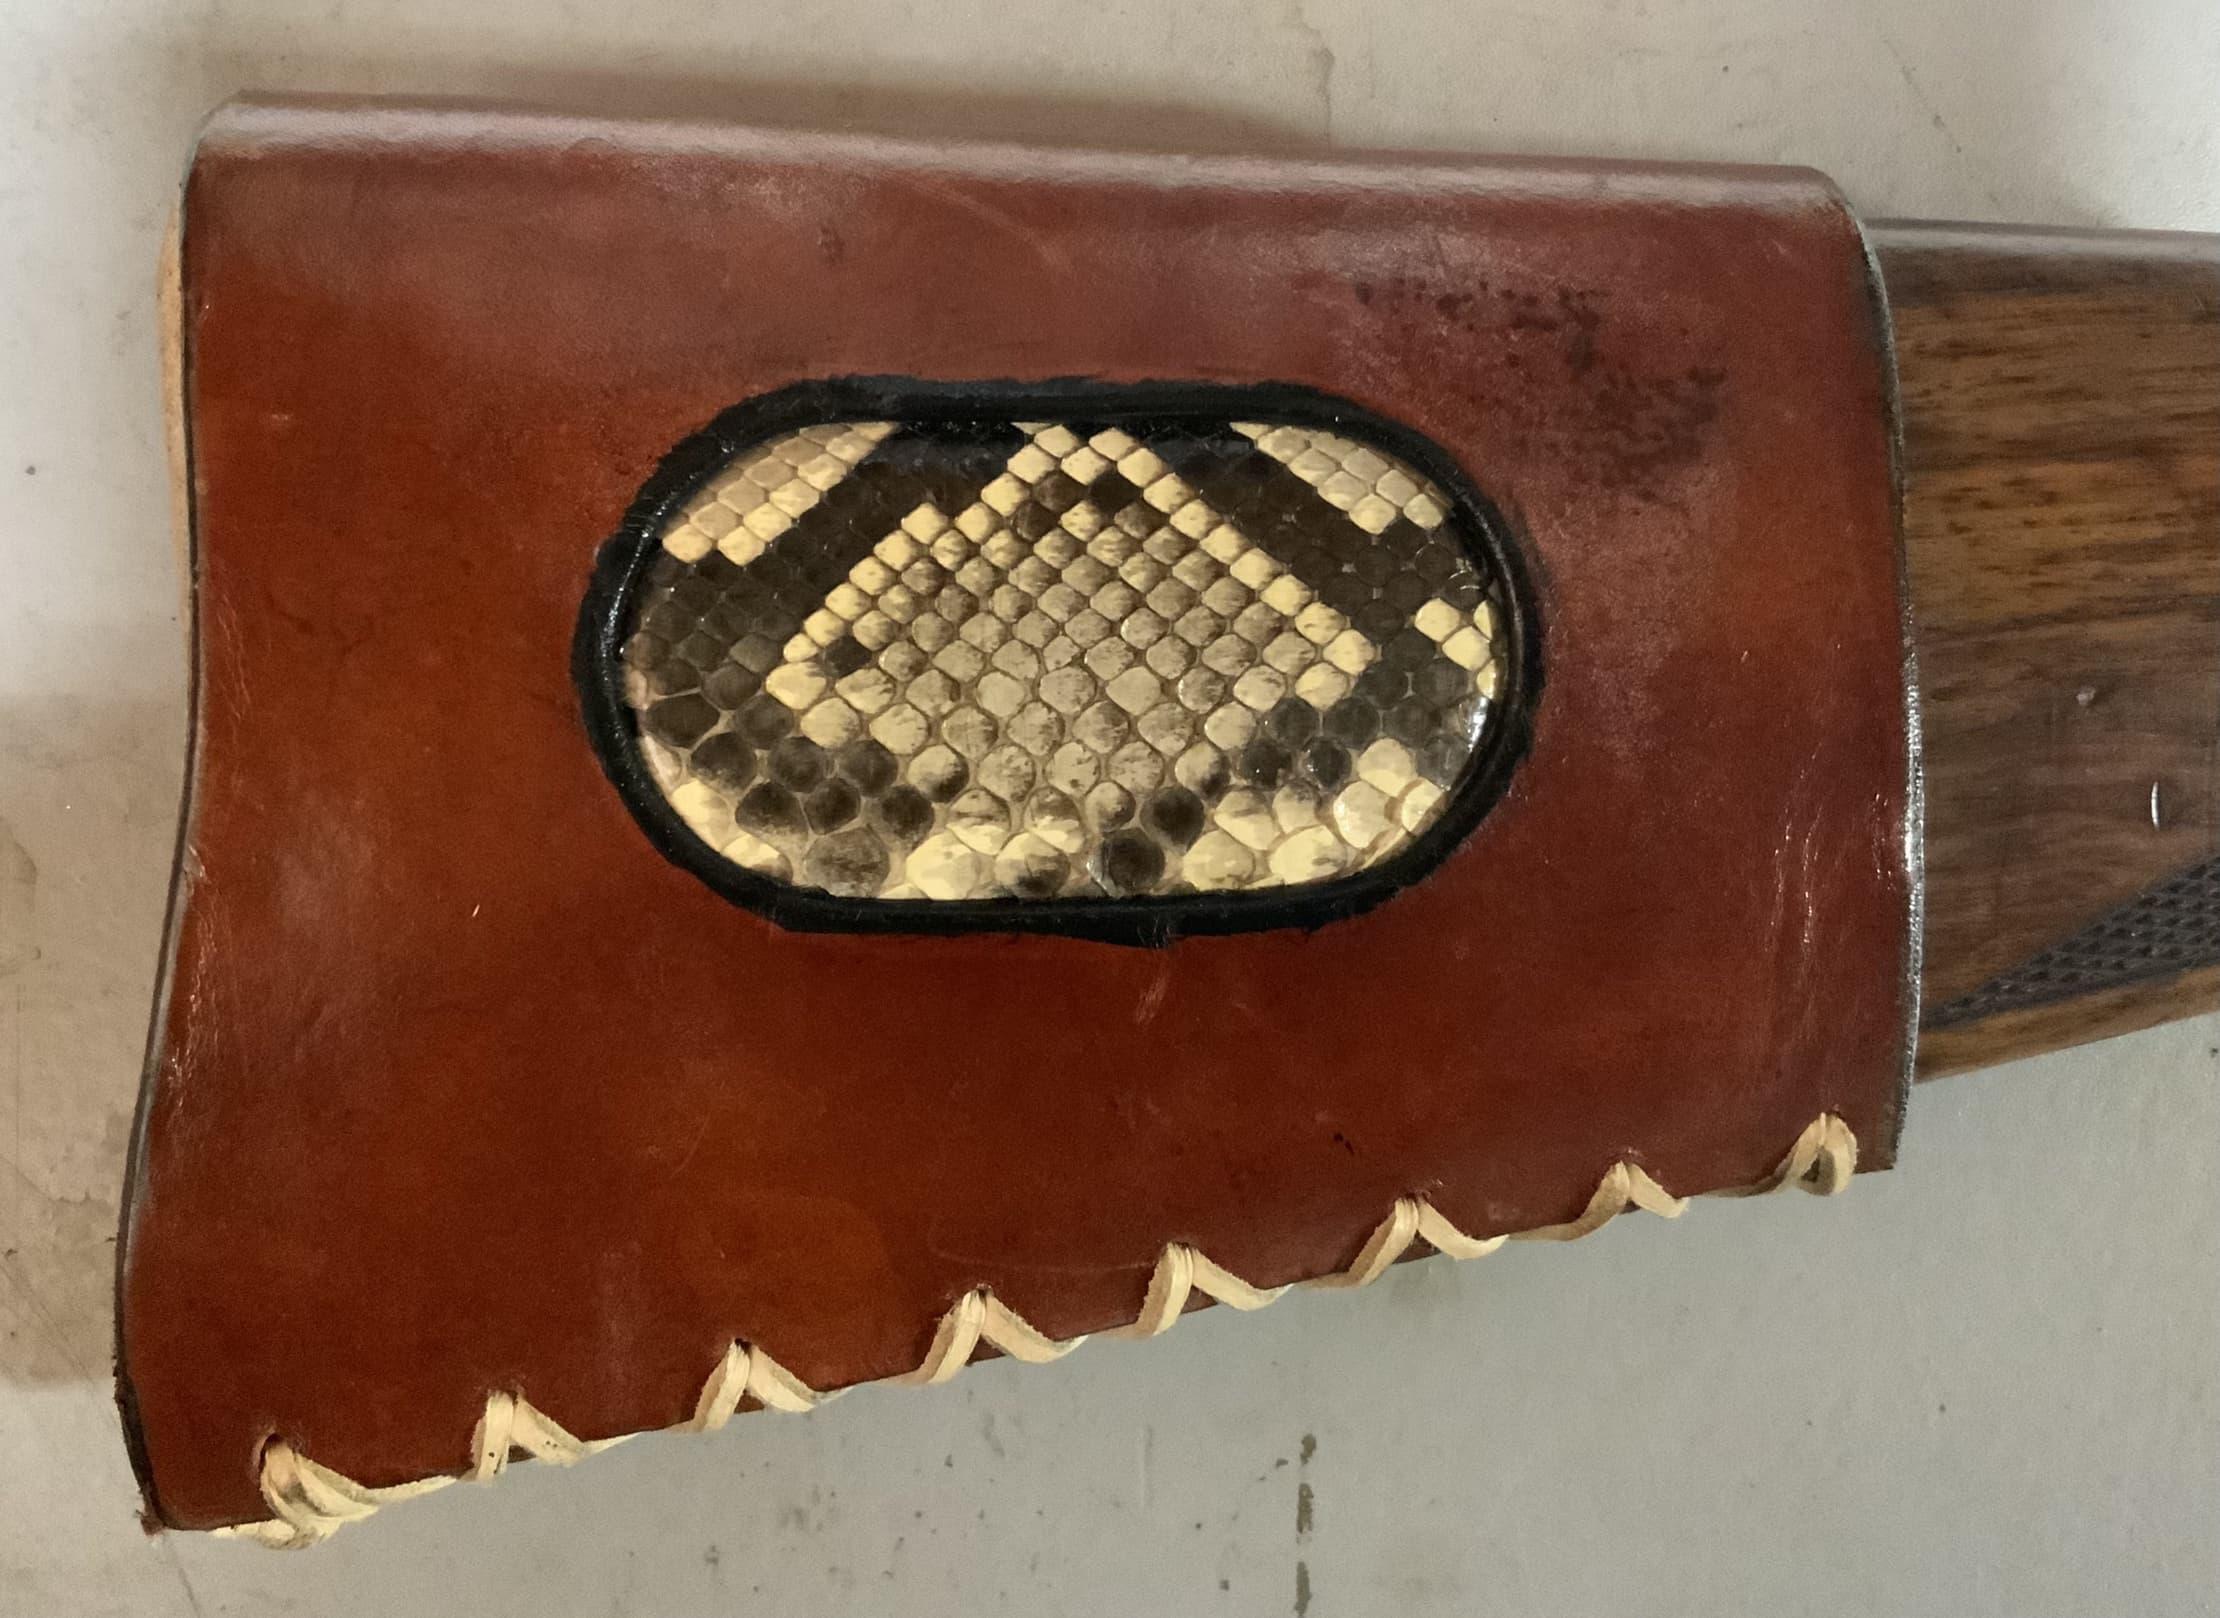
I think you did a good job. The stitching is nice and straight and I like the contrasting thread. I made a rifle butt stock cover with a python inlay, and I kept the inlay depth even with the cover. Here’s the method I used in case you want to try it on another inlay project. I cut the shape (in my case oval) out of the cover, then I took the cut out and sanded the face and edges down. Go slow on this step because you want the cut out piece with the inlay on it to fit in the cut out hole, so sand a little dry fit etc. etc. until you get the fit you like. In my case I edged and burnished the hole before the fitting process. For the last step I used contact cement and glued the python to the cut out, I left the python oversized and when I put the cut out back into the hole I was able to glue the python to the surrounding leather on the backside, it added stability cut out.
-
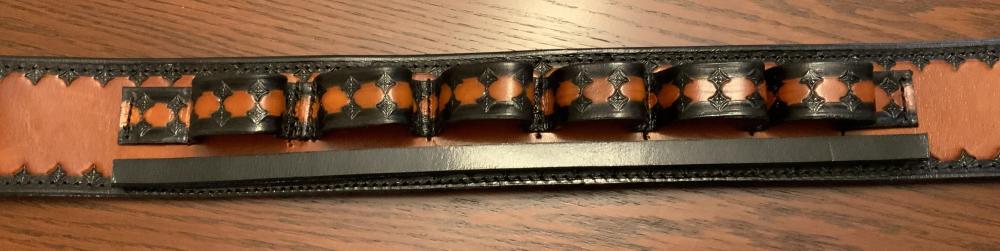
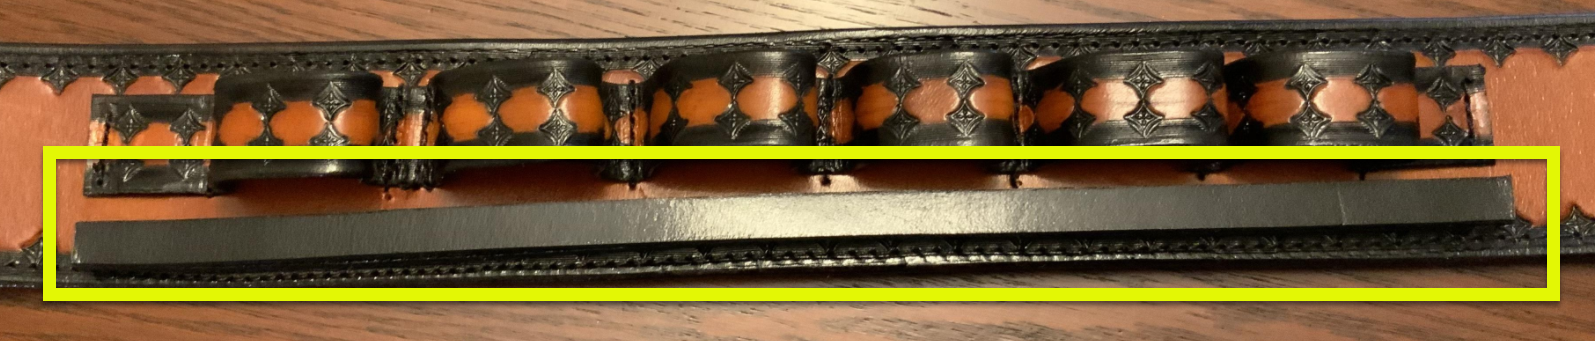
6 hours ago, PastorBob said:I love the 2-tone. Must have been painstaking to get that done. What is the piece below the loops for? And how is it attached?

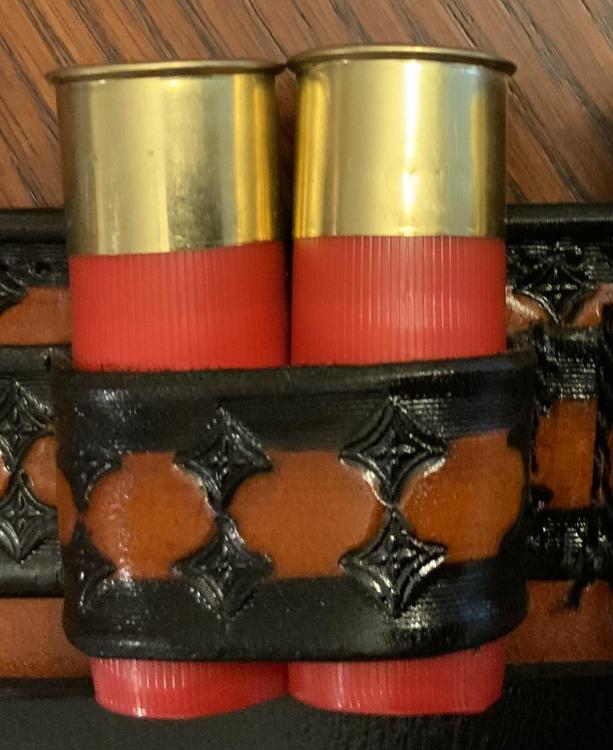
It basically acts as a shelf, when the shell are put in they sit on top of it and keep the shells from falling through. It’s made from 2 pieces of 9-10 Veg tan, the bottom piece was double stitched to the belt then I glued the top piece on with Barge. I couldn’t machine sew the piece on because it was too thick, the good thing is that even if that top piece should fall off during a match the bottom one is thick enough that the shells wouldn’t fall through.
The 2 tone took a little time, all the black was done by brush.
-
Another pic
-
I made this for myself to use in cowboy action shooting.

-
@grmnsplx what magazine is it from? Maybe if I see the entire pattern I could shed some light because it looks like it’s more than just a pair of spur straps on that page.
-
Paul,
Thanks for all the good information I’d like to buy #6 the C.S. Osborne and #9 the Harrington. Please let me know how you’d like to work out the payment. BTW looking at your screen name made me wonder do you shoot SASS?
Charlie


My Rossi 92 Got Me Interested
in Member Gallery
Posted · Report reply
I does look a little thick, I usually use 5-6 ounce on mine and they get beat up pretty good at CAS matches. Are you going to line it?