nejcek74
-
Posts
86 -
Joined
-
Last visited
Content Type
Profiles
Forums
Events
Blogs
Gallery
Store
Everything posted by nejcek74
-
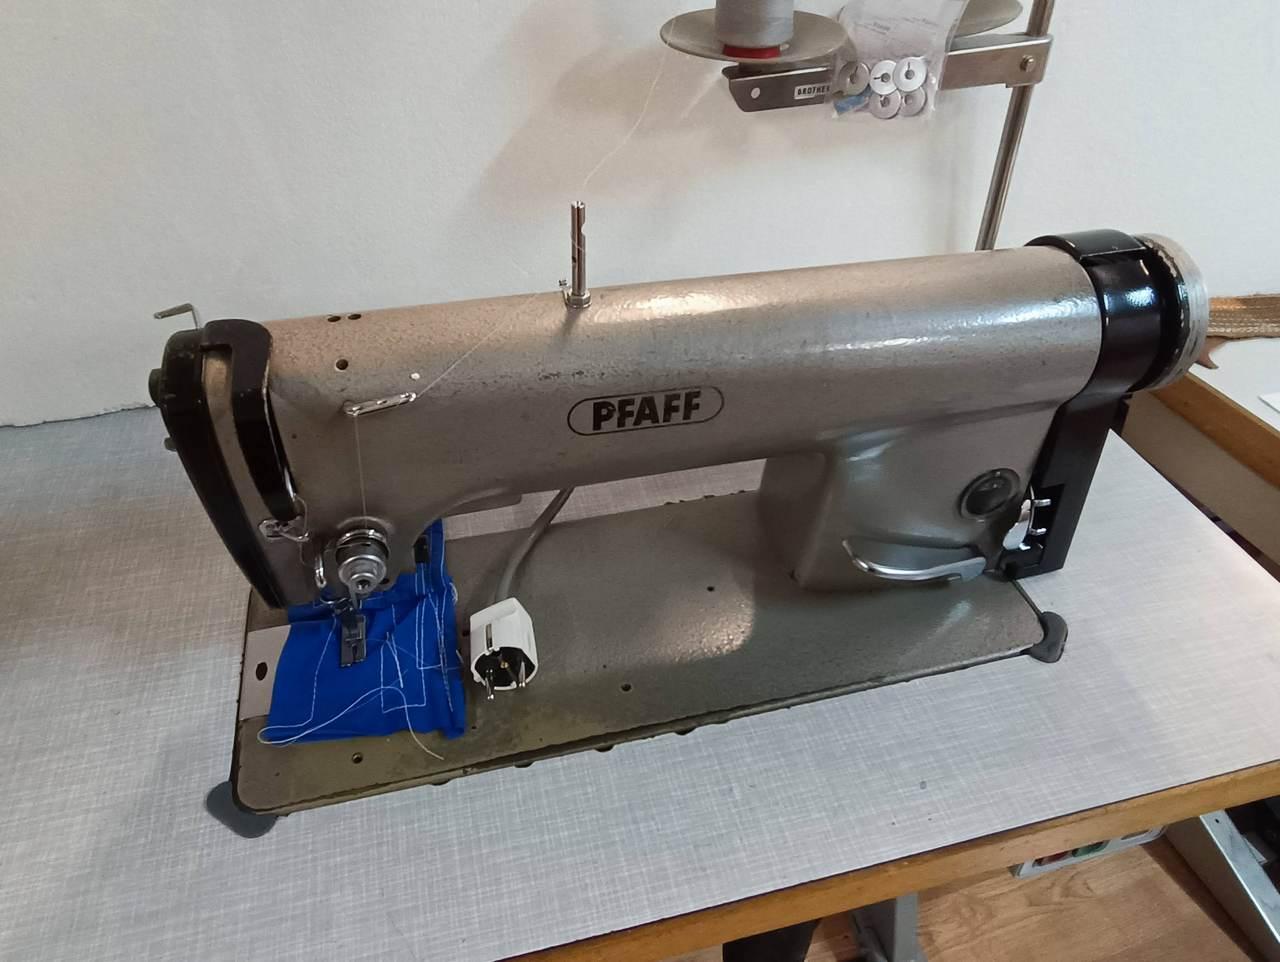
There is a screw beside the hook assembly that after untightening allows you to set relative rotation of the hook assembly and proper function of that finger.
-
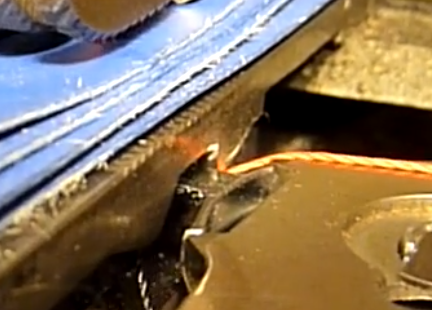
Love the Germans 😁 so pedantic and systematic, but they still fail to be on point. In the part list of n291 tha part has name Greiferspitze, but this must be a mistake and your source is right, hook point is hook point and the counter hook point cannot have the name. Yes, I meant the throw of the check spring. Btw watching your video, your bobbin case opener/thread release finger is not moving, you need to reposition the hook a little bit. The finger in that opening should open to let the thread through and close after to make the opening on the other side. There are videos about this somewhere around but I cannot find that atm.

-
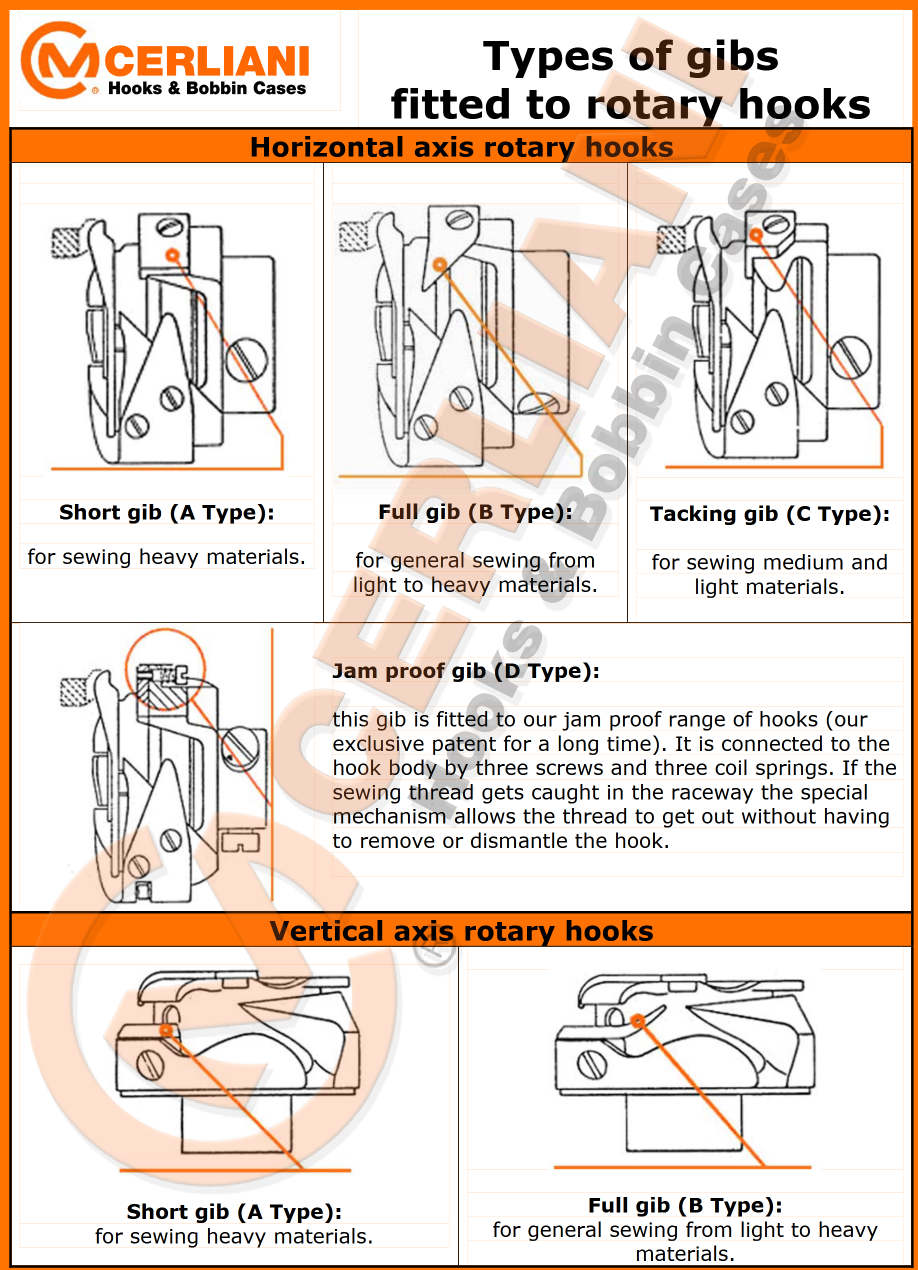
This is explanation from Cerliani: which follows what your experience is and what Constabulary said, that with thicker threads the full gib is not always used. On my Pfaffs I have some hook variants with short and long gib for the same machine. They are variants for either A/B and C/D thickness classes and different gib goes with different hook. Of course you can try and take this part away, but I am not sure exactly why. You wrote: "My problem is, that the thread is pulled hard by the take-up lever on this Gegenspitze before the thread finally is pulled off the end of the tip." Does it cause any real problem, like skipped stitches, broken thread or similar? Maybe you just need to make a little bit longer throw of the spring before the take-up lever? Have you compared hooks for different subclasses? Find if the differences is only in the gib or also in the other parts. This is for DA N291, gib looks always long. Durkopp also names it "Greiferspitze"
-
Threads used for authentic denim construction are either a cotton and polyester blend or pure cotton. You may need to use a larger needle. While the L-twist seems the most likely cause, you should also check that the distance from the hook to the left and right needles is consistent.
-
In trouser-making, there is a lot of chain stitching, which has all the necessary construction properties. Examples include the belt and the main seams of the trouser leg. Chain stitching is more resilient under constant stress and stretching, and unravelling is not usually a big problem. Does anyone have any experience of jeans unravelling? I haven't heard of it yet. I have a few old Union Special chain stitch machines at home and, except for one, they were all used for trouser production. The odd one is an off-the-arm machine that was used for knitted fabrics, but hopefully I will be able to adapt it for canvas. As most new machines use lock stitching, I guess there were historical mechanical and material problems with that. Perhaps also with using cotton threads, etc. Similar to awl and a needle machines, which you rarely see these days. Modern production is moving towards standardisation, so many special machines are being phased out, construction is simplified etc, everything in order to lower production costs.
-
it's about speed and strength. Don't forget that jeans is the grandfather of apparel mass production. Chain stitched seams are stronger and I think also faster to make. And you don't need the bobbin.
-
It's very much a question of garment construction. Jeans trousers and jackets can mean crossing flat felled seam with 16 layers of heavy denim. That's a lot. Classic approach was a chain stitch machine with a heavy puller. A triple feed machine works well, albeit a little bit slower. But people manage to do it also with old tailor's sewing machines, a hammer and careful construction, i.e. avoiding crossing flat felled seams. My leather garments were always kind of basic so I had less problems with them than with denim trousers.
-
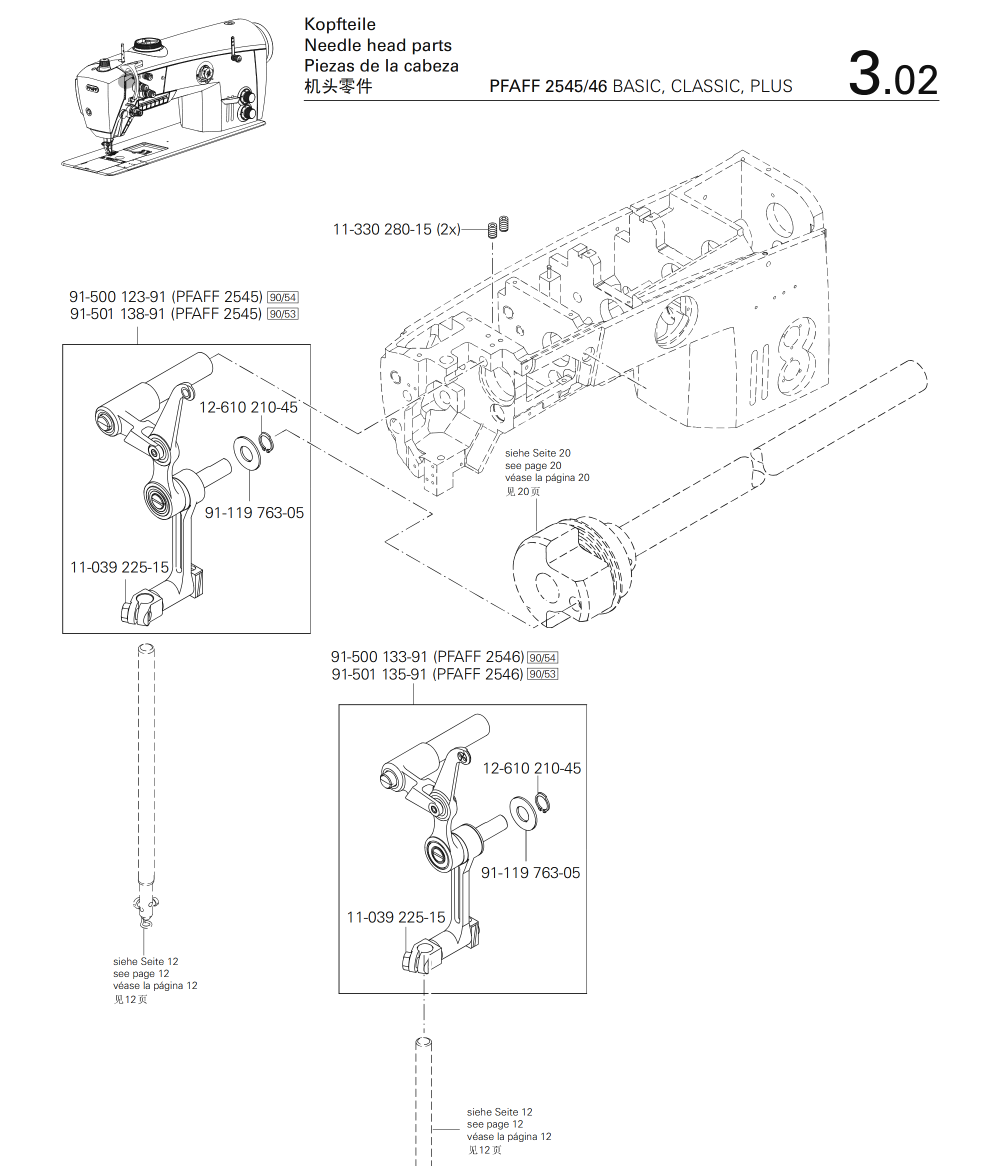
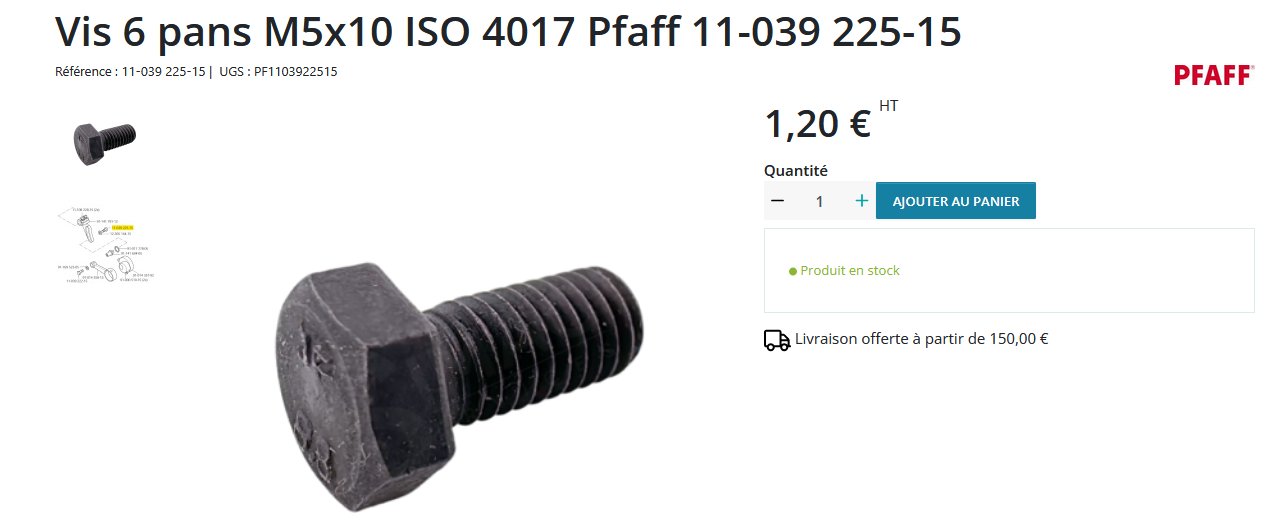
I guess that's the one Looks kind of normal screw, you can always but another one. It's the big rocker that is holding the needle bar, this screw is used just to tighten it. The only problem with is a screw could be un-tightening during the use, that you can probably solve with Loctite. I would be careful not to damage the thread inside the rocker. That is for sure much more expensive to change.
-
You have skipped stiches and a nest bellow? Have you checked the timing of the machine? here is one document, check the added text at the end https://docs.uwe.net/Pfaff-145-545.pdf you can also check different pfaff 1245 Service manuals which have nice graphics. It is much newer machine but certain things are same / similar etc
-
As it is an old home sewing machine, do you know this forum: https://www.victoriansweatshop.com/ they have some knowledge there
-
I use the second pedal for reverse, but I really don't see a reason why wouldn't you use it for a foot lift. Just connect the pedal and the lifting rod either with a chain or a wire.
-
What would your ultimate needle positioner/synchroniser do.
nejcek74 replied to beefy's topic in Leather Sewing Machines
Great project, Beefy! I really like elevated DIY projects, and I hope you succeed. I find the needle positioner extremely useful. What are your plans for the controller — will you use an Arduino or something else that can be programmed? In my opinion, you describe the basic functions well. What I would find useful is: - the ability to check and auto-apply signals from different types of needle positioner, as you already described. - the ability to easily define the up and down positions by turning the wheel by hand and pressing a button. Currently, on my controller, I can do this either by typing numbers into the controller or by moving the three metal discs inside the positioner mechanically. I always spend too much time fiddling with that. A more advanced function would be to perform automatic backtacking ((three forwards, three backwards, three forwards, or something programmable) as you are describing, that would be great.!!!!! -
How to ease when sewing leather on a 1341?
nejcek74 replied to joetroba's topic in Leather Sewing Machines
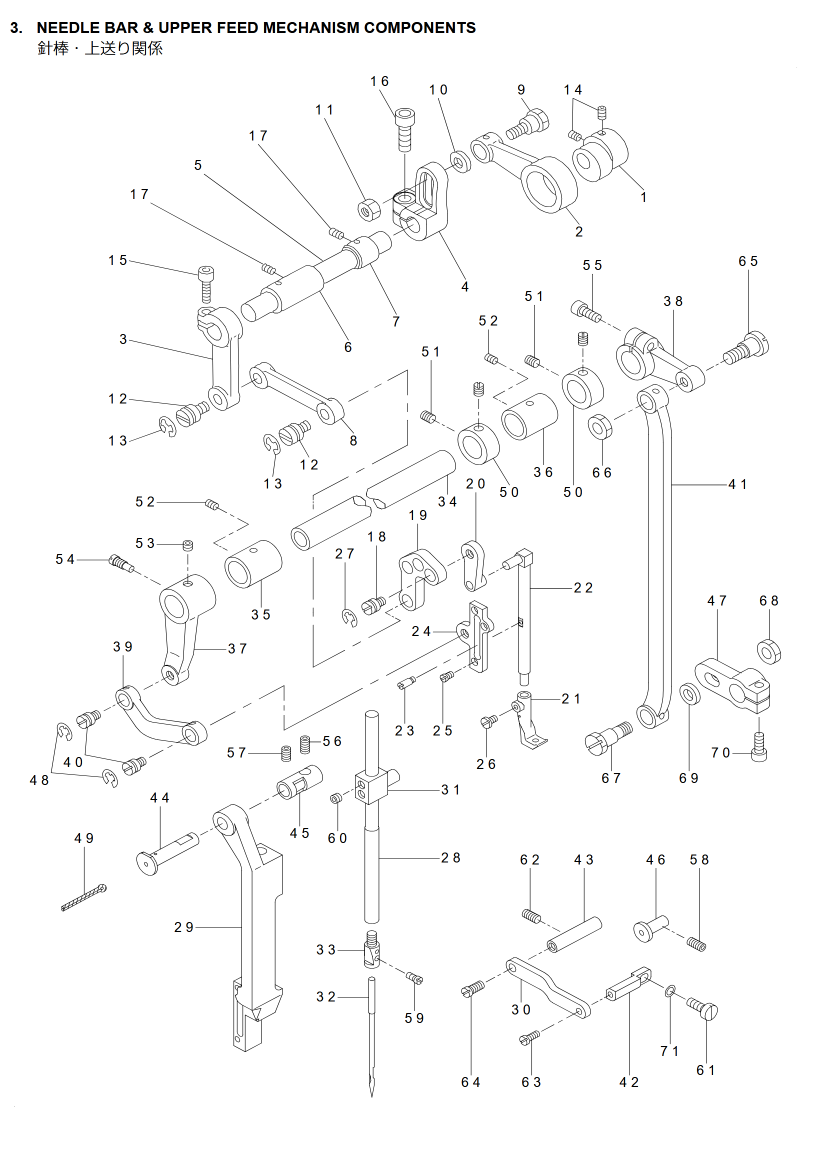
most of my machines have additional small pedal for reverse as I have simple setups with cheap servos or old clutch motors without control. Reverse is anyway the sewing machine function and it is just chain/rod connecting to the reverse lever. That's number 4 on the image.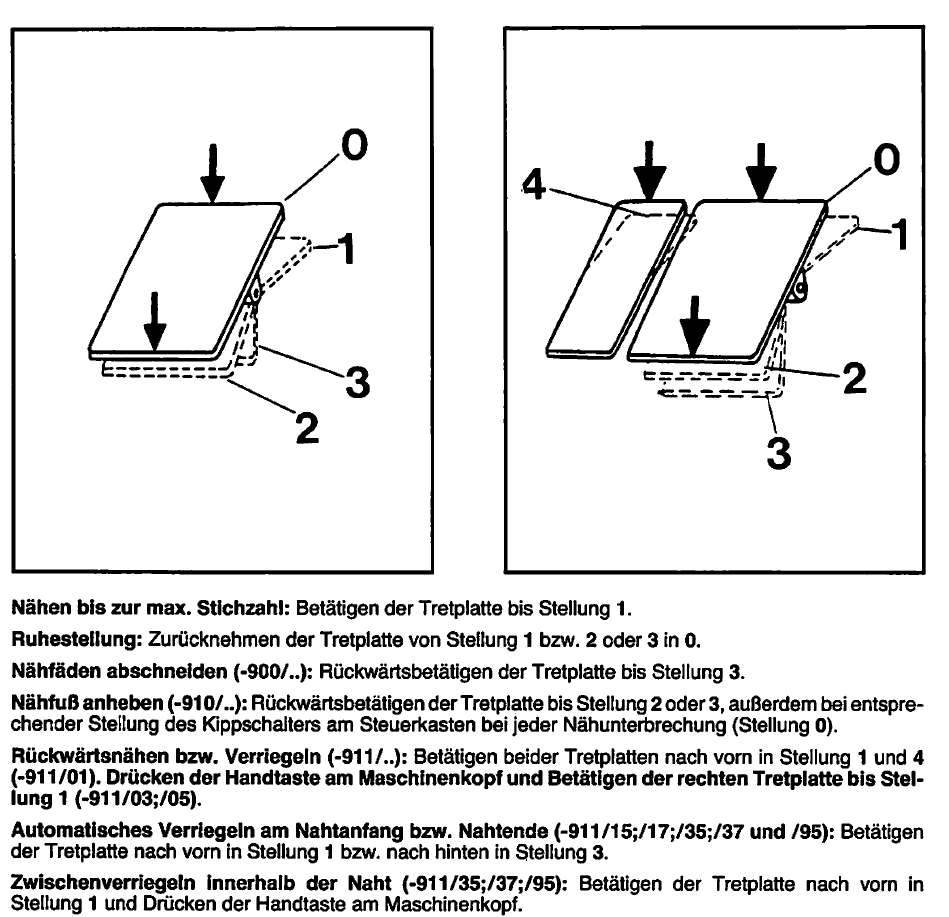
-
my solution for low speeds is a needle positioner, going from up to down and back up with as much time in between as you want. No problems with low speed/power ration and the needle always finish the cycle (locks). For a cheap servo is usually also a cheap needle positioner, sometimes they come included. All you need is half an hour to instal it, even if you get the instructions they are often just for something else :)))))
-
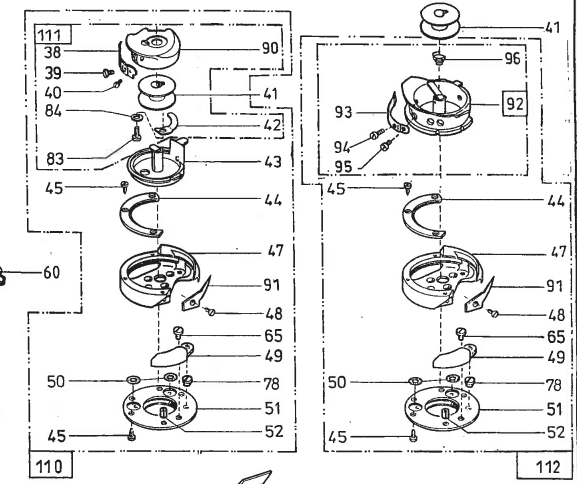
Aren't that those the parts?
-
Union Special machine setup installation and modifications
nejcek74 replied to DMH's topic in Leather Sewing Machines
yes, that's right, both machines were only fixed/sitting on those rubber feet. -
Union Special machine setup installation and modifications
nejcek74 replied to DMH's topic in Leather Sewing Machines
I have few old US machines, like 52900 and 53100. They are not in use at the time, as of lack of space :)))) Here is a pictures of the original table. At least for those two machines the tables are the same. They are very finely engineered, with pre-made holes for rubber fits, hinged access for the machine etc, lower board that can be fine tuned into the position etc. For sure made with a rig in a factory. For a single use I would do it much simpler. Ok, I would have to do it much simpler, as I don't have necessary machines :))))


-
I think the machine was produced till late fifties. Similar knob was also used in 238 but not in later 438. Such parts are not available any more, if you are lucky you can find sometimes something on ebay. Otherwise, just glue it together. I did this with the one I stupidly broke when cleaning the machine.
-
On my machine (Pfaff) you set the needle into the centre of needle hole in the feed dog by moving the needle bar frame. This is the upper assembly that includes needle bar and upper feed mechanism. By my machines is always annoying to get some movements. How is this solved by Juki I rerally don't know. check on which axe the needle bar is hanging, is there and screw that you can loose, and than by rocking the wheel you push the whole assembly slightly to the left.
-
In my opinion 1000$ for a machine that is so old is way too much. I own old pfaffs and Adlers, but I am using them as hobbiest and with a lot of love for old iron. It's great machine with some limitations (small bobbin), but with limited documentation and limited access to parts which are often very expensive. The worth of the head is max 300$, 500 if you really want this machine. Tables and old motors are practically not worth much.
-
Pfaff 545-H3 missing parts!!! Help please 🙏
nejcek74 replied to darkhornsleather's topic in Leather Sewing Machines
Google for parts diagram of the pfaff 545. Find the other post here for pfaff 545 and also 1245. Others, including me we already wrote and linked a lot of info how to time it. Feet will be the same as for 1245. Same is for hook and bobbin case, but you need to choose the right one according to your subclass (H3). 0) check this forum, 99% is already here 1) get parts diagram and find missing parts 2) compare it to 1245 to find some equivalents. 3) go to ebay/amazon /Aliexpress and get what you can 4) if something is still missing you will have to do more research 5) use pfaff 1245 engineering manual for timing it 6) ask here for what is missing -
Your timing is a little bit off (hook should be at the needle scarf when already on the way up, distance is defined in the manual) and probably the needle is too far from the hook (it should almost touch the needle, but not exactly, ca 0.1mm). I suggest you to find the engineering manual and follow it to time your machine.
-
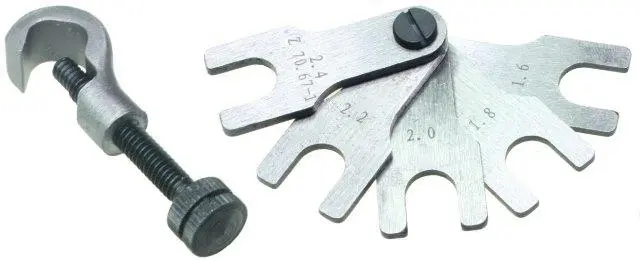
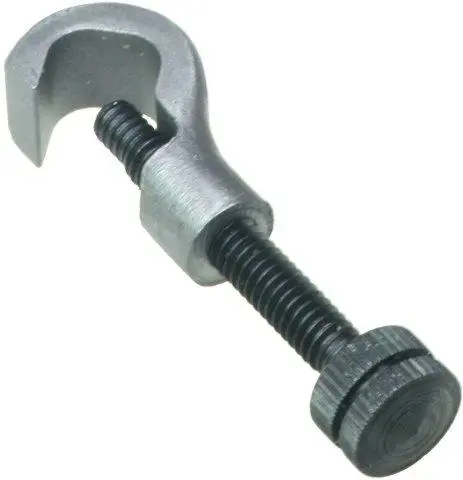
I bought it here, it's both needle bar clamp and gauge: https://www.diamondneedle.com/timing-gauge-set-p:11618.html
-
I have few pfaffs in the range of 142 to 1245 and I always adjust needle bar height regarding to the hook. - get the needle bar into the lowest position - advance so the needle bar rises to the necessary height regarding the model (between 1.6 - 2.5 mm)* * first I was doing this with making a black mark on the needle bar, later I bough the clamps for that - in this position the top of the needle hole must be 1 mm bellow the hook point see pages 9-10 here in the attached manual. Whenever I had serious problems I followed the manual from the beginning to the end and it always helped. p.s. manuals sold on the internet are usual exactly the same as the free one. Pfaff 1245 Adjustment 89_09.pdf
-
Anyone Heard of a "Bind-All" binding machine?
nejcek74 replied to hemiyota's topic in Leather Sewing Machines
To me there are a lot of visual similarities with Pfaff 461 (or 463, 467, or 483 etc) or something from that era and source. But they were all fast straight stitch sewing machines for light to medium fabric.