JamesR
Members-
Posts
324 -
Joined
-
Last visited
Content Type
Profiles
Forums
Events
Blogs
Gallery
Store
Everything posted by JamesR
-
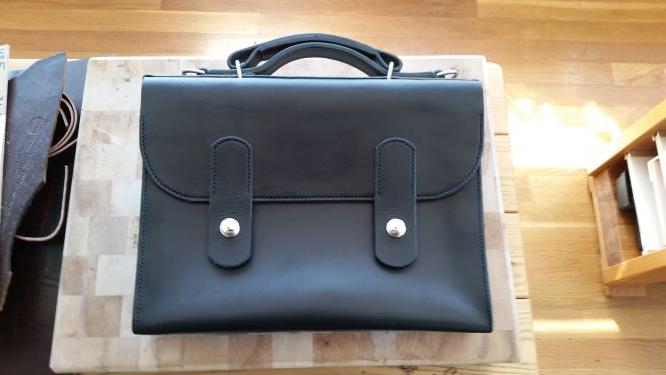
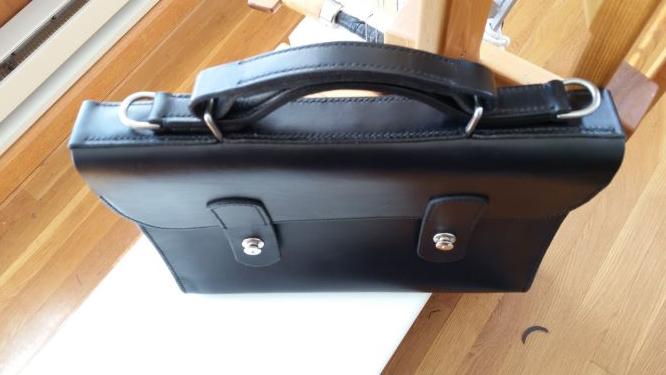
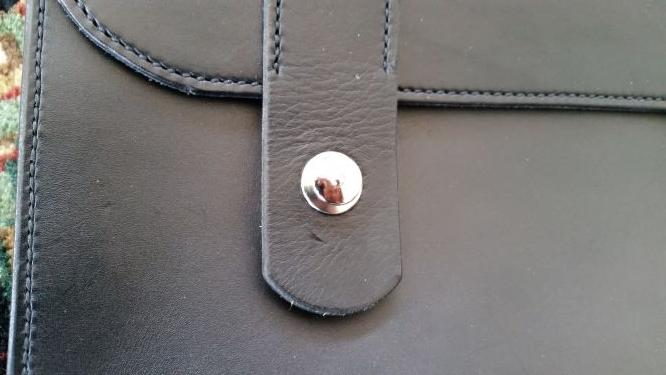
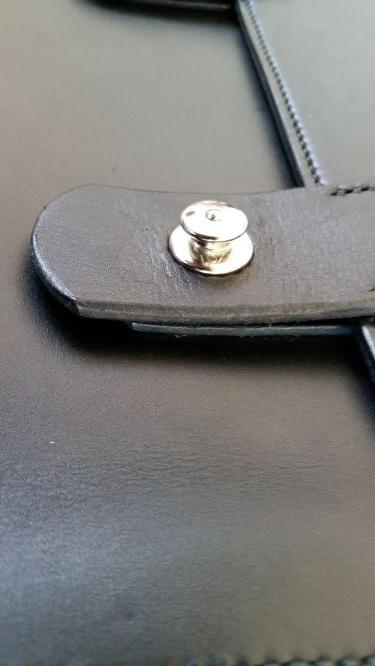
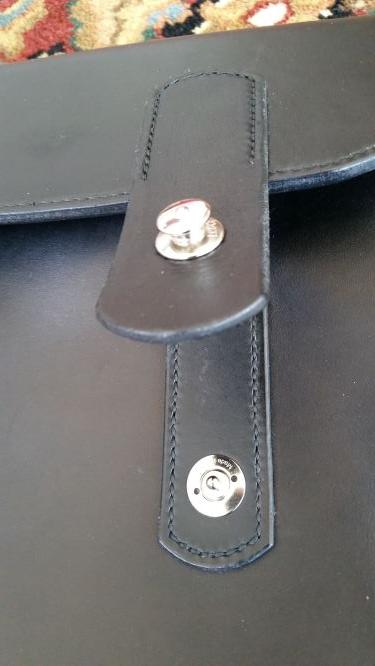
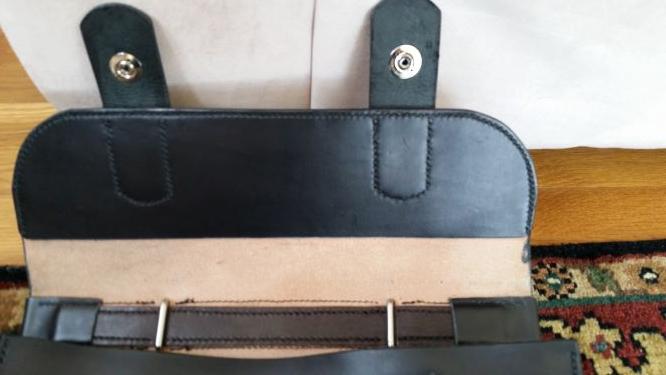
New black bridle leather briefcase using Loxx fasteners. They attach easily by punching a 3/8" hole and screwing them together. They are reliable and strong. I really like them. Anyone try them yet, what do you think?
-
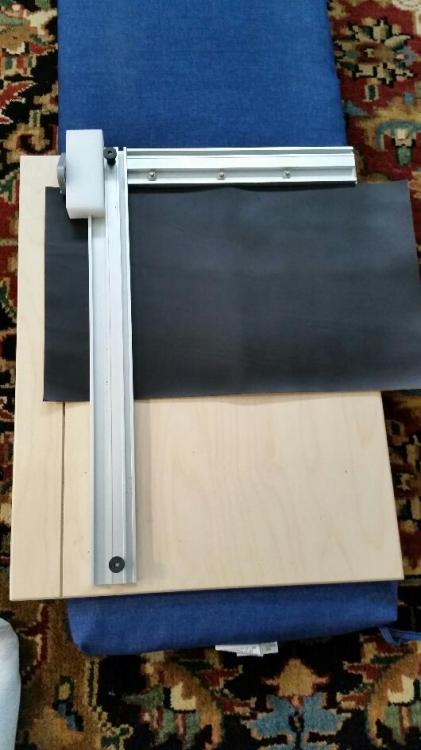
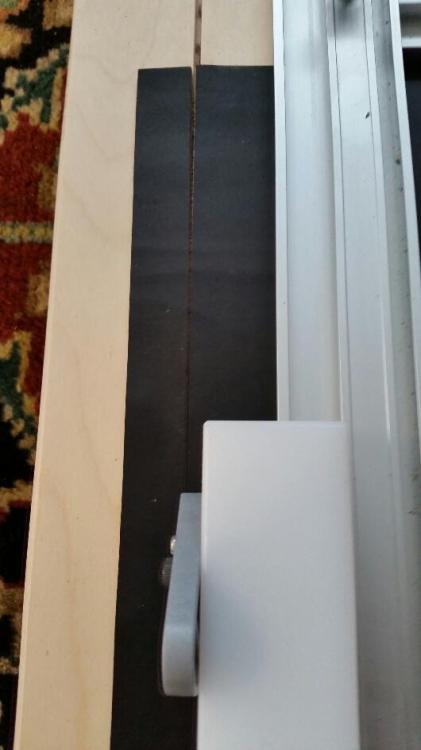
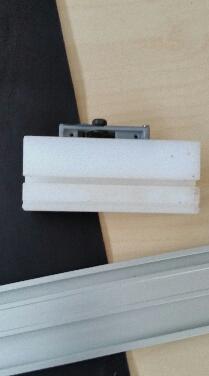
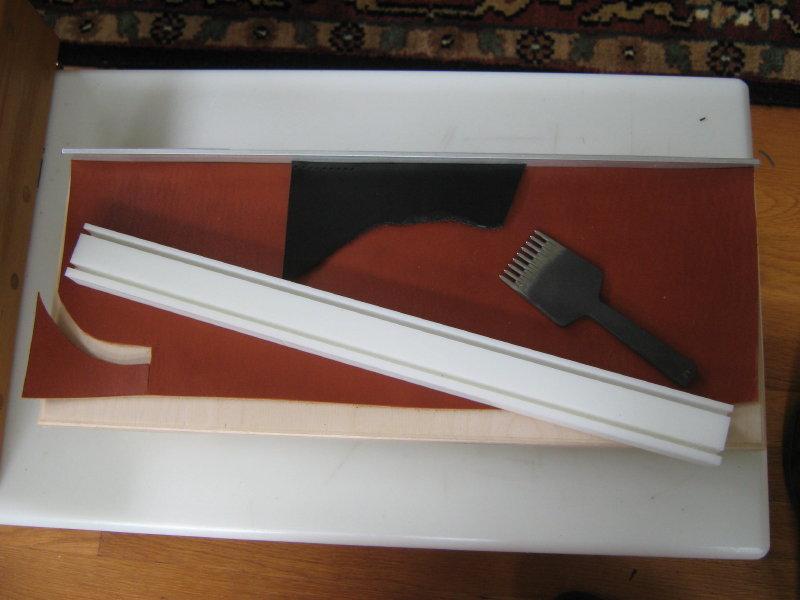
This is my new jig for cutting and squaring off pieces. It was made of plywood and aluminum extrusions. The cutting end was part of a mat cutting device. I removed the grey blade holder and mounted it on block of polyethylene material. The block was routed to fit tightly in the aluminum extrusion so it slides smoothly with no side play. The extrusion can be tightened down to hold the piece in place while cutting. The fixed top piece is at 90 degrees to the piece that holds down the leather which gives me square corners. The mat cutting blades are quite sharp and give clean cuts. There is a groove beneath the blade so it clears the plywood surface with no drag.
-
Thank you for all the replies. I get the idea that the glue not only holds the work but keeps the edges locked together for a no gap edge finish?
-
What do you think of the double sided tape for leather instead of glue? I am wondering what the edges look like without the glue?
-
GeneH Not sure if I follow about the curved vs straight block. I like the idea though of a movable block with a recess (rabbet)on the lower edge to keep the stitch line uniformly spaced from the edge.
-
Rockoboy, Yes, I like that idea.
-
Neilmott, Miss Denise You are welcome.
-
Also, because the aluminum is 1/8" and the saw kerf is also 1/8" it is a very snug fit. The poly does not slide around at all, it really stay put.
-
HeatherAthebyne, The poly does press down and holds the work quite well. Although the chisels do get stuck sometimes. Scoutmom103, You are welcome.
-
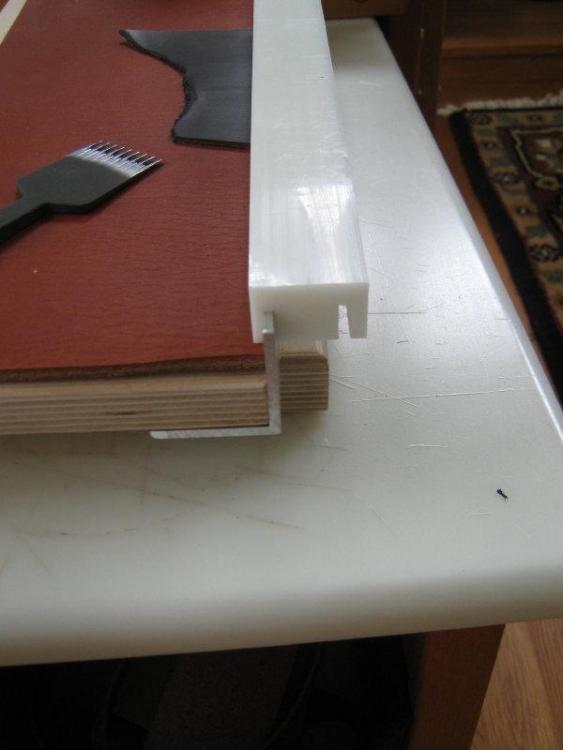
Thank you all for the kind words. Scoutmom103 I used a piece of plywood and screwed an aluminum angle to the bottom of one side. The aluminum angle is 1/8" thick metal with 1 1/2" legs. One of the legs sticks up to form a stop for the leather. I then used a piece of UHMW poly board. (Similar to cutting board material which could also be used) I cut two grooves (1/8" saw kerfs). The grooves provide the spacing from the edge of the leather for the stitch line. I used two different spacing for thin or thicker leather. The poly board provides an edge for the iron to press up against when using the iron. I use a 10 OZ leather backing piece under my work which can be changed as required. The metal angle is 1/8" thick which is also the thickness of most table saw blades. This makes cutting the grooves easy. Here is a better photo of the bottom showing the support blocks. I hope this helps.
-
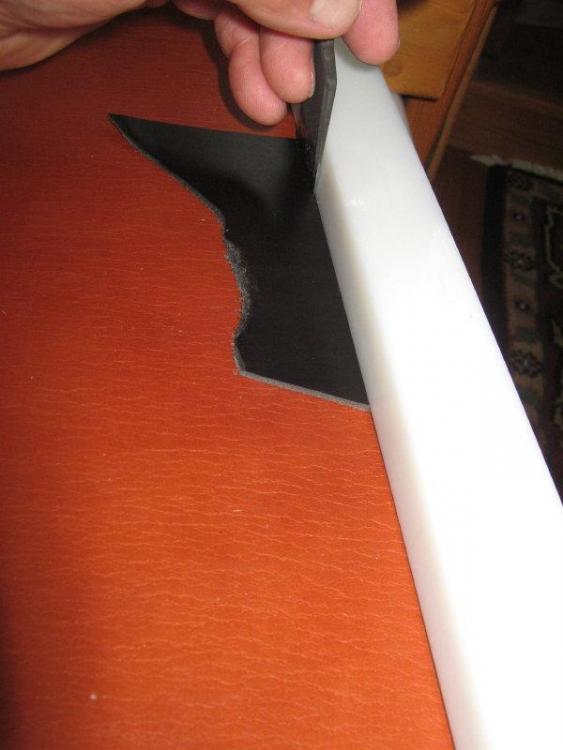
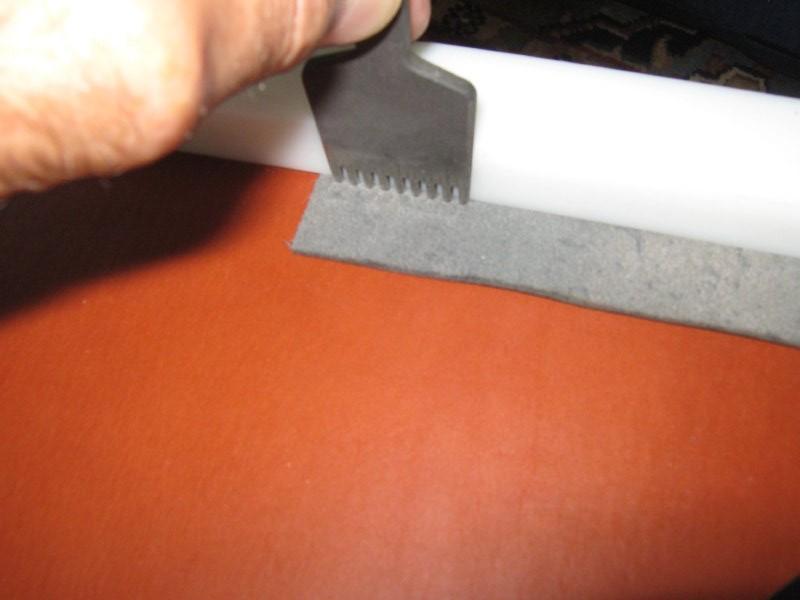
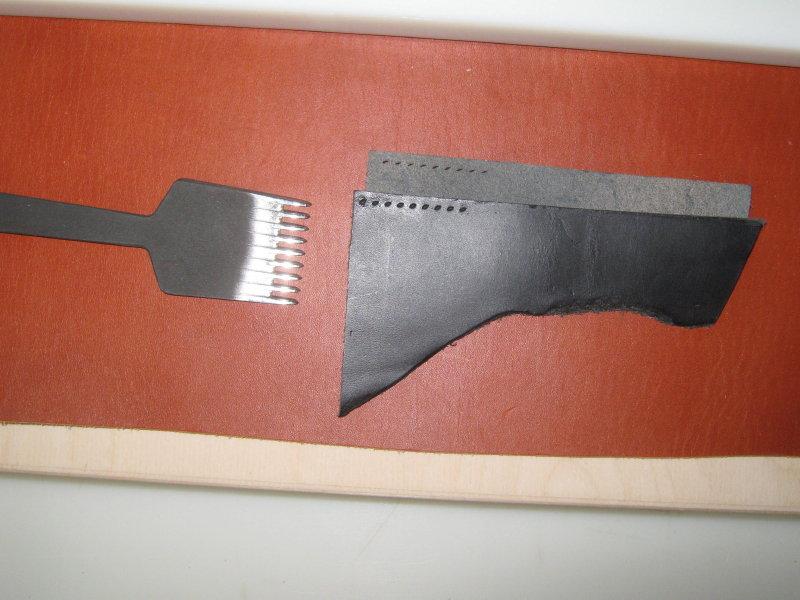
Made this jig to aid in using my Crimson Hides pricking irons. It is a plywood platform with an aluminum angle edge. I use the edge as a stop for my leather pieces to be worked on. It has a thick leather backing piece which the workpiece rests on. It also has a Poly guide strip which fits over the aluminum stop and presses down on the leather piece. The guide strip is grooved for two different stitch spacings to the edge of the work. With the work against the stop, the guide piece presses down on the work and provides an edge to align my iron vertically. The guide also keeps the stitch holes evenly spaced along the edge of leather. I can punch the grain side of one piece and then the flesh side of it's mating piece and my edges stay very closely aligned. This also keeps the angle of the holes parallel to each other which is not possible when the holes are punched from the grain side on both. If the leather is not too thick I can also punch through both pieces at the same time. This jig keeps long stitchlines quite straight. Also these Crimson Hide irons are very fine tools.
-
terrymac, Not sure what you mean, are you saying they will separate on a belt or wallet even if you do glue them? Thanks
-
Koreric75, Yes I am about to do just that and see how it comes out. Rockoboy, I see your point with not pulling too tight. I'm guessing that no matter how tight the edges are drawn together by the stitching eventually a gap will form.
-
I have been gluing and stitching edges for some time. I always assumed that the glue served two purposes. First, it keeps the pieces aligned while stitching. Second, it bonds the edges together so when they are burnished and waxed the seam stays closed up and looks like one piece. I am sure about the first purpose of glue but not so sure about the bonded edges for burnishing. Can you still get good edges without glue? What are your thoughts. Thanks
-
Any help on punching a clean tip on the end of a strap? >>
JamesR replied to DONAG's topic in How Do I Do That?
Made these jigs a while back. They are fixed width 1" and 1 1/4" The strap lays in the groove and the tips of the punch press against the shoulder of the jig. The wider area of the jig is an exact fit for the punch which centers it. They work quite well. -
Stetson912, Thank you, YinTx, I went thru several of those thread zappers and the tips all bent and broke or they just would not get hot. I finally got this: https://www.iso-tip.com/product/quick-charge-soldering-iron-kit-boxed-7700/ It is not cheap but it has been working very well for months now. The tips will not bend and break.
-
Briefcase finished this week
JamesR replied to leathersmyth's topic in Satchels, Luggage and Briefcases
I like the way the rod distributes the load evenly across the top. What is the rod made of? It looks like something I would like to try. Thanks -
Briefcase finished this week
JamesR replied to leathersmyth's topic in Satchels, Luggage and Briefcases
Very impressive! What did you do exactly with the handle attachment? Its looks like the dee rings are going through a rod covered with leather at the top. -
Big Sioux, Thank you for the informative reply. I guess I might have to come up with a way to attach them so they can be replaced without too much effort. I get them from Weaver. They have brass and stainless. I imagine the brass would wear out a lot faster then the stainless. What do you think?
- 6 replies
-
- stays latched
- no retainer strip
-
(and 1 more)
Tagged with:
-
Big Sioux, Is there a lot of tension on them when they are used for their intended purpose?
- 6 replies
-
- stays latched
- no retainer strip
-
(and 1 more)
Tagged with:
-
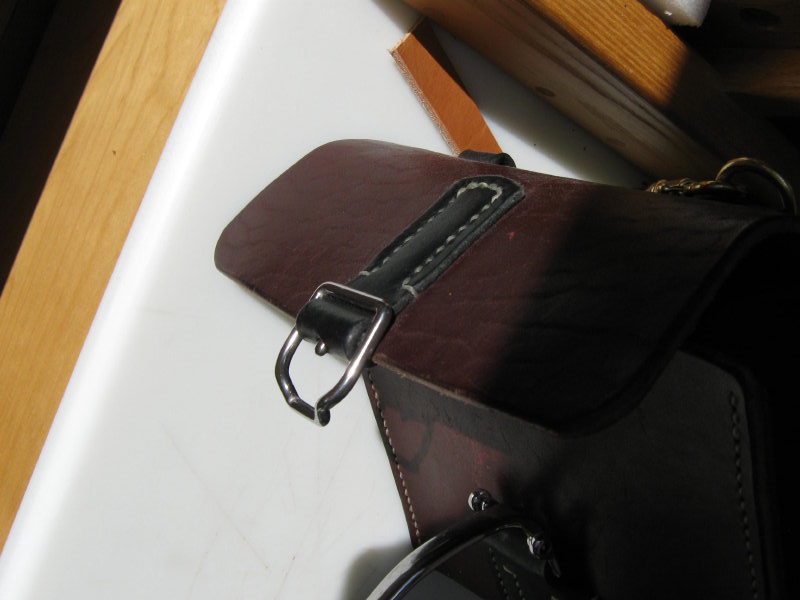
I have made 4 bags so far (working on my 5th) using the horse collar latch. I notice that quite a few bags that use this latch have a retainer strip to prevent the latch from opening inadvertently. I have never had this problem. I can take the bags I have made and turn them upside down and shake without the latch opening. I wondered about this and I think it may be the way I am mounting them. Most of the bags I see have the upper portion mounted under the flap edge. Mine are partially over the flap which angles them in. FWIW I think this helps to prevent unintended openings.
- 6 replies
-
- stays latched
- no retainer strip
-
(and 1 more)
Tagged with:
-
Harness leather case
JamesR replied to JamesR's topic in Purses, Wallets, Belts and Miscellaneous Pocket Items
Bogwot, Thank you- 17 replies
-
- w&c harness
- tiger thread
-
(and 1 more)
Tagged with:
-
Harness leather case
JamesR replied to JamesR's topic in Purses, Wallets, Belts and Miscellaneous Pocket Items
Grey Drakkon, Thank you. As far as the buckles go I see your point, They are made in different colors though. I may have to try something different.- 17 replies
-
- w&c harness
- tiger thread
-
(and 1 more)
Tagged with:


