Search the Community
Showing results for tags 'speed reducer'.
-
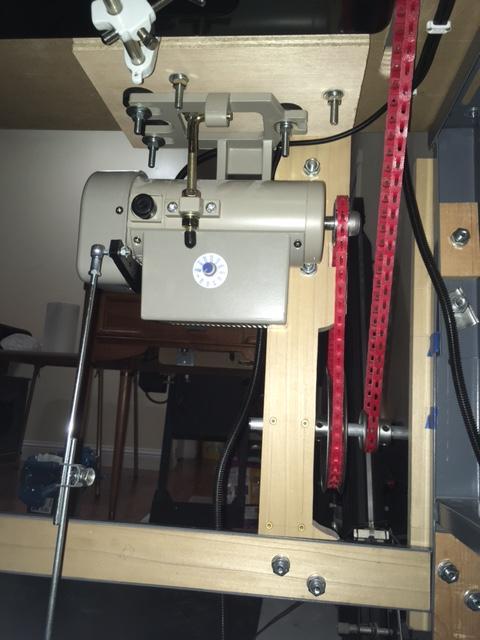
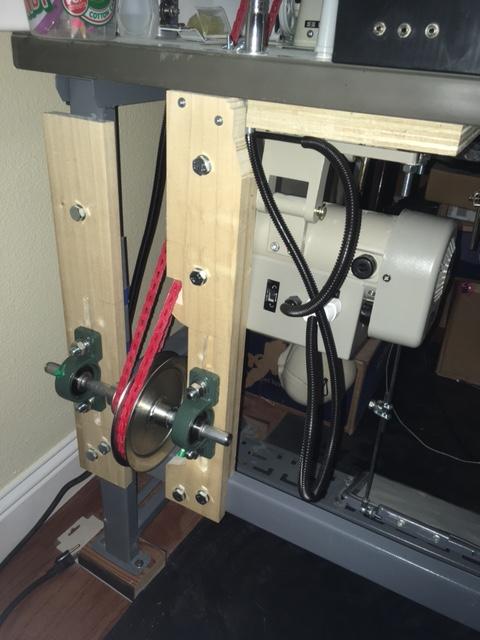
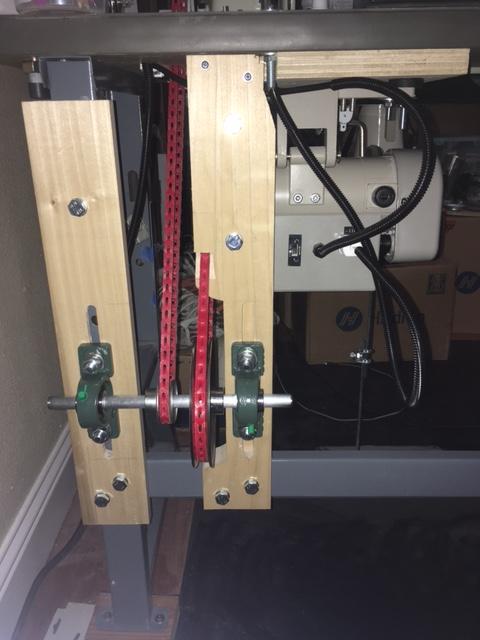
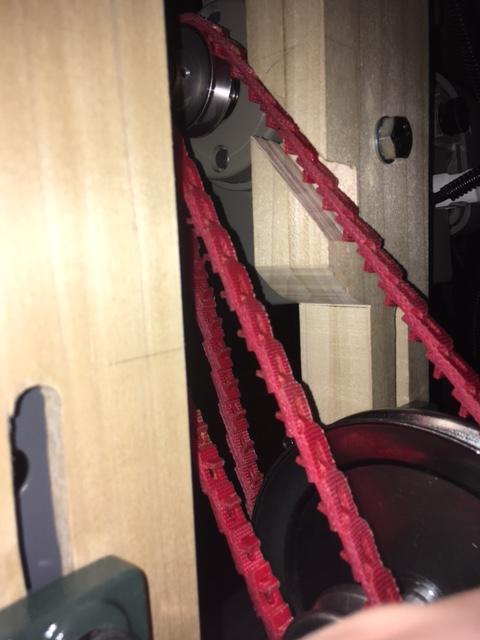
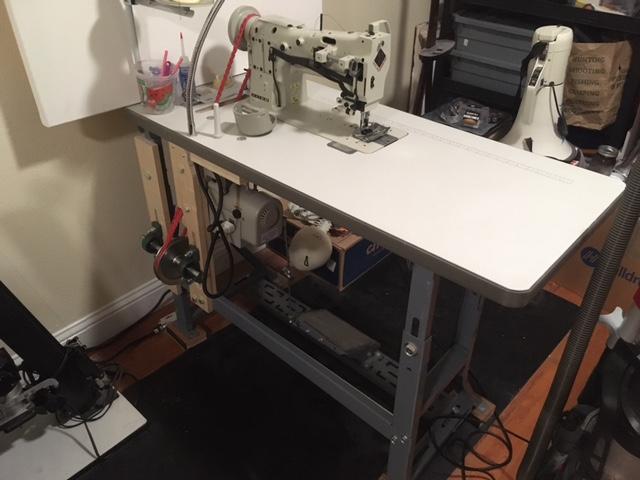
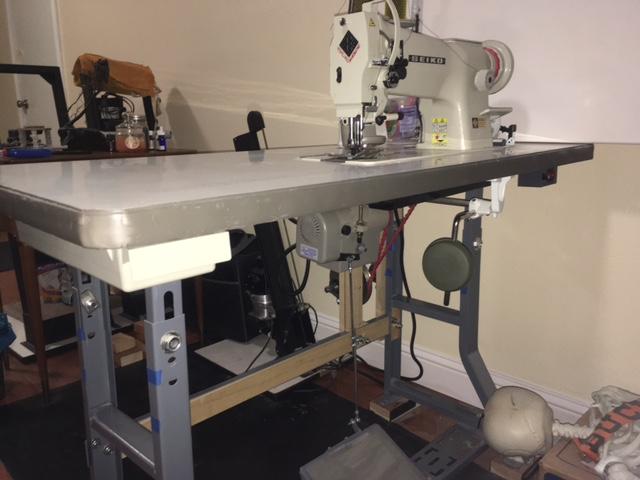
Back in 2018, I got hold of a STH-8BLD-3. I used it for a couple of small leather projects, but without a speed reducer, it primarily it saw use for heavy canvas on a theatre gig I was doing at the time. In 2019 I moved across the country and my art/craft/hobby area had to be colocated with the cats' litter boxes for the past few years. I've had plenty of other stuff to do in the meantime, so I've kept my machines bagged until the last of the kitties eventually passed on. Now that I'm able to eradicate the clouds of fine dust from the room, I've started setting things up again. Regarding speed reduction, I researched the topic on the forums back in 2018, and again recently. After considering others' builds as well as the purpose-made products available, I still chose to go the DIY route. The factors leading to my DIY decision: I felt that I could build a reducer for less than the cost of a commercial product. As it turns out, I can--so long as I'm paying myself in beer. I really really really didn't want to cut or drill extra holes in my table. This was really the biggest factor. Every other solution I'd seen required modifying the existing belt hole or was a new top build. I hate myself apparently and don't have enough problems There are likely simpler ways of accomplishing this, but here's what I cobbled together with a band-saw, drill-press, dremel and hand tools. Maintaining the original angle coming down from the hand-wheel prevented the need to modify the slot, but made for a long stretch. I haven't measured each belt, but the two add up to ~9ft. This worked to apply load to the pillow-blocks in their strongest direction, directly into a leg; though, beefy as they are, I doubt it much matters here. Note, the belt going to the machine head is on in the wrong direction in these photos. The vertical boards, and the horizontal bit inside the cross-brace (pictured further below) are all 1x4" poplar. The slots for the bearing mounts were done on the drill press by setting a fence to slide the board along while drilling a LOT of holes with spade & Forstner bits, then cleaned up with a chisel. The bolt heads and spring washers sit in a pocket and can slide up or down. For the motor mount, I plotted out the base on graph paper and made a template to shift it left and back enough to be out of the initial belt line and to not interfere with the original bolt locations. This ended up being a really tight fit for belt adjustment at the end; if I did it again, I'd position the motor a quarter to half an inch forward. This worked out because link belt is forgiving, and I designed this to allow for adjustment at the pulleys in addition to the motor. It's two pieces of 1/2" birch ply, with the motor bolt heads countersunk and hidden between the boards & table. These bearings are adjustable, however, the ones I received were very stiff initially. Even after greasing, I worried I'd break something while trying to get them aligned. I ended up bolting each pillow-block to a 2x4 clamped to my bench and worked them around for a while with a 3ft rod until they loosened up. For the axle, I cut steel bar down to size & chamfered the ends. Using a dremel and file, between bouts of sciatica, I ground about the ugliest usable flats that I'll never show you for the pulley & bearing set-screws. Because my flats are dodgy, and because both pulleys have key-ways & I'm not using keys, I balled up lengths of electrical solder to fit comfortably in each set-screw hole, which mushed down and engaged nicely. This also prevented the set screws from extending into the empty key-ways where they'd be unsupported & weakest. Once I got everything tensioned, it all moved nicely by hand and easily penetrated several layers of heavy canvas. I'll get some leather under it later this week and see how it does. I suspect I may want to move up to an 8" pulley and designed with this in mind, however I may look to a larger handwheel first if I still find it too fast.
- 9 replies
-
- speed reduction
- sth-8bld-3
-
(and 1 more)
Tagged with:
-
Hello, I recently posted about choosing my first industrial machine - thanks to everyone who chimed in to help there. I am going with the Juki 1541S and wanted to discuss the pros and cons of the motor setups I'm looking at to make a more educated purchasing decision. Cost difference: $10 - negligible. Typical use case: Sewing through 8-10 oz bridle + two layers of 4 oz soft leather. Would like headroom to ensure power isn't an issue if I need to use heavier material for some projects. These pros and cons are based on my research so far, including reading a lot of threads here, not actual experience. Please feel free to correct me if something seems off and/or add your own experiences. FESM-550S w/ reducer - PROS Gold standard - used by lots of people, known to work well. Very slow speeds possible. Maximum controllability. Reducer can be used with a variety of motors. Easy/cheaper to replace motor if it poops out. FESM-550S w/ reducer - CONS Reducer is a heavy cast iron wheel that might introduce some additional momentum into the system that the motor has to brake. Anyone have issues with this in reality? Might not be an issue at low speeds anyway. Reducer makes for a more mechanically complex setup compared to other methods of slowing things down (smaller output wheel, larger hand wheel, motor that supports very low speed/high torque out of the gate). Less powerful motor for the money (reducer itself costs more than the motor), though still plenty to do the job. SP-1100-NPFL - PROS Every account I've read so far has described this as a torque monster even at low speeds. Probably overkill for me, but nice to know I'd never want for power. Simpler setup with detached control box in easy reach. Comes with the needle positioner, which seems cool, but might not be needed at slow speeds anyway, and could just be another gizmo to break. SP-1100-NPFL - CONS Expensive - if this motor poops out, high replacement cost since I can't just slap a $150 servo on it and call it good without a reducer. Not as time-tested as the 550S/reducer setup. Perhaps not able to reach the low speed/high torque abilities you can get with a reducer (without aftermarket mods)? Can anyone chime in on this? Question: Which of these setups would you choose to power your new machine if you were buying today, new to using a sewing machine, and wanted a reliable low speed setup that has room to grow for the future? Or should I just toss a coin because they're both pretty darn good?
-
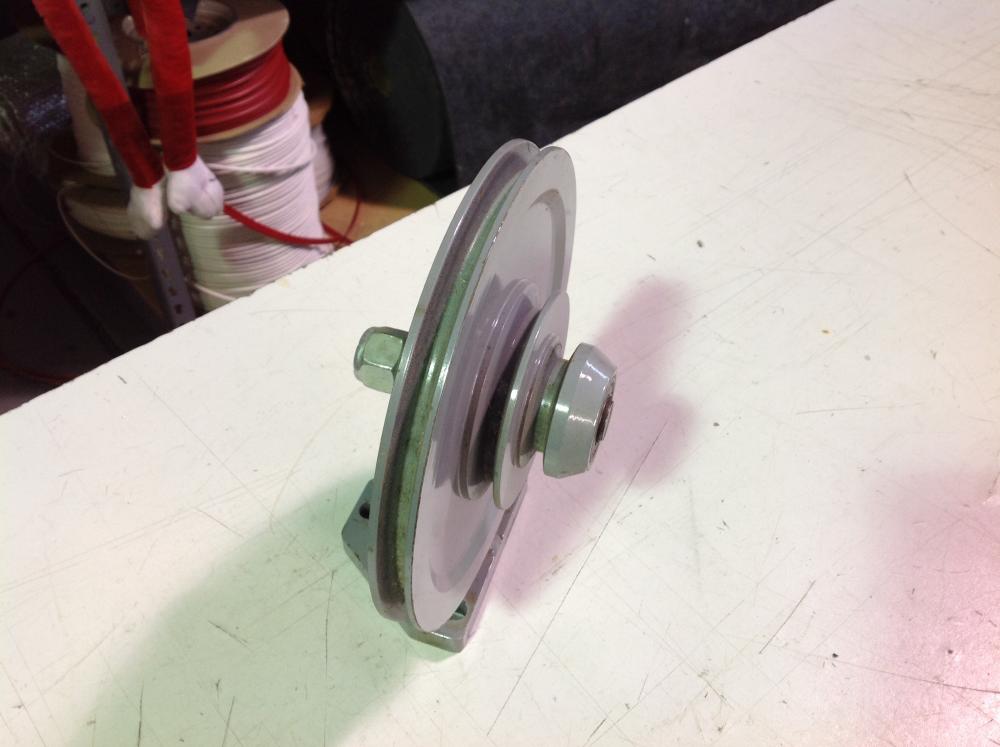
Just got around to fitting my speed reducer and have a problem that there is not enough room on the left of the cut-out to fit the reducer but space available or the right hand side The speed reducer has the large wheel on the right side and small wheel on the left, and i need them switched around but not sure how to do it Please can anyone explain as i don't want to pull it apart and fail to put it back properly, there seems to be a cap of sorts on the far end holding it all together but no apparent way to remove it, and at the other end the opposite side to the support bracket there is what appears to be a grease cap and under that a bolt This is the same type of reducer If anyone in the UK is interested they are sold in Germany at 45 euro with 25 euro postage to UK plus import vat from info@sieck.de
-
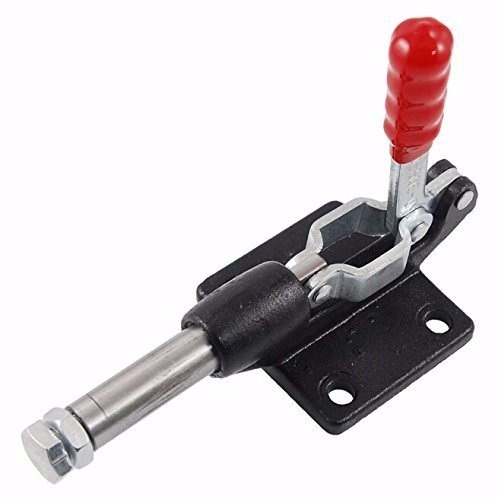
I have a simple speed reducer setup on a Consew 206rb. I like the control and power of the speed reducer, but it's sometimes a hassle to release the belt to tip the head back. Has anyone seen a quick release to de-tension the belt without using a wrench? If there's no commercial solution, I have two ideas... 1. Star knob to replace the bolt that tensions the belt on the smallest pulley. That would allow me to quickly release the belt tension so I could slip off the belt and tip the machine back. However, I'd have to get the belt tension right each time I adjust the knob. 2. Toggle clamp (Push Style) bolted to the sliding portion of the speed reducer frame. This should allow me to quickly release the belt tension, and lock in a consistent tension setting each time. When tightening the toggle clamp to start sewing again, the tip of the clamp would exert light force to the underside of the table. This is pretty hard to picture, but I'll post a picture of the installed clamp if it works.
- 24 replies
-
- quick-release
- qick release
-
(and 1 more)
Tagged with:
-
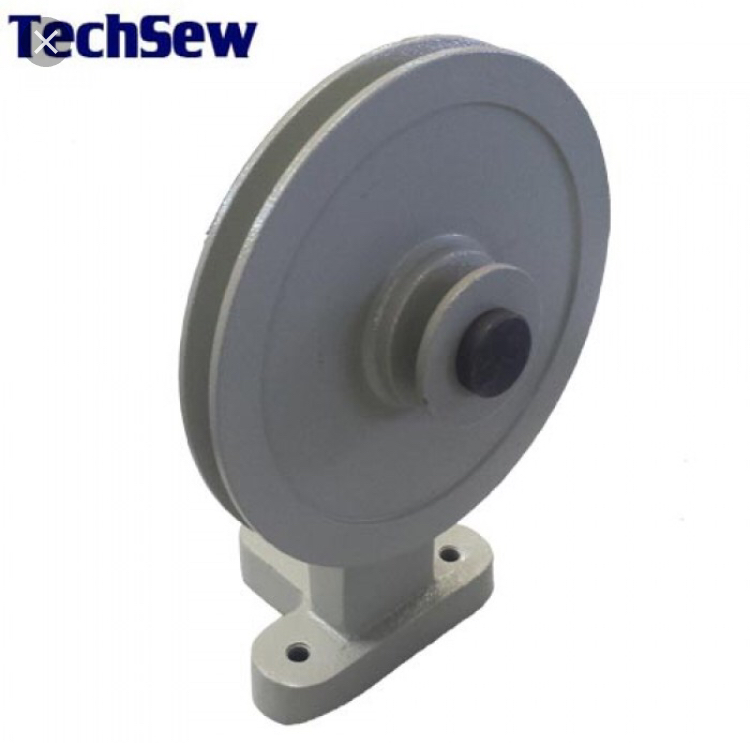
I'm curious is there is any difference in torque with the Techsew speed reducer being a 6" pulley and the SR-2 speed reducer being 9"? Any help is appreciated!
- 9 replies
-
- techsew sr-2
- speed reducer
-
(and 1 more)
Tagged with:
-
I have 3 Speed Reducer Pully's purchased from Weaver Leather. I moved to Needle position servo motors and these are just sitting on the shelf. $85.00 each you pay ship. Any interested parties please message or email me pst@wickedstitcher.com Thank you Paul Edited Friday at 09:09 AM by Stitcher Quote
-
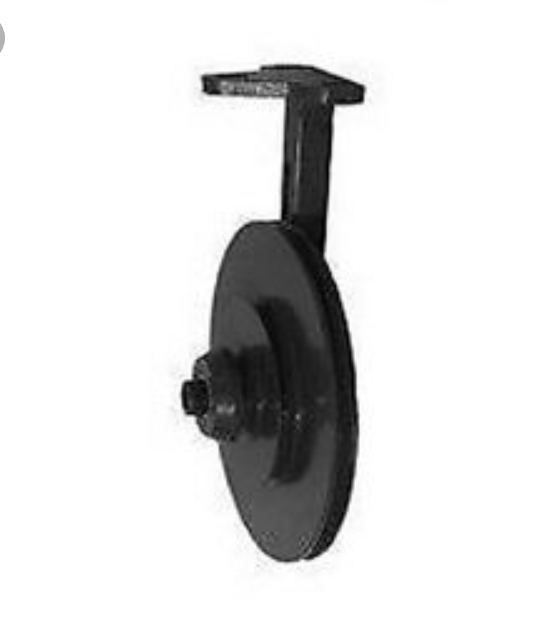
This morning i came to my friend's metal workshop, initially i asked him to make me a custom stand for one of my cylinder bed and a metal working table. On the corner i spotted things that would look like an industrial speed reducer they were belong to some gentlemen that came to his shop many years ago tried to built some sort of plastic crunching machine but ended up couldn't pay the bill He said i can have it for free as long as it come to a good use, there are 3:1 and 5:1 ratio Lately i've been thinking for a simple speed reducer pulley setup like on most youtube videos, my seiko lsc 8bv is now equipped with chinese made servo with 2' pulley, it can slow down alright but it lacks some low torque if i want to run really really slow Will this industrial speed reducer be a solution? Have anyone installed this kind of speed reducer to their sewing machine? I snag a picture from the web, because. Its hard to photograph the speed reducer gearboxes in his workshop due to plethora of stacked stuffs
-
I installed a speed reducer and adjusted the tension on the belts, but I'm finding that the belt between the motor and the speed reducer slips quite a bit. The speed reducer has a baked on epoxy paint. I was thinking about sanding the paint off of the pulley where the belt touches, but thought I would ask if anyone has any slick tricks to try before I do that. If I go any tighter on the belt tension, I'm afraid I'll burn out the bearings. Gary
- 2 replies
-
- speed reducer
- belt
-
(and 1 more)
Tagged with:
-
I've got a Consew 206rb-5 with all the bells and whistles. I am not including any pics because the machine is in beautiful condition and you can just image search one if you want to see it. I will provide pictures to any interested buyer of detailed mods. This machine was upgraded to include: speed reducer/torque increaser (2 belt system) http://www.allbrands.com/products/13324-superior-sr-2-speed-reducer-3-6-9-pulley-sr2-insta servo motor ($160) roller edge guide ($100) I also modified the servo motor so it has a much wider range in the pedal. You can sew as slow as you want in the beginning and also run at bobbin winding speed at the other end of the pedal. Machine is finely tuned and I have also had several walking feet modified to have lower profile and be easier to use in tight in spots. For the record. I love this machine it is my daily work horse and has been well taken care of. I am only selling because I hope to attend a Leather Arts School in Italy for the rest of the year. That includes selling off everything I own and moving in a backpack with my designs and a laptop. Don't want to store tools. I have a unique request of the interested buyer. I would prefer to keep this machine until I depart for classes. That would mean that the machine would be available for pick up the week of the 16th-22nd of February. If this works for you or any where around there I would appreciate you contacting me. I am firm at $1000 for the machine. It truly is ready to work! Its all going towards Tuition! Thanks for viewing. Anthony Loughan 715-271-9558
-
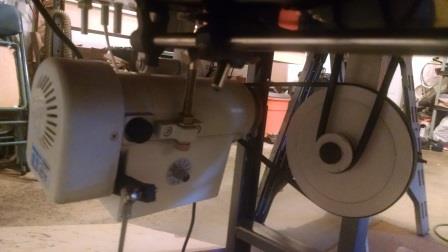
here it is 1.5in on the 3400rpm motor to a 10in with a 1.5 headed to the machine total cost 48.00 maybe I should have just bought a servo motor but whats the fun in that lol still might up grade one day hope the pics upload first time trying to upload
- 12 replies
-
- consew 225
- speed reducer
-
(and 2 more)
Tagged with:


