Frodo Report post Posted December 26, 2022 Shouldn’t this thread loop be taunt ? if so, how do I adjust it? IMG_3850.MOV Quote Share this post Link to post Share on other sites
Frodo Report post Posted December 27, 2022 Mod, video did not upload correctly please delete it from this thread to avoid confusion Quote Share this post Link to post Share on other sites
Wizcrafts Report post Posted December 27, 2022 Is that a Singer 29? What sub-model is it? Your video doesn't show enough of the top of the take-up rack to ID it. Early models only have a flat spring on top to pull the take-up check lever back to keep the thread taut. A tight spring keeps the thread taut for most projects. If the top spring, no matter its style, is loose, the check lever tends to drop down too soon and stay down, thus leaving the top thread looser than it should be. So, try tightening that top spring. Later models also have a barrel shaped adjuster to force more slack when sewing thick jobs. When it is fully backed out it has no affect. As you screw it in the check lever is forced to stay up. This adds slack thread on top. That may help maintain the stitch length in thick leather by reducing the back pressure that tight thread causes. Quote Share this post Link to post Share on other sites
Quade Report post Posted December 27, 2022 I was able to watch the video so it seems like you got it right. Quote Share this post Link to post Share on other sites
Frodo Report post Posted December 27, 2022 EC 974118 is on the brass plate directly below the 29k62 brass plate picture of the top adjustment Quote Share this post Link to post Share on other sites
Frodo Report post Posted December 27, 2022 EC 974118 is on the brass plate directly below the 29k62 brass plate picture of the top adjustment below are 2 pictures, one at the top of rotation. The other at the bottom of rotation Quote Share this post Link to post Share on other sites
Constabulary Report post Posted December 27, 2022 (edited) Normal - nothing unusual. You have thread slack on all sewing machines (as far as I know) when the needle bar is in the lower position before it rises and is forming the thread loop. However - thread slack can cause problems on the Singer 29K or Adler 30 when the paddle spring on the needle bar is worn / has a worn in grove (caused by thread and / or the threading wire). Edited December 27, 2022 by Constabulary Quote Share this post Link to post Share on other sites
Wizcrafts Report post Posted December 27, 2022 Frodo, do this test. With the machine threaded with your usual size thread, gently pull up from the top and down under the foot on the top thread. Is there any tension on the thread, or is it totally loose? It should have some tension holding onto the thread. If the thread is very easy to pull through the snout, lower the needle bar all the way to expose the bottom of the paddle spring, which is immediately over the needle mounting bracket. Take a small screwdriver and gently push against the paddle and see if it grabs the thread tighter. If so, it may be that some thread fragments are caught between the spring and needle bar thread channel. Running the thread down should clear it. Compressed air may help if shot down through the top of the thread channel. If the spring appears to be bent, or cracked, it must be replaced. This is requires punching out the tapered stud on top at the needle bar/take-up lever junction. It pushes out from front to back. Then you remove the presser foot and screw, then pull the needle bar out from the top. The paddle spring is secured by two tiny screws. One or both of them may have been filed down on the leading edge so it clears the bushing as the foot is turned in any direction. Carefully remove them and keep them separated left and right so you can reinstall them in the same positions. Clean out any debris in the thread channel. Get a new paddle spring and fasten it down all the way, minding the position of the screws. NB: If you have to replace the screws they may need to be filed a bit on the edges that protrude of of round and might touch the revolving bushing. The paddle spring is responsible for holding the top thread taut as the hook comes around to pick off the loop. If that spring is twisted, cracked, gouged or too loose, the loop will dissolve before the hook can pick it off. Sometimes, users will deal with this situation by loosening the top spring that pulls the check lever up, so it drops down easily. Then they compensate for a lack of thread control by tightening the barrel adjuster to force the lever up. I've done this a few times on patchers until I obtained a new spring and found time to install it. Quote Share this post Link to post Share on other sites
Frodo Report post Posted December 27, 2022 Do not laugh but.. is the needle bar missing? doesn’t it go in that slot? Quote Share this post Link to post Share on other sites
Frodo Report post Posted December 27, 2022 Do not laugh but.. is the needle bar missing? doesn’t it go in that slot? Quote Share this post Link to post Share on other sites
Constabulary Report post Posted December 27, 2022 The paddle spring is missing on the needle bar and as it seems you have a deep grove in it. You can file it out up to a certain degree. This is how it should look Quote Share this post Link to post Share on other sites
Frodo Report post Posted December 27, 2022 Whats your recommendation new paddle spring ot new paddle spring and needle bar? on a chi chi patcher, removing that assembly is pretty straight forward is it comparably the same on the 29k? Quote Share this post Link to post Share on other sites
Sheilajeanne Report post Posted December 27, 2022 Glad you edited the title, Frodo! When I first read it I thought, 'wait, did someone have a really bad date?' Quote Share this post Link to post Share on other sites
Frodo Report post Posted December 27, 2022 6 hours ago, Wizcrafts said: Frodo, do this test. With the machine threaded with your usual size thread, gently pull up from the top and down under the foot on the top thread. Is there any tension on the thread, or is it totally loose? It should have some tension holding onto the thread. If the thread is very easy to pull through the snout, lower the needle bar all the way to expose the bottom of the paddle spring, which is immediately over the needle mounting bracket. Take a small screwdriver and gently push against the paddle and see if it grabs the thread tighter. If so, it may be that some thread fragments are caught between the spring and needle bar thread channel. Running the thread down should clear it. Compressed air may help if shot down through the top of the thread channel. If the spring appears to be bent, or cracked, it must be replaced. This is requires punching out the tapered stud on top at the needle bar/take-up lever junction. It pushes out from front to back. Then you remove the presser foot and screw, then pull the needle bar out from the top. The paddle spring is secured by two tiny screws. One or both of them may have been filed down on the leading edge so it clears the bushing as the foot is turned in any direction. Carefully remove them and keep them separated left and right so you can reinstall them in the same positions. Clean out any debris in the thread channel. Get a new paddle spring and fasten it down all the way, minding the position of the screws. NB: If you have to replace the screws they may need to be filed a bit on the edges that protrude of of round and might touch the revolving bushing. The paddle spring is responsible for holding the top thread taut as the hook comes around to pick off the loop. If that spring is twisted, cracked, gouged or too loose, the loop will dissolve before the hook can pick it off. Sometimes, users will deal with this situation by loosening the top spring that pulls the check lever up, so it drops down easily. Then they compensate for a lack of thread control by tightening the barrel adjuster to force the lever up. I've done this a few times on patchers until I obtained a new spring and found time to install it. Nice detail on how to fix the problem looks like I am going to be replacing some parts Quote Share this post Link to post Share on other sites
Constabulary Report post Posted December 28, 2022 For what ever reason the depth of the worn in grove looks significantly different on your pictures. One like almost no grove and the other looks quite deep. If the grove is not too deep it will not bother (as it seems to be on the left picture). Anyway you can file if down as long as you do not go too deep cause that may create an edge / burr in the thread path and could damage the thread when thread slides over the edge. If it is as deep as it looks on the right picture I would file down the grove and install a new spring. Springs should be available from most industrial sewing machine dealers. Part # is 8656 The spring is held by 2 very tiny screws Part # is S133D or SS133 Even when the screws are there I would order new screws. They are tiny with very fine threading and when you drop them they are gone (guess how I know). Make sure you are using a proper screw driver and do not damage the screw heads. If the screw wont come off / are seized I would heat the screws with a little gas blow torch... Important hint from WIZ: 17 hours ago, Wizcrafts said: NB: If you have to replace the screws they may need to be filed a bit on the edges that protrude of of round and might touch the revolving bushing. BTW - filling the grove with epoxy or lead makes no sense cause the threading wire will wear it out soon. Quote Share this post Link to post Share on other sites
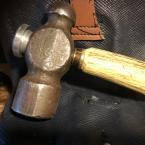
Frodo Report post Posted December 28, 2022 Ordered some parts. Shout out to Bob the drift pin seems to be a bit stubborn so I ground down what looked to be mushroom on both sides tje front side shows signs of slight movement How much “whooping” will this u bracket attached to the needle bar withstand? should I stop and drill the pin out or just go full gorilla on it? Quote Share this post Link to post Share on other sites
MikeRock Report post Posted December 29, 2022 That's a tapered pin. Notice one end is larger in diameter than the other. Drift out appropriately. Back up with a weighty chunk of steel, but NOT on the pin. You could heat it with a propane torch, not red heat, just heat. They come out fairly easily then. Quote Share this post Link to post Share on other sites
Constabulary Report post Posted December 29, 2022 (edited) All pins on this machine are tapered. This pin would go out back to front just as the large pin on the lever arm. The 2 mentioned pins usually go out with a few gentle hammer strikes. There is nothing on this machine that requires drilling or grinding for removing / replacing parts. Ask Bob if he has a new pin. Parts # is 8589 BTW - in one of your earlier threads on this machine KGG linked a manual with parts list with good part diagrams for the 29K7x series which is not the exact same machine but it is a very good manual and the majority of parts remained the same (just minor differences). Edited December 29, 2022 by Constabulary Quote Share this post Link to post Share on other sites
Frodo Report post Posted December 29, 2022 2 hours ago, Constabulary said: All pins on this machine are tapered. This pin would go out back to front just as the large pin on the lever arm. The 2 mentioned pins usually go out with a few gentle hammer strikes. There is nothing on this machine that requires drilling or grinding for removing / replacing parts. Ask Bob if he has a new pin. Parts # is 8589 BTW - in one of your earlier threads on this machine KGG linked a manual with parts list with good part diagrams for the 29K7x series which is not the exact same machine but it is a very good manual and the majority of parts remained the same (just minor differences). It is not tapping out, I suspect that whoever removed the spring may have installed the pin backwards or the wrong pin. When Wiz first said it was a drift pin I was concerned. The head of the pin on both sides was mushroomed making it difficult to determine which end to tap I removed the mushroom. And have tapped the pin with sharp taps i will heat it after the sun comes up and I grab my torch off of the truck Quote Share this post Link to post Share on other sites
CowboyBob Report post Posted December 29, 2022 (edited) @Frodothe pins usually come out towards the front,so tap on the backside.Try holding a piece of metal on the frontside while tapping on the pin from the back,if you still can't get it out.You can take the 4-screws out of the head along with the needlebar holder & lower it(the head) down off the needlebar take the spring off the top of the takeup lever then knock the pin out of the takeup lever& remove it & you can take the needlebar off & put it on top of a vice or a small socket & tap the pin out. Edited December 29, 2022 by CowboyBob Quote Share this post Link to post Share on other sites