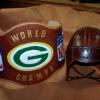
Members Colt W Knight Posted August 3, 2016 Members Report Posted August 3, 2016 Awesome What are you using to attach the binder mechanism? It looks cleaner than the way I do it. I drill out the posts on a binder, and attach it with some # 6 brass screws and nuts, or SS. Quote
Chief31794 Posted August 3, 2016 Report Posted August 3, 2016 Absolutely Beautiful!!! Excellent craftsmanship. Quote "Life's too short to carry ugly leather"
Members builderofstuff Posted August 3, 2016 Members Report Posted August 3, 2016 Looks amazing. Chris Quote Just a man, a shop, and a long list of unfinished projects..... My Website My Etsy Shop
Members Wedgetail Posted August 9, 2016 Members Report Posted August 9, 2016 On 04/08/2016 at 3:57 AM, Colt W Knight said: Awesome What are you using to attach the binder mechanism? It looks cleaner than the way I do it. I drill out the posts on a binder, and attach it with some # 6 brass screws and nuts, or SS. Look like Chicago screws mate. Quote
Contributing Member JLSleather Posted August 9, 2016 Contributing Member Report Posted August 9, 2016 Crisp stampin', even colors, clean uncluttered look, contrasting stitchin'.... AND you didn't drown it with that ant-streak crap! I like it One simple "fix"? Keep a piece of 3/4 or 4/5 ish leather next to yer machine - size of a belt keeper all you need. When you turn a corner (like in the middle of your binder spine piece), set it on the leather under the center presser foot and you won't git that 'booger' outside the stitch line. Just stitch to the turn, lift the foot like normal, slip the slip under there before setting the foot back down, and resume stitching. No booger Note there is another way, but that way is SO simple to do AND to explain ... Quote "Observation is 9/10 of the law." IF what you do is something that ANYBODY can do, then don't be surprised when ANYBODY does.
Members Bluesman Posted August 11, 2016 Author Members Report Posted August 11, 2016 Thanks for the tip JLS. And yes I used Chicago screws. Had some fancy domed top ones. Quote If it ain't moving and should......WD40, If it's moving and shouldn't....Duct Tape. There you have it, now fix something


Recommended Posts
Join the conversation
You can post now and register later. If you have an account, sign in now to post with your account.
Note: Your post will require moderator approval before it will be visible.