

All Activity
- Past hour
-
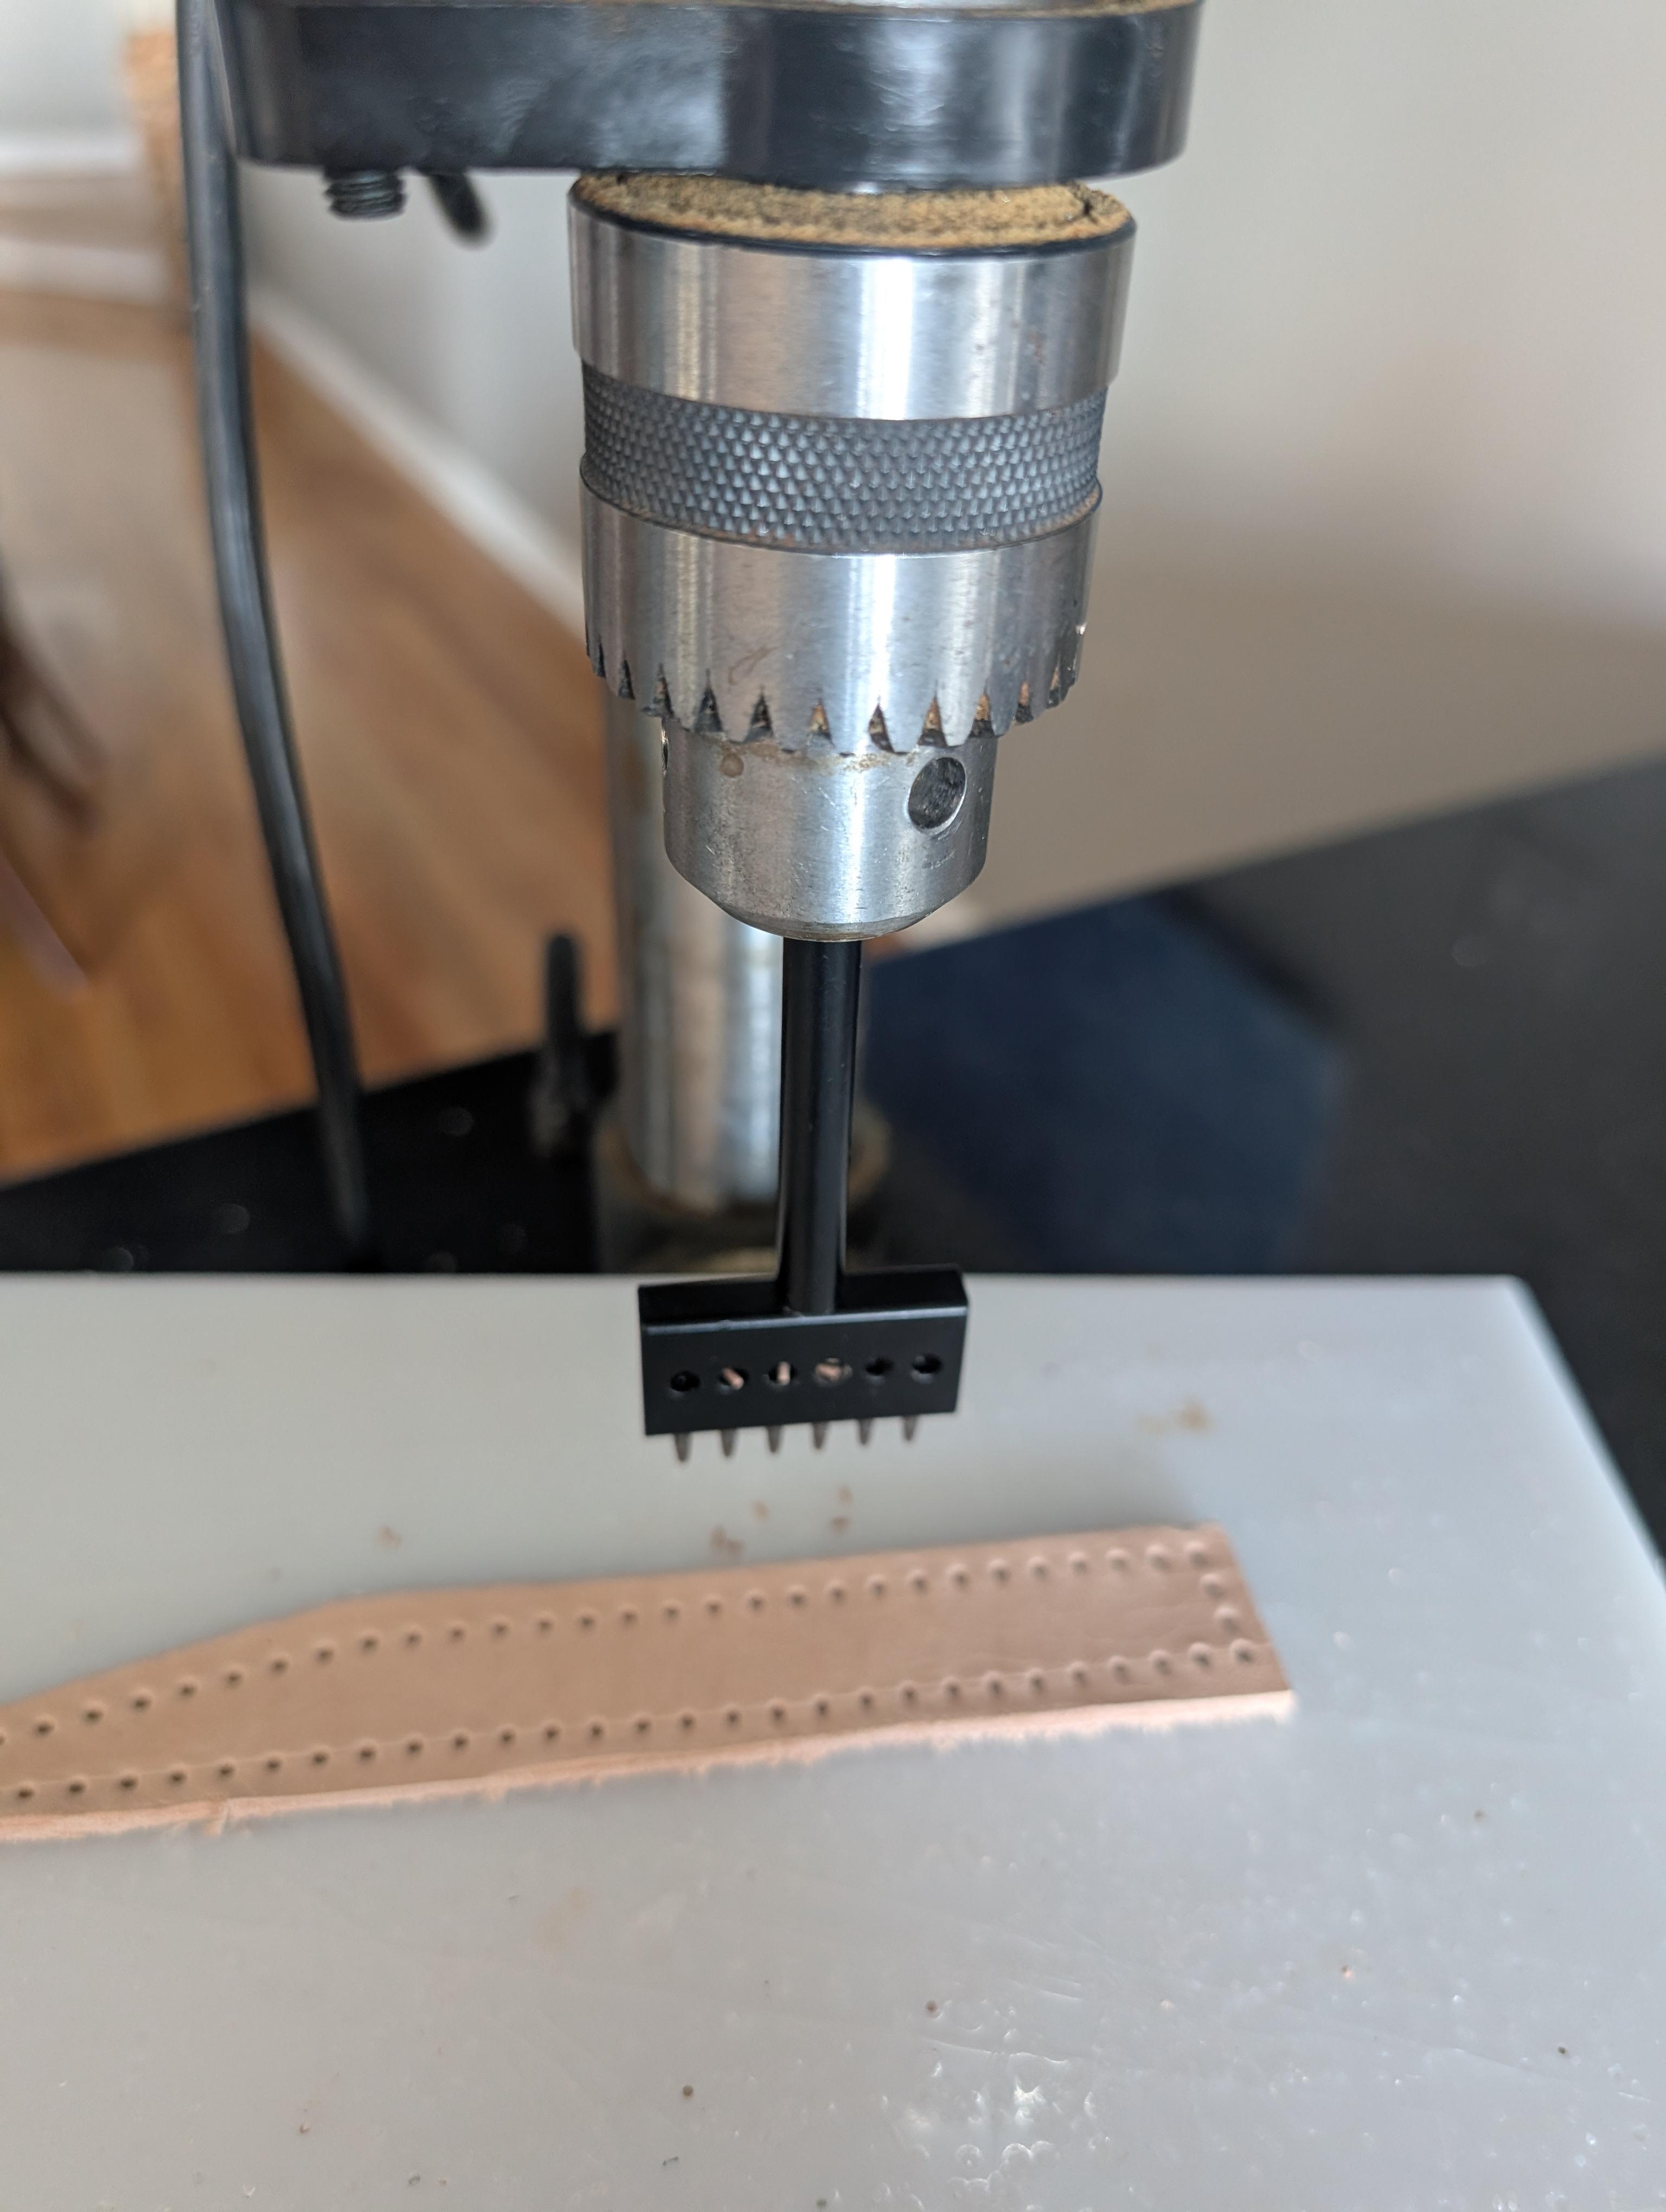
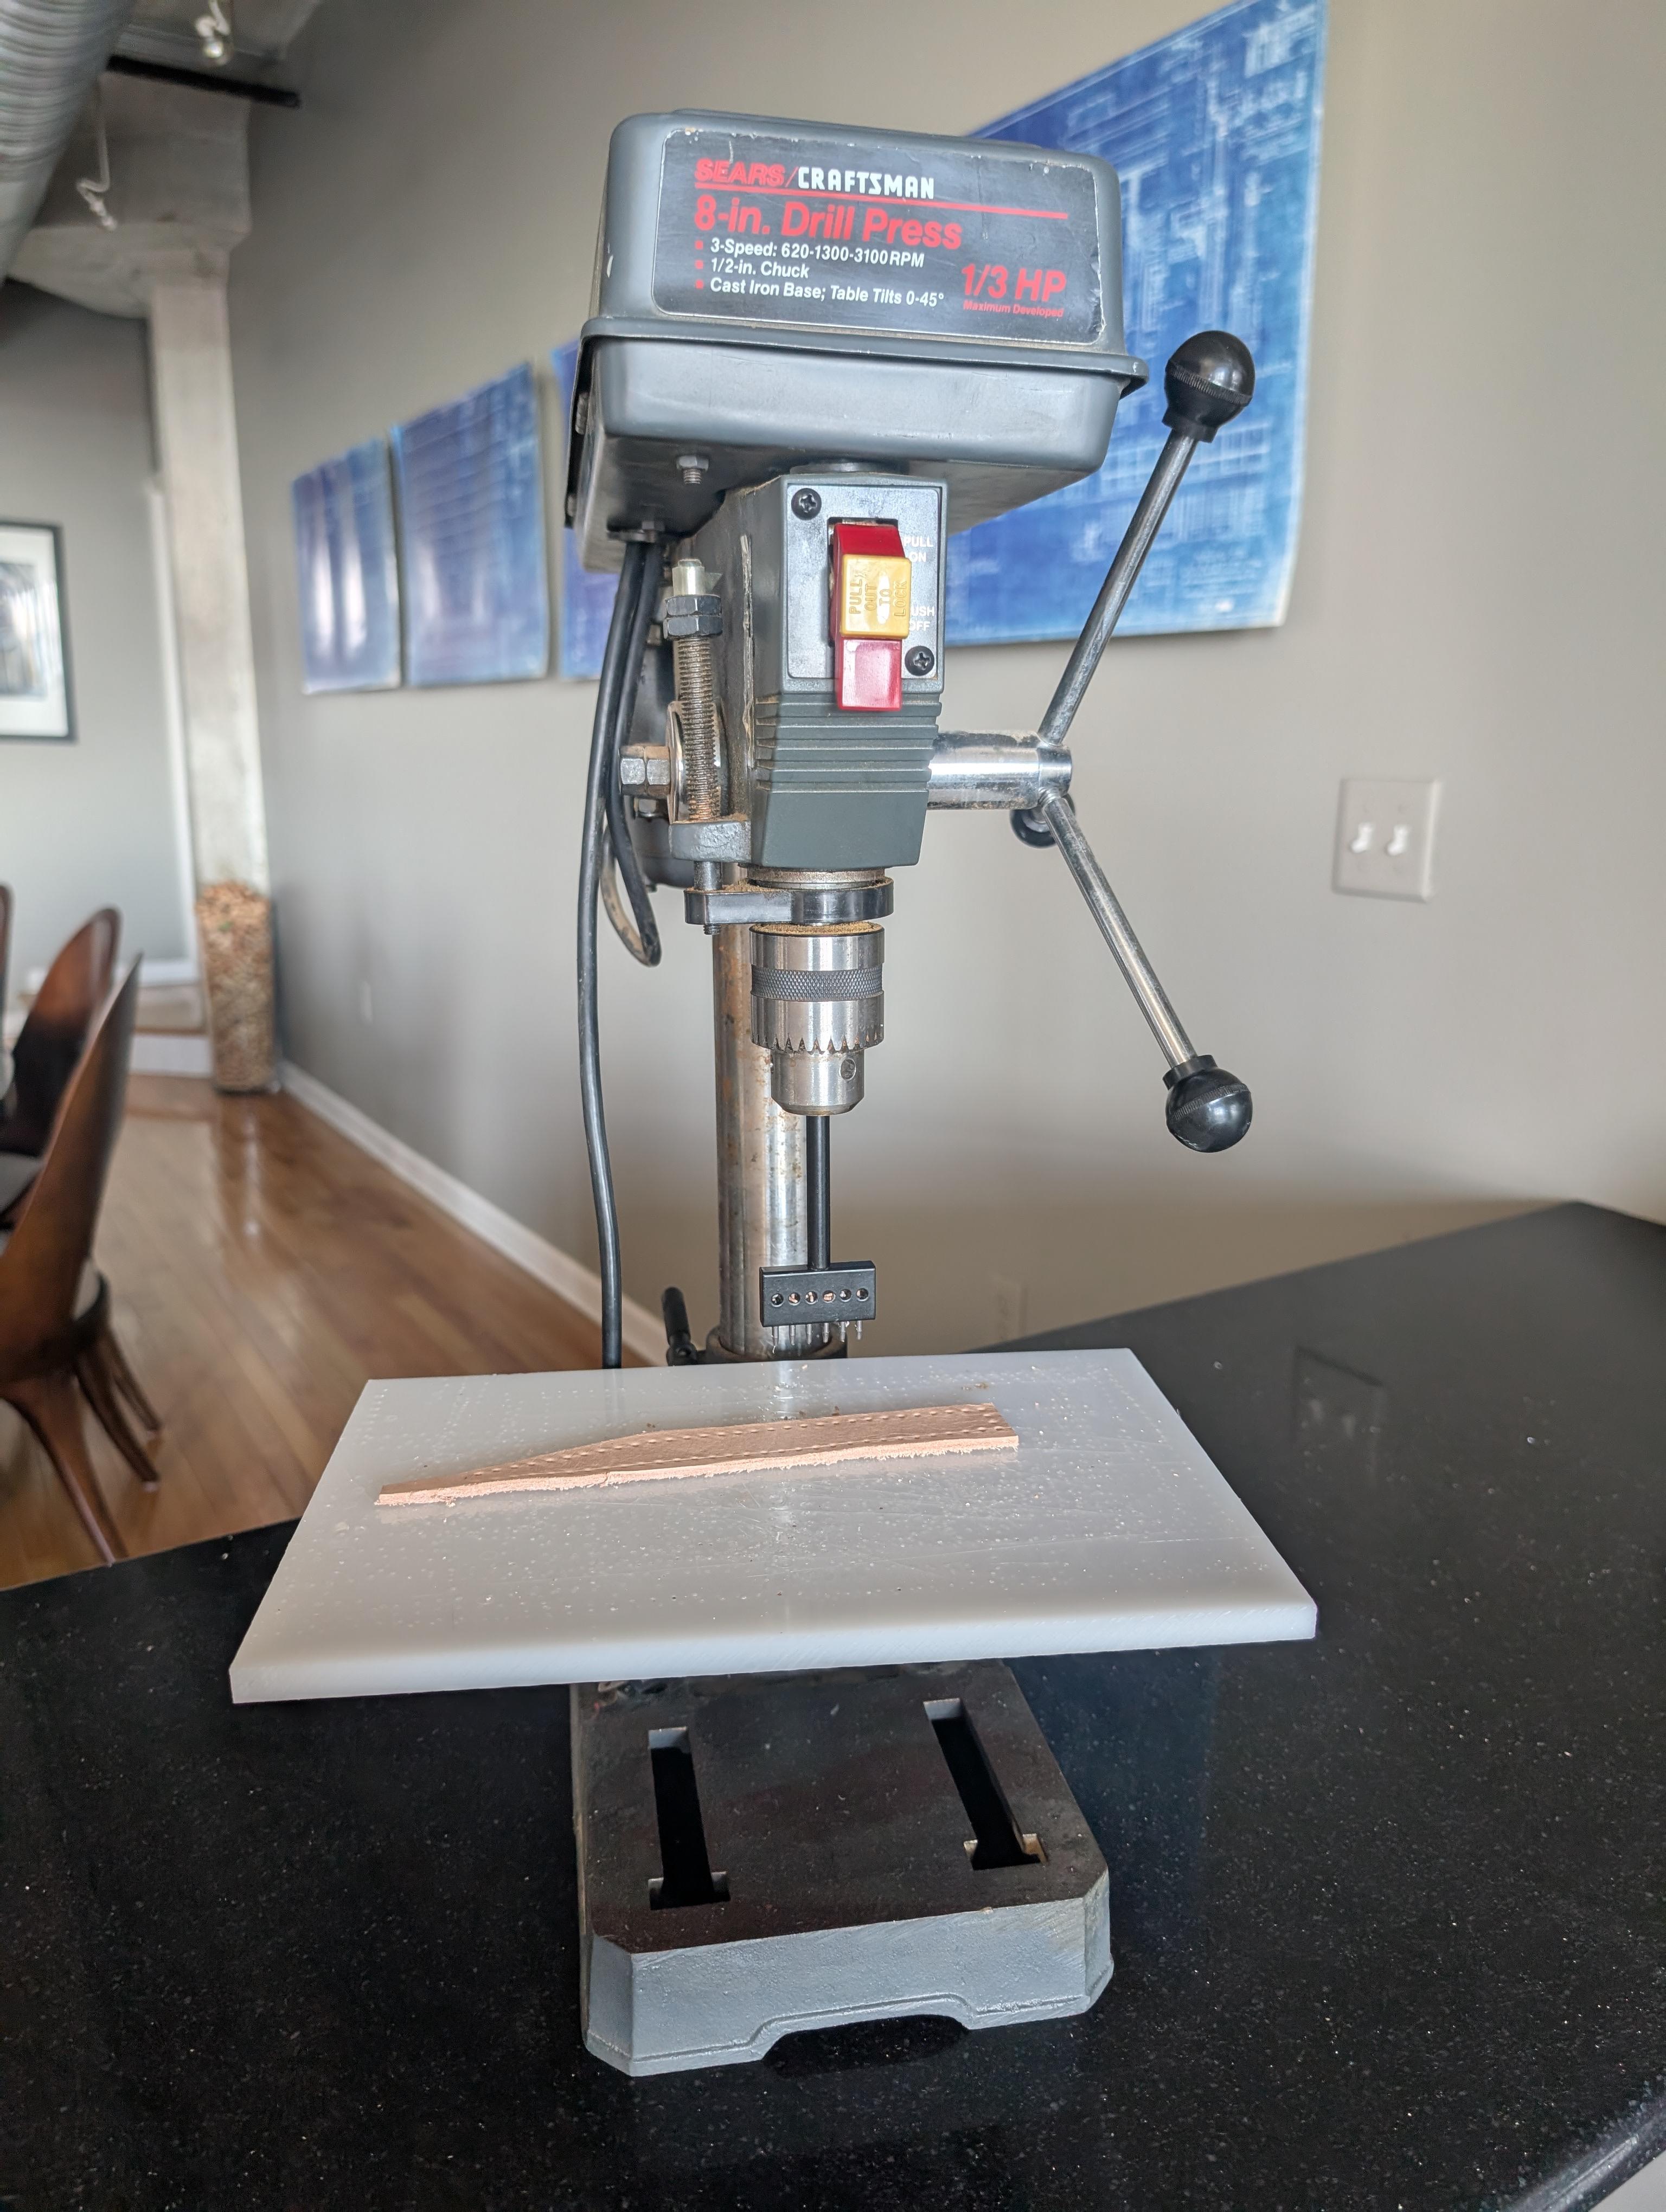
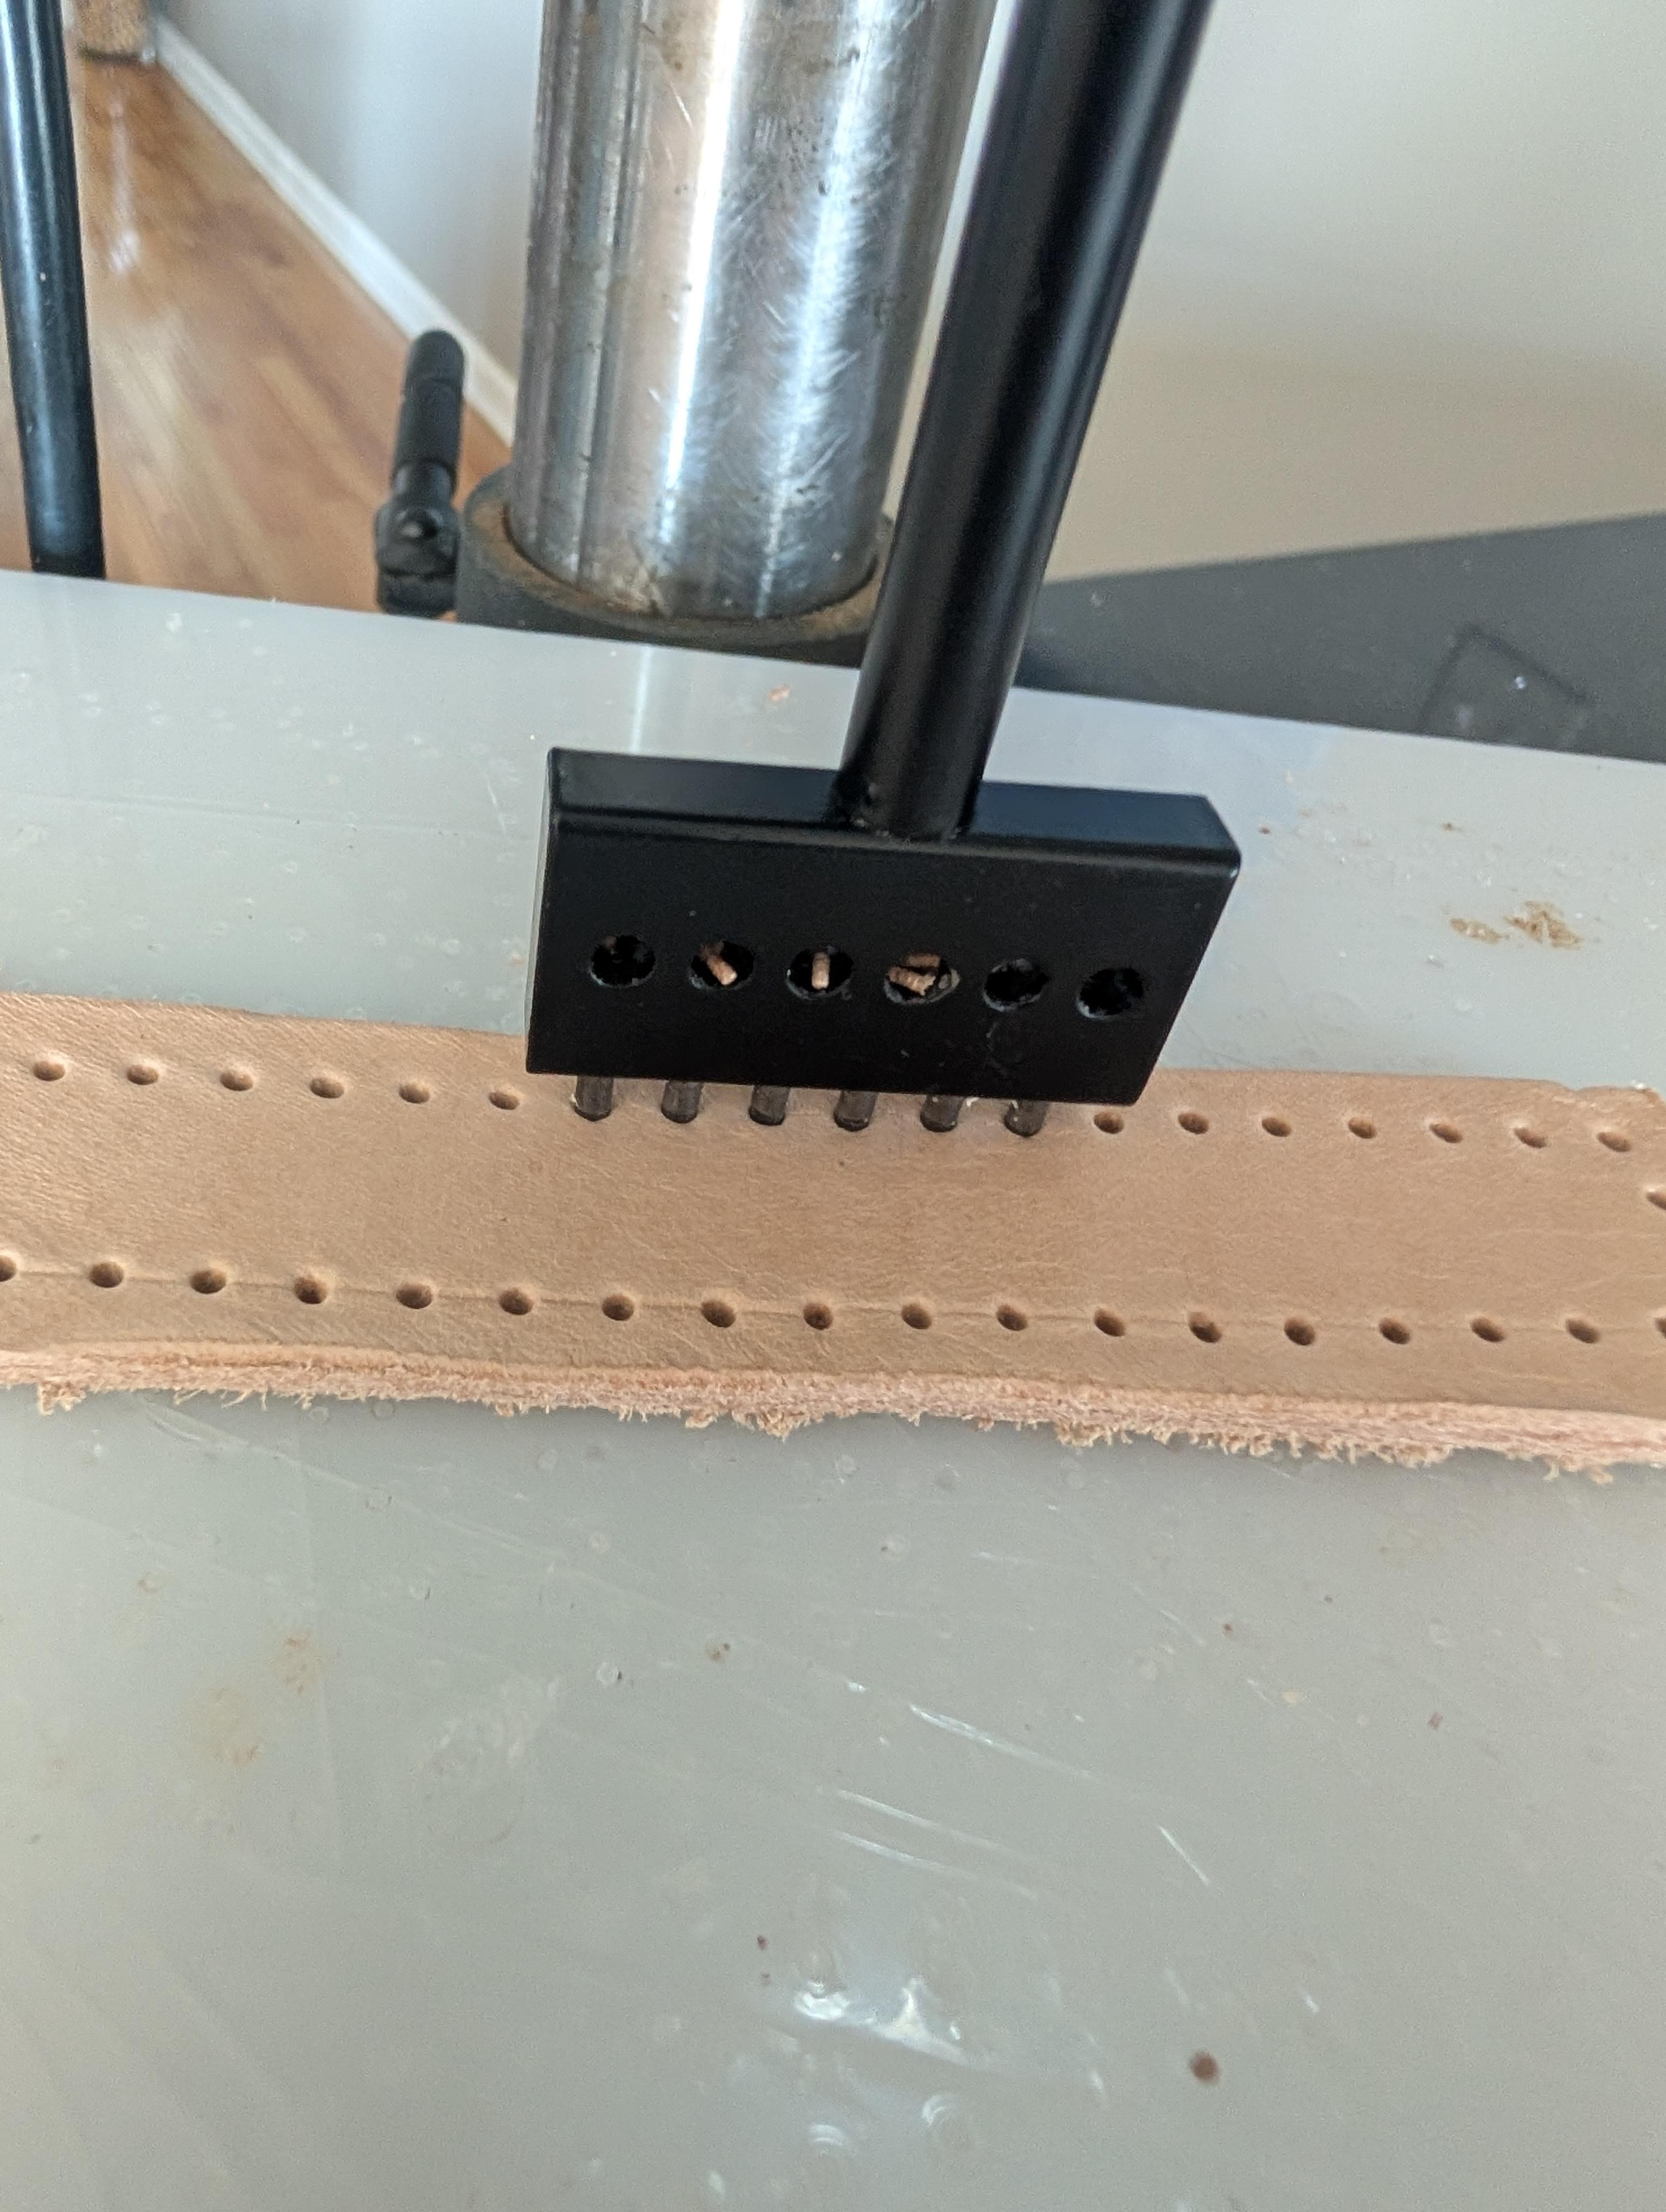
I haven't searched that way before. Thanks for the tip. I'll give it a try. I just put my 5mm hole punch into the drill press and didn't turn it on. It was easy for me to go through this heavy leather just pulling down on the handle. Is there a benefit to the spinning other than making it easier to go through the leather? Using the press like this is a game changer for me. I think I'll be able to get my stitch lines straighter and do it without damage to my body or upsetting anyone else with the noise. Working with heavy leather, I can probably go faster too vs hammer the 6 prong punch 4-5 times to get it through. Maybe I'll invest in a dedicated press eventually, but for now I can use this and get good results. I'm not sure if the drill chuck's ability to spin with the punch in it is a good or bad thing for this yet.
-
Many thanks to all respondents! Very helpful! When I get the appropriate appliance, (and some practice!!) I'll share what I am making!
-
WOW! That is some awesome work. Very talented. I'm still new at this so thanks very much for your help. I really do appreciate it. Happy carving
-
Here is a small set of single hole punches that are made for the drill press. I used to have a customer that I made leashes for and each required 8 holes punched into 10/12 Latigo. They saved my life and sanity. https://www.harborfreight.com/6-piece-hollow-punch-set-67030.html
-
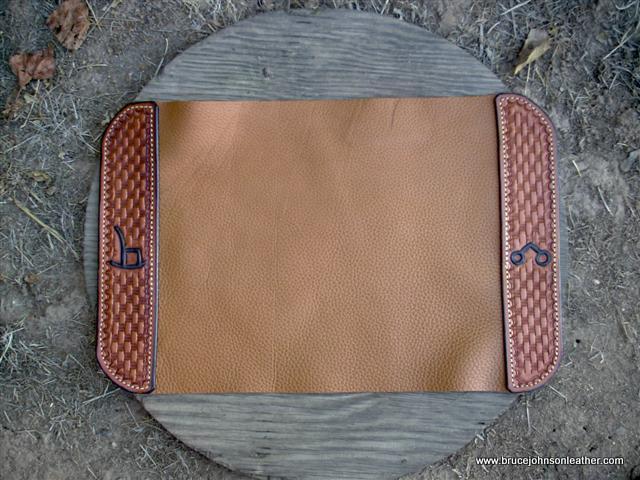
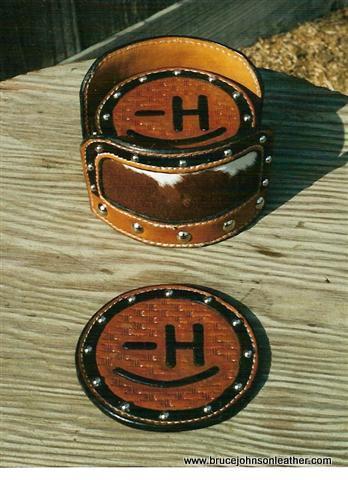
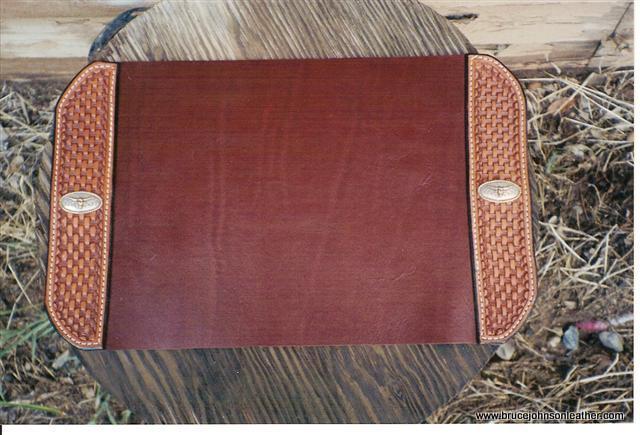
I made a couple hundred probably. Some stock and some custom. My favorites (and most popular) were made from heavy chrome tan and then tooled side panels. The veg tan were harder to clean and tended to roll a bit over time. These chrome tan could roll up in a drawer for storage and lay right out flat. Handy for the folks with living quarter horse trailers. Heavy chrome tan and tooled strips. I treated them with at least three coats of acrylic finish and they wiped off well with minimal staining. I treated vegtan coasters the same.
.jpg.eb659f0d2339304efe327ea8130096b8.jpg)
-
Using LW's search for "drill press" AND stitching brought up lots of hits, most not fitting what we want. Down 20 or 30 items, found a good hit. Better to try a google search like this site: leatherworker.net "drill press" sewing stitching -machine -motor Site: tells google to search the listed site "drill press" quotes tell google to include both words, not individual -machine tells google to ignore machine The google search engines are much faster and easier to select the parameters you want and don't want. Add or remove additional parameters as you like.
- Today
-
A bit different but - First tip I EVER learned on the internet was from the old IILG group and Verlane Desgrange. (fun factoid - this group morphed out of the IILG - courtesy of a leather artist from Africa and a pizza baking momma from Ohio @Johanna). Verlane posted about chucking your mini or maxi punches in the drill press and turn it on. I literally read that, walked straight out to the shop and tried it. You want to make punching holes easy and no effort to remove? Even on damp sticky skirting with a big tube punch? This is it. That single tip was worth my annual dues right there. If you have visited the shop, I expect Rundi has demonstrated punching round holes with a drill press and using a rein trimmer to cut pieces. NOTE - As the punch tubes fill up the punchings will will fly out the ejection port in random directions. Eye protection is recommended.
-
There have been many threads about this subject over the years. Some ppl use a drill press, some use an arbour press and I use a Tandy Pro-Press
-
I use my drill press for my maker's stamps and other large stamps. Using it for punches is a good idea. I've thought about putting hole punches in it but haven't as of yet. Looks like it's a good use for your purposes. Good thinking.
-
Yes, but didn't see anything. Maybe I didn't look hard enough or maybe this is the first post on the topic?
-
This option is so the motor can be mounted left or right or some other permutation depending on how it is belted, whether the motor is on the left side of the drive belt or right side. If you turn a sewing machine backwards, the hook can't pick up the top thread, and you will likely get into quite a mess. Reverse lever on a sewing machine reverses the action of the feed dog and walking feet, not the hook action.
-
12. I'm looking at the Consew 29B. Prefer the larger bobbin. I'm pretty confident that I know what machine I need, more just curious about my original questions. I mostly just want to make sure that the Consew machine is going to be a significant improvement over the replica version.
-
Have you done a search here to see what has been posted? You could search for drill press and related keywords.
-
The next question is do you need a 12" or 18" arm? kgg
-
No, I'm definitely in need of a patcher. I customize and repair sneakers.
-
First off what are you needing / wanting to sew as there maybe better options then a patcher? kgg
-
I'm sure someone else has already thought of this and it might have been posted already. I put a six prong hole punch into my drill press and it works really well. I was considering buying a press so I could avoid waking up the neighbors and the jarring to my hands/arm from hammering. Some of my mistakes on my first project were a result of shifting the punch ever so slightly as I pulled the hammer back to hit. I think this is an approach that will help me and maybe some others.
-
Hello everyone. I was wondering if anyone has made any placemats. My daughter asked about them and I have no idea the type of leather to use and how to finish it. She would like it at least stamped on the edges if hand carving can't be done. Any suggestions would be greatly appreciated. Thanks
-

Singer 211 U166A walking foot problem
friquant replied to NowhereMan01's topic in Leather Sewing Machines
that's good! Just wanted to check that the middle foot had not been disconnected from the driving apparati. Here's what I would check, in this order. Page 13, "Reengage safety clutch". It's typical when the bobbin binds up for the safety clutch to trip. Make sure it's reengaged. Page 13 "Reverse Feed Mechanism". You mentioned a screw came off. I would inspect the reverse feed to make sure all the parts are in place and moving properly. Page 26, "Replacement of Arm Shaft Connection Belt". You don't need to remove the belt, but follow the instructions for verifying that the arm shaft (the one that the hand wheel bolts to) is in time with the hook shaft. Page 24, "Feed Eccentric Adjustment". You need to get the feed dog so that it halfway through it's fore-aft stroke when the needle is at bottom dead center. Page 23 and 24, "Feed Dog Adjustment". You want the feed dog to be at its highest point when the needle is at bottom dead center Page 25, "Lifting Eccentric and Alternating Presser Feet". -
Hey all - I've been using a replica/Chinese version of the Singer 29 and it's been okay, but man is it buggy. It's constantly needing tweaks and problem solving. I'm thinking of upgrading to a Consew 29B but want to make sure that the value add is going to be worth the price tag. I'm guessing that there will be no comparison, but just thought I'd post here to ask for help pushing me over the finish line. Also, I've found the best price at Precision Sewing Machine Outlet - if anyone can vouch for them please let me know. I'm hoping to buy from somewhere that will be open to lending some support should I run into any snags once I have the machine. Thanks!
-
The edit option is only open for a limited time. The window is about 2 hours, maybe somewhat longer. It is found in the 3 dots in the upper right corner of the post. Are you able to put your list into a PDF file? If so you can post it in this thread listing what is still available. Else message me a list of what to take out and I will edit your list. Much prefer if you could do the work though! Like most of our members, I'm not around all the time.
-

I Used an Automaker's Emblem on a Key Fob. Did I Do Wrong?
Dwight replied to Gosut's topic in Leatherwork Conversation
Some years back . . . I started making key fobs for folks . . . and started to fix one for me . . . went back and forth on name vs address vs phone number. Finally decided that any of those could get my vehicle stolen if the wrong person found it. Wound up putting my Vietnam Veteran Assn. group name on it . . . it's a local group . . . and if returned to them . . . they would let me know. Wound up making key fobs for all of them . . . it's a lot safer than a name or address or phone number. Since then my advice is to always put your church name . . . club name . . . company name . . . or something like that on the key fobs . . . as it could mean you would get it back . . . but would prevent an immediate pilfering of your vehicle. Just a suggestion. May God bless, Dwight -
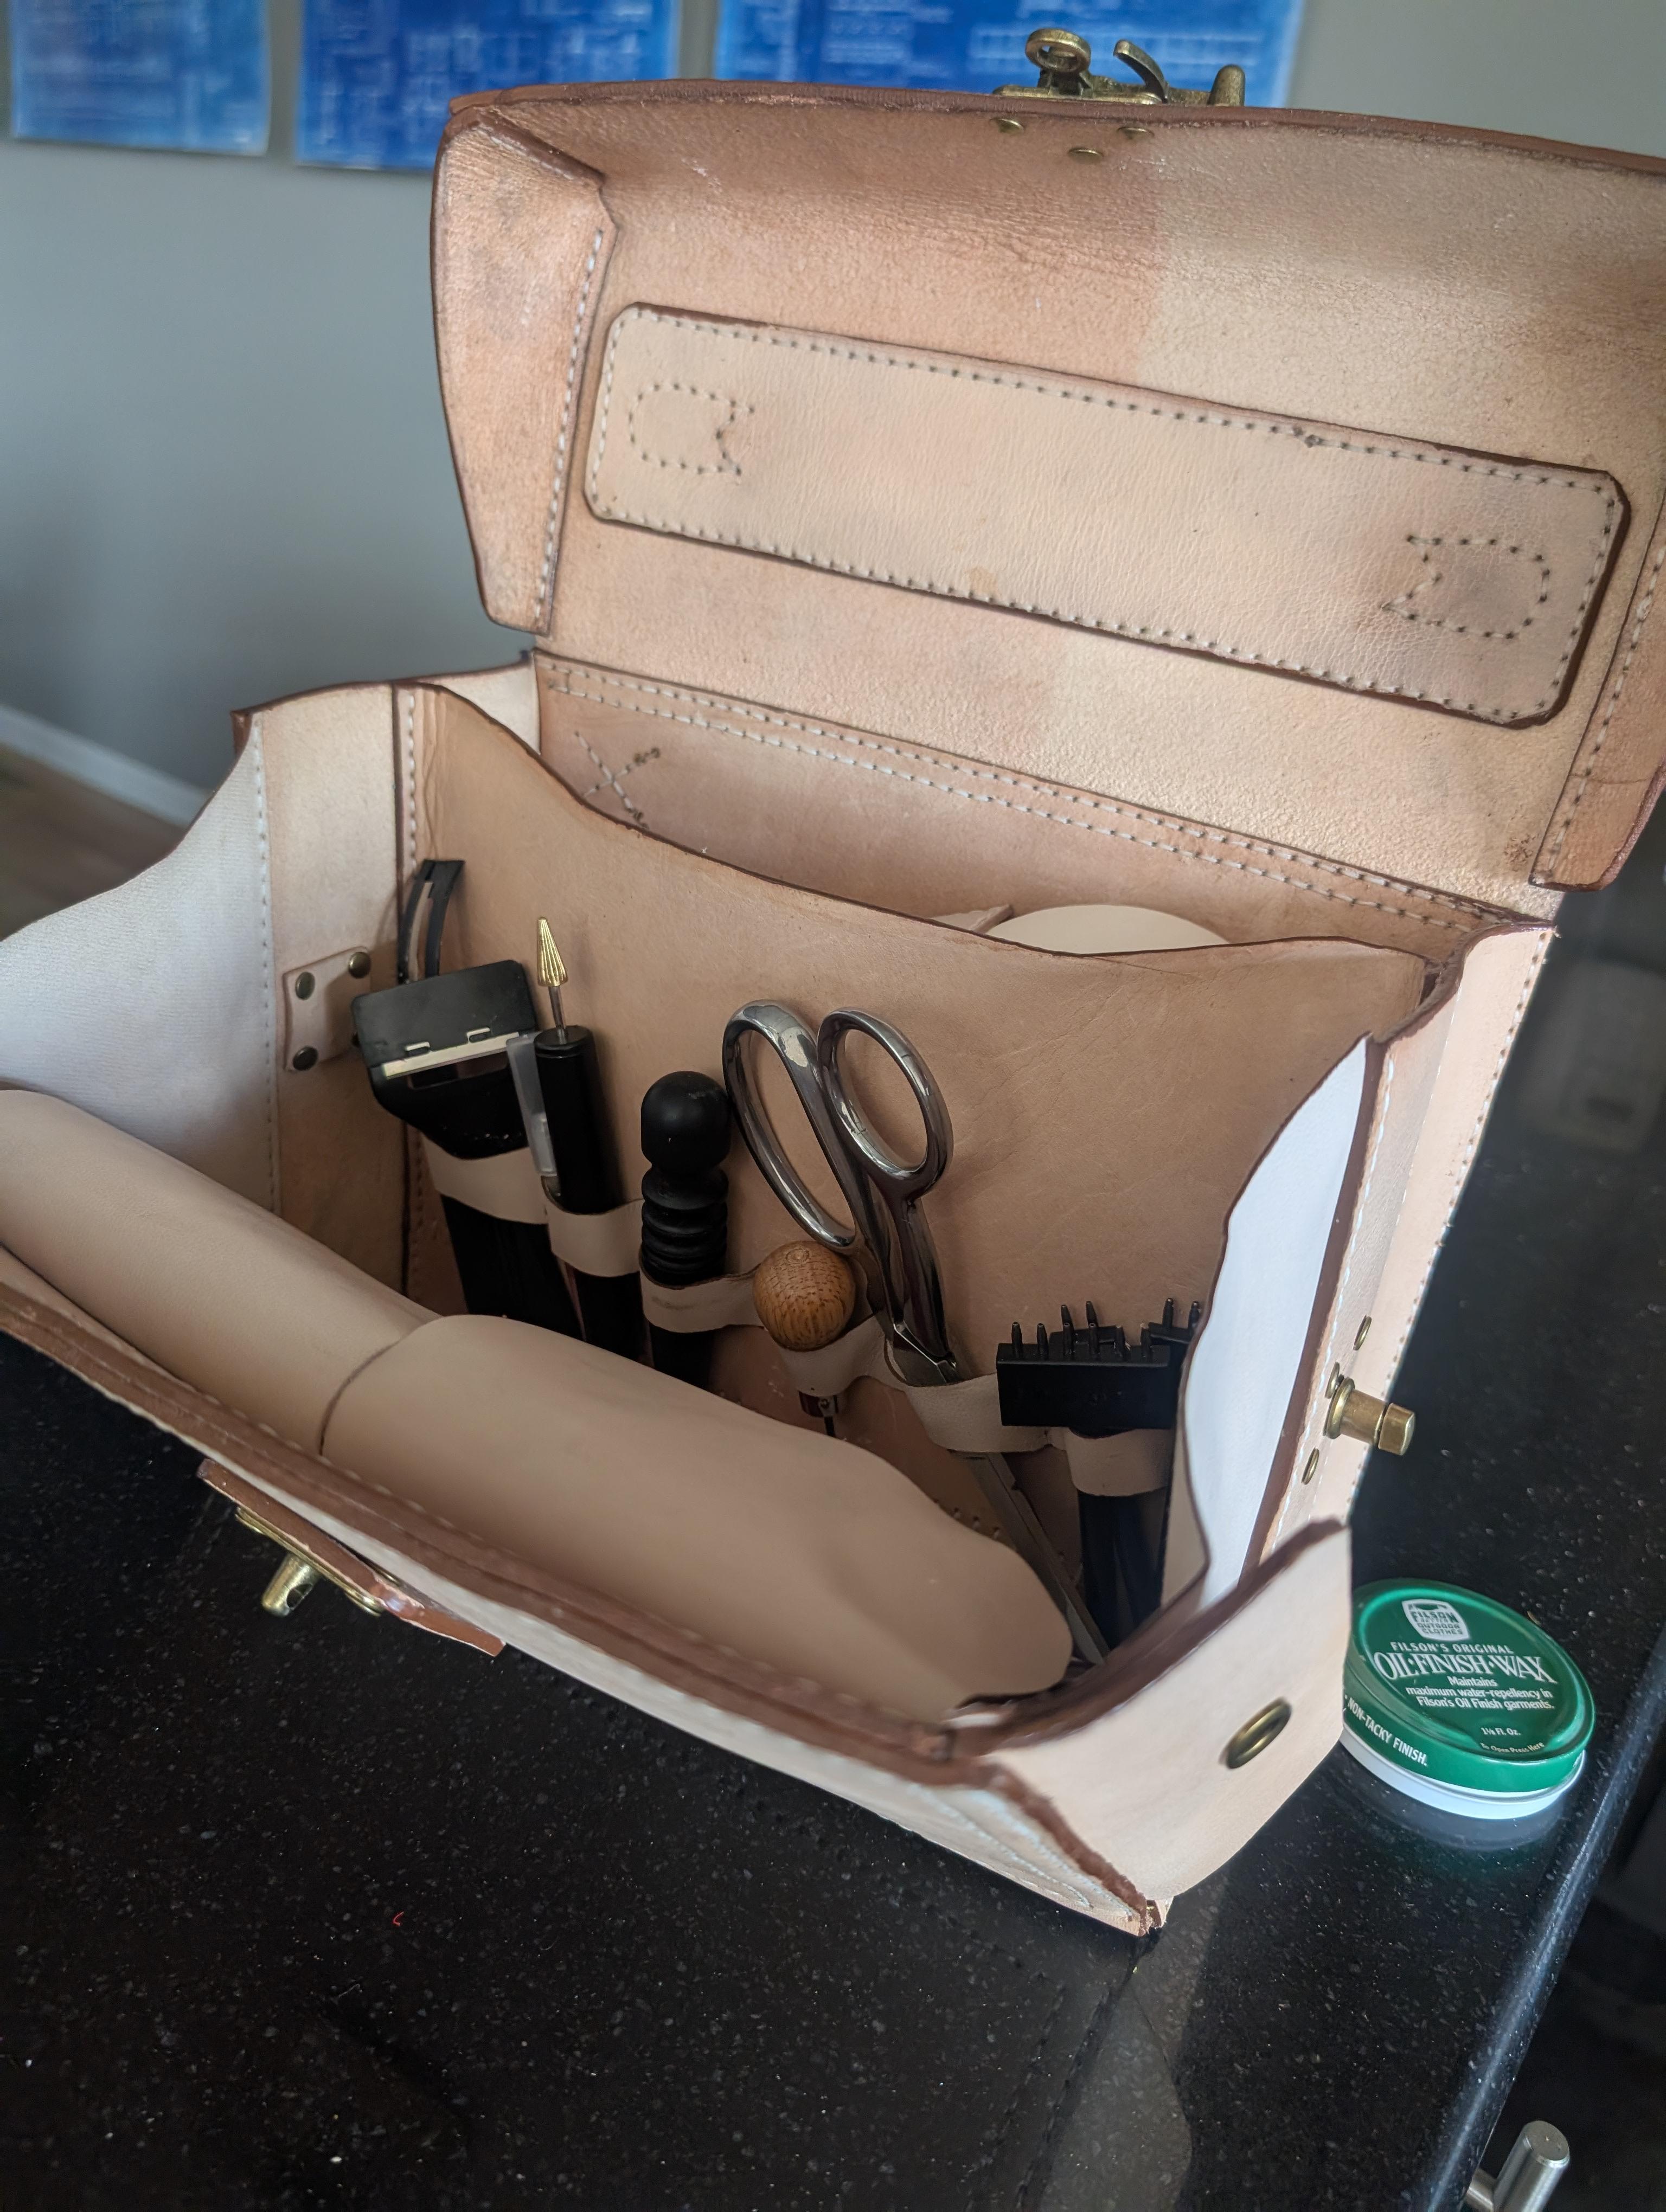
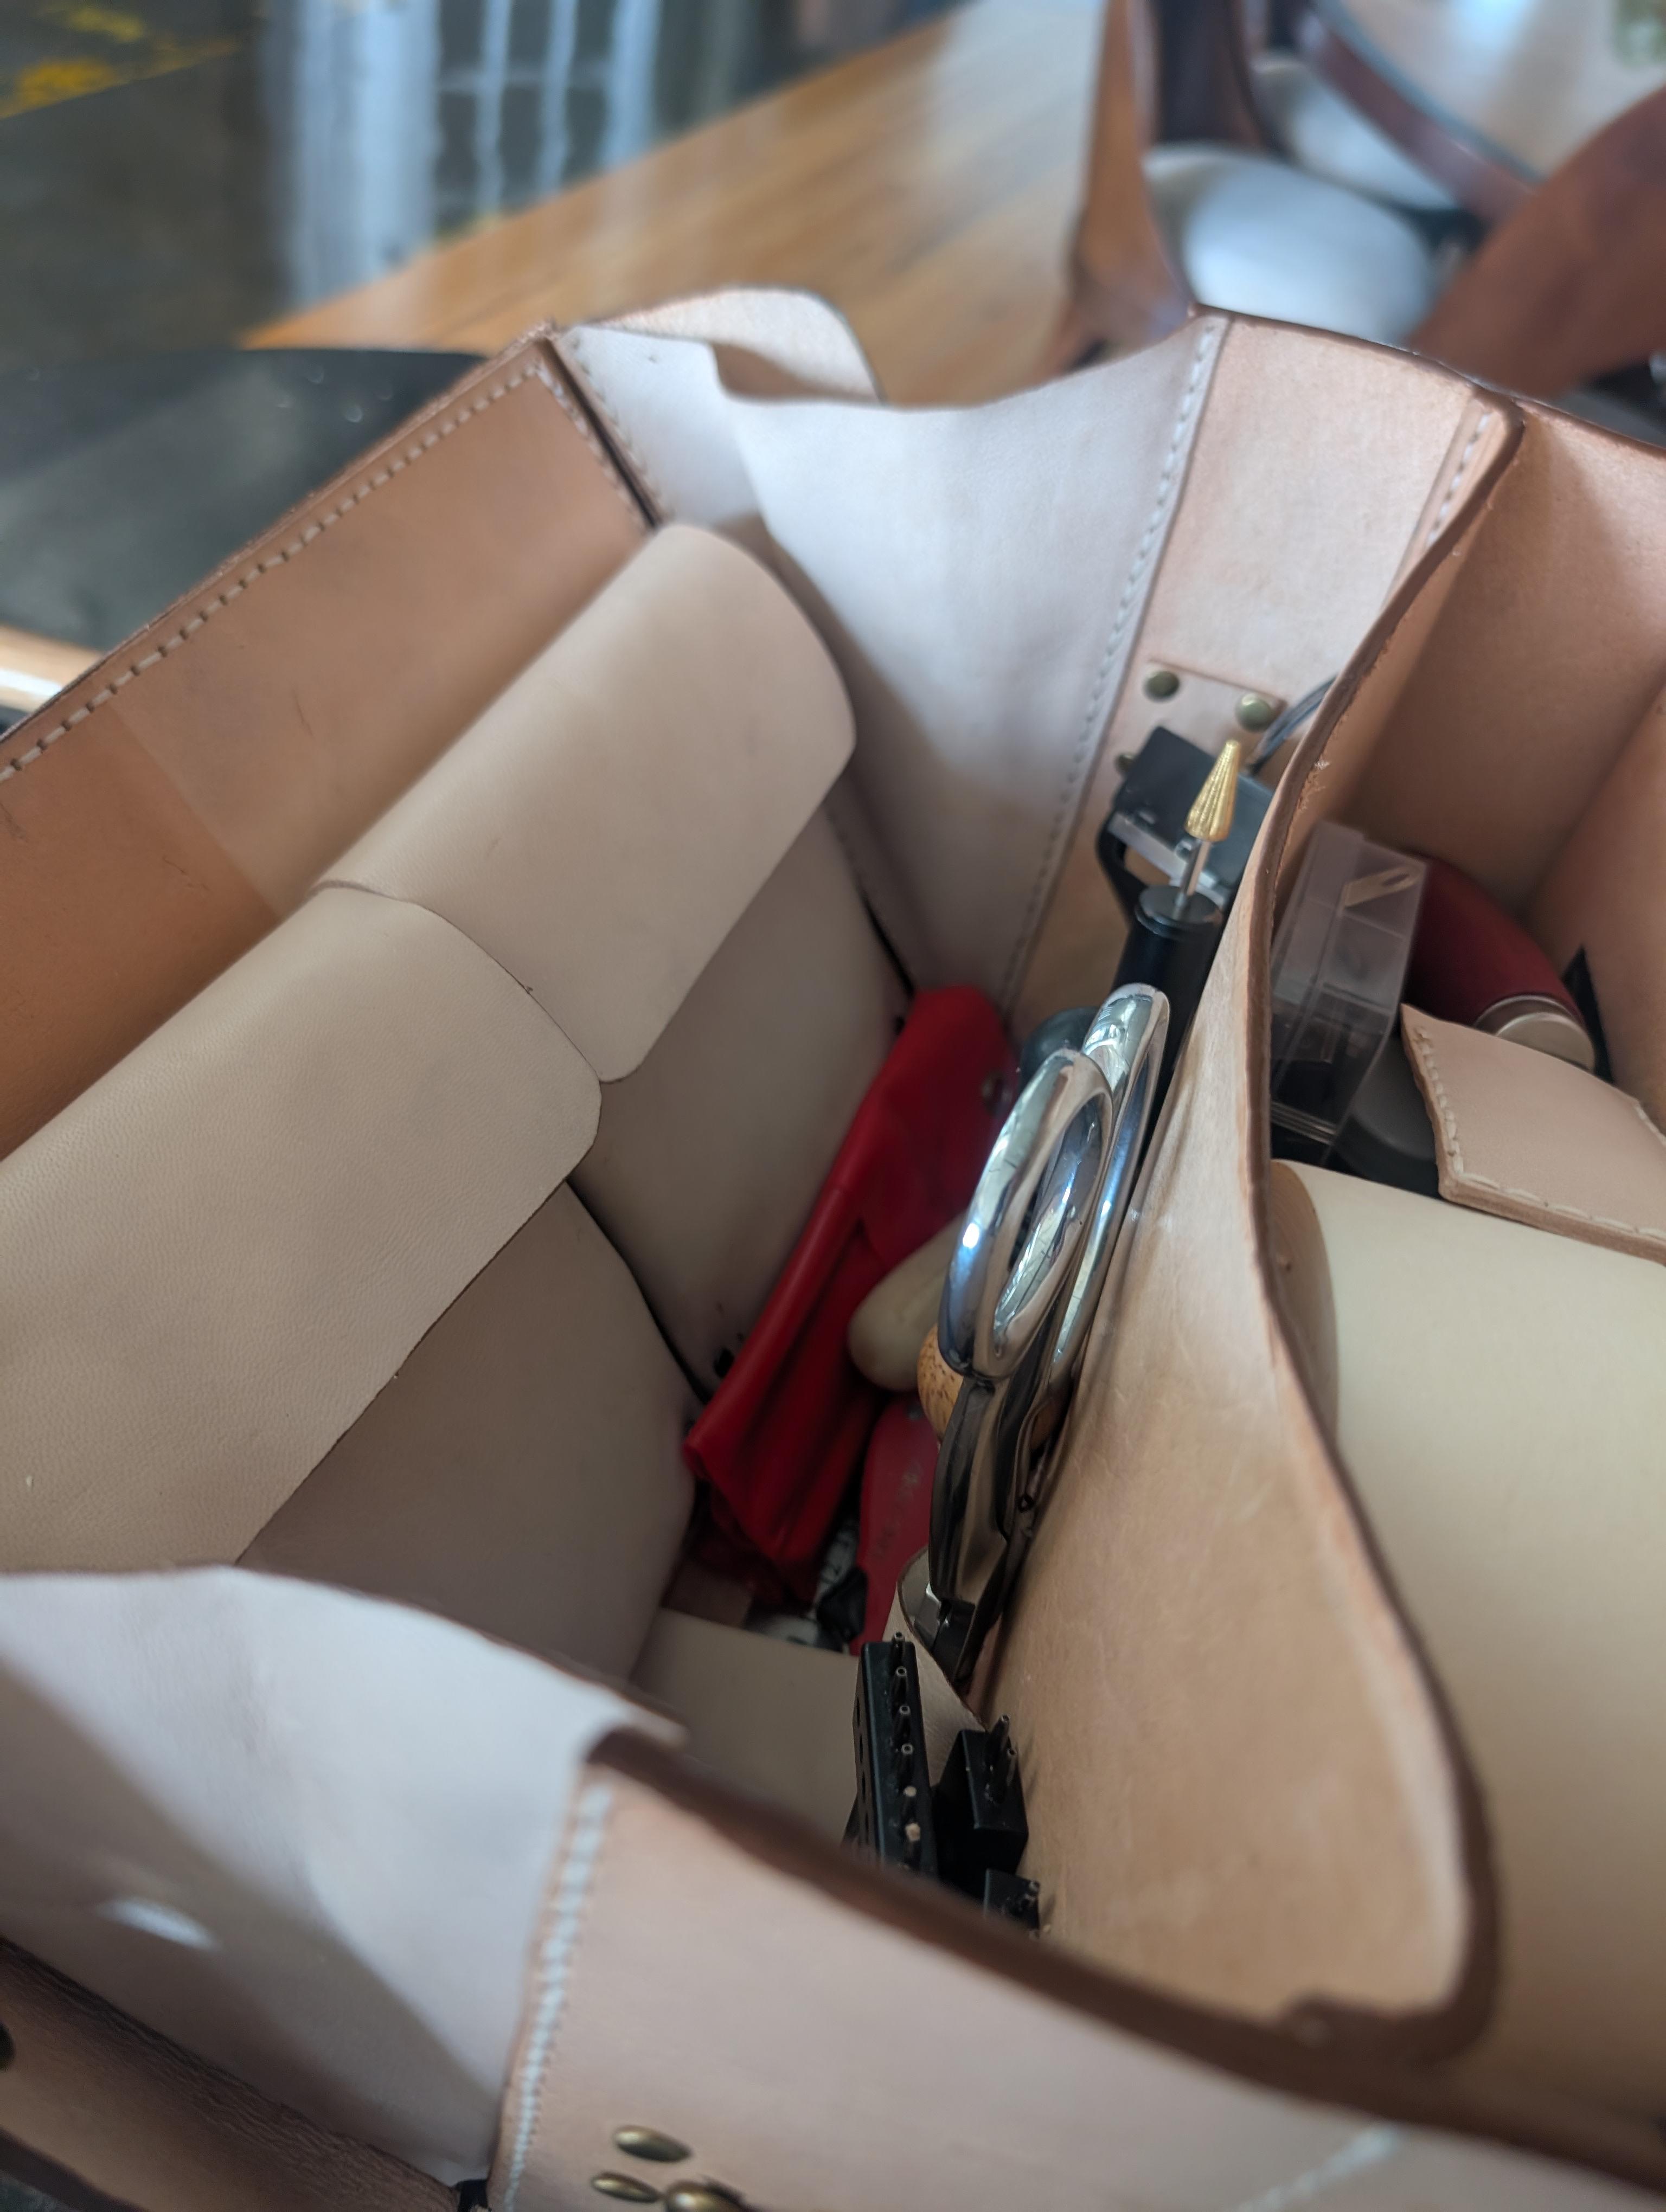
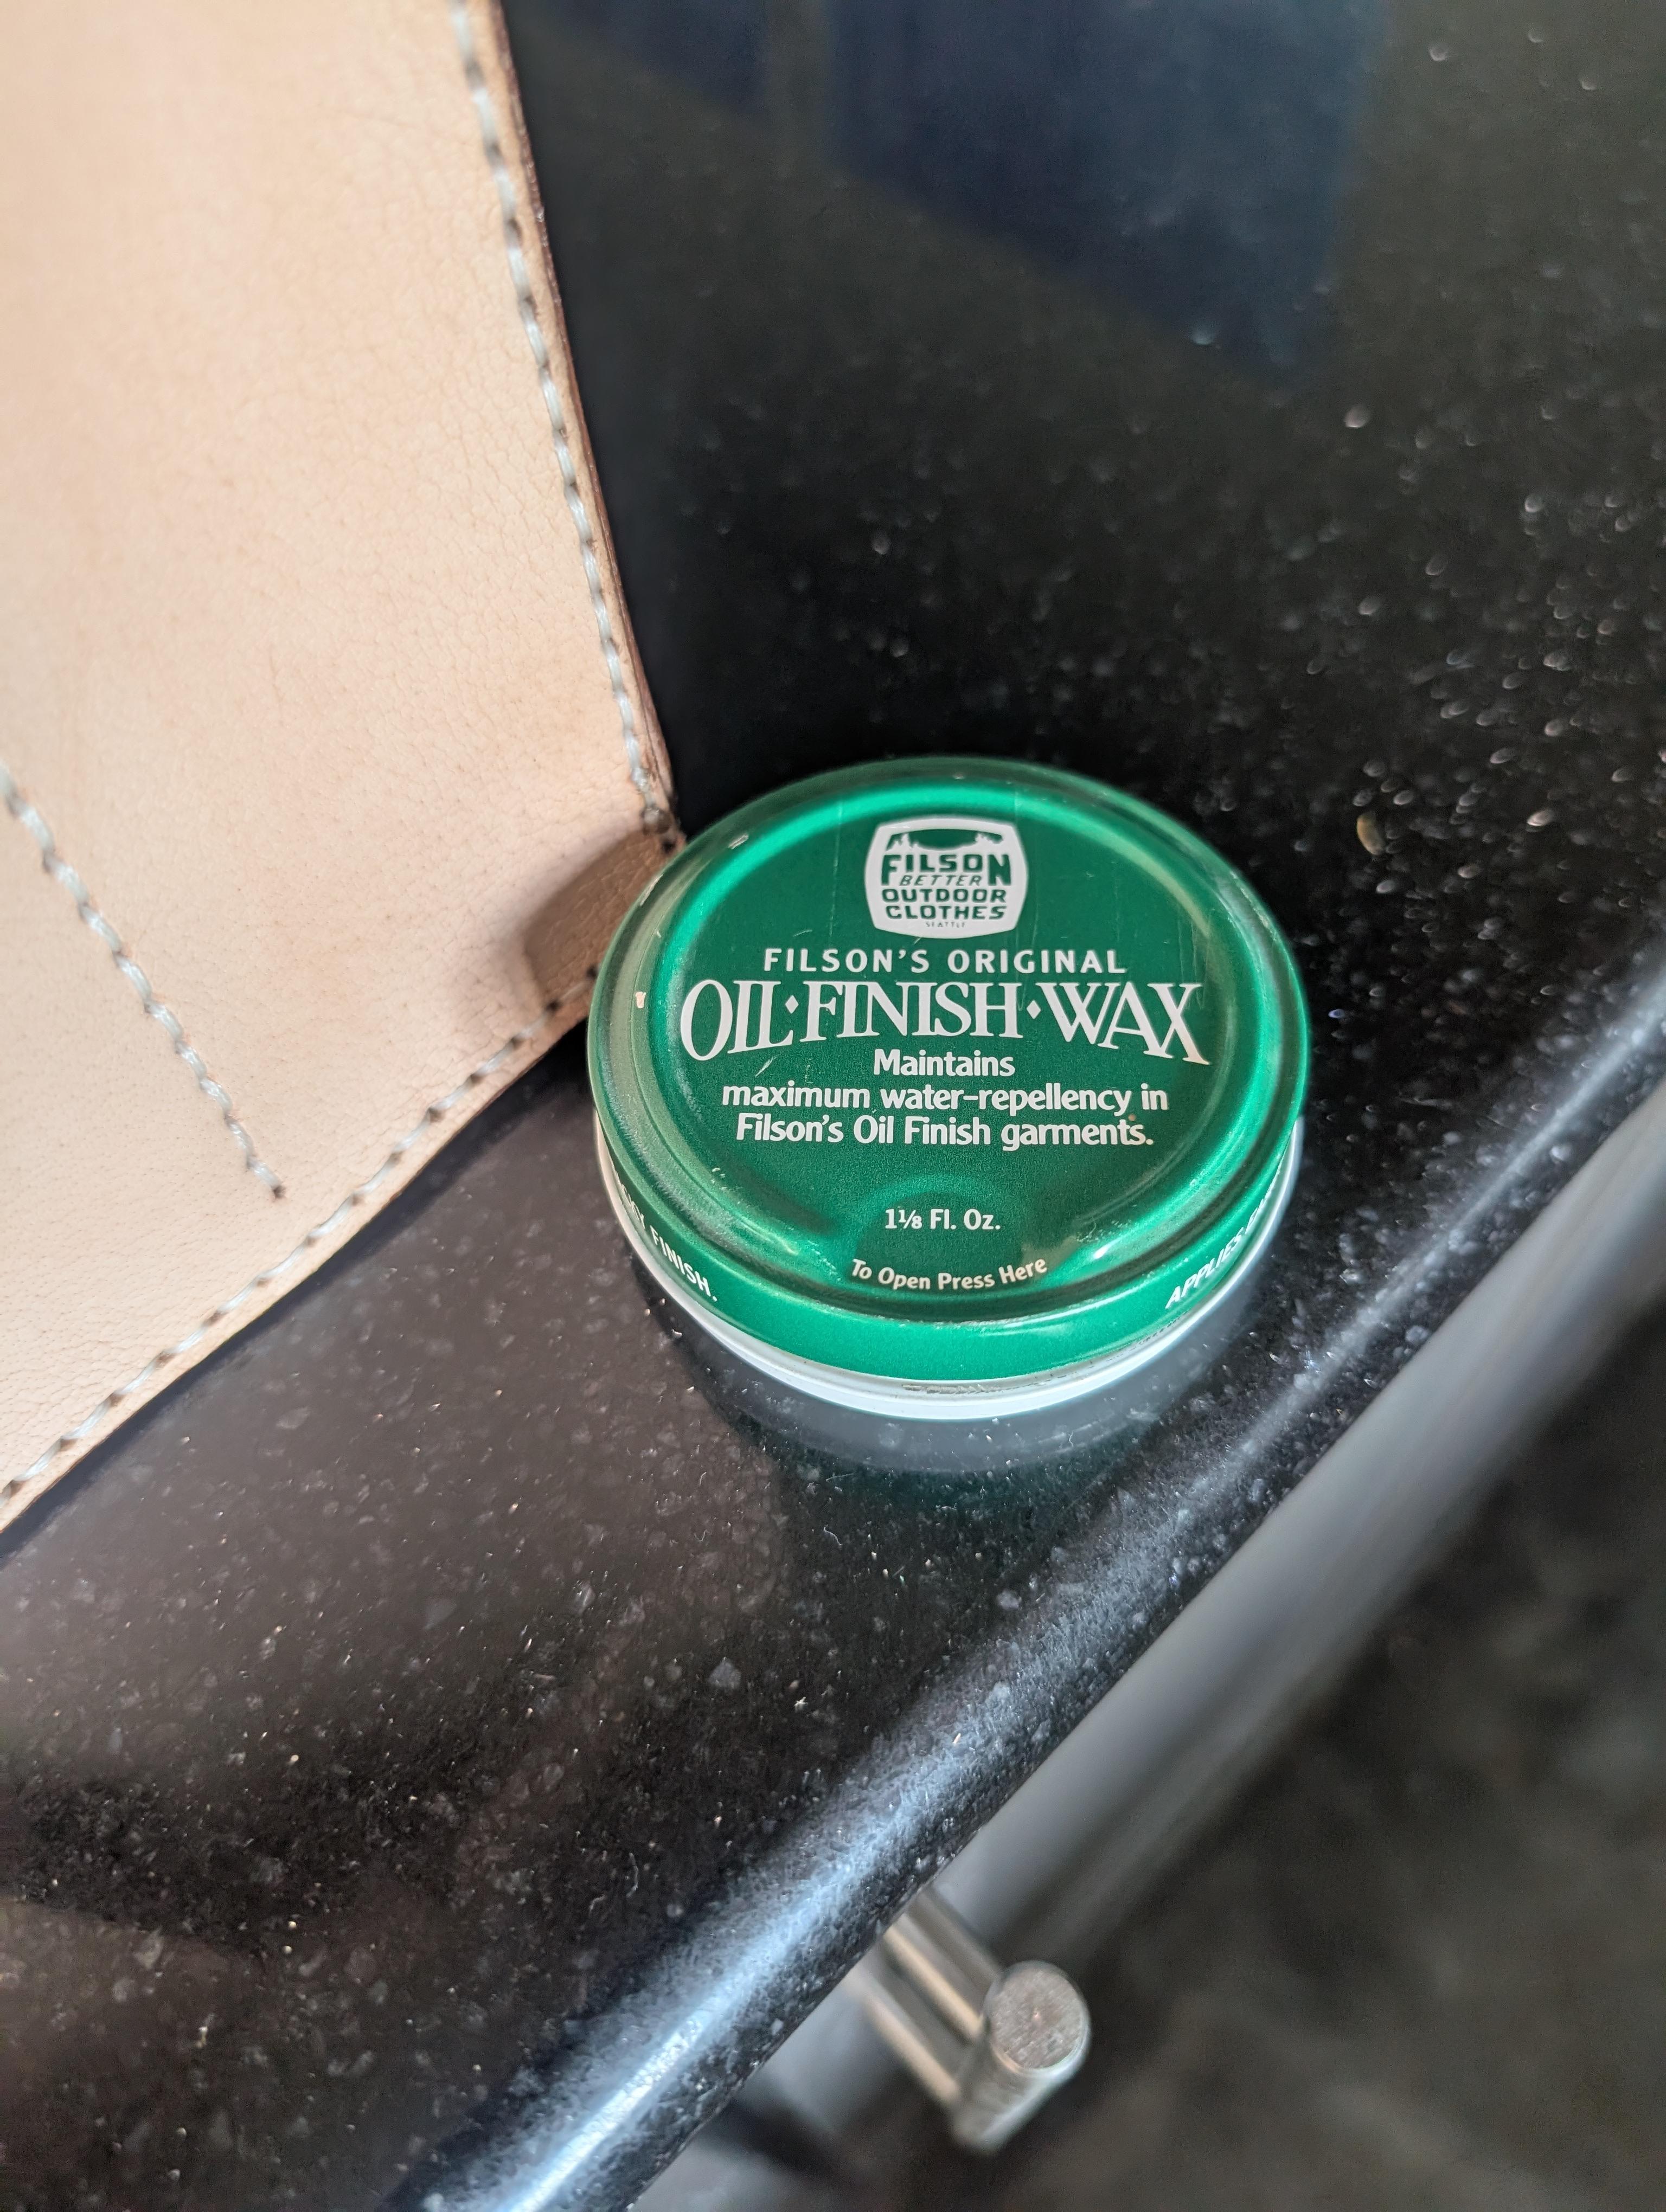
The pattern called for 7-8 oz veg tan. I bought the thickest I could find at Hobby Lobby called tooling leather; I'm guessing 3/16ths (4.5mm?) inch thick..maybe 12-14 oz? Much thicker than what Tony (Diesel Punk) used in the YouTube video. I thought a tool bag needed to be thick and tough and at this point had not been to a real leathercraft shop where other options are available. I used a 1, 2, 4, and 6 hole punch for the holes. It took probably five hits on average to get the 6 hole punch through. I'd say I'm above average in hammering strength. I wore noise canceling headphones throughout or I might have had hearing damage. 1.5 mm holes and 1mm white waxed thread off Amazon. The edge are painted with brown ArtMinds edge paint. I bought a little roller tool off Amazon and it got a little sloppy...the roller head keeps falling off. I used a fine beveler. I was hoping for better results overall. Most of the edges are not even and my stitch lines are not straight in several areas. The leather didn't bend as nicely as I hoped where the side and the front/bottom/back come together. Cleaning up the leather from my dirty hands caused some creases/wrinkling on the surface. The handle is the worst for part for bringing two edges together. The leather edges were pulled inward instead of making a nice square edge. The stitches were too close to the edge to sand and make it even...I would have sanded the thread. I didn't have an awl to start, but bought one and found it really helped with lining up the holes for stitching. I broke probably 10 needles. They kept snapping at the eye. Eventually I started using needle nose pliers to pull the needles through as my hands ached from the work. If I followed instructions of 7-8 oz, stitching probably would have been easier and the edges might have matched up better. I ordered some hardware from Amazon, but my wife said it was cheap stuff and encouraged me to return it. I went to Tandy Leather Shop in Livonia MI and found the clasps I used. I'm happy with the quality of the clasps from Tandy. I had to make some modifications to use this hardware. The rivet above the swing clasp was a hole for the original Diesel Punk plan. I just put that in to fill the hole...I don't think anyone would think it's to cover up a change in plans mid project. I'm going to clean the bag a little more than apply some Filson's Original Oil/Finish/Wax to protect it from staining. I'll test the product on some scraps before I apply it to the bag. I'm currently using the tool bag to hold my leather tool. I'm also planning to add magnetic clasp/buttons to the inside pockets to old them closed...I haven't looked into my options for this yet though.
-
Very nicey indeedy But . . . . we like more information, eg what weight or thickness of leather did you use? What thread? Stitching chisels or awl ? I see you didn't dye it but there is something on the edges, what?
-

I Used an Automaker's Emblem on a Key Fob. Did I Do Wrong?
Gosut replied to Gosut's topic in Leatherwork Conversation
I had a key fob that I liked, but made the mistake of letting it go with my previous vehicle. It used a regular key and needed a fob. Today, new vehicle keys are the fobs, or is built into the fob. Maybe that's why key fobs aren't available locally. Wasn't an issue until I took it in for service, and realized that it would look like practically everyone else's. Made a paper tag for it, but knew I needed a fob. I could put my cell phone number on it, and a design makes it stand out from others. As a plus, leather doesn't put much weight on the fob, and this one goes into an ignition switch. It was quickly done, even with my beginner skill level. Will probably make another for practice. If I had antiquing gel, it would have turned out better, but this was done with what I had on hand. Thinking about trying one with a concho instead of a design. Also thinking that this might be a good for Christmas presents - without the aforementioned logo, of course.


.thumb.jpg.6e903dd66163ad5672f00f144058c571.jpg)


