

All Activity
- Today
-

Wallet in progress
KillDevilBill replied to KillDevilBill's topic in Purses, Wallets, Belts and Miscellaneous Pocket Items
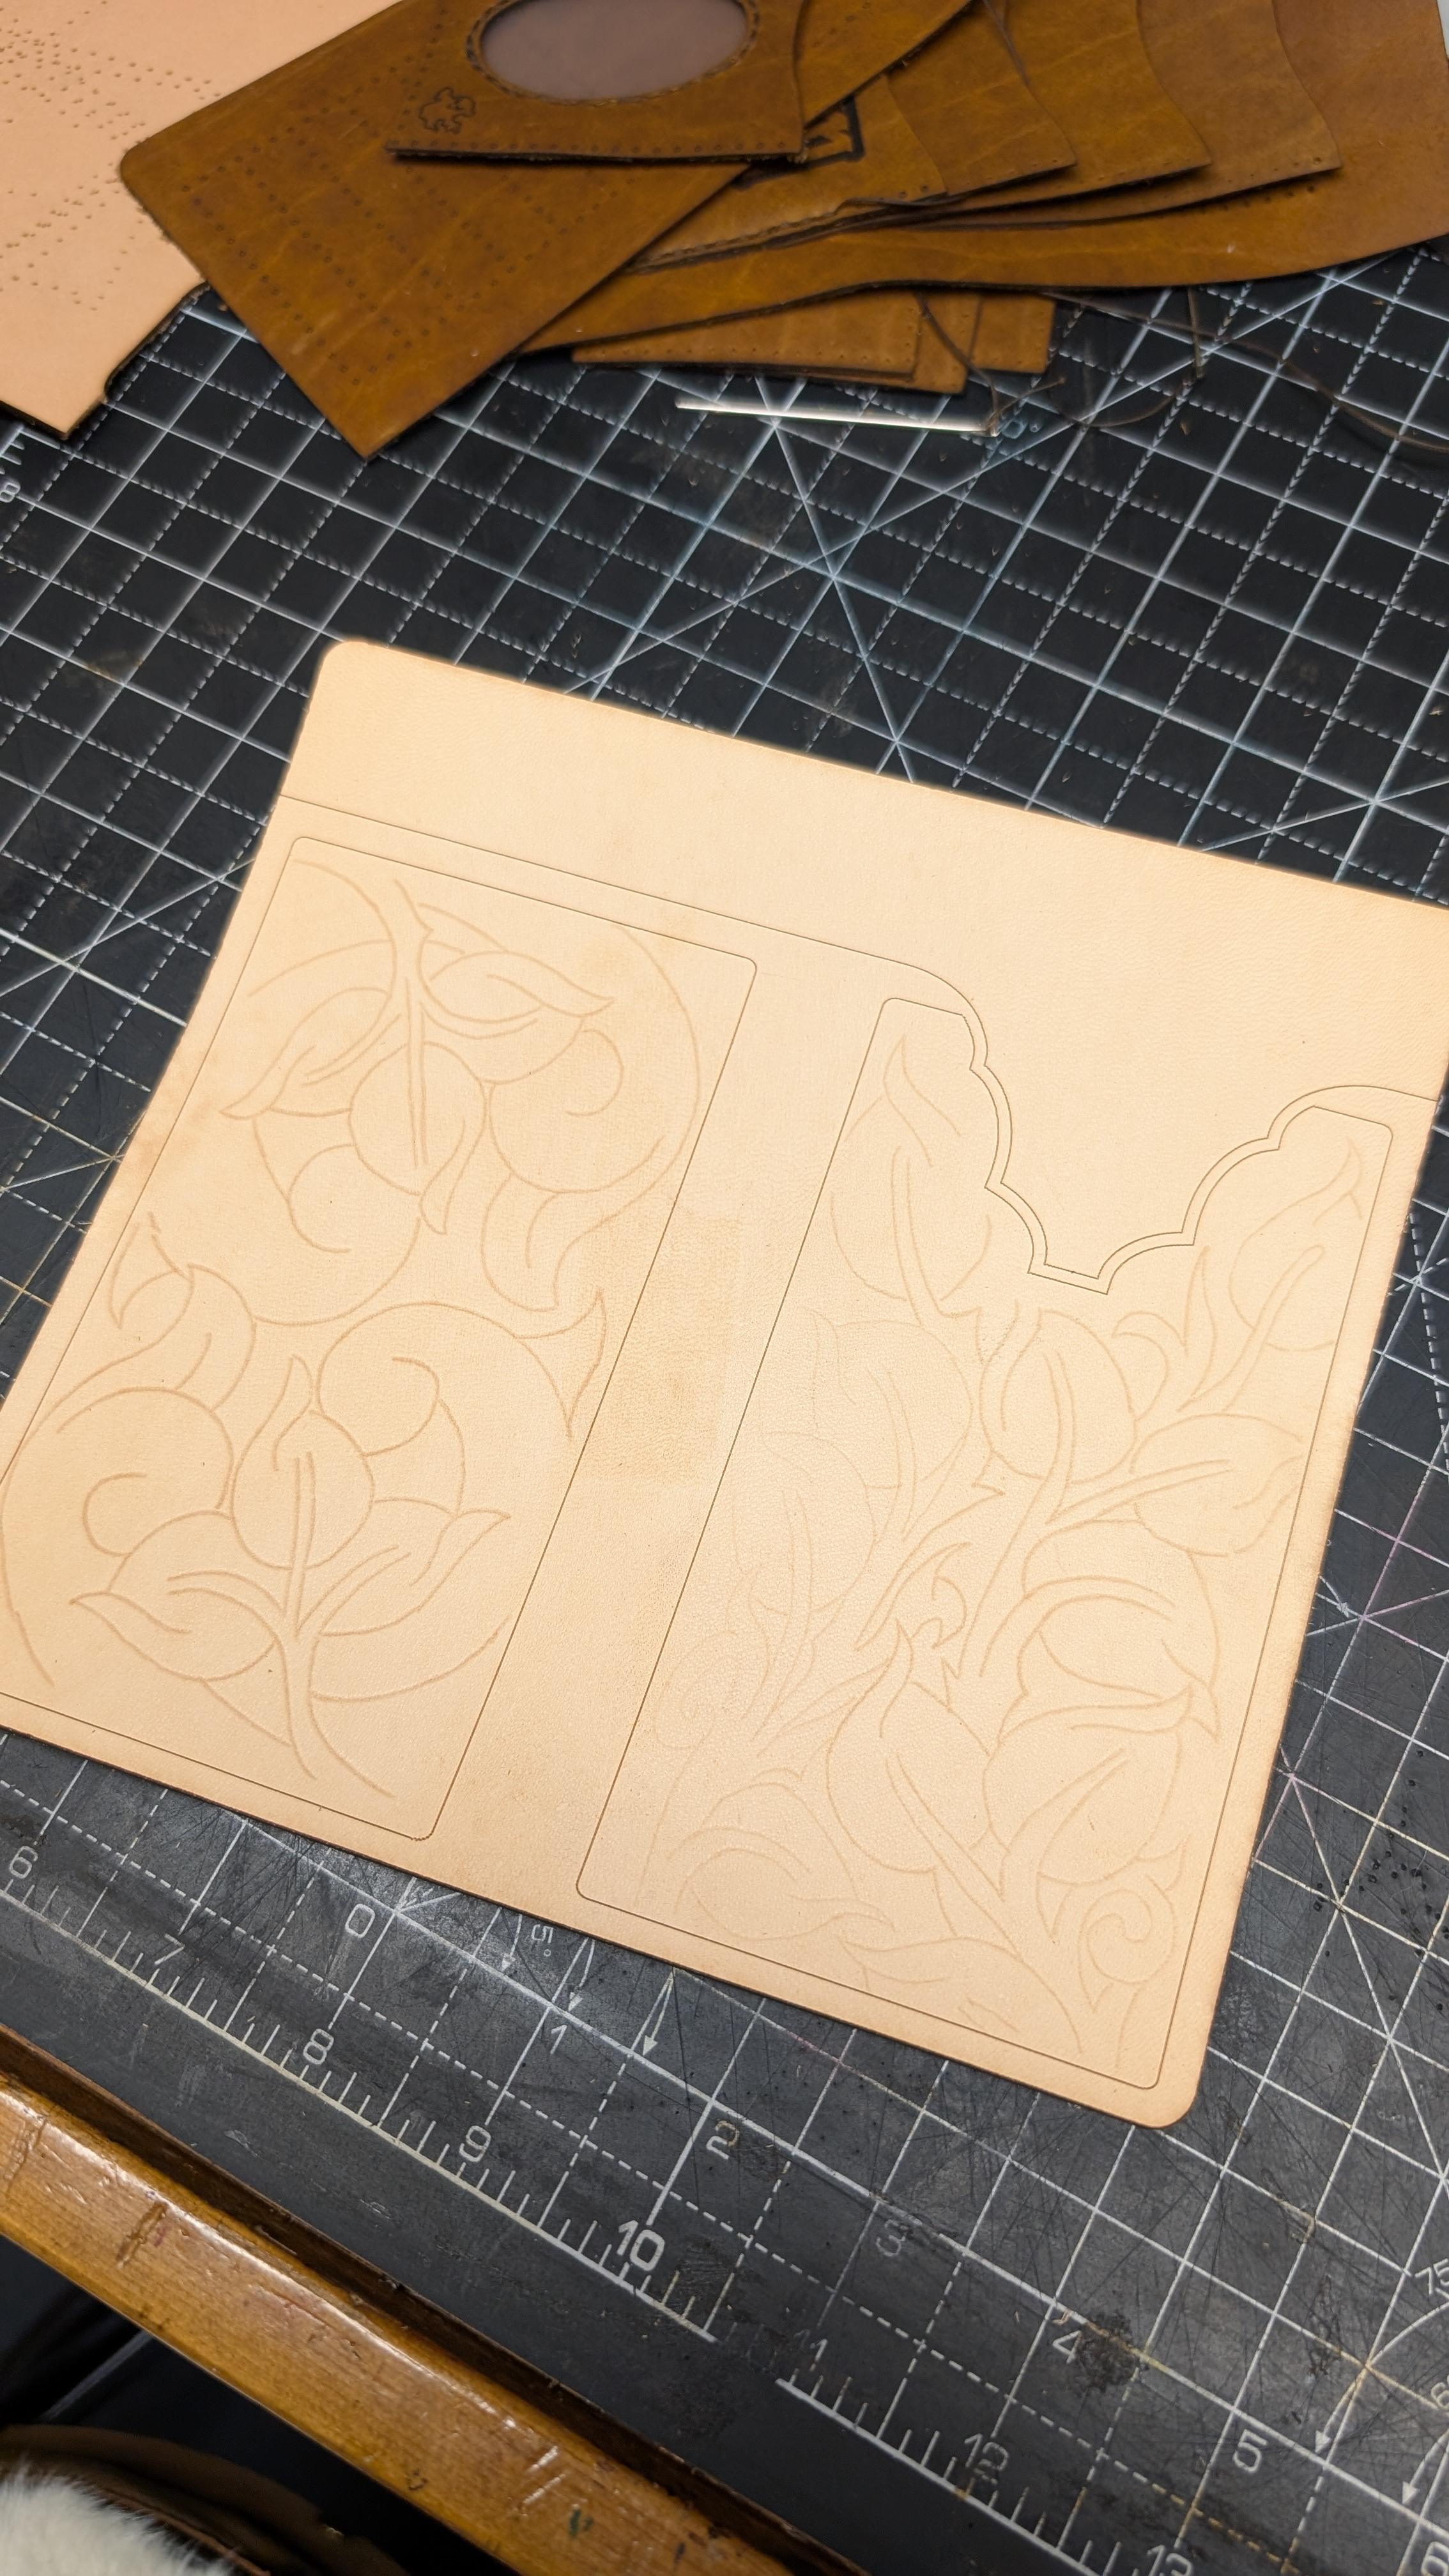
2/3 oz "peanut" Bison inside, 4/5 oz veg outside. Fancy edge at the top will be "chocolate" gator -
 Numby joined the community
 -

Wallet in progress
AlZilla replied to KillDevilBill's topic in Purses, Wallets, Belts and Miscellaneous Pocket Items
That's going to be a nice wallet. Is it chrome tan interior and veg tan shell? I just can't get a nice wallet. Functional, but nothing special and the pockets are always too tight. -
Thank you. Should be able to improve the looks with a little more time than an hour also? Winters coming so maybe lots of time to expand on the idea.
-
Me neither, I have however had luck carrying them open on a sling (two side by side lengthwise). Its also something that might be able to incorporate into a scabbard. Putting them on a butt stock causes a lot of snagging.
-
Wow, very nice and impressive work. Tweak the dimensions and this should work for any cartridge.
-
Thank you. I have a tendency to agree if the dye isn't applied with the proper air pressure to drive the dye into the leather. From what I have seen on youtube people are using pressure settings in the sub 20 lb pressure range and the dye is basically a top coating. Probably because most people are painting model figures/cars/nails/cakes/etc. I use a 30 lb pressure setting when applying the dye with multi coats in different directions to get a more even dying which I apply after the oiling process. My basic process is oil/dye/oil. Thank you. The shaker part is probably not necessary, just an added feature. Many, many years ago the father while trying to teach me some basic bodyman techniques always said to shake the paint when I refilled or changed to a new cup on the gun. I guess it just stuck. kgg
-

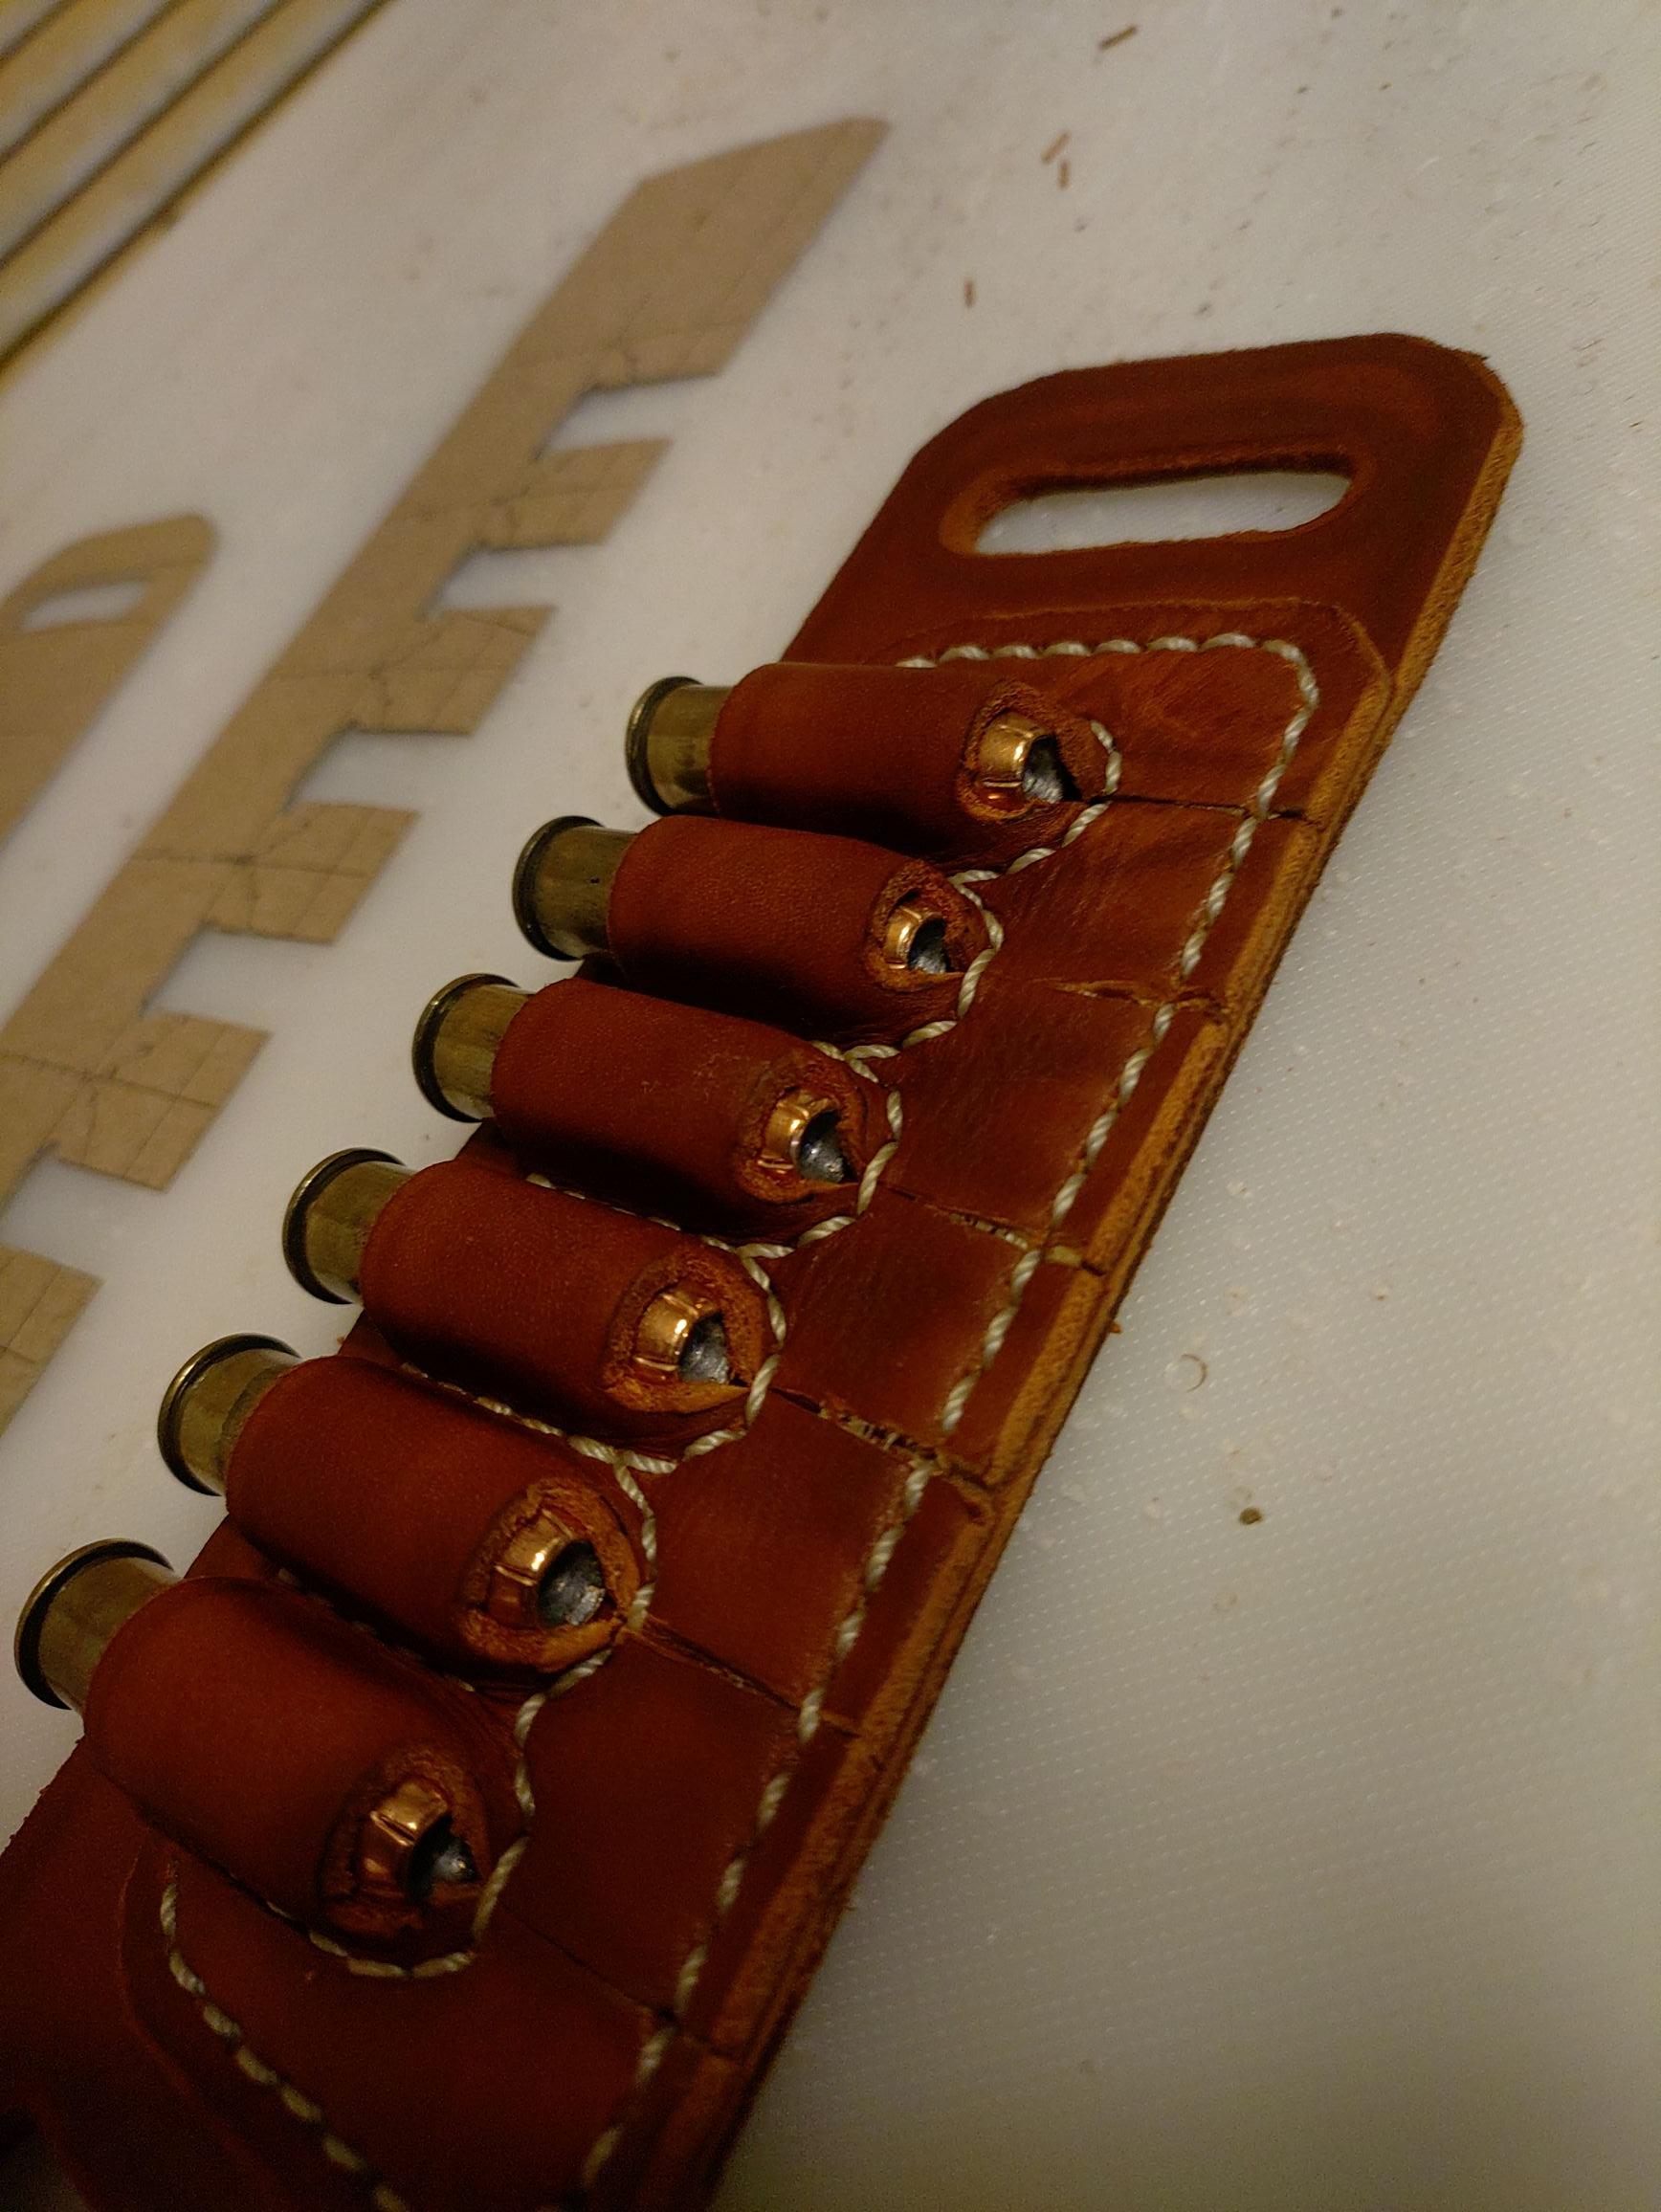
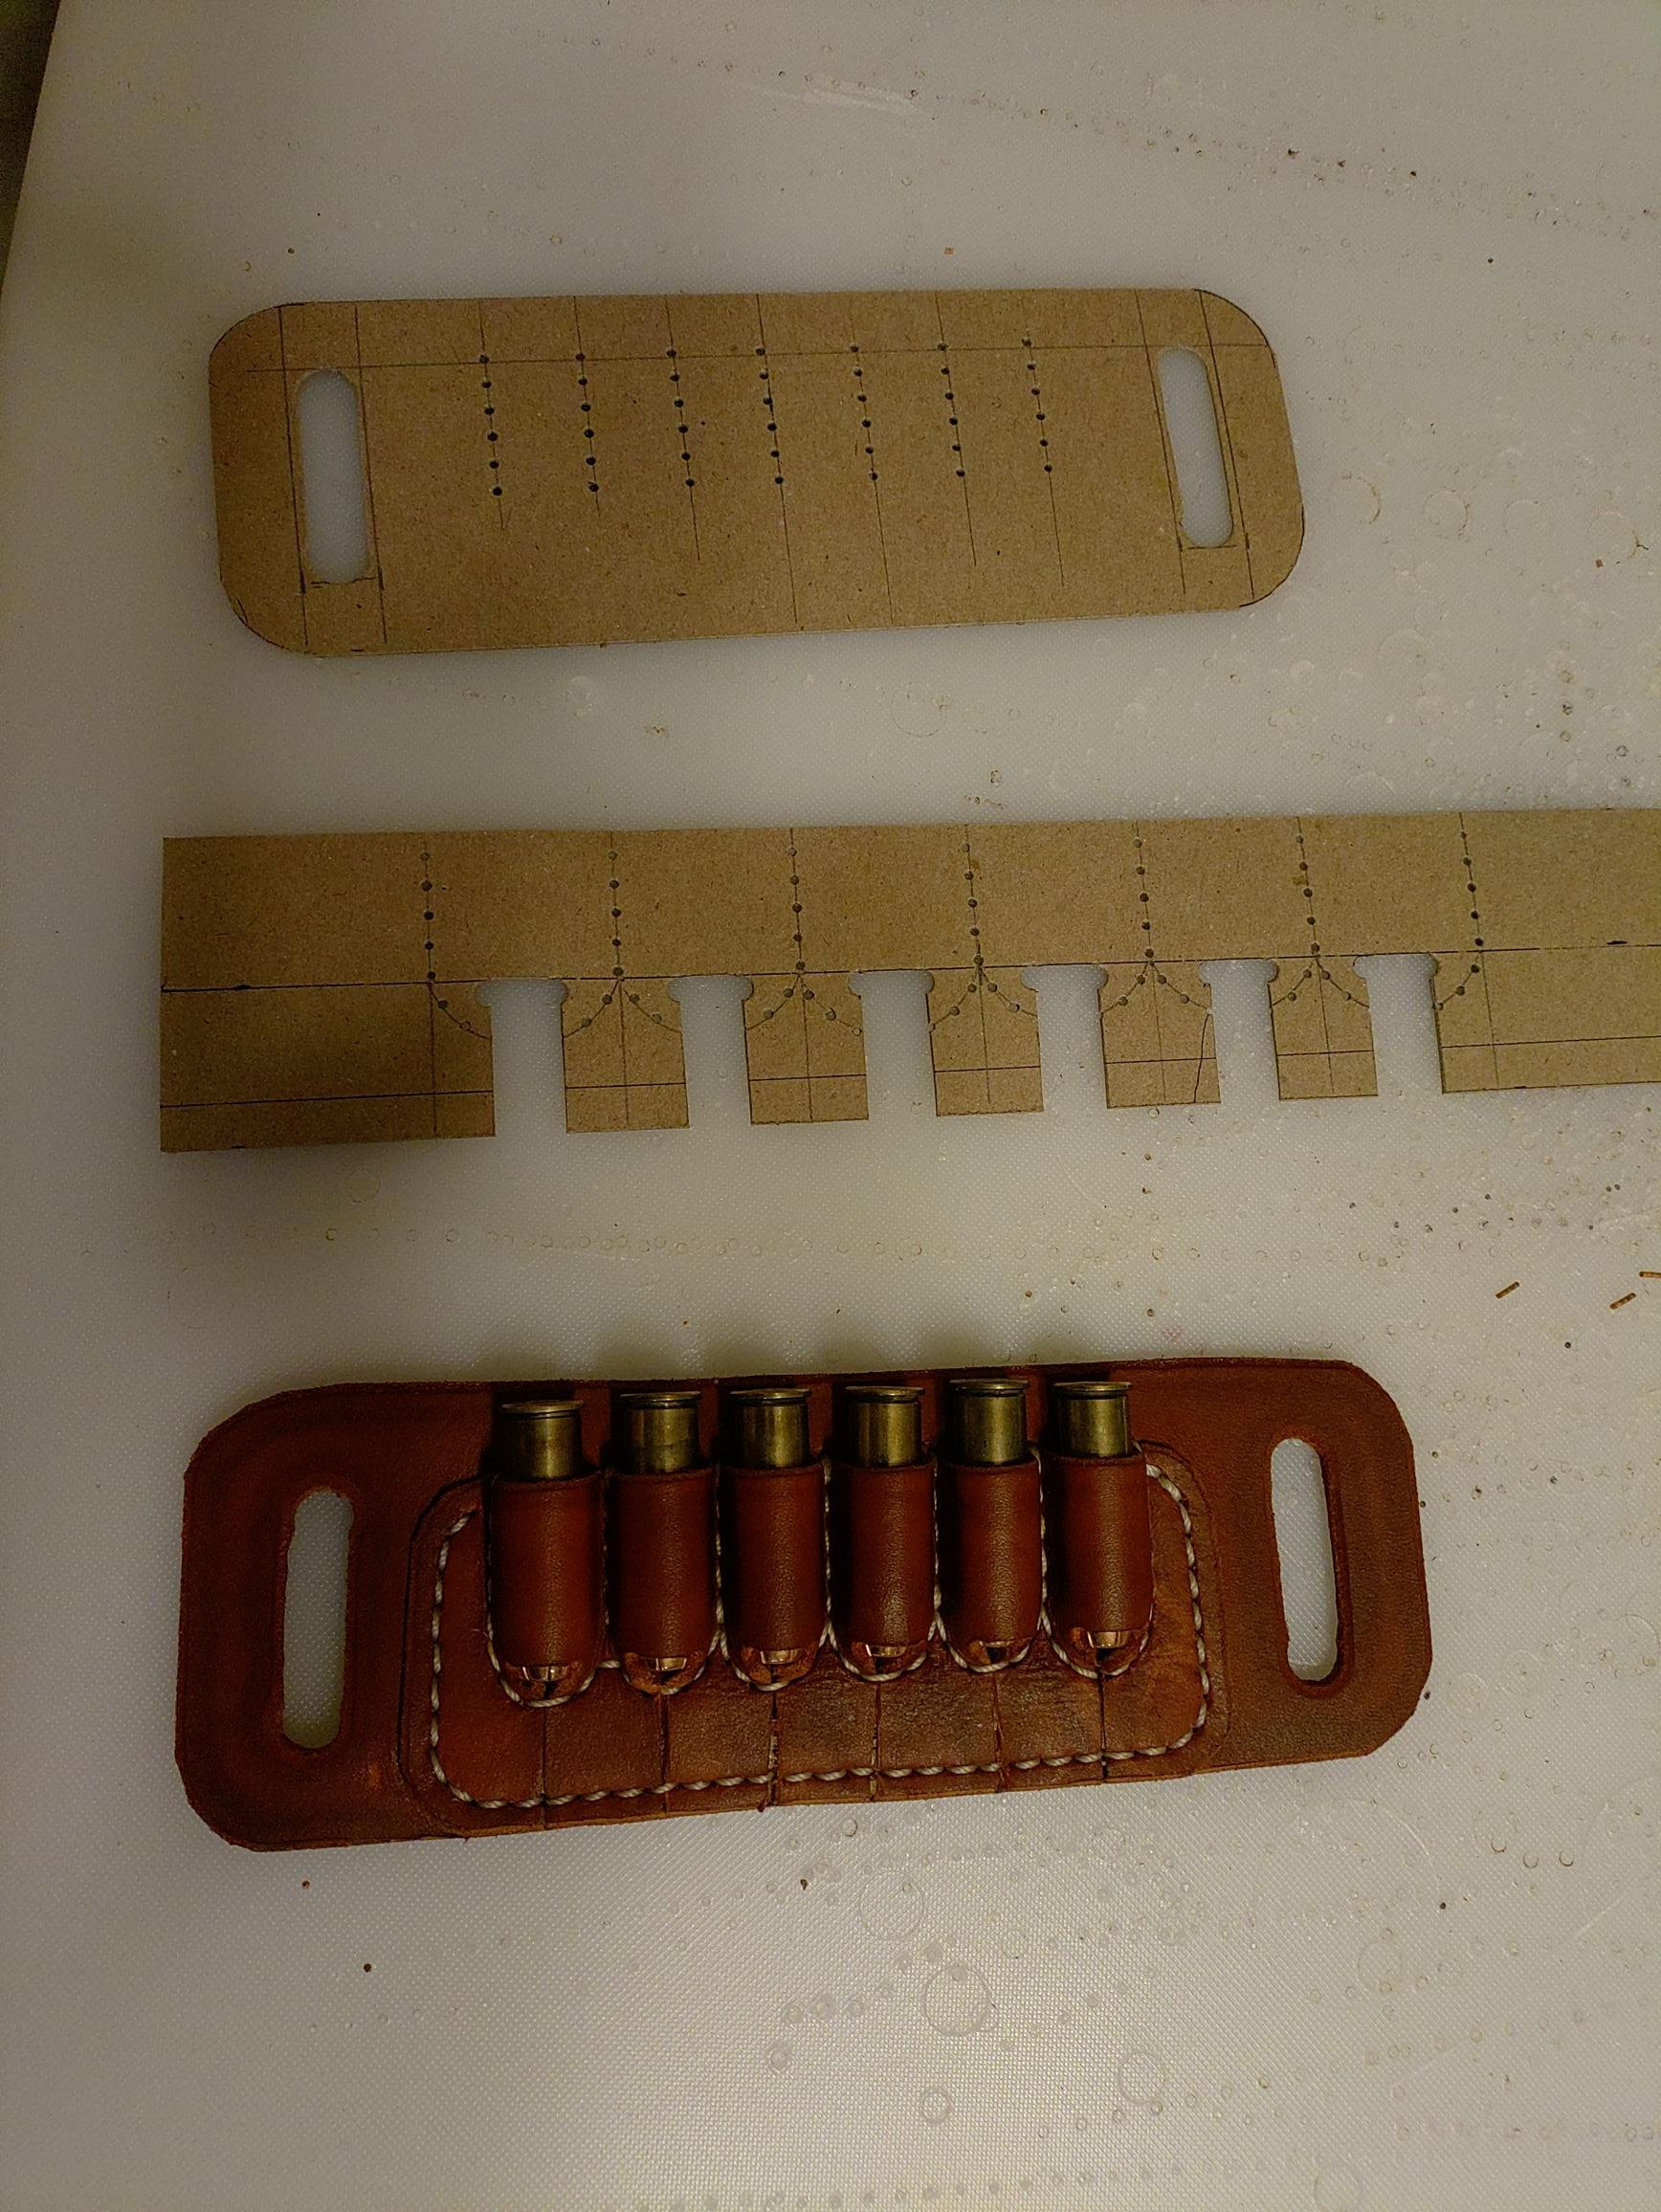
ammo holder
chuck123wapati replied to Thadrick's topic in Gun Holsters, Rifle Slings and Knife Sheathes
Good job my friend, you got it!!! I've never had luck carrying tapered cartridges in a buttstock type holder so I quit even trying open type holders of any kind. You will have to let me know how it works on the trail. -
I don't know if a dye shaker is a need or a want, lol. But you have built a really cool setup, and you can learn to paint in your off time.
-
 PNW joined the community
 -
I bought a Dürkopp 291 recently. The table is junk but I can get a new one for $100. The Varistop V720 does not seem to work and the motor spins but does not engage. It has pneumatic controls that do not work either. It is 220V 3 phase. I am interested in removing all the electronics and outing on a servo motor. Is this easy? I paid $50 for the machine. Is it worth it?
-
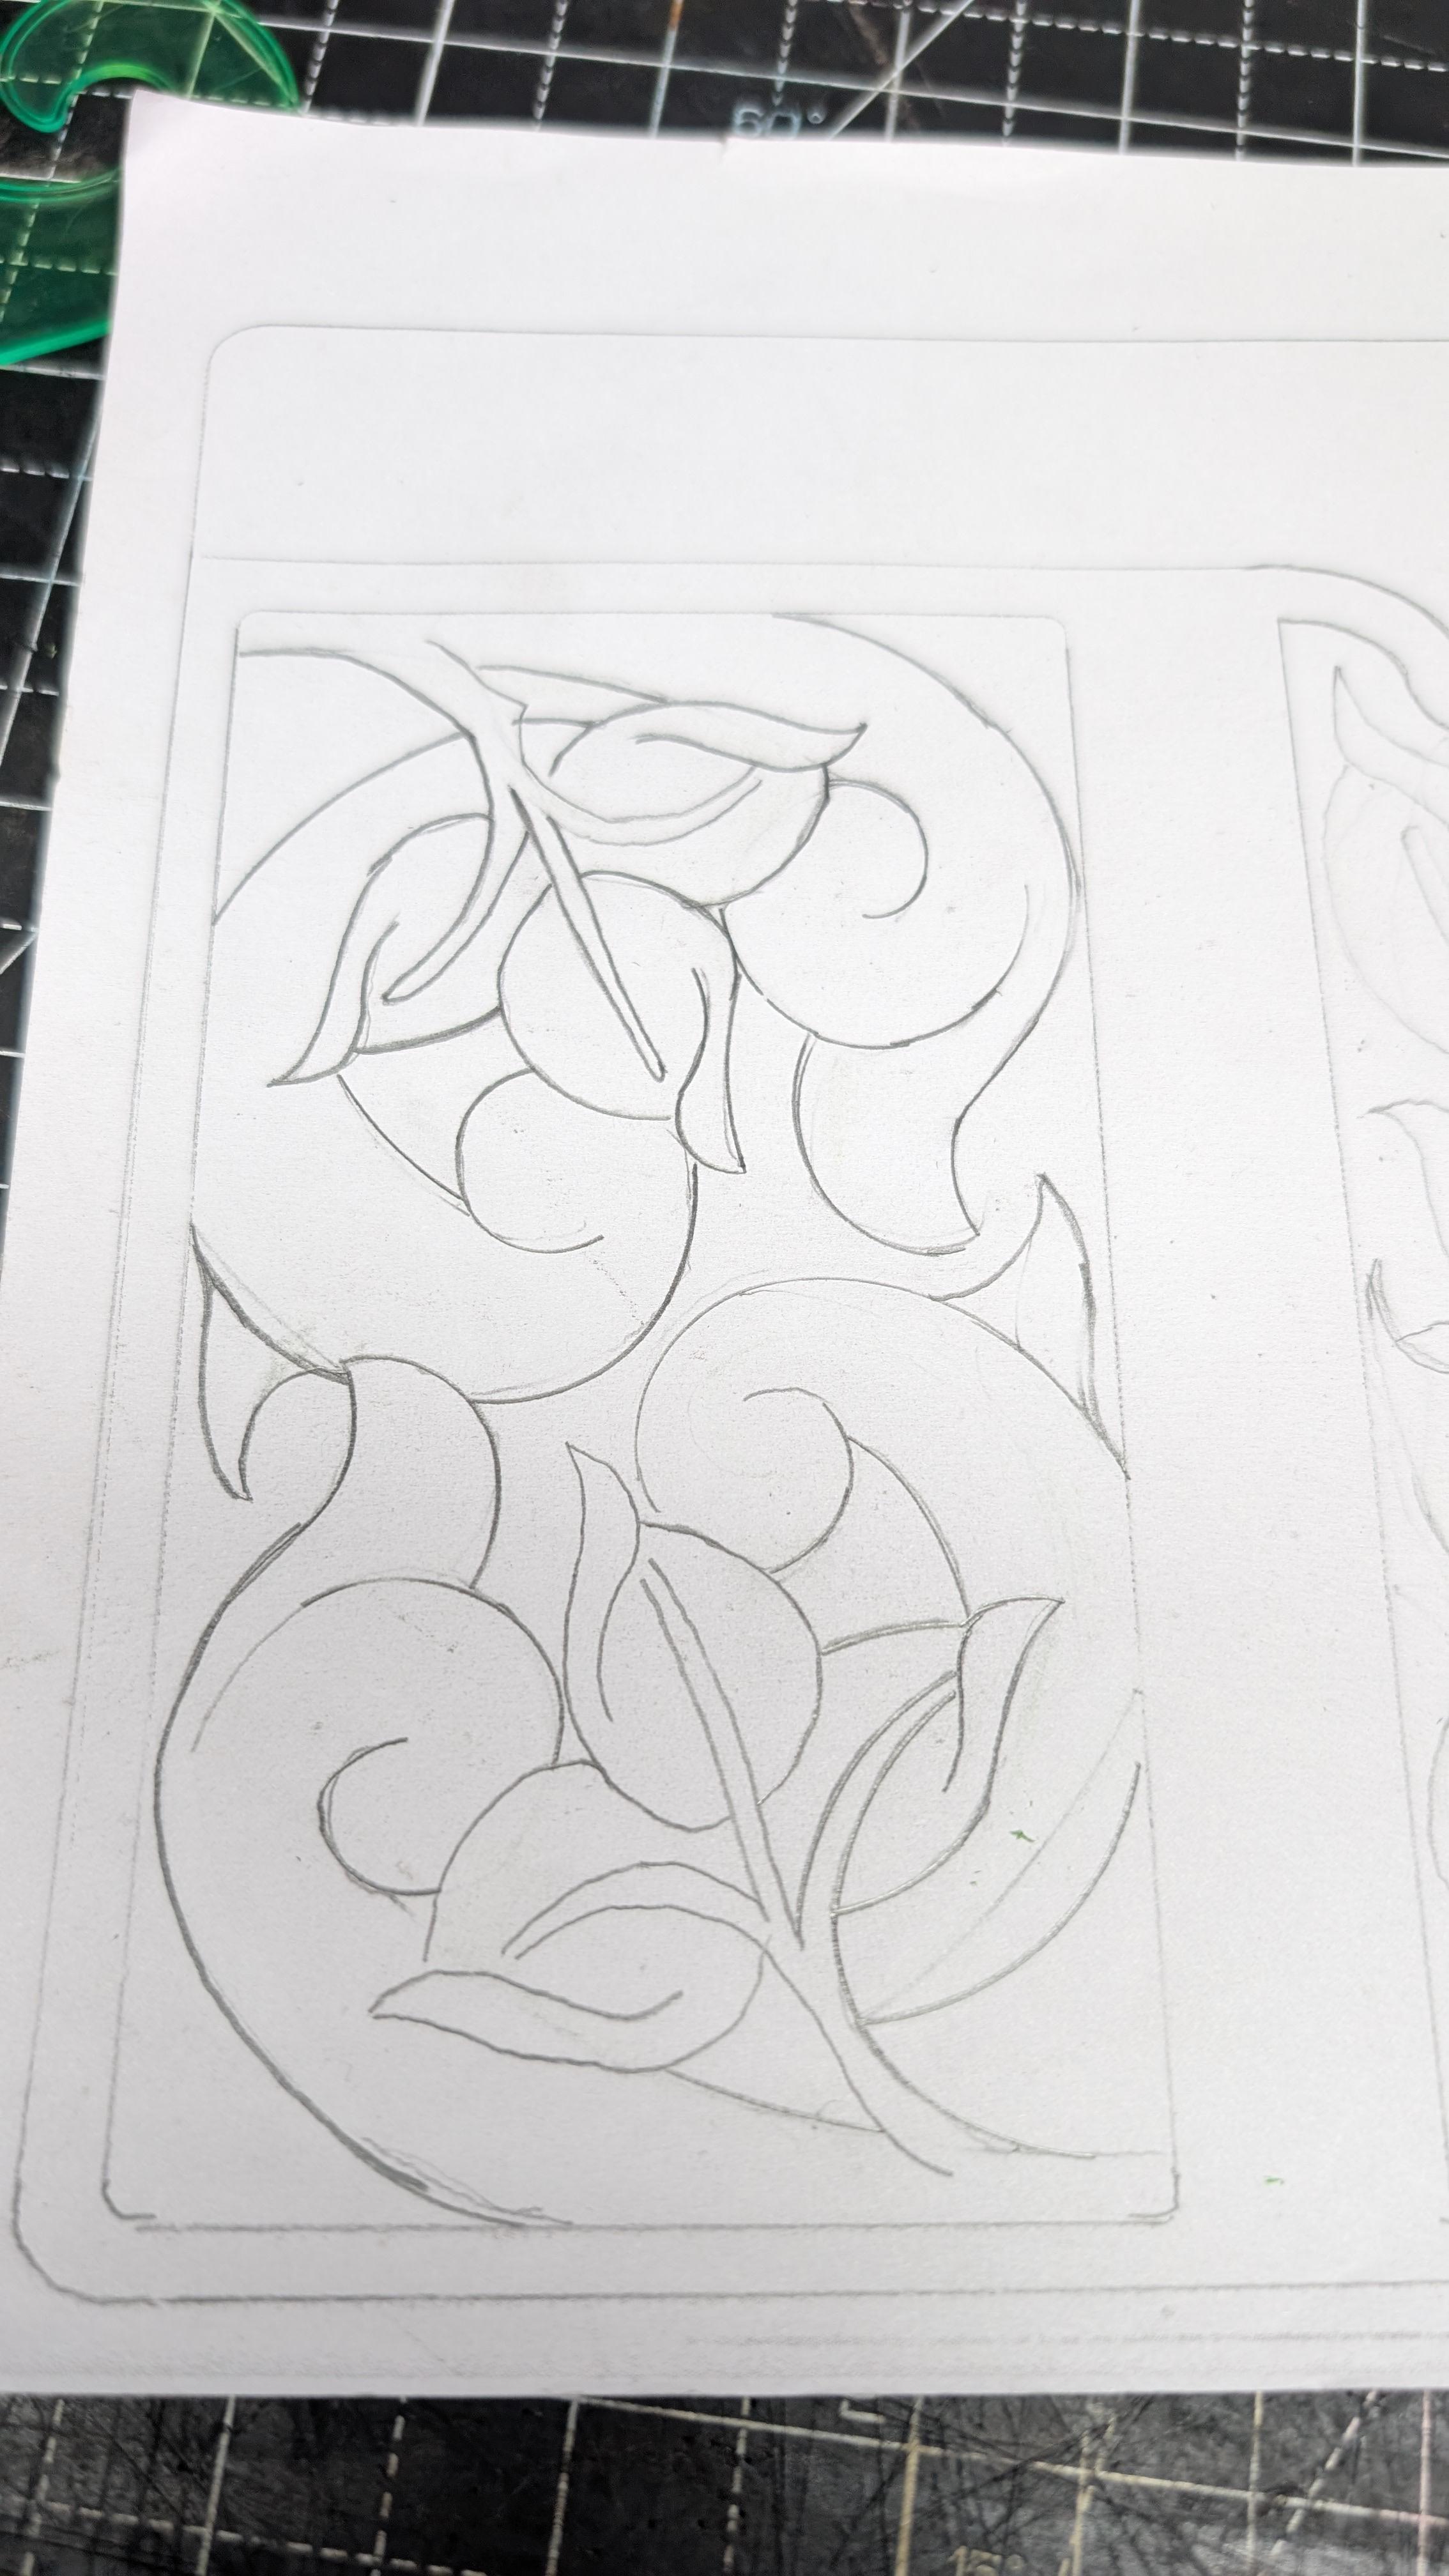
Nothing special, just felt like sharing my latest project. Wallet for a friend Tried to make a $ without making a $

-
Airbrushing produces a pretty appearance . . . and can be feathered to the extent that it is very very uniform in color. It can also be used to make a two or 3 or even more . . . toned layers of color . . . making some really unique and lovely color(s) or color patterns. BUT . . . airbrushing is only a light surface dying technique. Almost any scrape or beating will remove the dye . . . there is a thread on here about re-dying shoes . . . the scrape on his right shoe proves my point . . . as shoes (especially Oriental made) are very lightly air brushed with the appropriate cheap thin dye. I much prefer and seriously advocate dip dying if one wants one color . . . and wants the item to be able to stand up to at least some serious abuse. May God bless, Dwight
-
That would be very easy duplicated on a laser engraver . . . And using some oddball scrap leather . . . shouldn't take over 3 or 4 tries to get the first pattern done for it. I don't need any such cartridge holder . . . but if I did . . . I think I would like that pattern . . . especially if I were using something bottle necked like a .308 / 30-30 / 30-06 or so. Would be a good deal for a deer hunter . . . maybe even incorporated in a butt stock cheek weld riser. Shouldn't be too hard to do . . . even sew the thing on a big rig machine like a Cowboy 4500 May God bless, Dwight
-
-
Not exactly the same but kinda the same idea. I have a couple other projects going on and then Ill see if I can figure out something like this for my 7 SAUM.
-
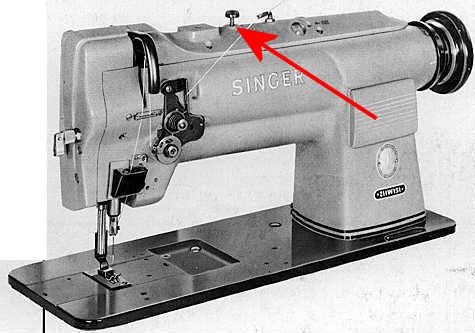
there either is a big thumb screw OR a slotted screw (flush with the lid or a bit deeper) in about the same spot for adjusting the foot pressure. But if you dial in a too low foot pressure the friction between needle and leather may lift your sewing material when the needle bar is rising.
-
 Some AI notes on Jojoba oil and Neatsfoot oil. Jojoba oil is chemically nearly identical to the sperm whale. Jojoba oil is a liquid wax ester that closely resembles human sebum. It penetrates leather fibers well, moisturizes deeply, and is less likely to darken leather or cause discoloration. It is also stable, won't go rancid, and is hypoallergenic. It is often recommended for delicate leather items and is favored for leaving a natural feel without heavy saturation. However, it is more expensive and can be harder to apply evenly without over-saturating the leather. Neatsfoot oil is derived from cattle bones and is a traditional, widely used conditioner for rugged and outdoor leather items like boots and saddles. It penetrates deeply and restores suppleness and flexibility to leather. However, it can darken leather significantly and may turn rancid if over-applied, which can negatively affect the leather and its stitching over time. It is suitable for thicker, durable leathers but needs cautious use. Neatsfoot oil is still commonly used for leather boots, saddles, and outdoor gear. It deeply conditions but may soften or darken lighter leathers over time and must be used in moderation to prevent damage to stitching. kgg
 -
Do you mind posting a photo of the top of your machine?
-
 Hello, Tove! Thanks for your advie! Yes, I didn’t apply any sealer to the shoes, since many YouTubers in their videos just use conditioners after re-dyeing their shoes. They then create a gloss or mirror shine, which looks like a coating or sealing effect. So I did the same, but I didn’t realize it would turn into a disaster. I've just looked up that Fiebing's Caranauba Creme which you've mentioned but fortunately it's not sold in Korea. I think I might put Fiebing's Leather Sheen or Resolene on my shoes after I re-dye them again Also I've seen many people talking about using neatsfoot oil, let me look into whether this is also suitable for sealing my leather shoes, or if it will play more of a conditioner role for them.
 -
Thank you kgg! These are fantastic works
-
Below is the photo which is mistakenlly pulled down. It was after I deglaze the shoes thorugh acetone.
-
 Skylerlubert joined the community
 -
Shoe Repair Machinery for Sale in Covina, CA.
AlZilla replied to Shoe repair daughter's topic in Used
Hi @Shoe repair daughter To do this right, we really need a listing of what you have, pictures, condition, pricing and whether you'll ship or if it will require pick up. Thanks for offering it here. The Marketplace Rules are linked here for your review: https://leatherworker.net/forum/forum/71-items-for-sale/ -
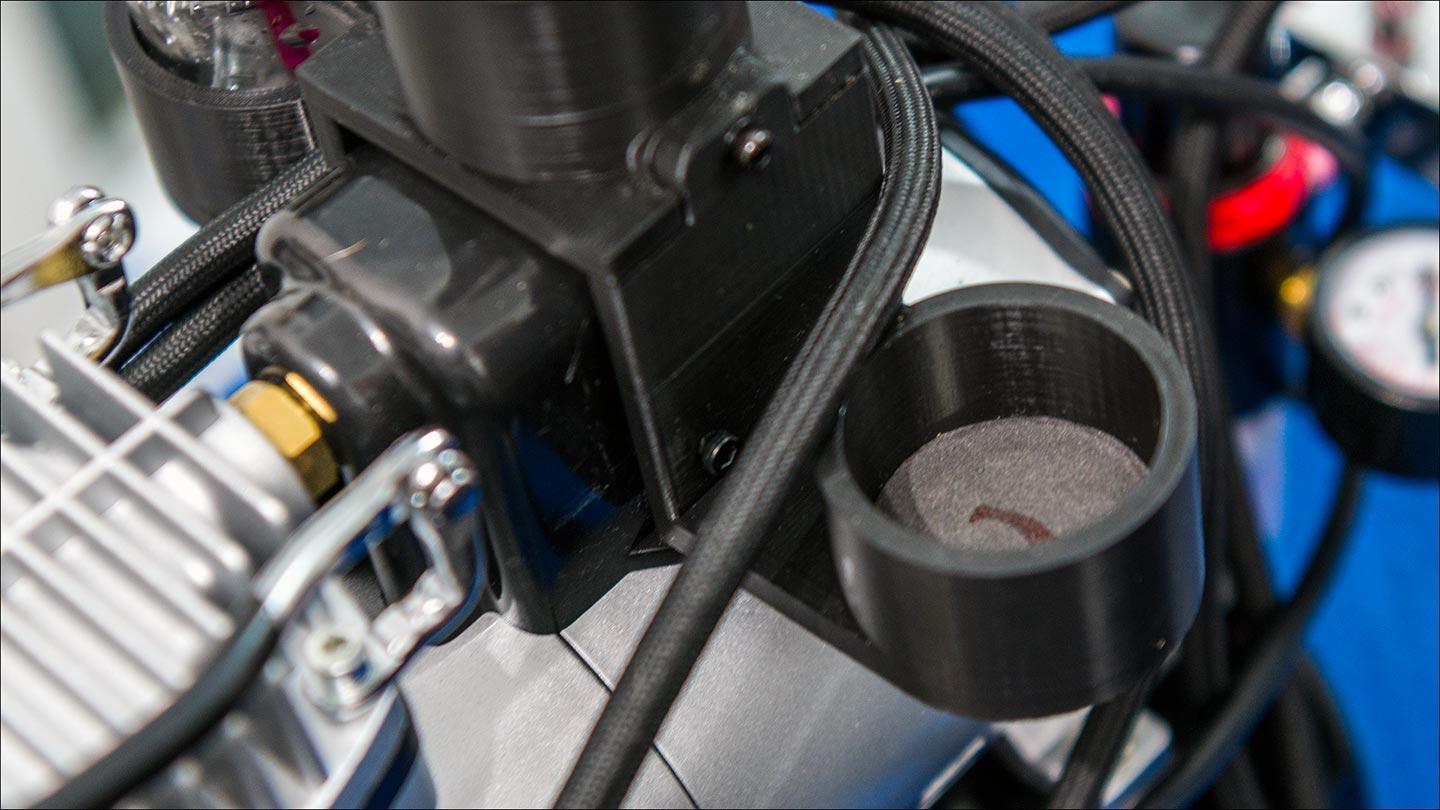
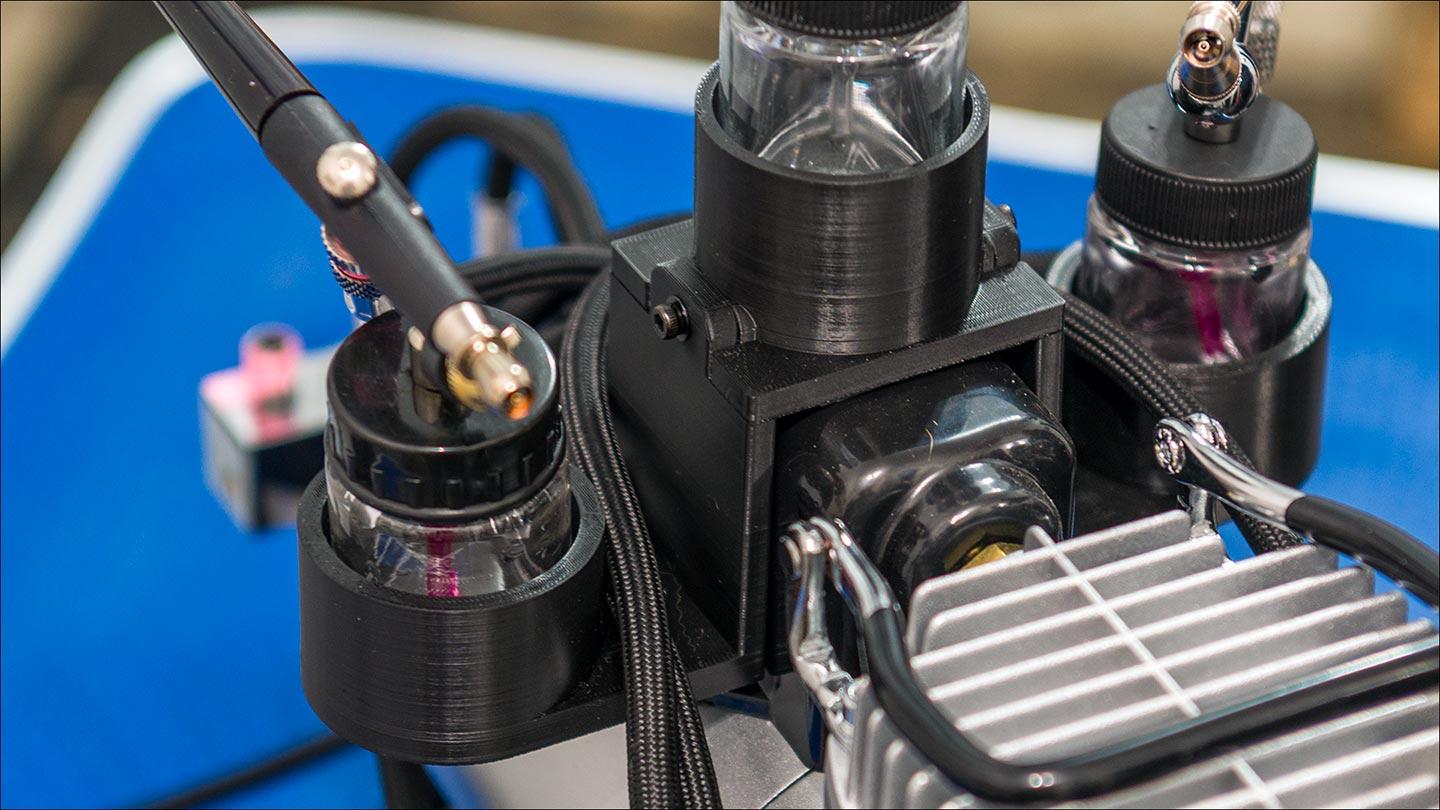
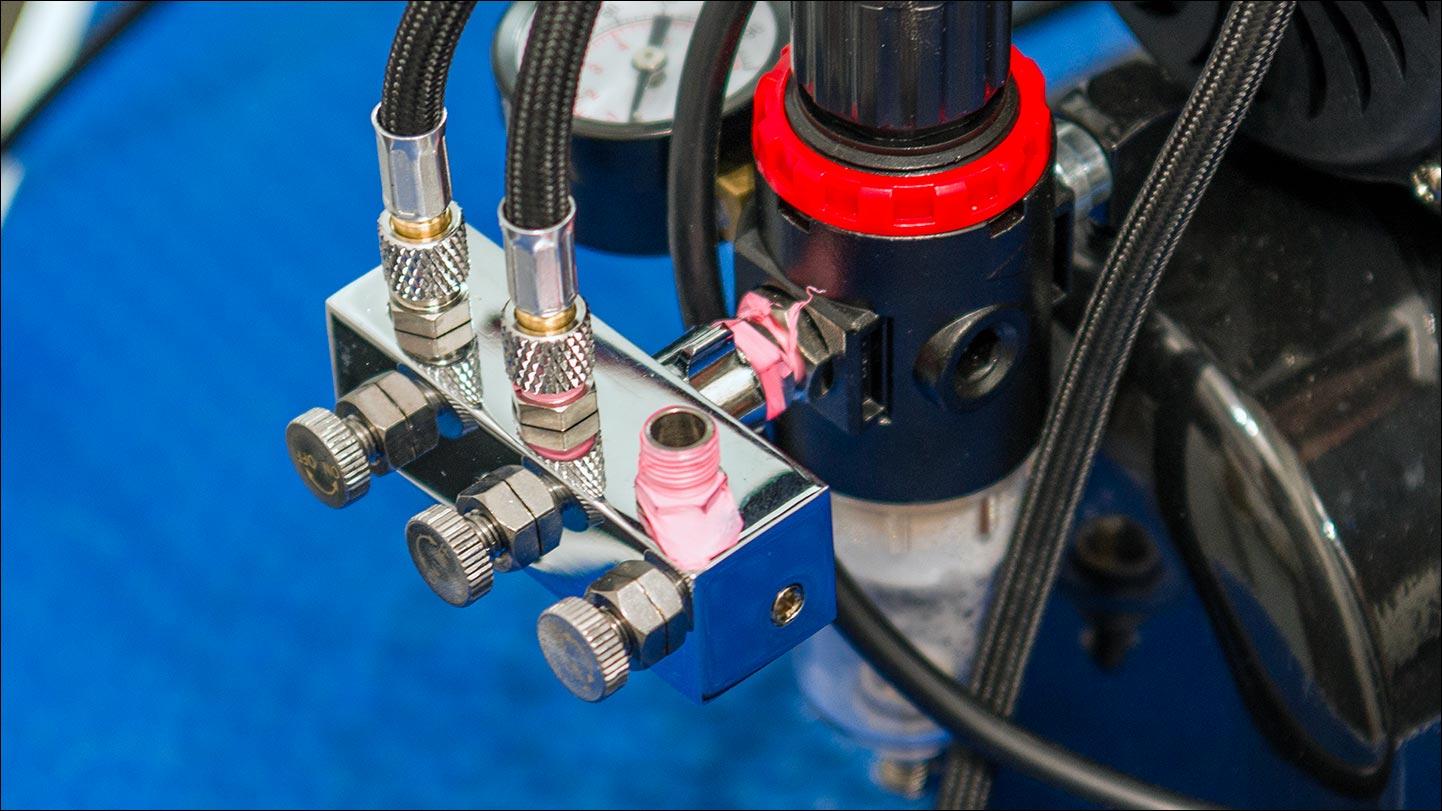
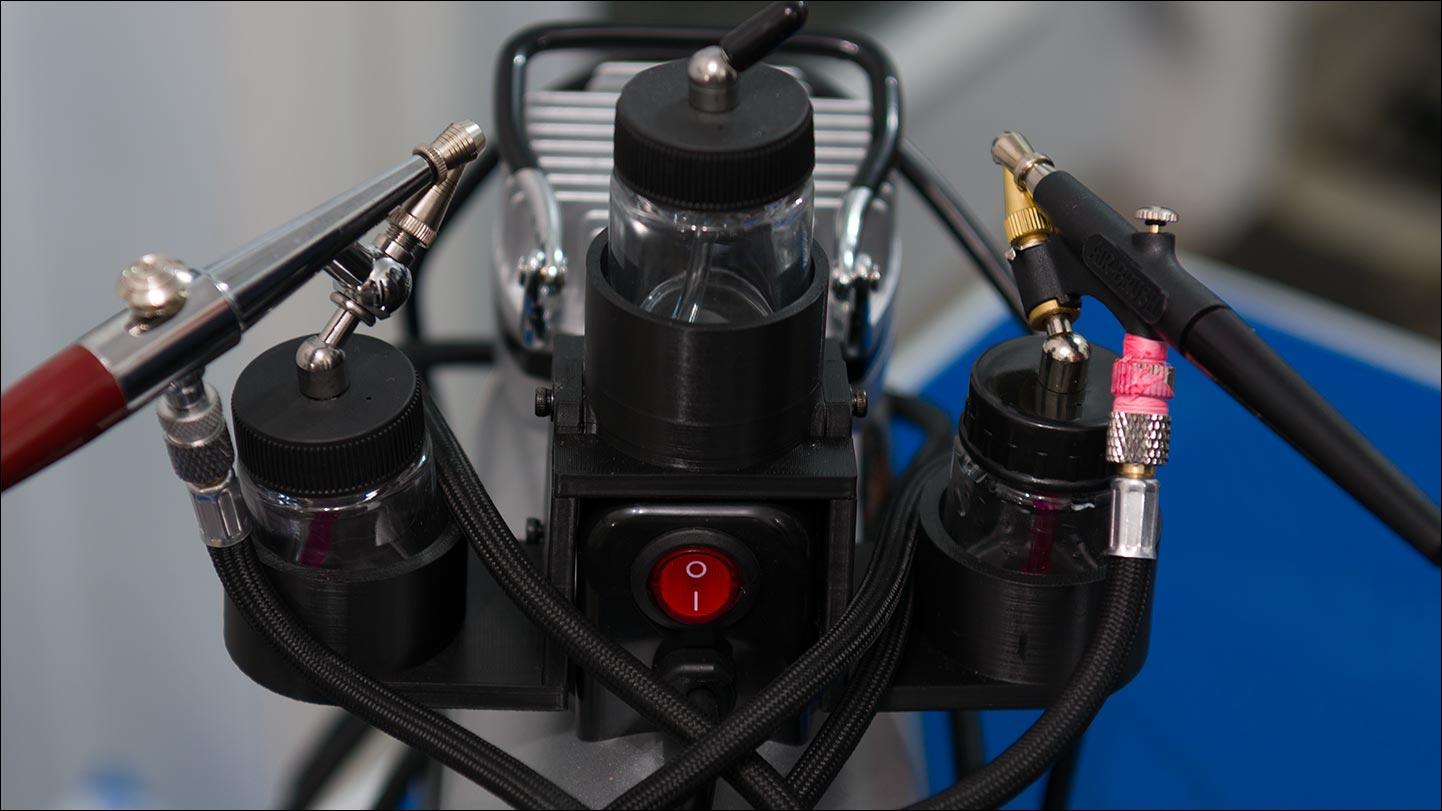
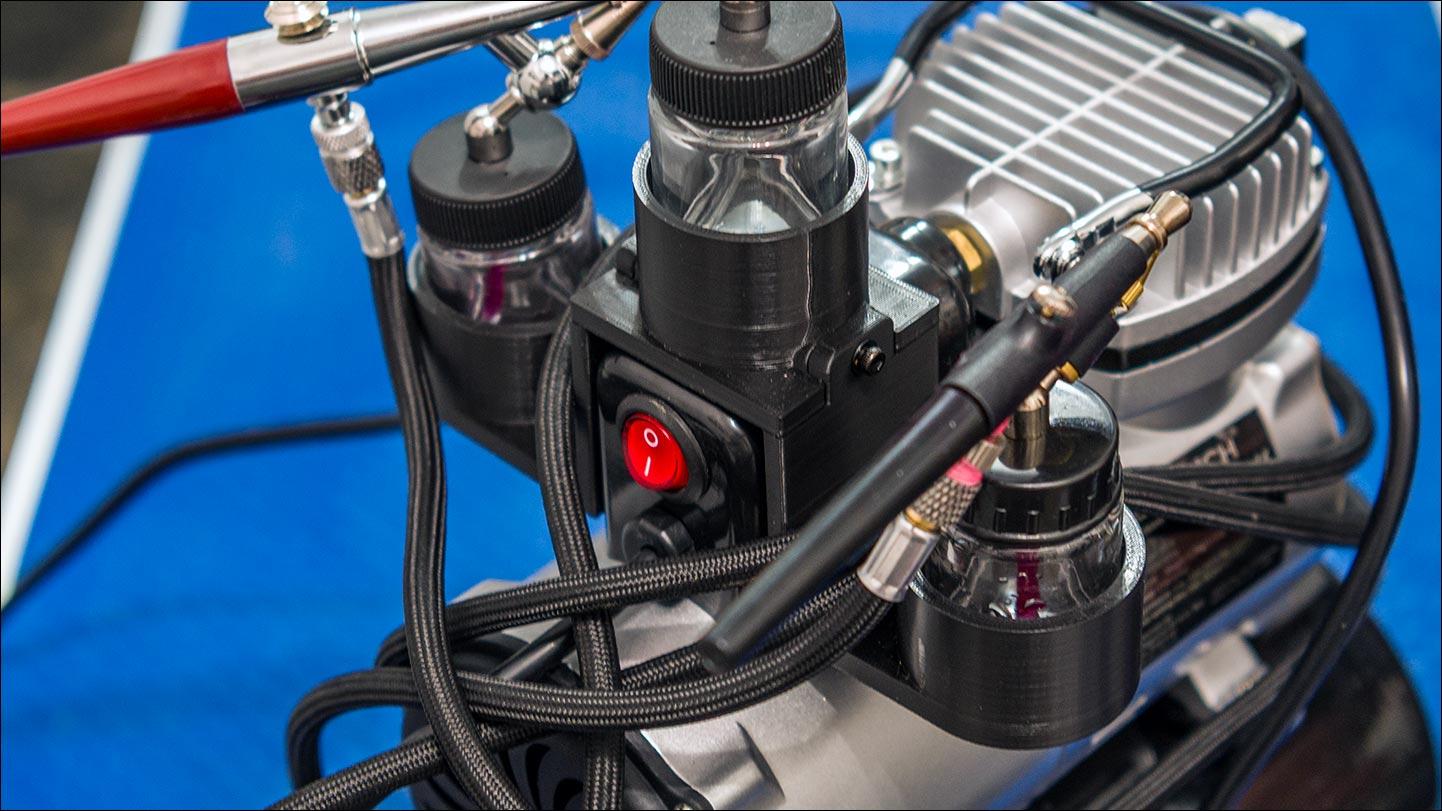
The following is long and my experience for dying, oiling leather. My journey to airbrushing and the cost of a small setup not including a spray booth. How I got here: i) Tried the dabber method I could not get consistent results from one piece to another and used to much dye. ii) Tried the dipping method got consistent results just never liked what it done to veg tan leather or the end result. iii) Tried the brushing method getting consistent results were difficult. iv) Tried the continuous spray bottle that women use for misting hair but typically gave a spotty coverage. The spray bottle was large, clumsy and awkward to use. v) Tried the small cordless airbrush which was a dual action airbrush. It did work but was under powered pressure wise, clumsy and awkward to use due to it's battery pack size. I have used a single action Pasache airbrush in the past with a real compressor and it worked perfectly. The pro to a real air compressor is all the reserve air capacity while the drawback particularly indoors is the noise of the compressor motor. To that end I purchased off Amazon.ca two cheap single action airbrushes ($40 CAD), nylon braided 6' hose ($28 CAD), 10 pack of 60 degree down angle glass bottles ($30 CAD), three way outlet splitter ($10 CAD) and a small airbrush compressor with a 3 litre reserve air tank ($106 CAD ) for a total of $214 CAD. The reason for: i) Airbrushes: The simplicity of the single action airbrush vs the dual action airbrush. Insert the bottle of mixed dye and thinner (50/50) to the airbrush, push the down on the "go" button, set the nozzle spray and you are good to go. As a note I use 100% pure organic JOJOBA oil and the airbrushes will apply it without dilution. I like JOJOBA oil as it is almost identical to sperm whale oil. ii) Hose: The air hoses that came with the Amazon airbrushes, to be kind, were absolutely terrible. They are made of plastic tubing with poor end fittings that leaked. iii) Compressor: The airbrush compressor is almost silent, had a cooling fan, water separator and a 3 litre air reserve tank. iv) Bottles: Pro's: Glass bottles are easier to clean, don't stain like the plastic ones and you can see at a glance how much dye / oil you have left. Also I can mix different dyes, oil and thinner without the worry of any cross contamination. Con's: Getting 60° angle down angle adaptor lids with rubber seals, spout covers and 22 cc (3/4 oz) glass bottles for single action airbrushes can be either difficult or expensive ($6 - $10 CAD each). v) Outlet Splitter: Simply convenience. The three way splitter with three separate shutoff valves makes it so easy to change between airbrushes. Personalization: The setup was still lacking for my needs. It needed: i) an airbrush storage holder and I'm to cheap to buy one that fitted over the Pressure Regulator at $30 CAD ii) a dye shaker to prevent any die/thinner separation. So me being me I designed a very simple one and 3D printed it. The holder mounts on top of the ON/OFF electrical box, install 3mm high density rubber in the bottom of the holders and was dirt cheap to make. When the compressor motor kicks in the airbrushes and or bottles vibrate slightly. Conclusion: What I have found is that airbrushing for dying and oiling uses considerably less fluid then any of the other methods that I have tried and gives more consistent, repeatable results. As a note I use JOJOBA All comments are appreciated. What are your thoughts??? kgg

- Yesterday
-
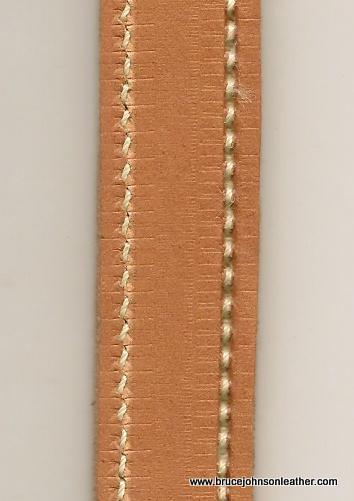
Yes needle type makes a huge difference in the appearance and uniformity of stitches. The only times I used round needles was for nylon. I preferred LR needles for my leather, and then rolled the backside stitches with an appropriate sized overstitcher when appearance mattered like it does here. I have attached a picture of some backside stitching as it came out of the machine with one side left as-is and one side overstitched.
-
Perfect, I assumed it was right but with the positioner working it just looked funny. thanks. btw, that video is great explanation.
-
I just went upstairs and looked to be sure. My 111w153 acts like yours. I never paid much attention but the other 3 machines up there all do the same thing. I don't even think it's possible to adjust the timing of one to the other. Just tweak where your "needle up" position stops.


