All Activity
- Past hour
-
I honestly did start out with a big vise and a couple of six inch nails and I got reasonably good at it, only because I was fitting around a solid wooden core and lots of screws around the outside helped to get it into shape. And of course I was using 3pt R/Steel at the time so your stuff should be easier.
-
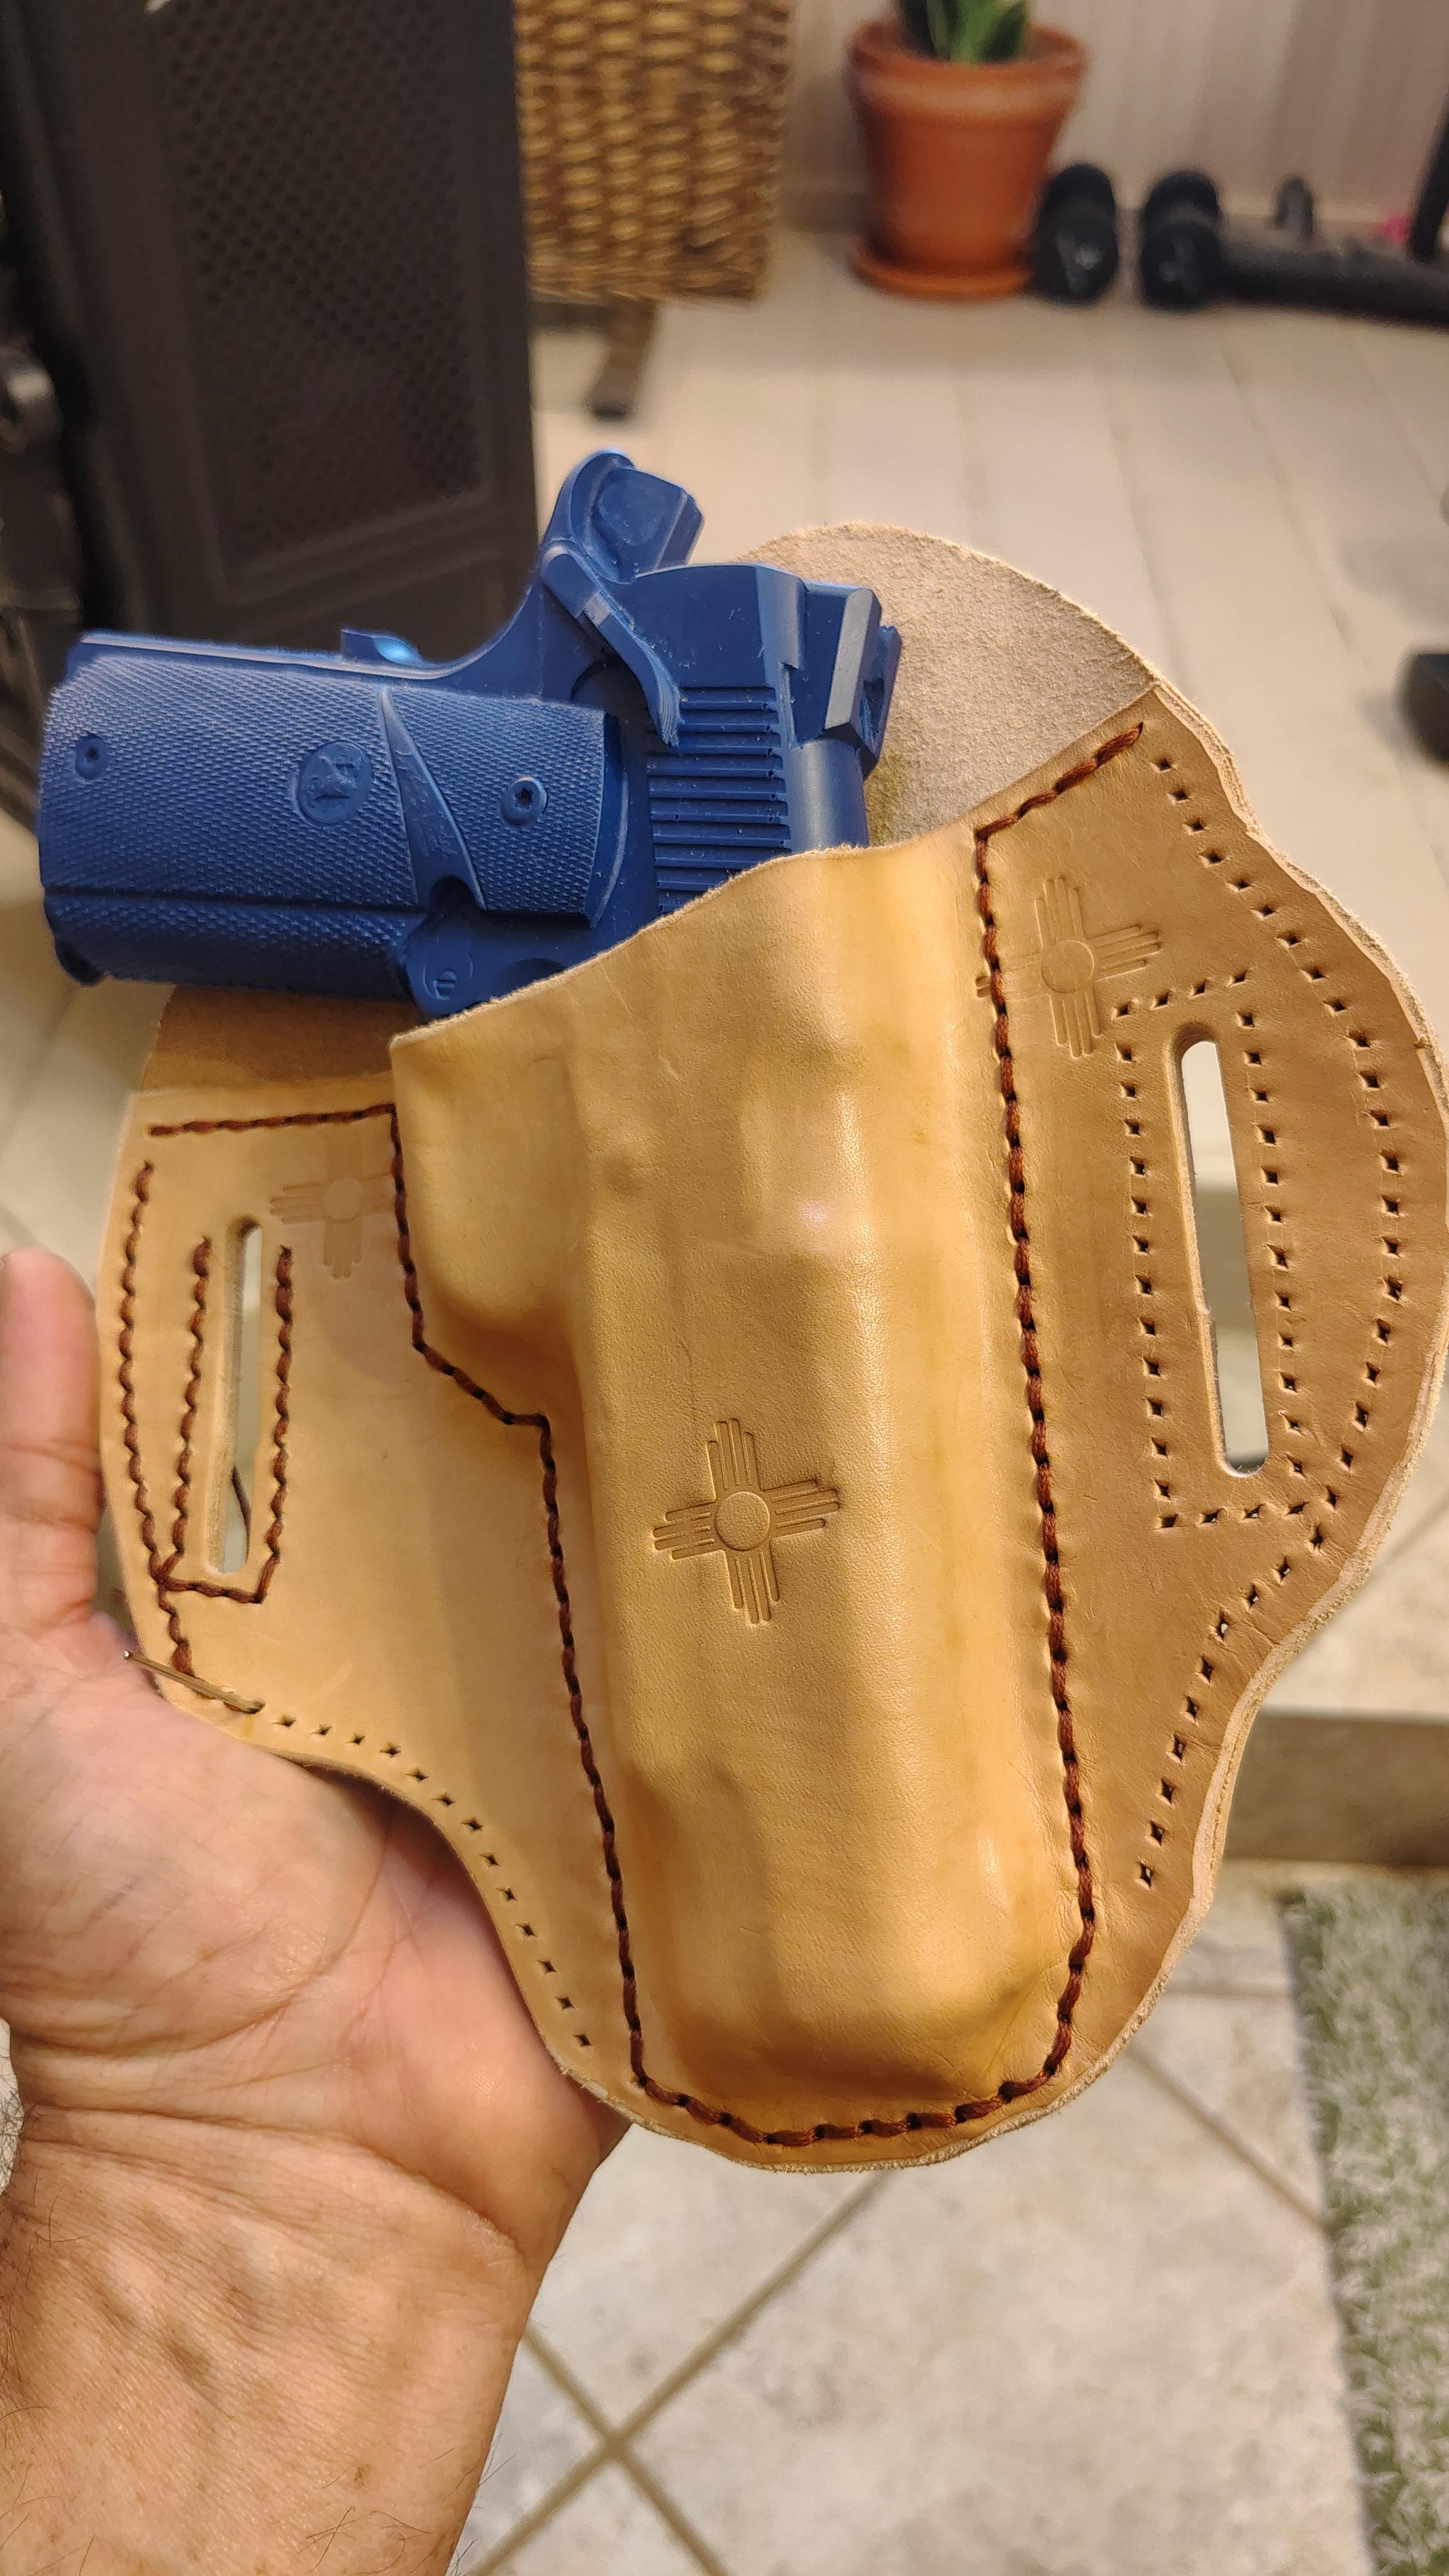
Harry Rogers used one of those but I didn't know what it was called, apparently designed for jewellery work. It looks like it's for material about 25mm high(?) but my stuff is about 32mm. They're also very expensive here, maybe $600 or so. Temu have a version for $35 but it looks like it's even smaller. It wouldn't be hard to make something that operates on the same principle but it depends on what I've got in the scrap bin.
-

DIY servo motor with wide speed range
friquant replied to Gymnast's topic in Leather Sewing Machines
I like it! I saw this video a few months ago on youtube, and had not figured out who you were on leatherworker. Using a variable frequency drive (VFD) and an AC gearmotor I have been able to get super low speed like you demonstrate. It would be convenient if the VFD had an option to add some parabola effect (or "exponential" as the radio control pilots call it) at the slow end. As it is I get the best low-end resolution when the max speed is on the slow side. Here's a link to a video in that thread: https://leatherworker.net/forum/topic/131403-my-first-vfd-w-3-phase-ac-gearmotor/#findComment-783471 As you built this system (or from your general knowledge) did you learn why it is that commercially available servo motors start at such a high speed? I'm still looking for a satisfactory answer to that. Or a way to adapt a commercially available servo to start at whatever speed I choose.. - Today
-
 This Wikipedia article on museum level leather conservation may be of interest. If I recall correctly, current thinking in museum circles is to not use any oils, balms, conditioners of any kind because they found that in the long term, they did more harm than good. https://en.m.wikipedia.org/wiki/Conservation_and_restoration_of_leather_objects I've tried neatsfoot oil a couple of times and it made the leather soft. I see plenty of people here who use it regularly and love it.
 -
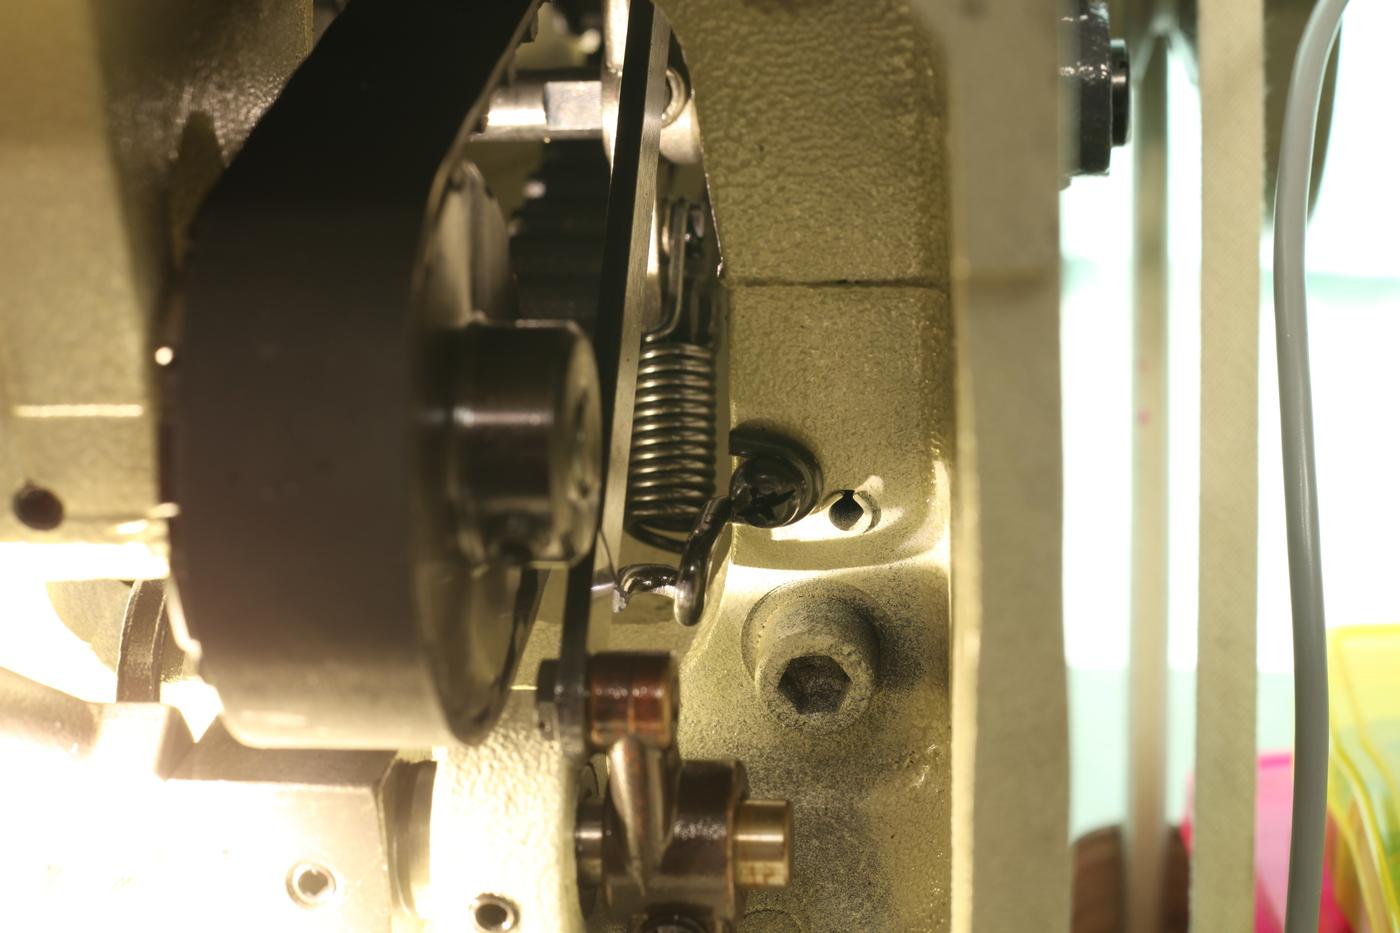
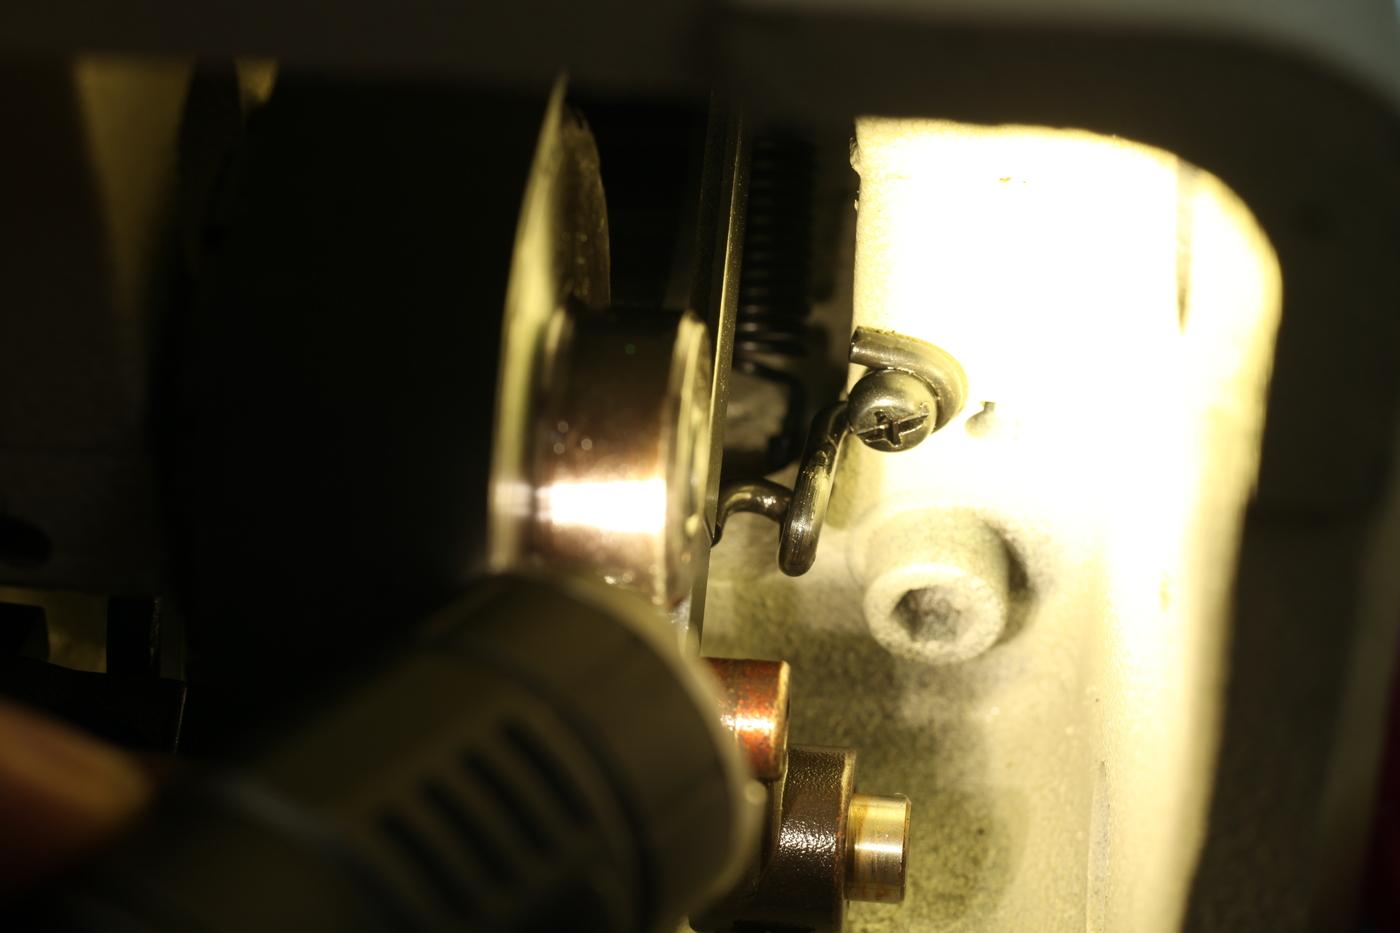
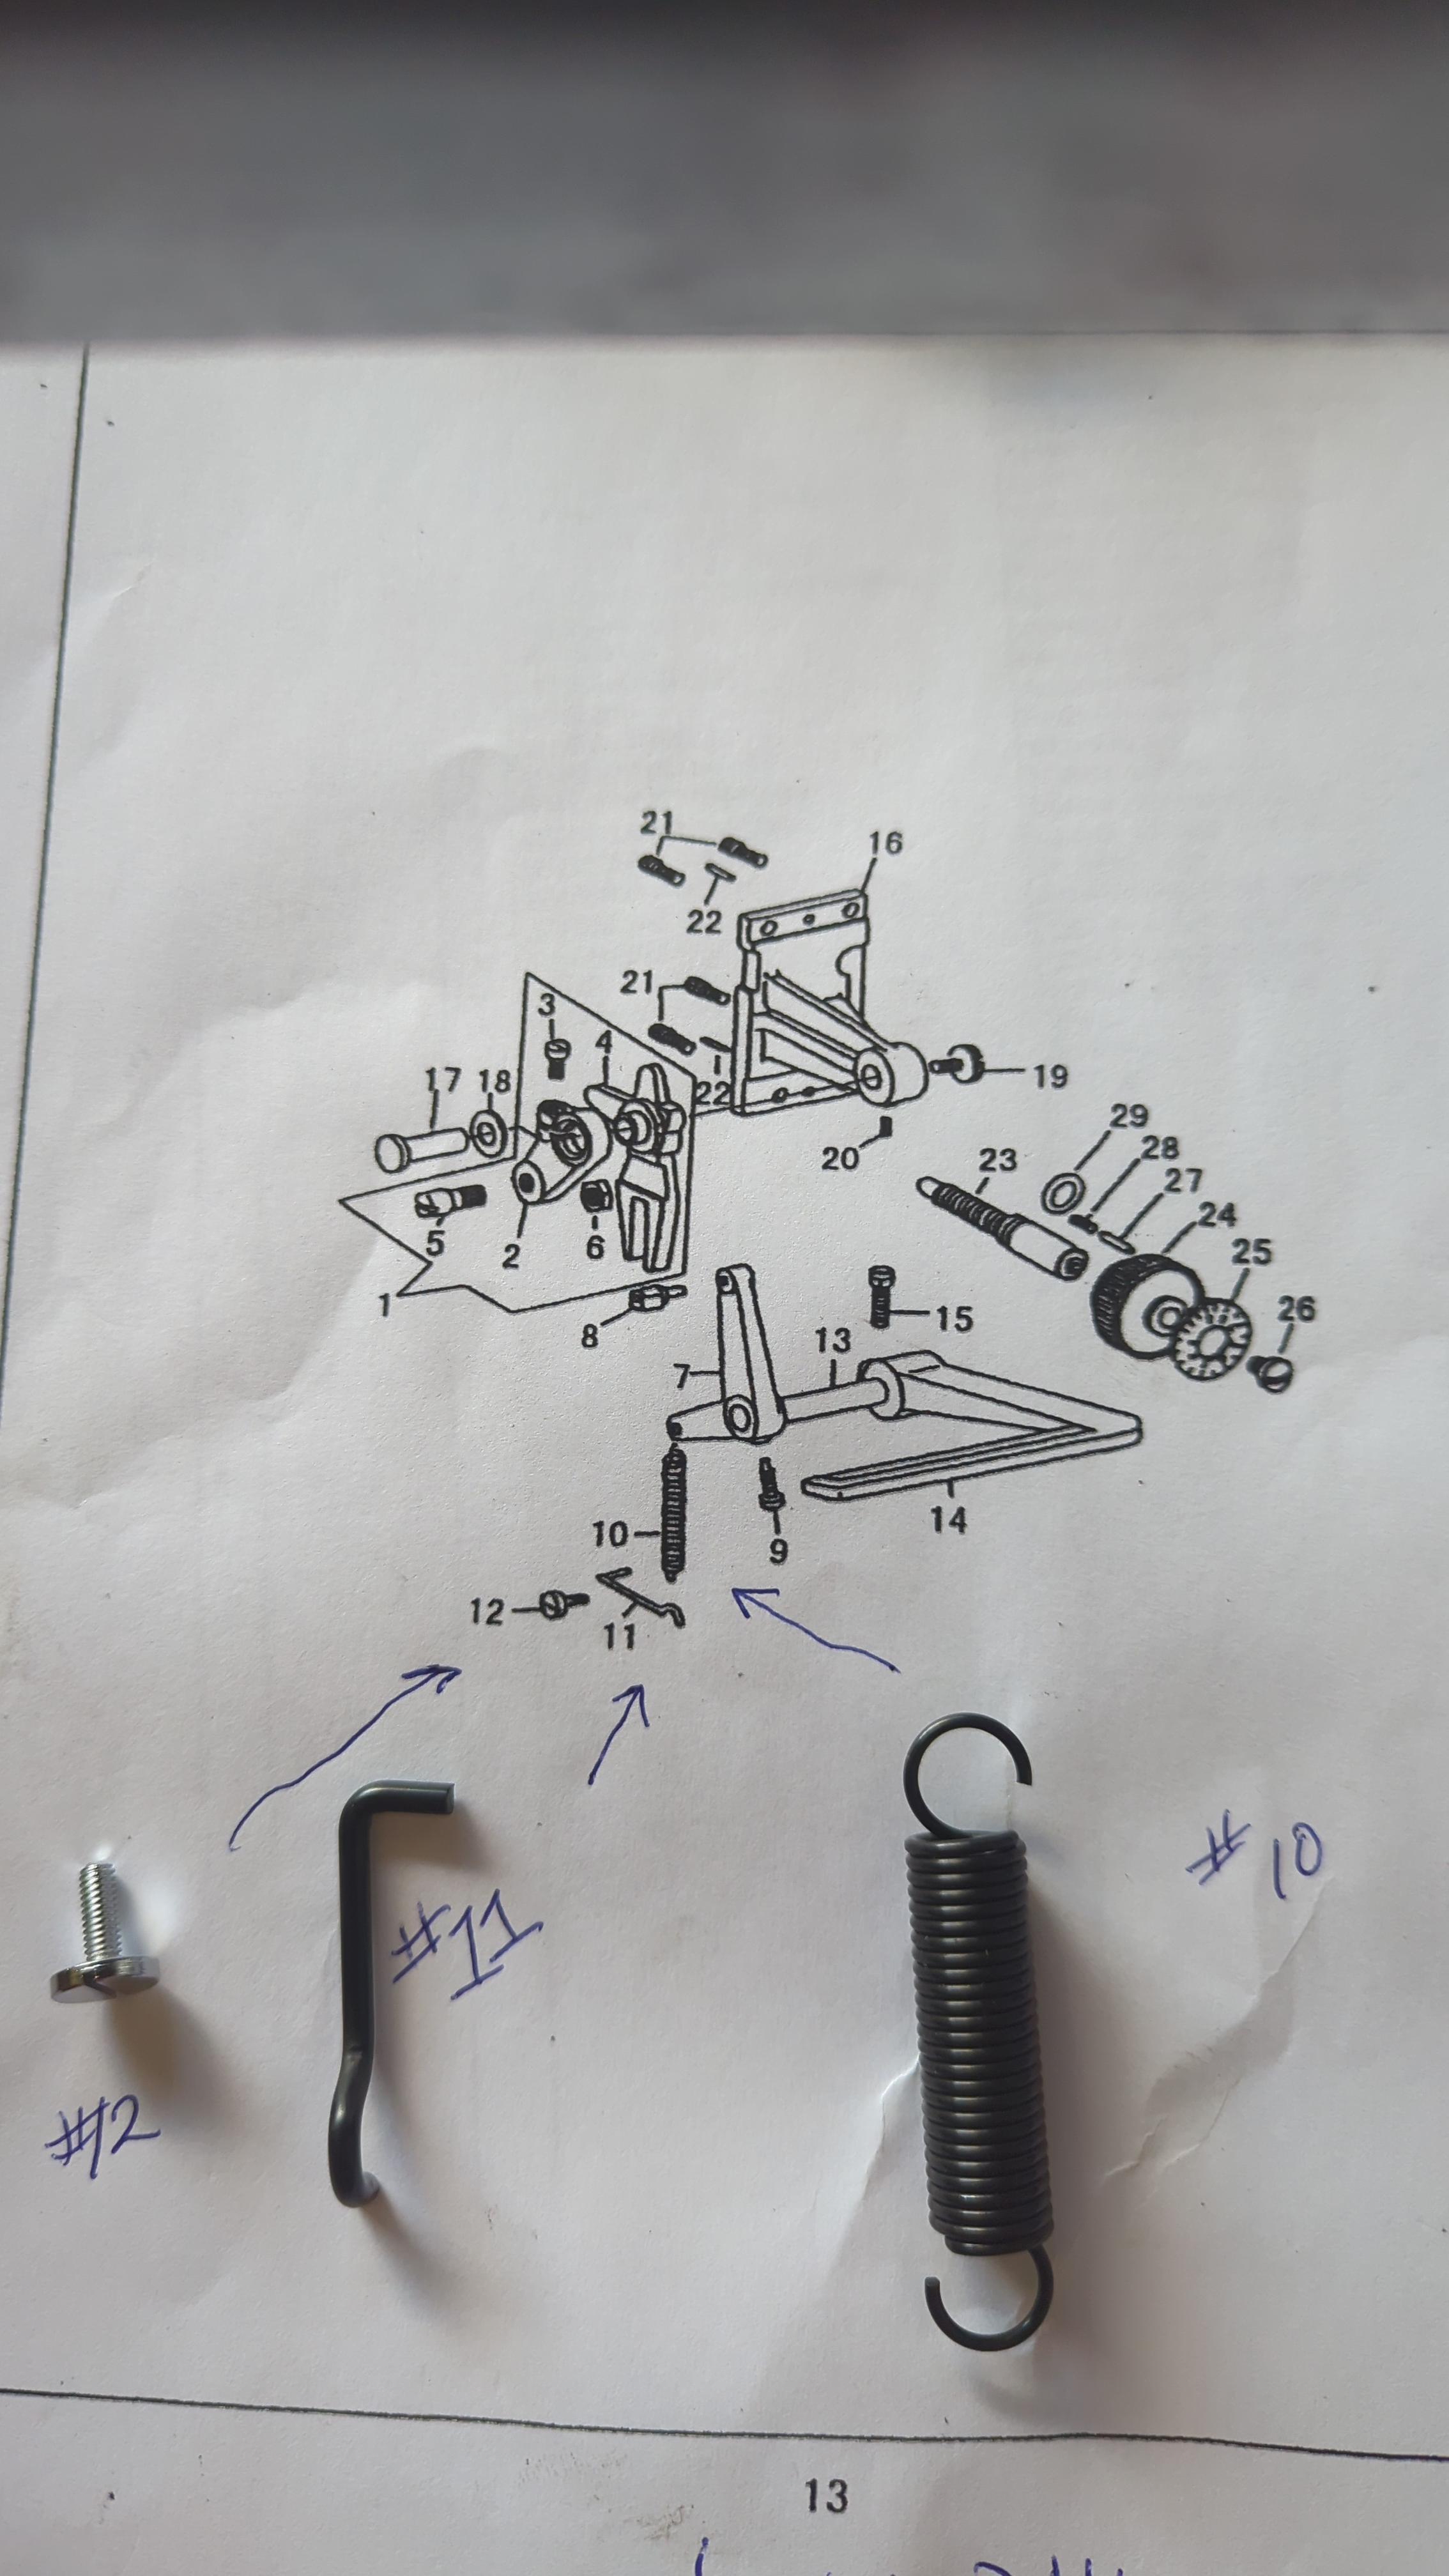
Here are some photos from underside of different machine that may give you an idea where to look. You may notice that my spring is disconnected (too stiff for me!) But that's the hanger that it was on. Yes that's how I'm interpreting the diagram. Notice the screw has a very wide head---that will allow it to hold the U-shaped wire (#11) in place.
-
.thumb.jpg.6e903dd66163ad5672f00f144058c571.jpg)
Sewing machine stitches slanted-CB4500
Northmount replied to Crest's topic in Leather Sewing Machines
This is a machine type question so I moved your post to Leather Sewing Machines. Perhaps you could add some more information. What needle type and size are you using? What thread size and type? A picture would help visualize what you are describing. The machine guys crystal balls haven't been working for several years, so they really need your help by providing adequate information. -
-
Thank you very much I'm going to check it out
-
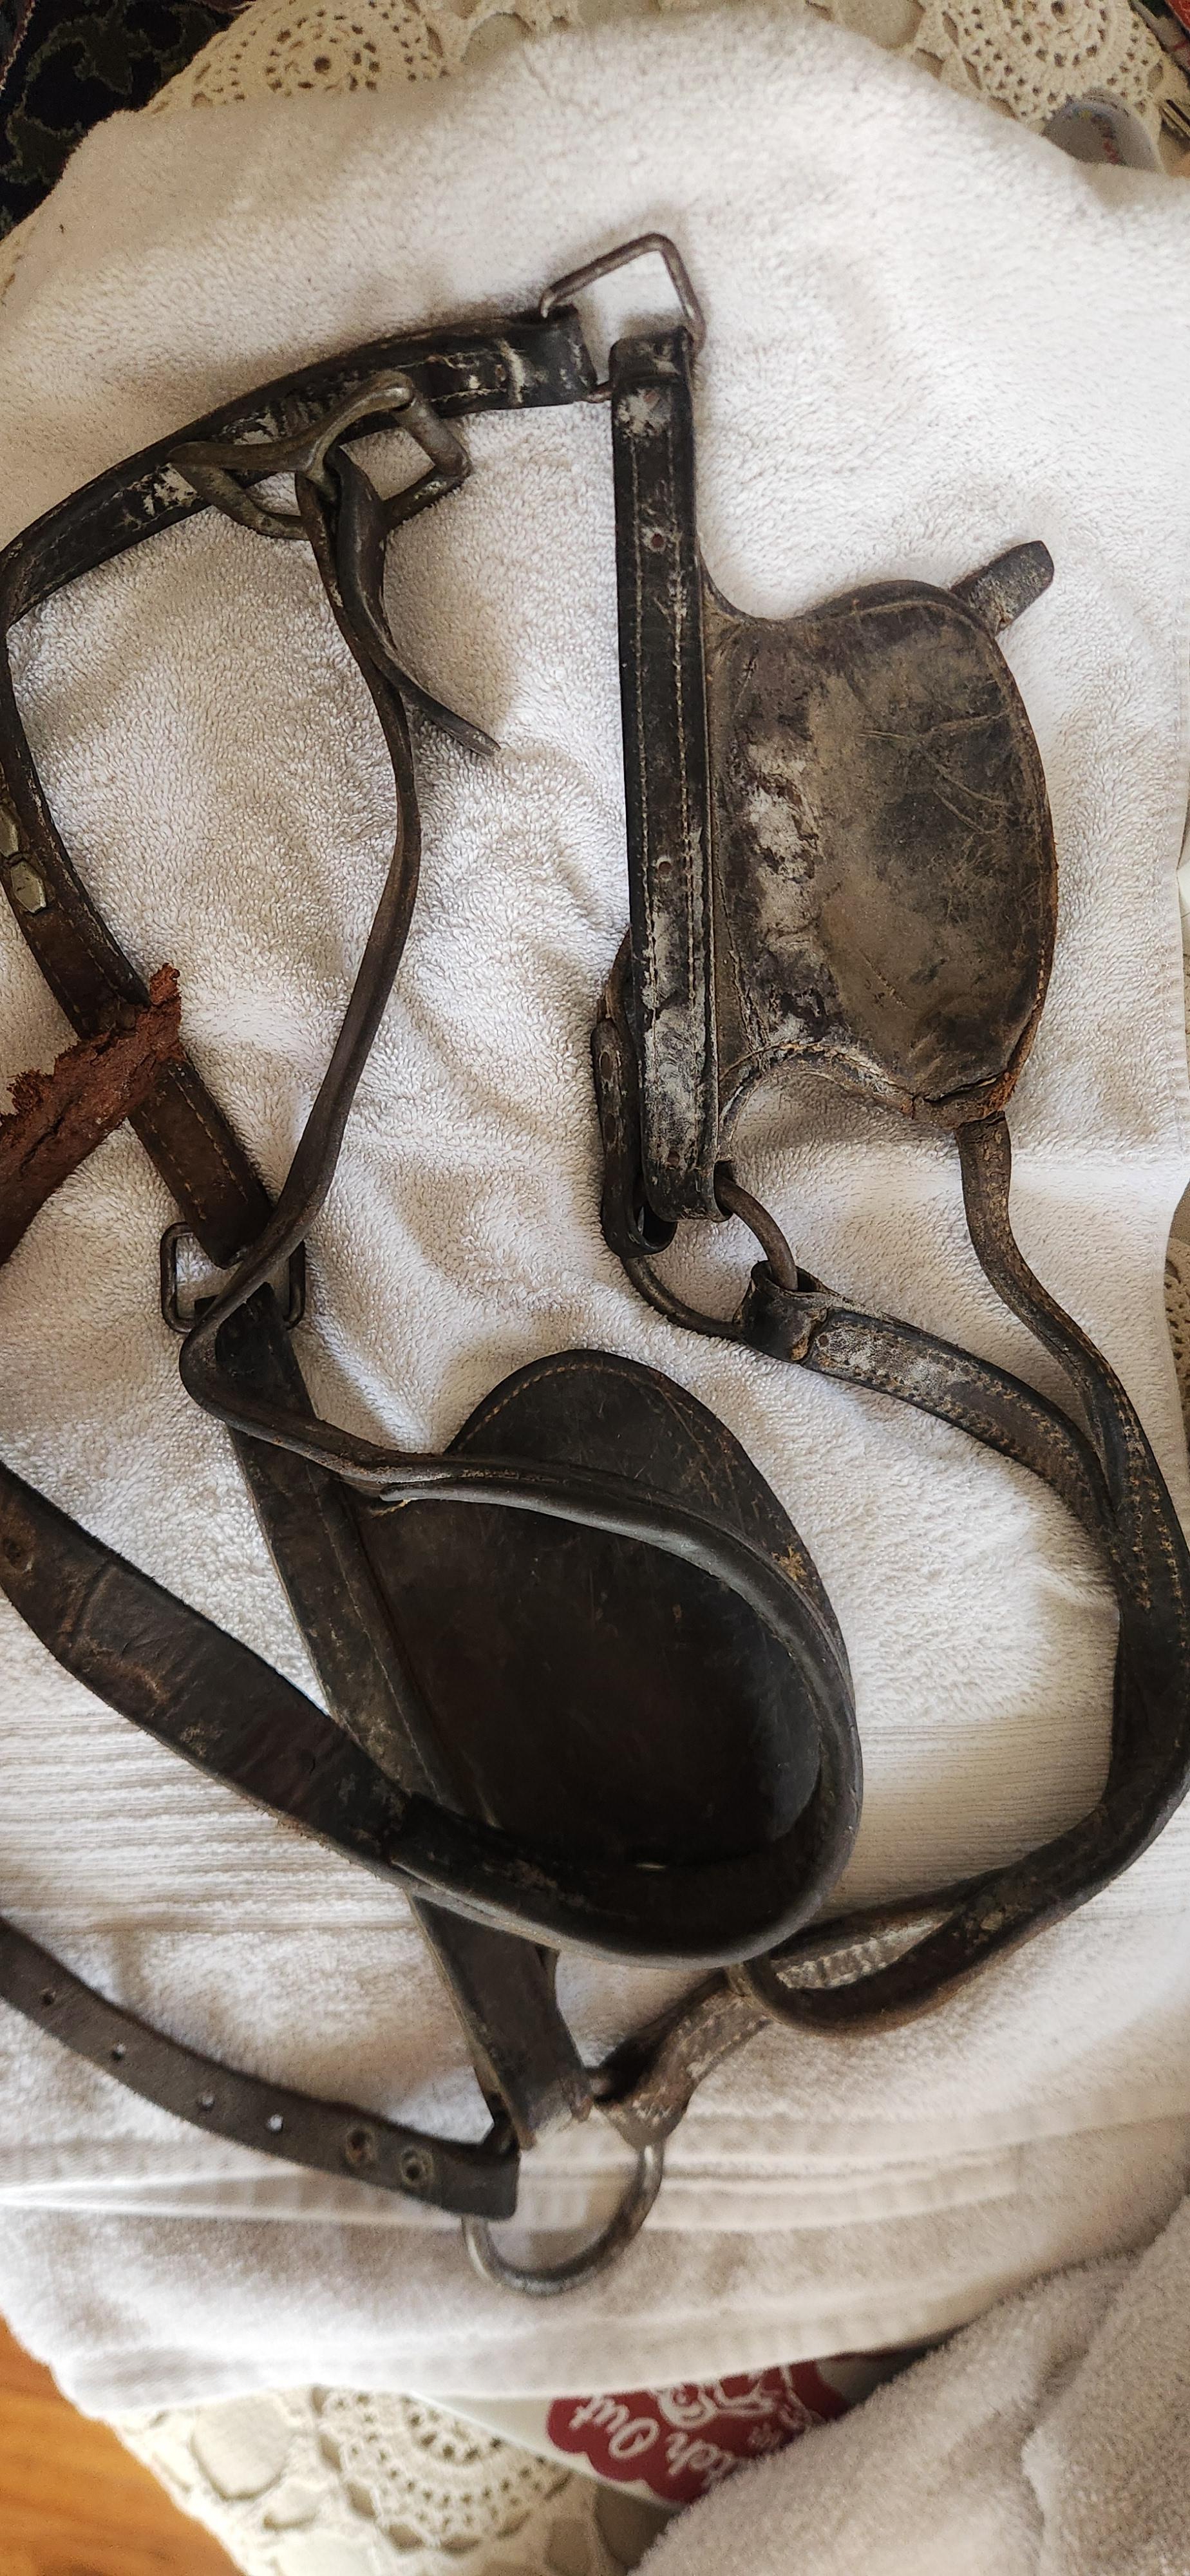
Good afternoon .I'm stuck with my consew 206 RBL 25 ..on the feed regulator I trying to install the reverse lever spring and the spring retainer. I can't seem to figure out where it goes . I think i know where the spring hangs from but can't find where retainer goes. Also is the screw #12 for the retainer ..the diagram for this is not to helpful for me .. I'm trying to do all this myself so I can learn and hopefully one day I I'll be the one who's answering the questions..and plus the closest repair shop is 4 hours away...so I'm sorry but you guys are are my only source of help...thank you for always being so willing to help . Here's a pic of what I've got.
-
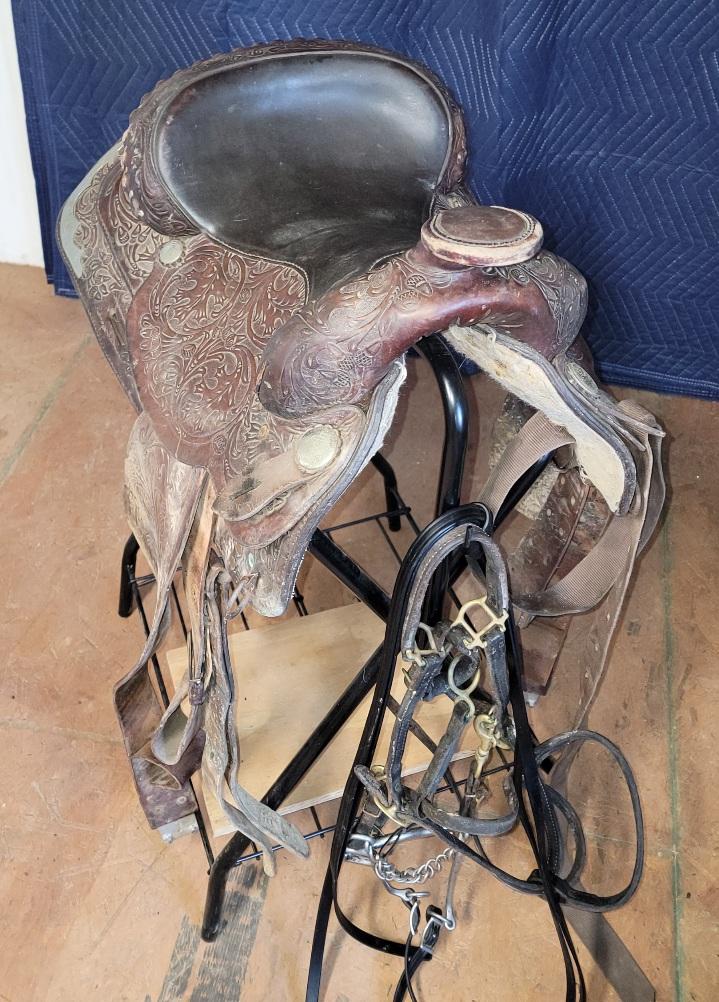
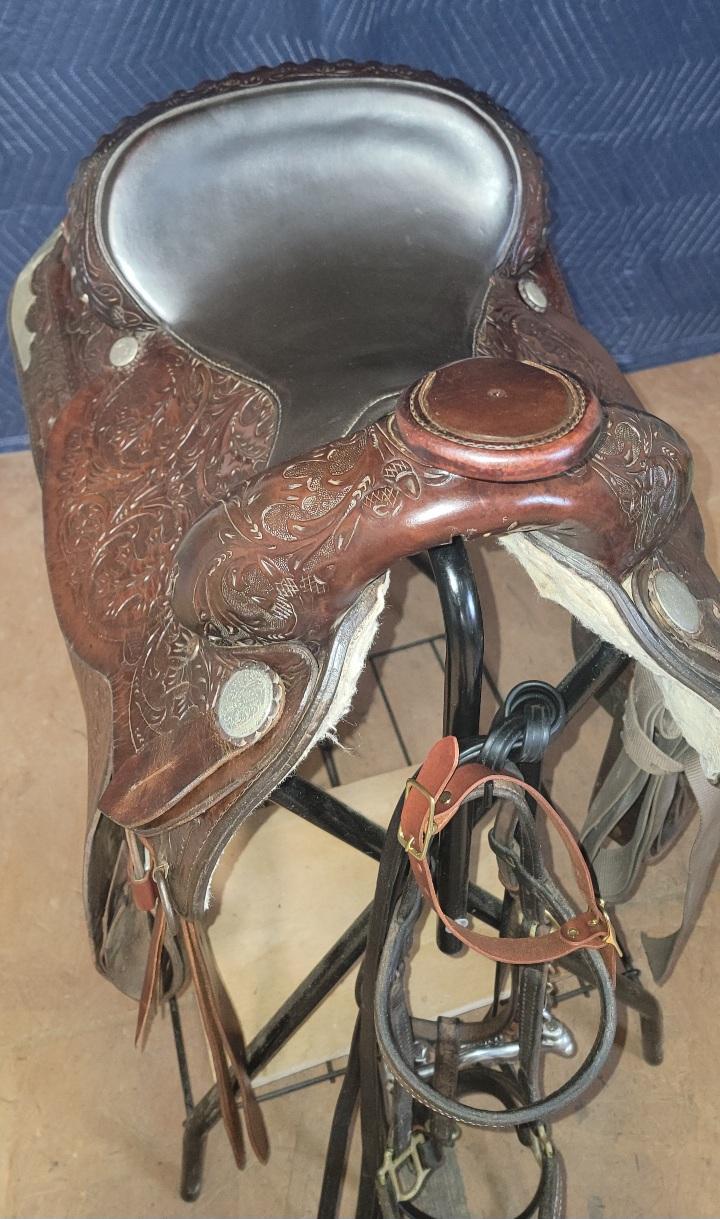
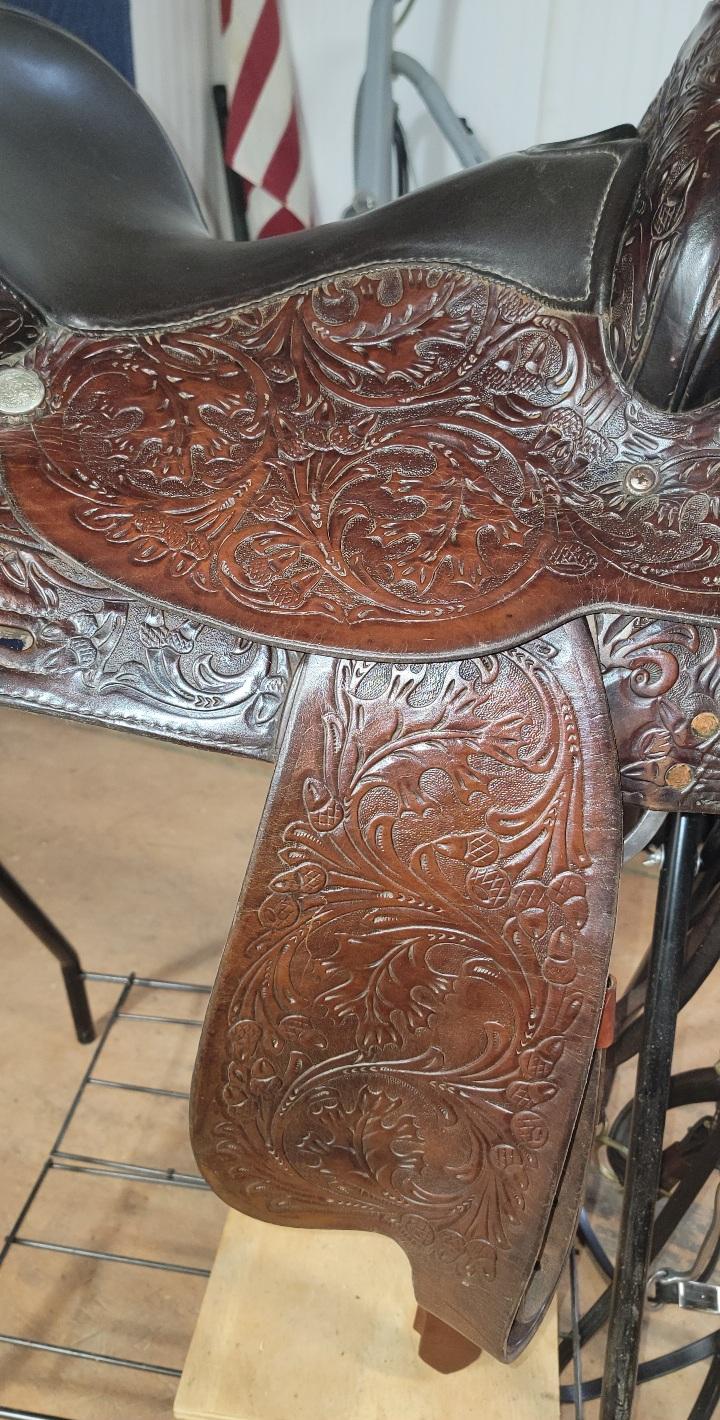
 If you want to remove the dirt and grime you can use warm water, saddle soap, and a sponge. Then wipe off the soap with warm water, let it dry thoroughly, then wipe some neatsfoot oil on all of it. If you add wax after the oil soaks in it will deepen the color and add a little protection. Leather, like your skin, needs to breathe to stay healthy so I don't recommend keeping it in a tote. If you do store it in a tote make sure it's completely dry because wet leather will mold. Most tack stays in a barn or tack room its entire life and as long as it's taken care of it can last decades. Your tack is 100 years old, it's seen heavy use and it's still around. If you're going to keep it on display in the house or tack room just wipe it down every year to remove dust and condition it.
 -
You will be stressing out the 563, which was built in the 1980s. It wasn't made to sew veg-tan. I had one around 1988 through 90 and found that it struggled to sew pancake holsters made of two pieces of 8 ounce veg-tan leather. If your projects will be in this thickness range, you're better off with a 441 clone, like a Cowboy cb4500. I have one and it will sew anything I shove under the feet, using the heaviest thread sizes, like 277, 346, or 415. It will also sew 10 ounce belts and straps, all day long, using #138 or 207 bonded thread. The bobbins are huge and cylindrical and hold enough #138 or #207 thread to sew several days worth of belts. The Cowboy can also handle Nomex thread. All of the take-up and tensioning parts are extra beefy and made of hard and polished steel. Nomex lists for about $200/pound. But, I've been able to find it on eBay for much more affordable prices.
-
Hello! I have a CB4500 and have been pleased with it overall but it stitches slanted. As I feed the leather through, I can’t feed it straight through. I have to feed it at a slightly slanted angle in order to stitch straight my stitch line. Has anyone had this issue and been able to fix it?
-
Pfaff 335 Sewing in Reverse, please help
friquant replied to Hickenbottom's topic in Leather Sewing Machines
I would check whether the feed eccentric on the main shaft is 180 degrees out. It's common for a manual to say "Adjust the feed eccentric so that there is no movement of the feed when you move the stitch length lever at bottom dead center." But there are two positions this is true for: A. The correct position that feeds forward, and B. 180 degrees from this. -
Been playing around with things all week. So frustrating when experiments take hours or overnight to dry to see if they worked or not. I think if I can make this work, I'll need to invest in a scissors dedicated to cutting leather and a decent awl. But, I'm hoping that, and maybe some goop to stiffen with, will be all that I need, for now. Found microwaving a bit of leather in a bowl of water, I think I tried 60 seconds, shrinks the leather and if quickly positioned over the form (bit of a wrestling trick with something so tiny) will dry pretty hard. But, I suspect there's no way to control the shrinkage or shaping too much. Didn't try less time though. Might play with it for another idea though. Dunking it in boiling water worked fairly well to hold the shape but wasn't really hard. though it did allow me to still sew through it. Those ideas seem fuddly, hard to be consistent and require hours of waiting time without knowing the outcome. I've been experimenting with ways to do it consistently and faster. Have an idea the works for shaping and is easy to duplicate, but, I'm back to how do I make it hard or at least stiff. The attached photo is where I'm at. It was definitely a duh moment when I realized how simple it could be. The tongue is a piece of felt. I can control the bend and size completely and make the upper and lower beak parts with slightly different shapes. Elmer's glue on the smooth side (is there a term for the "finished" side?) seems to add a bit of durability but only marginal stiffness. Elmer's on the rough/suede side adds a bit more stiffness and darkens the suede. I could live with the darkening or just add a bit of paint to the glue I suppose. Would I be able to paint Resolene, or something else, on and use that to stiffen it better than the glue? Or would the Resolene not do much more than the glue is doing? Leather in image hasn't been treated with anything yet.

-
 Thank you! I just want to save them so they don't fall apart, and I would be devastated if I did that while cleaning them.. For wiping it down, would you say just use some warm water and a sponge? And then add the neatsfoot oil lightly to just the cracking areas or the entire thing? For the parts that are severely degraded, is there anything you would recommend? Also, for storage purposes, where would be the best place to keep these? I live in CO, and we have such a variety of weather, so I thought in the house, but didn't know if they should stay in the plastic tote.
 -
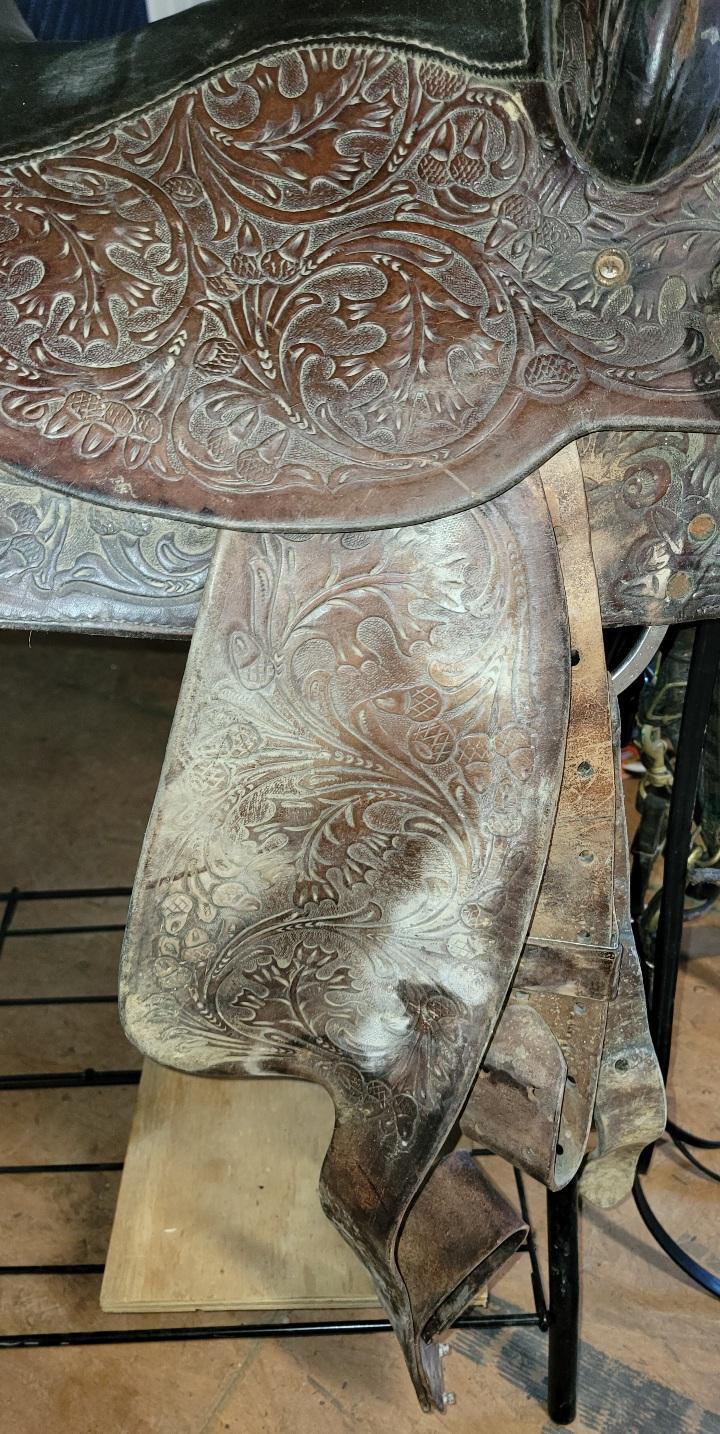
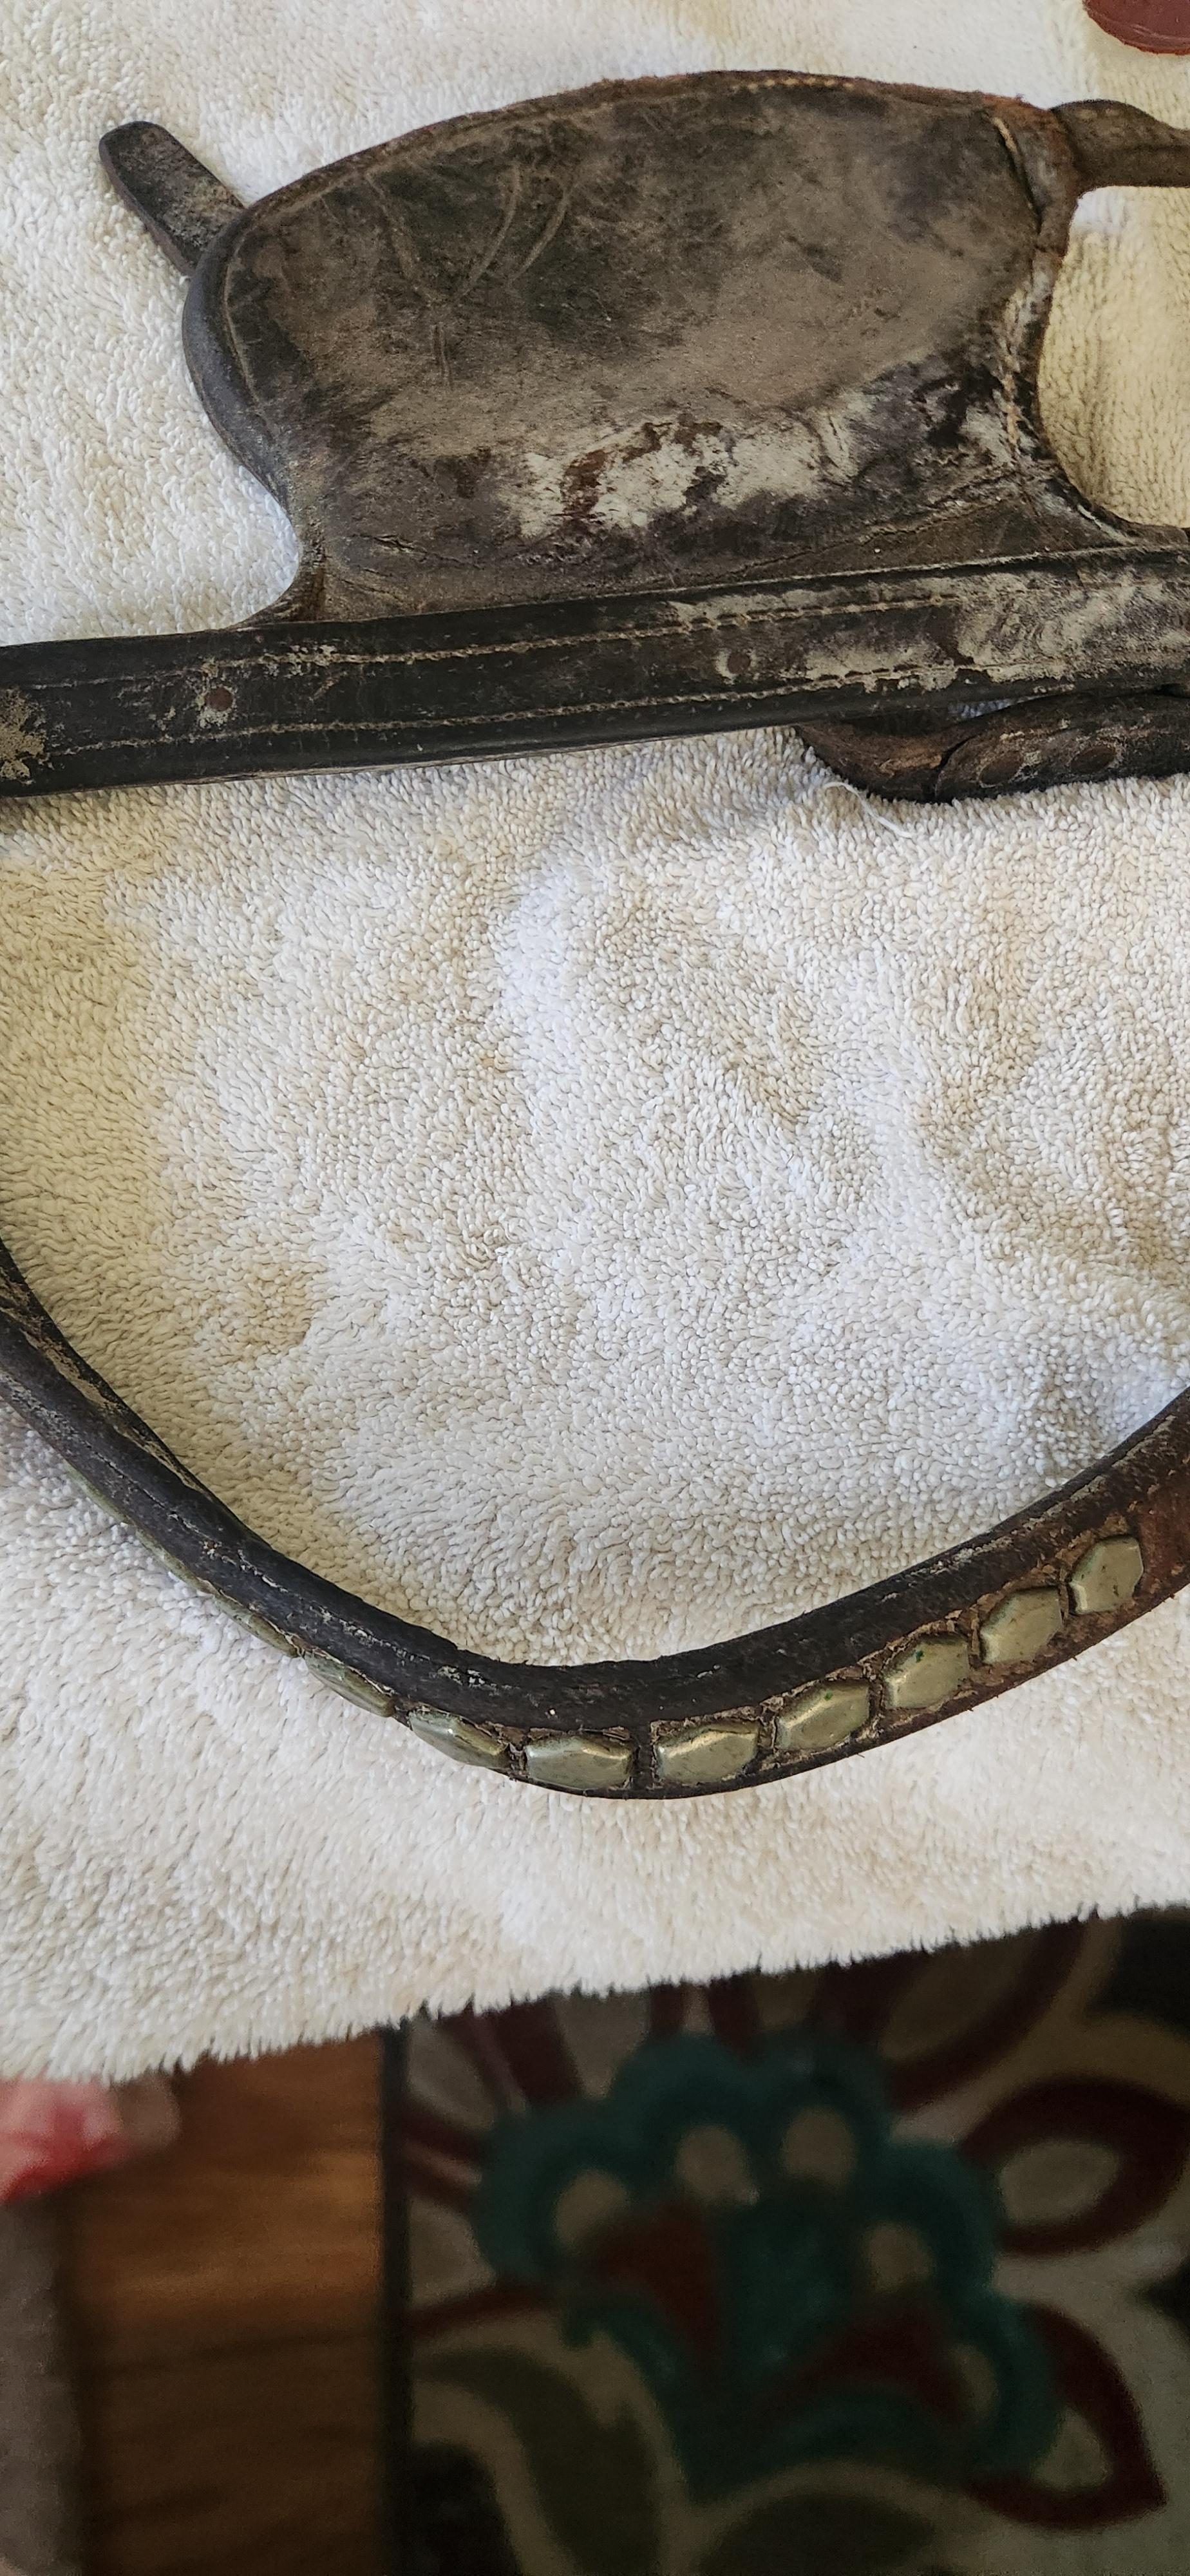
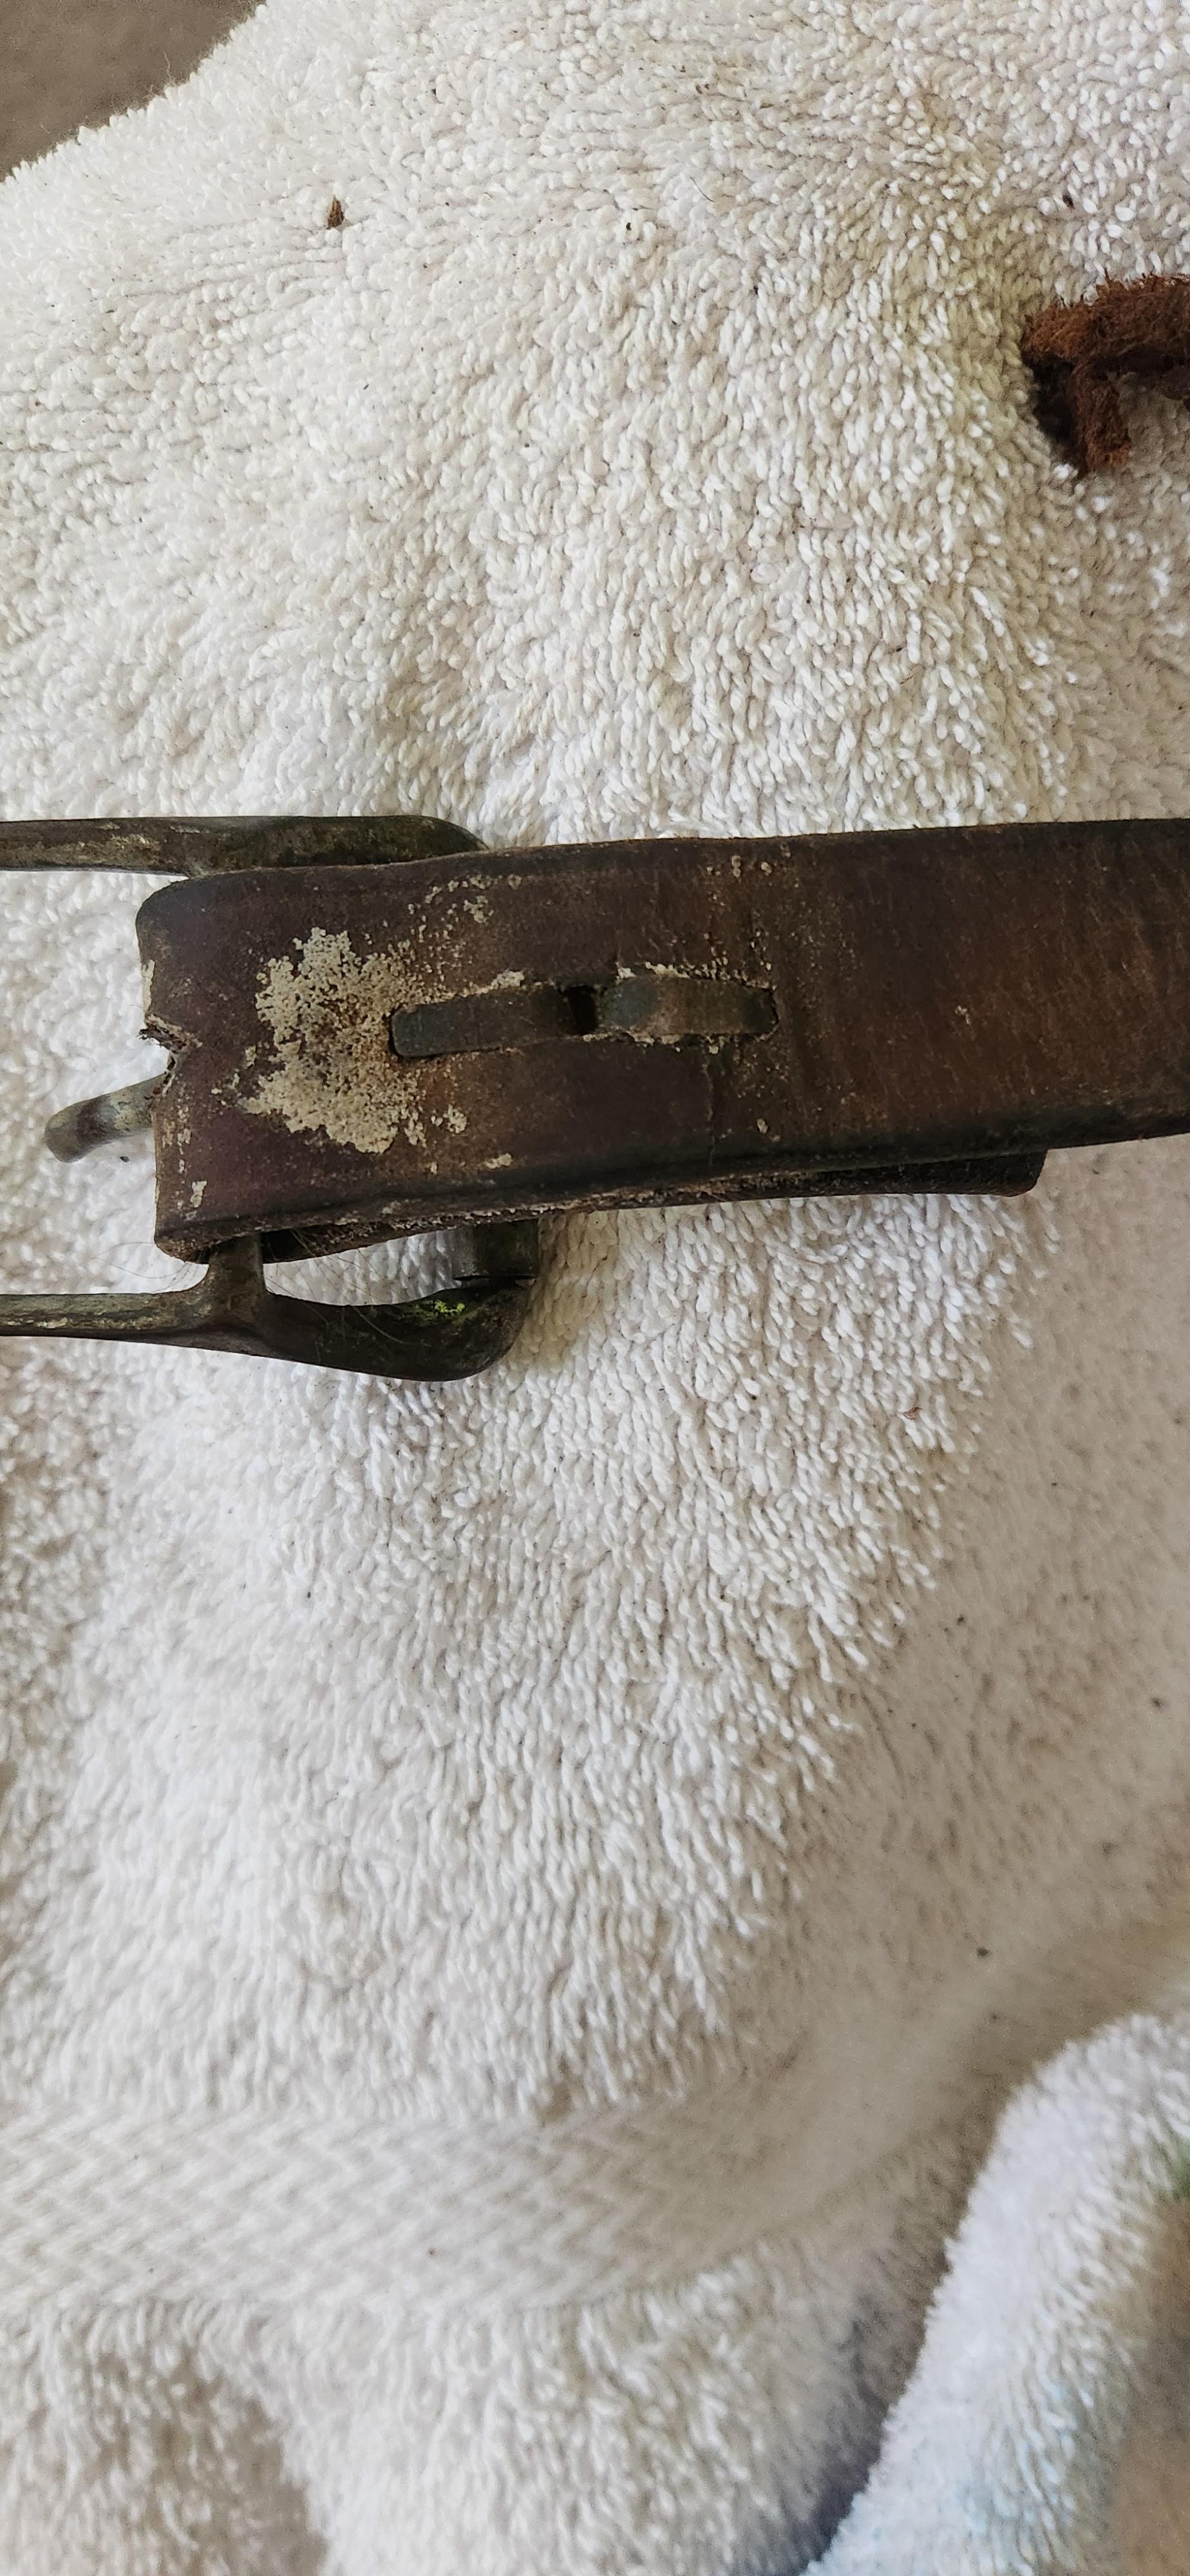
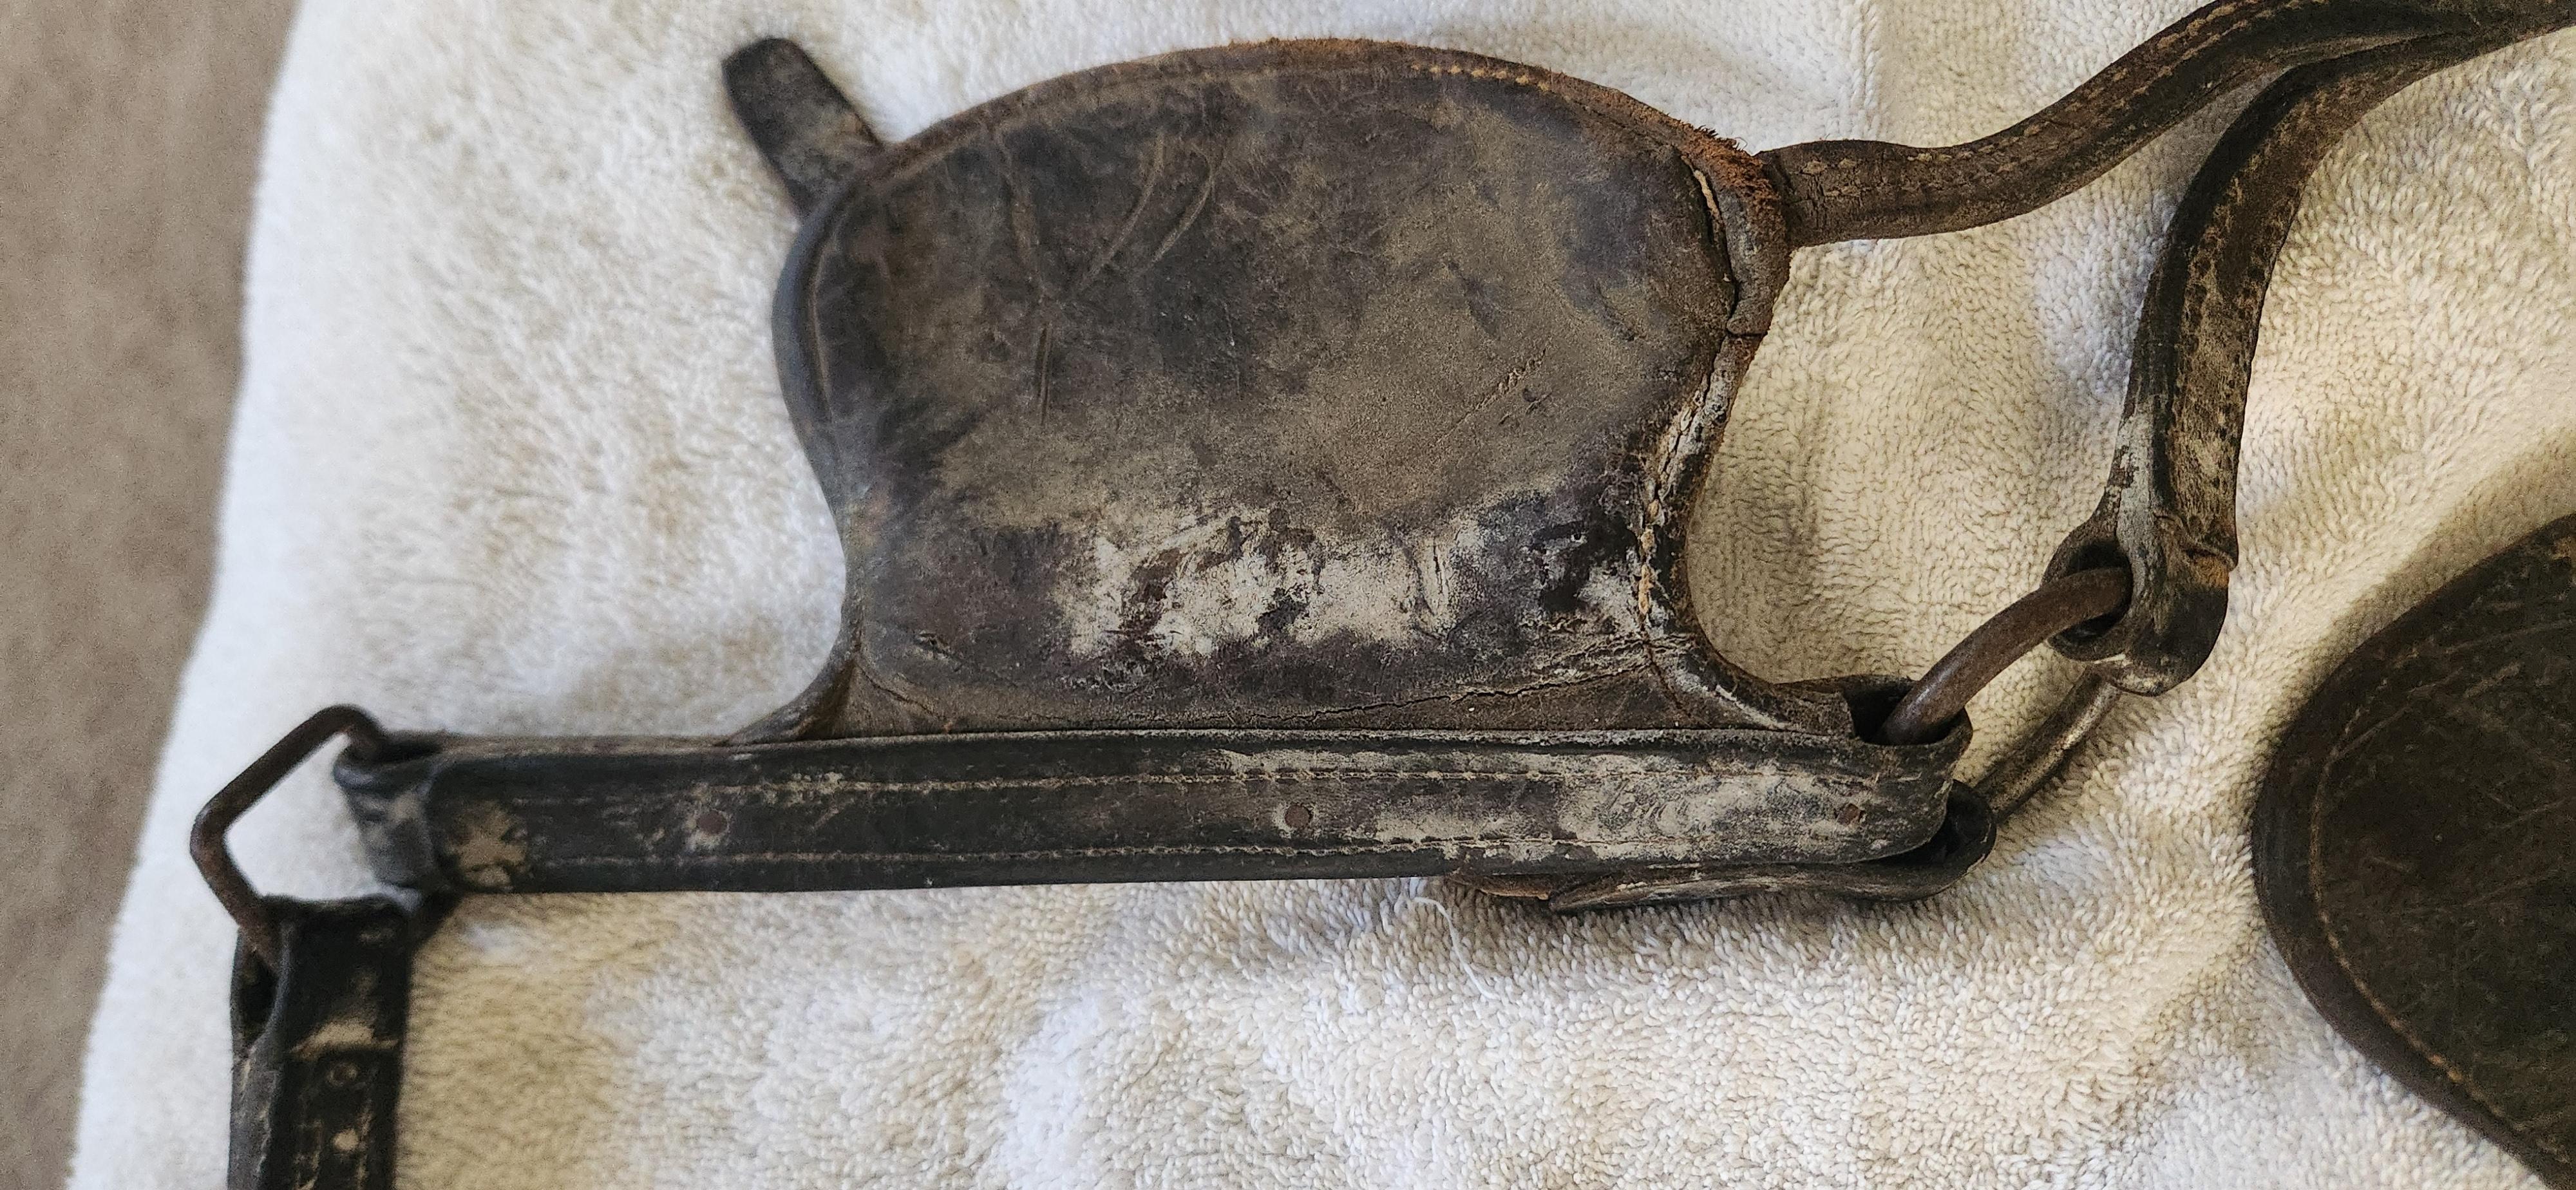
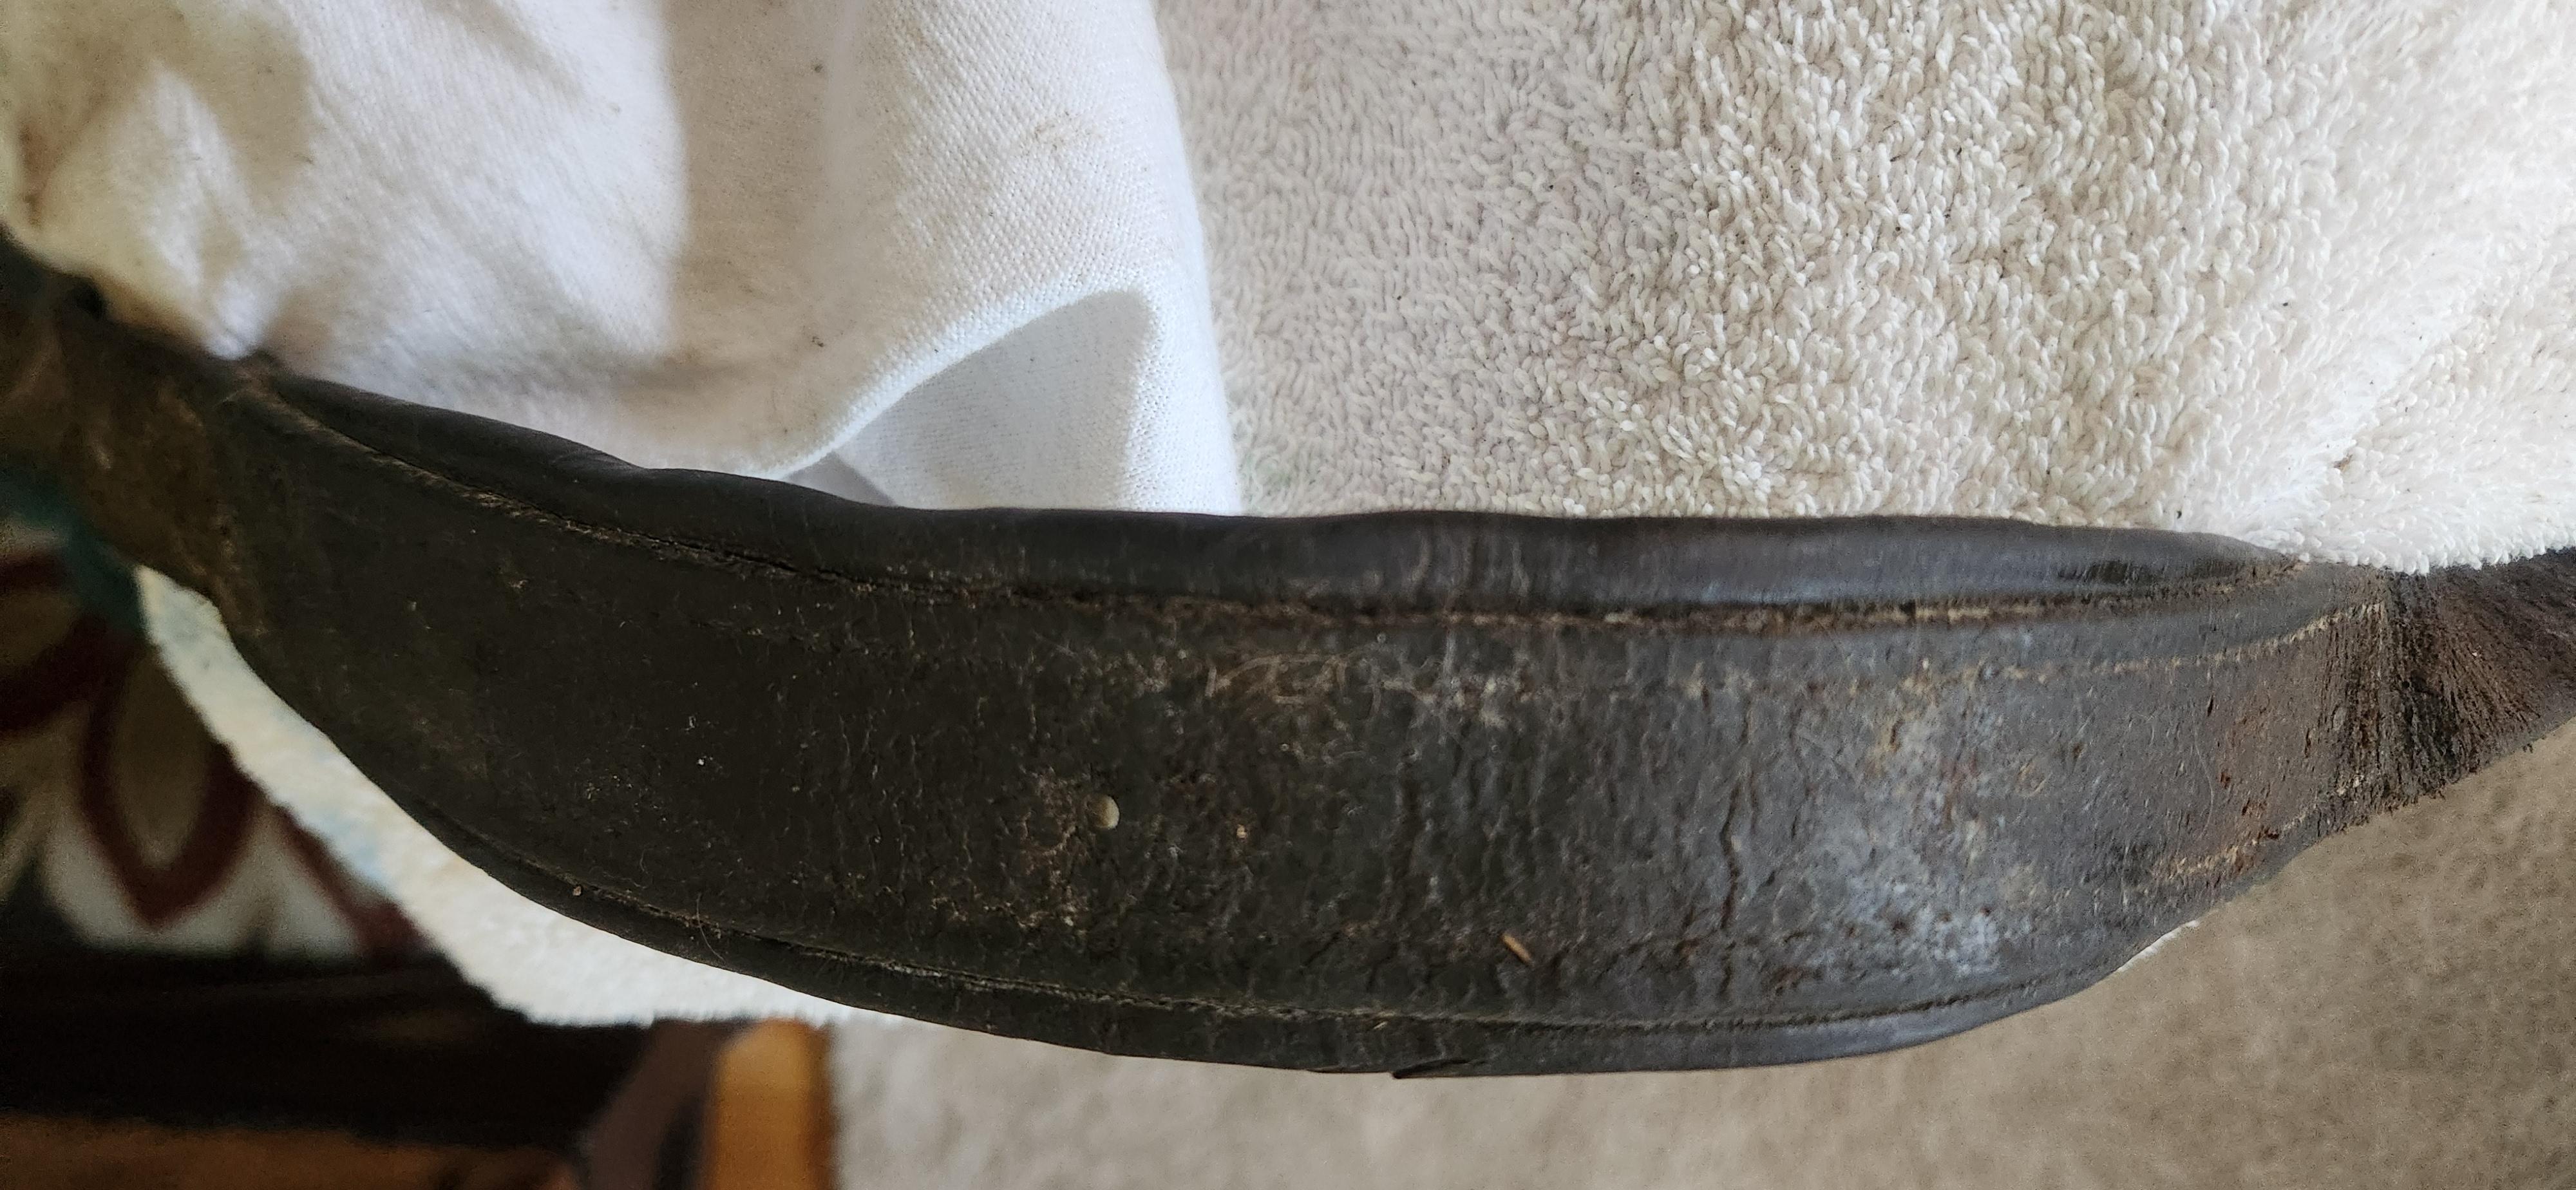
The white looks like mineral deposits from sweat. The brown can be dirt or the leather is deteriorating. Since you're retiring the equipment you can wet it and lightly scrape the mineral deposits off. There is quite a bit of cracking, that cracking means the leather is failing and in pic #3 on the left side that degradation is pretty severe. I wouldn't get to deep into cleaning since it's only going to be for display. The deposits just attest to the life and use of the gear. I would just brush it off, wipe it down with a damp rag, let it dry, and add a little oil to preserve it.
-
 Hina Heritage Handicrafts joined the community
 -
I sew that weight with a Consew 225, which is the same class, does so with difficulty and a speed reducer. Would not do well without reducer.
-
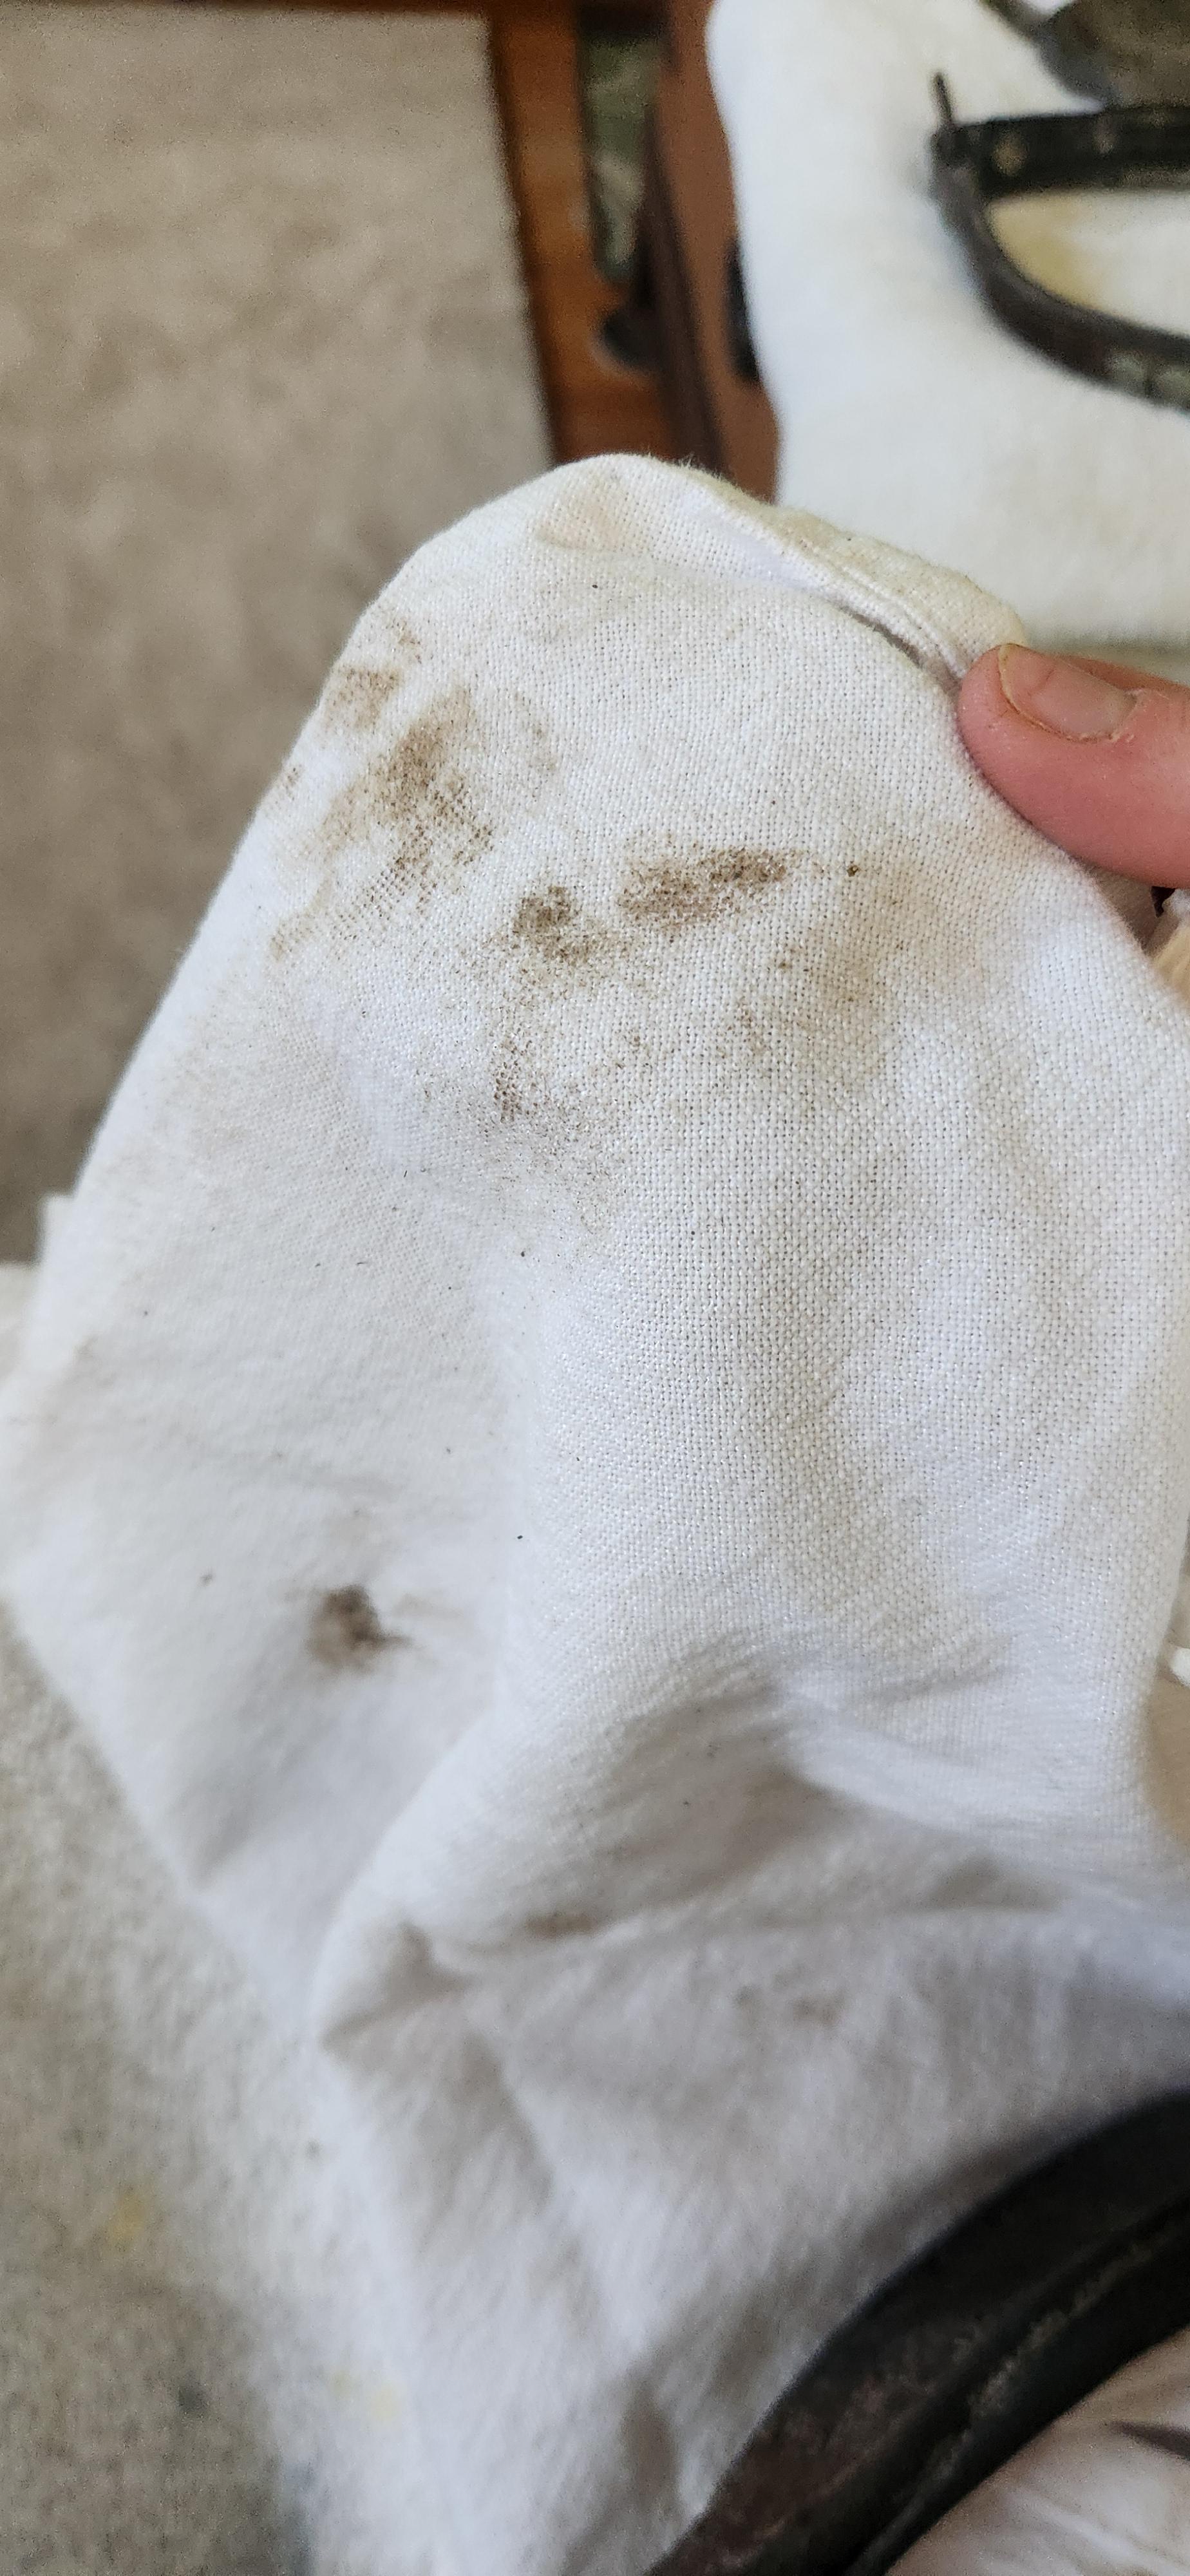
Hi thank you so much! It wouldn't let me add photos but I have attached ones in this reply. The last photo is the test photo and I also included the brown that was coming off as well as my products I'm using. There's still horse hair and hay from the last time they were used and so I don't know if I'm taking off leather or dirt. Thank you for your help!

-
That means your table is too pretty. Make it work!
-
Hi! They will definitely not be used, they are now soley for display! So sorry I should've mentioned that.
-
I forget where I saw it... During training at Juki Miami maybe? But they looped one arm through the machine and gripped the handwheel with the other hand. This is how I generally do it, it helps if you wipe it down thoroughly for any oil up top because even a little bit will make this job much harder. It occurs to me that gripping the handwheel is not going to be as useful if the handwheel is large (the DDL-8700 is small enough to be fully gripped) but anyway, looping an arm through the machine is the main support.
-
I think this thickness is too difficult for the 563. You’ll need a 244 or 246 to handle it.
-
 Mad Mongo joined the community
 -
Yeah, that's exactly the guy in going to call ...
-
 @cowagonwheel I would ad a caution that leather harness that old with unknown care should most likely be retired for display only. Really bad things can happen really fast if harness gives way while pulling a load. You didn't say if you were cleaning for use or display so I thought I would throw this out there. Todd
 -
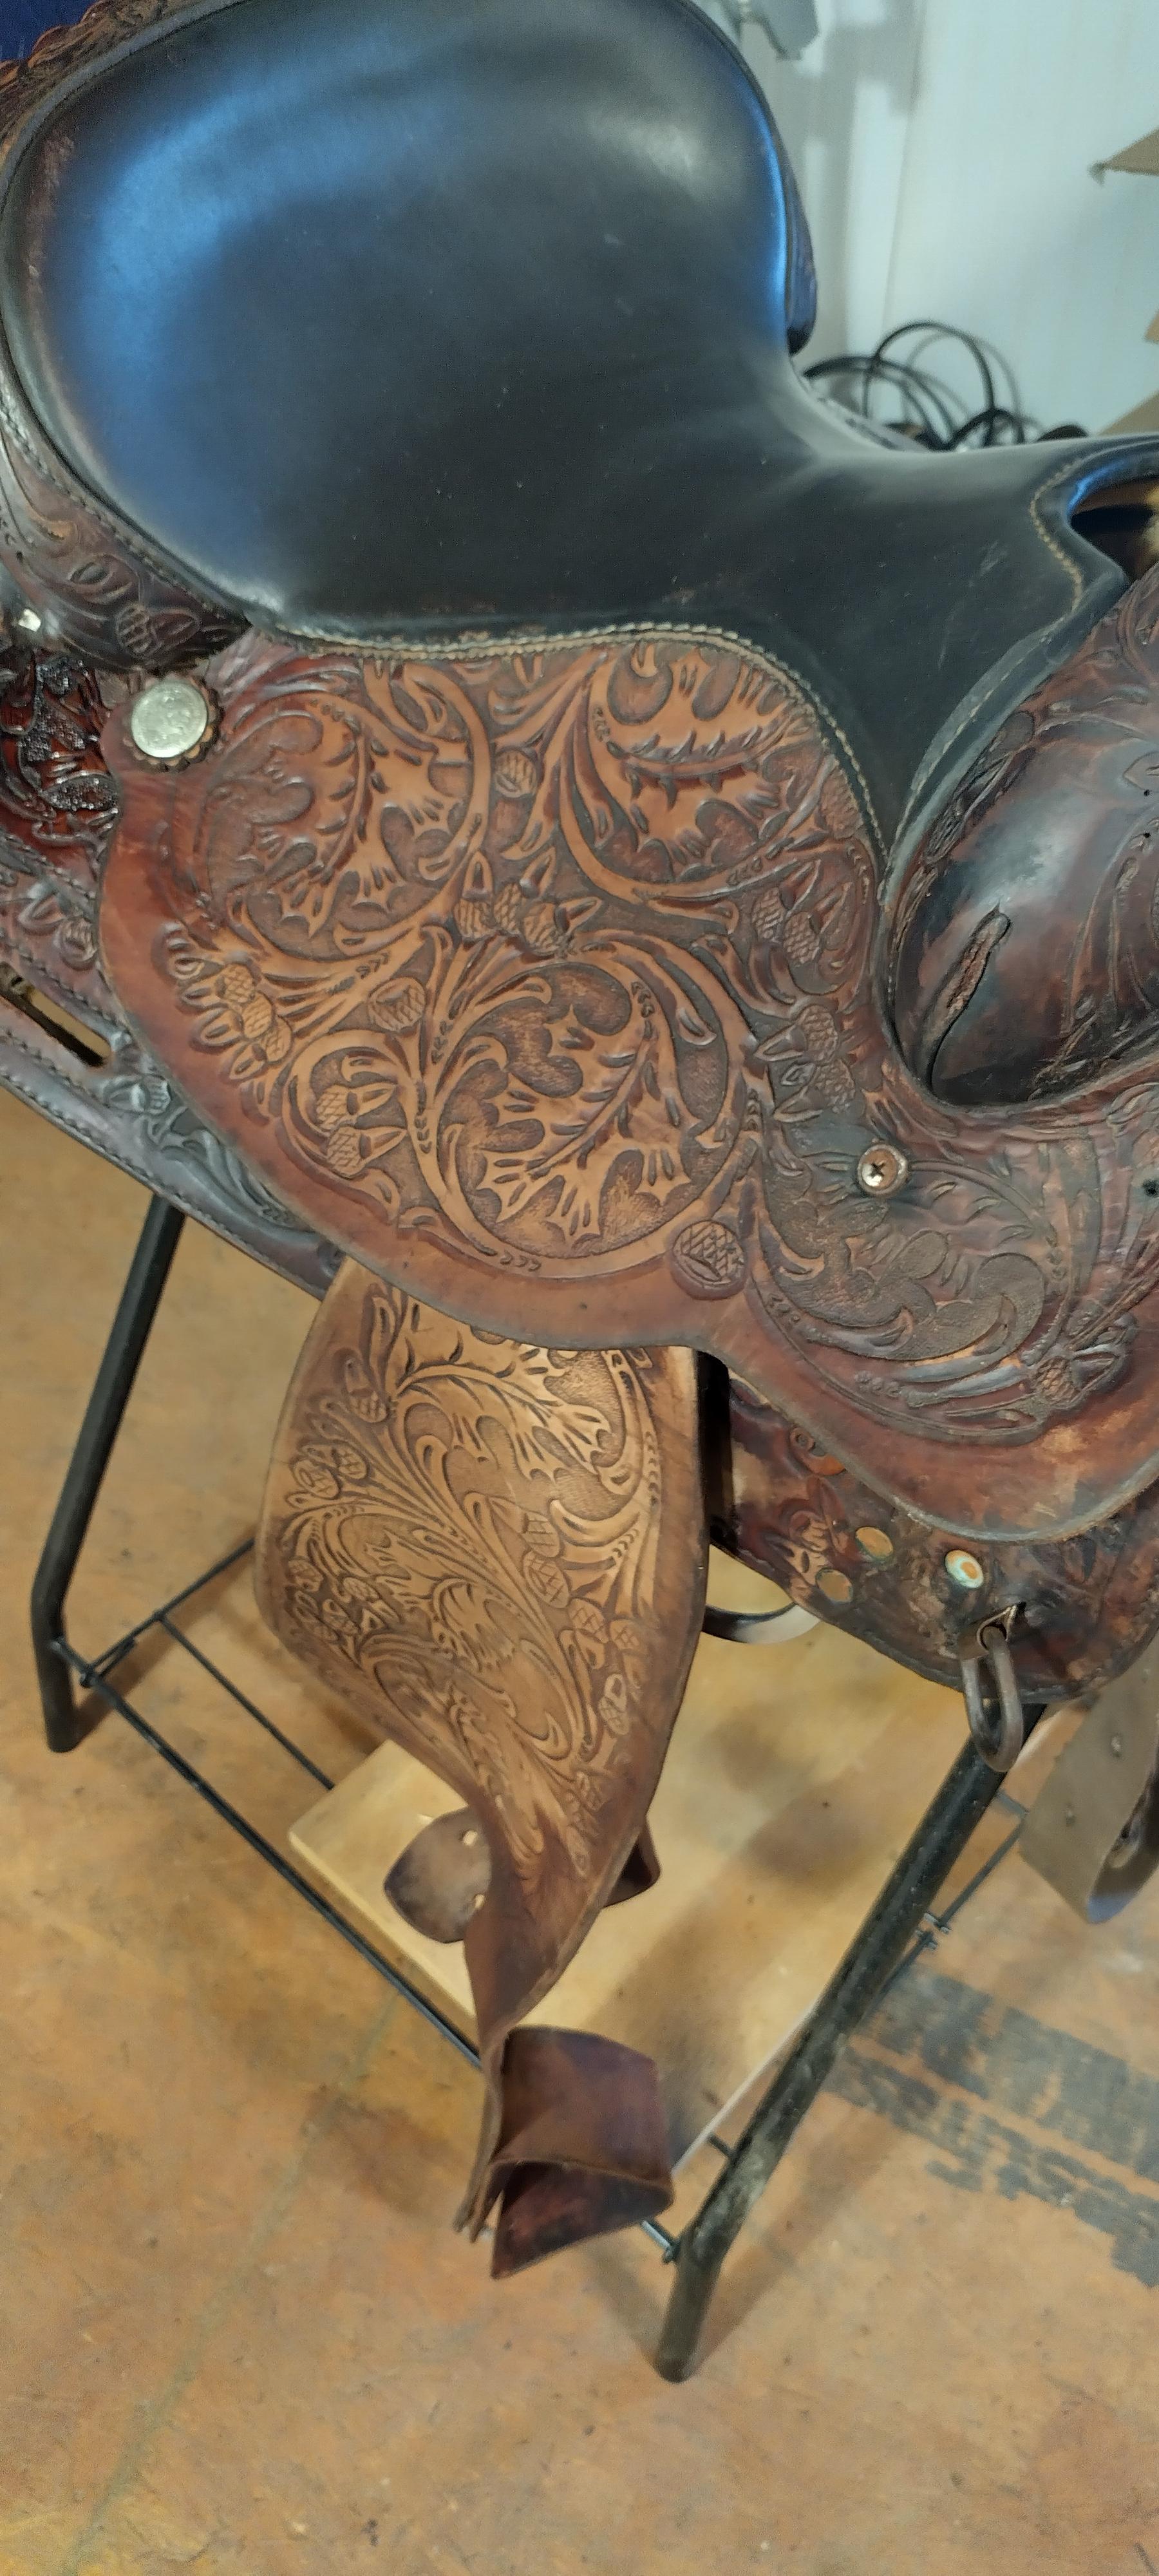
It's hard to determine what the white is without pictures. It could be mold, sweat, dirt, wax, or some type of chemical. When washing down saddlery it's common for the dye to rub off. Leather becomes soft when wet and can be indented easily, let it dry completely before putting unnecessary pressure. First thing I do when a saddle comes to my shop is to brush as much of the dirt and grime I can. As I'm cleaning I start determining what needs to be replaced or repaired. I can do small repairs and replacement but if the saddle needs to be broken down I don't take on the job. Normally I remove the stirrups completely but these would not come out and if they were going to be this difficult removing they were going to be harder to get back in. I then start to wipe it down with warm water to get any mud off as well as softening any waxes. I then go at it with saddle soap, warm water, and a sponge or toothbrush. I wipe it down with warm water as I go so the soap doesn't dry on the saddle. Once I'm satisfied with how clean the saddle is I let it dry for at least a day. Then I oil it with neatsfoot oil and let the oils soak in for about a day. At this point I determine whether or not to add some dye if to much dye came off while washing it and let it dry. I then wax. I use Fiebing's Leather balm with atomic wax and get great results. Before After washing and letting it dry After