


friquant
-
Posts
518 -
Joined
-
Last visited
Content Type
Profiles
Forums
Events
Blogs
Gallery
Store
Everything posted by friquant
-
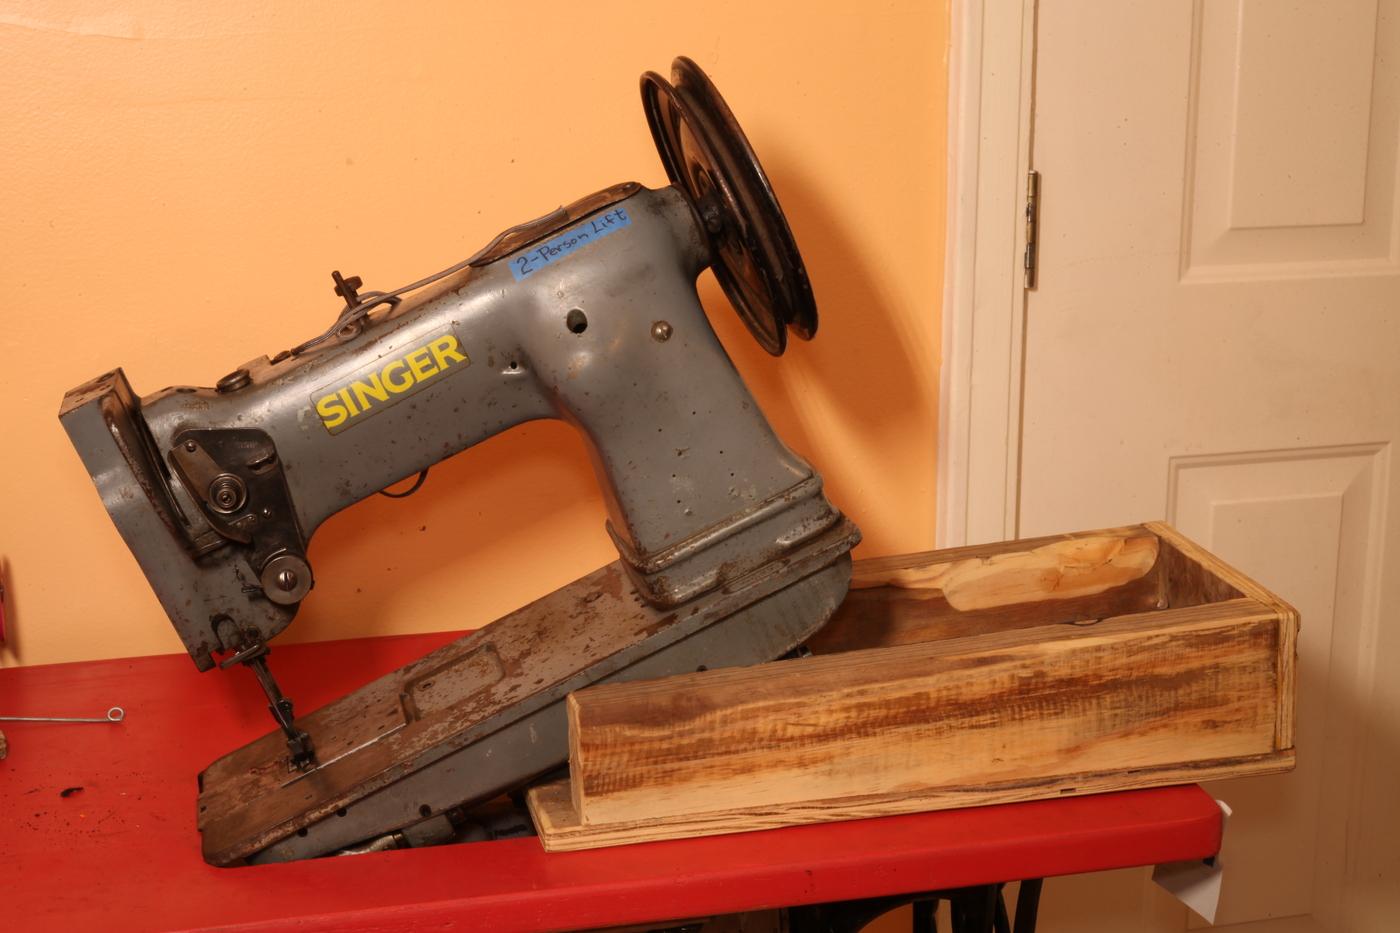
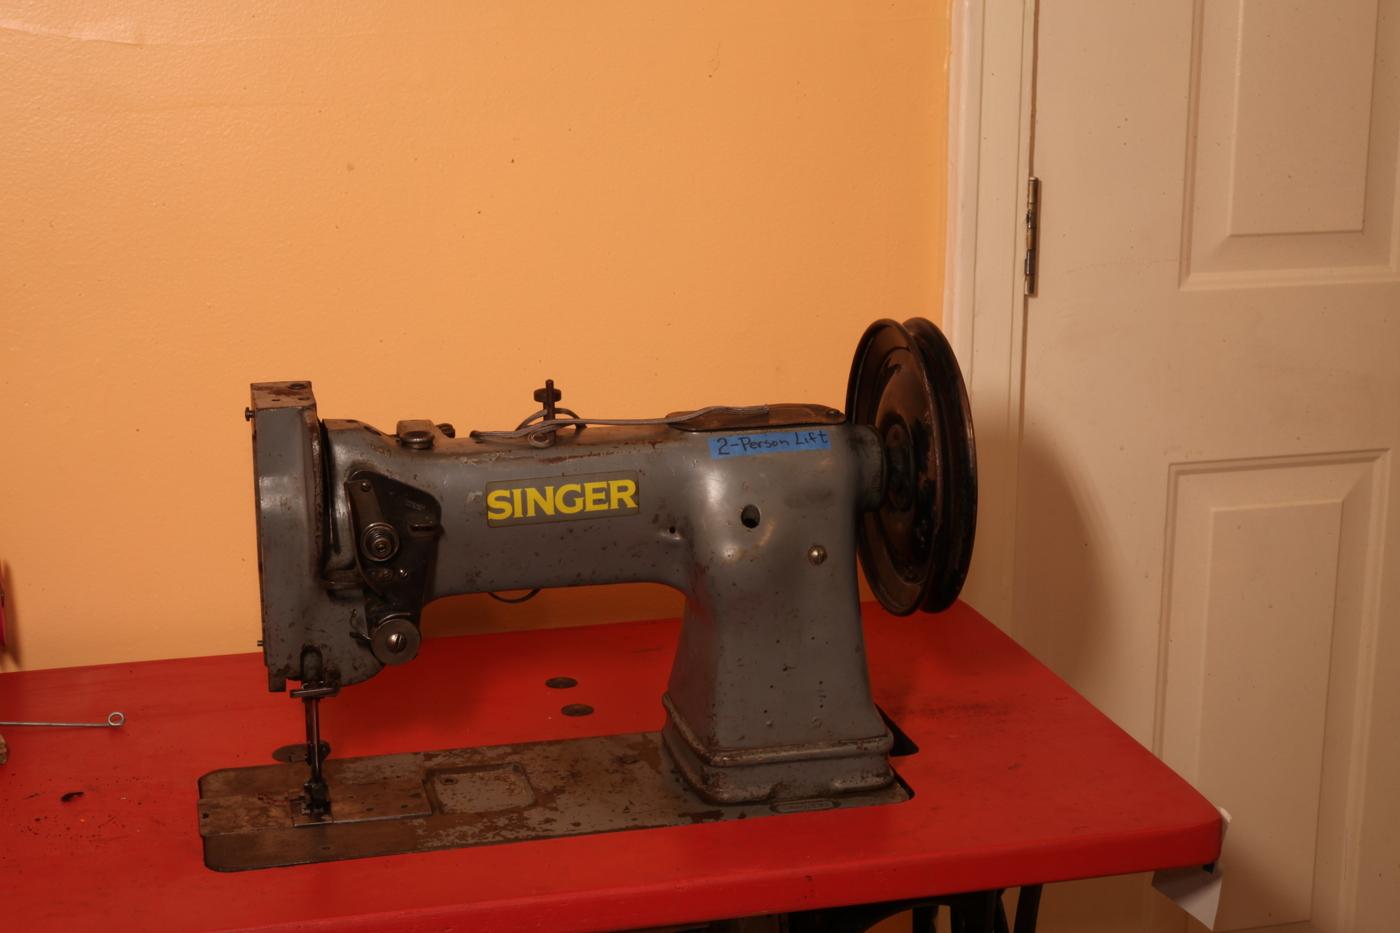
One-piece casting: sturdy!
-
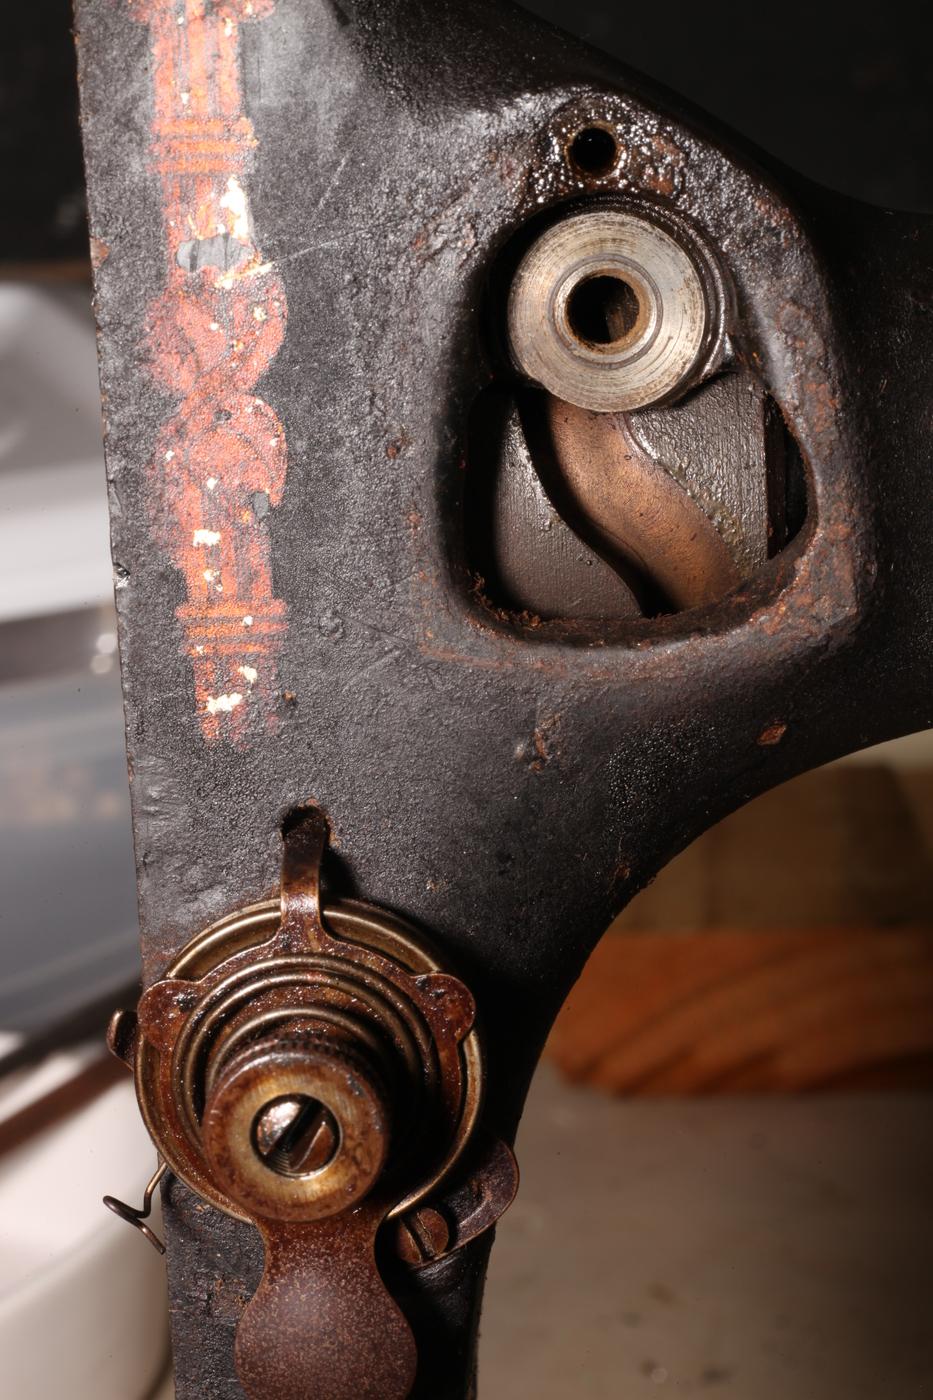
It does look that way in the photo, but I've checked and those holes go all the way to the shaft. (A bit of lint in the bottom of the holes casting shadows). Are there parts manuals for these old machines? All I've seen is the user manual: https://ismacs.net/singer_sewing_machine_company/manuals/singer-model-27-number-2-vibrating-shuttle-sewing-machine-manual.pdf which does have somewhat of a drawing
-
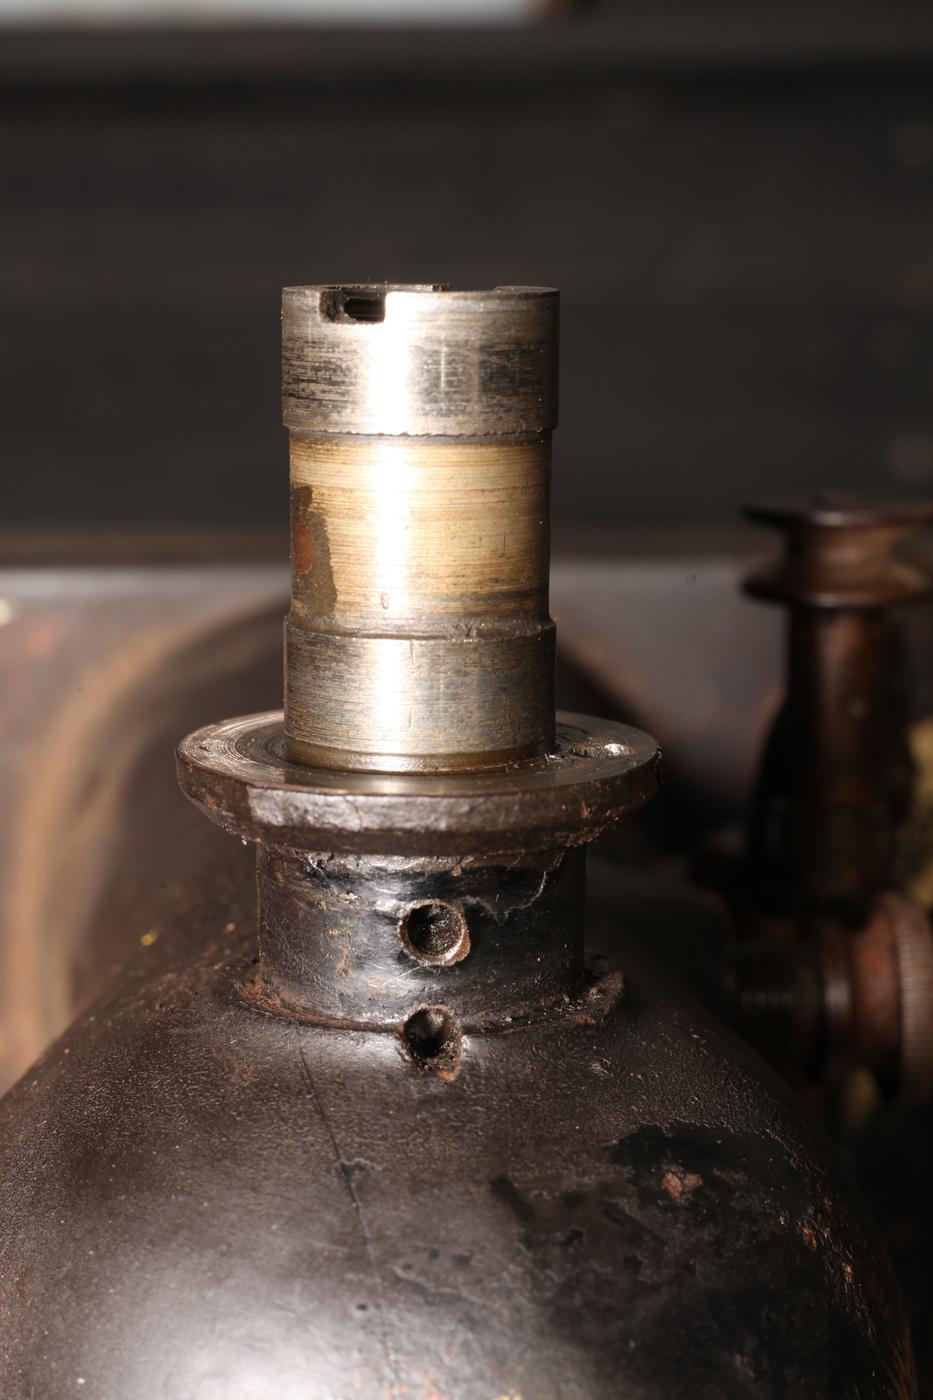
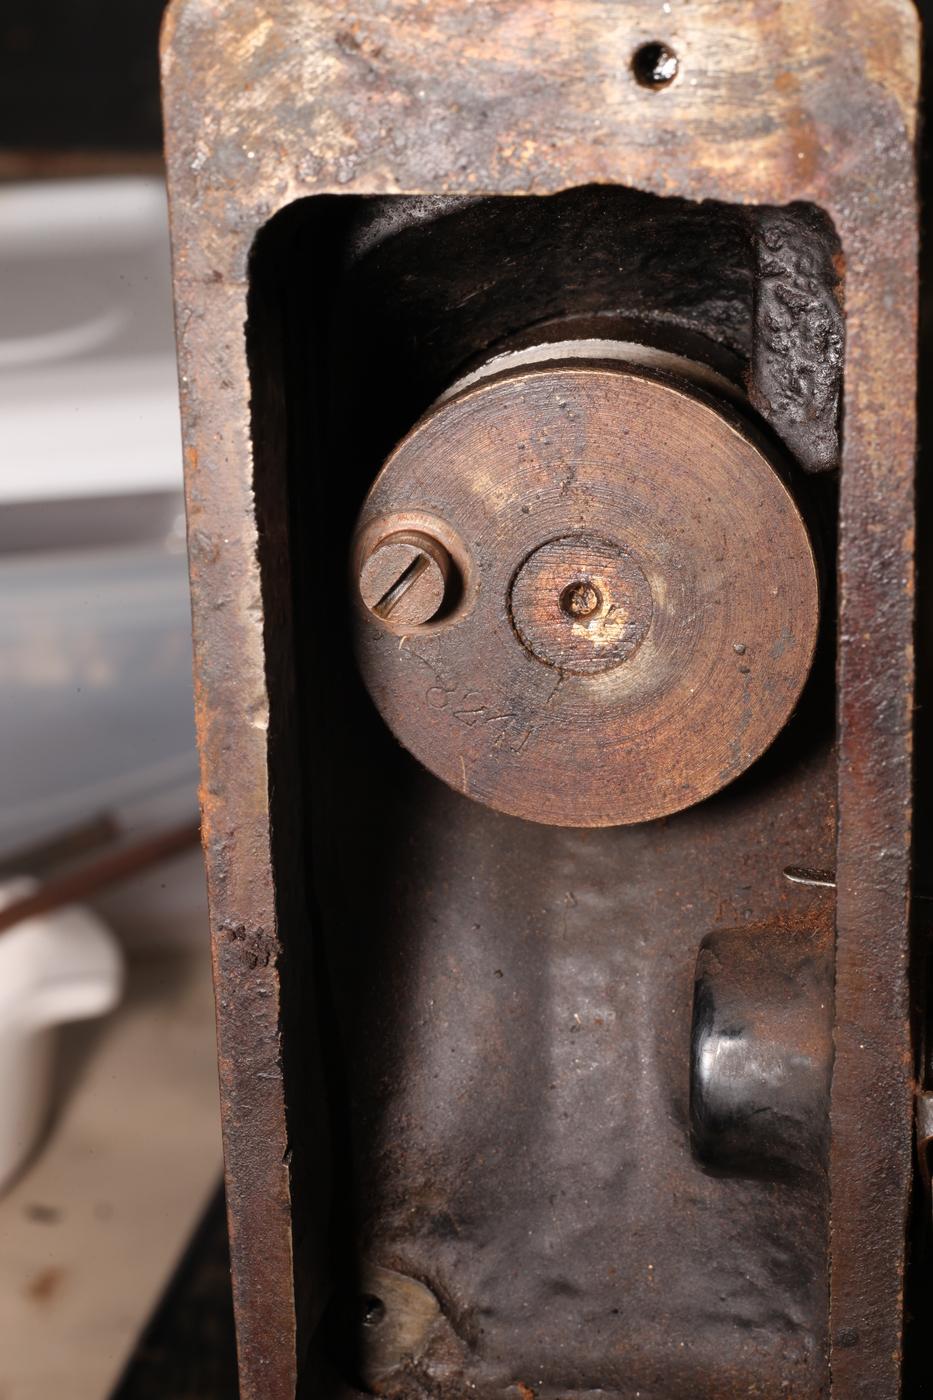
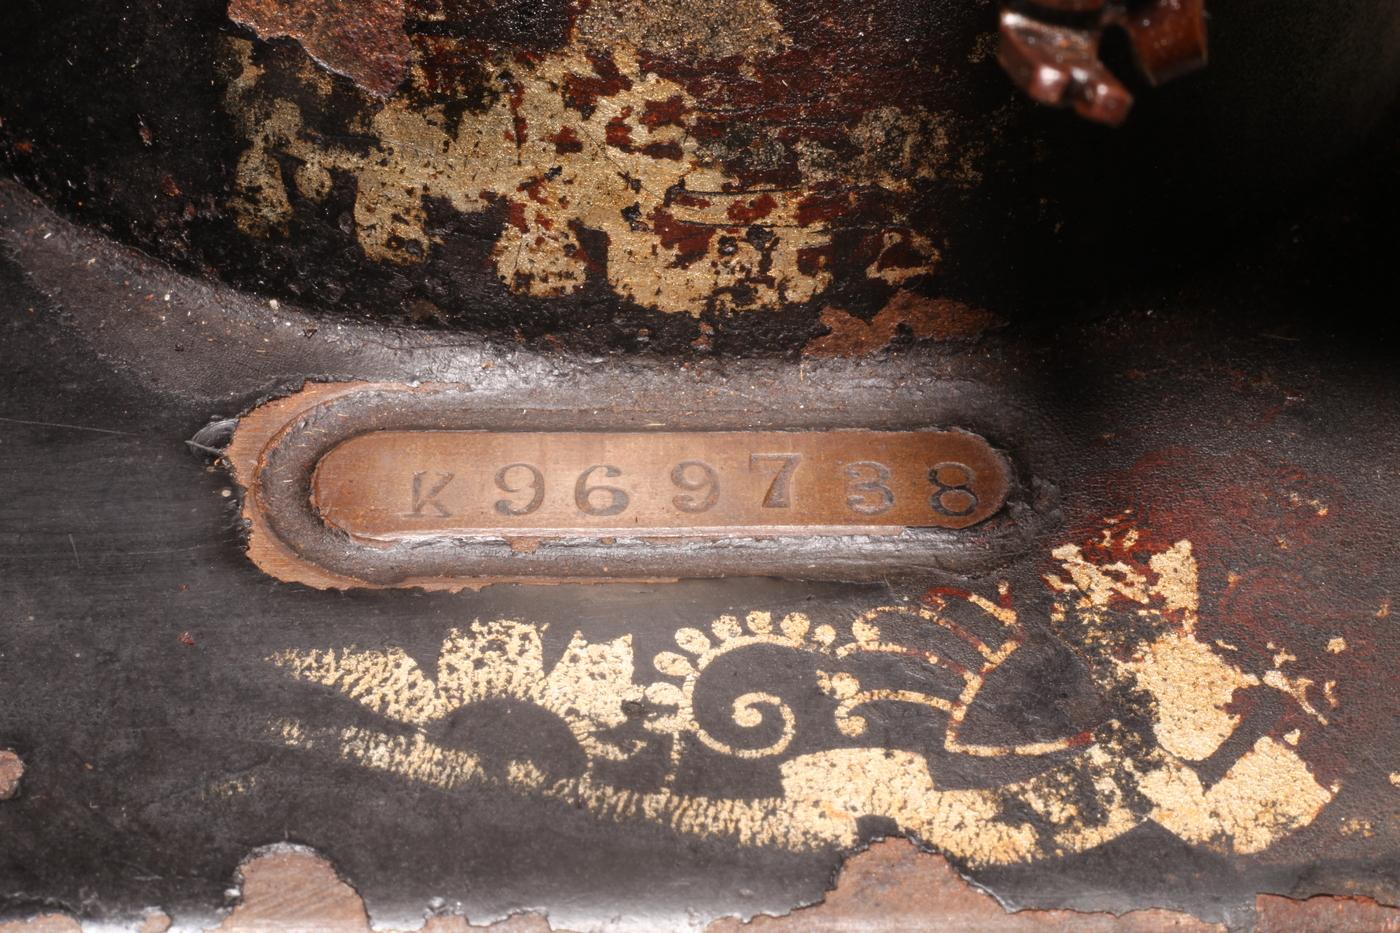
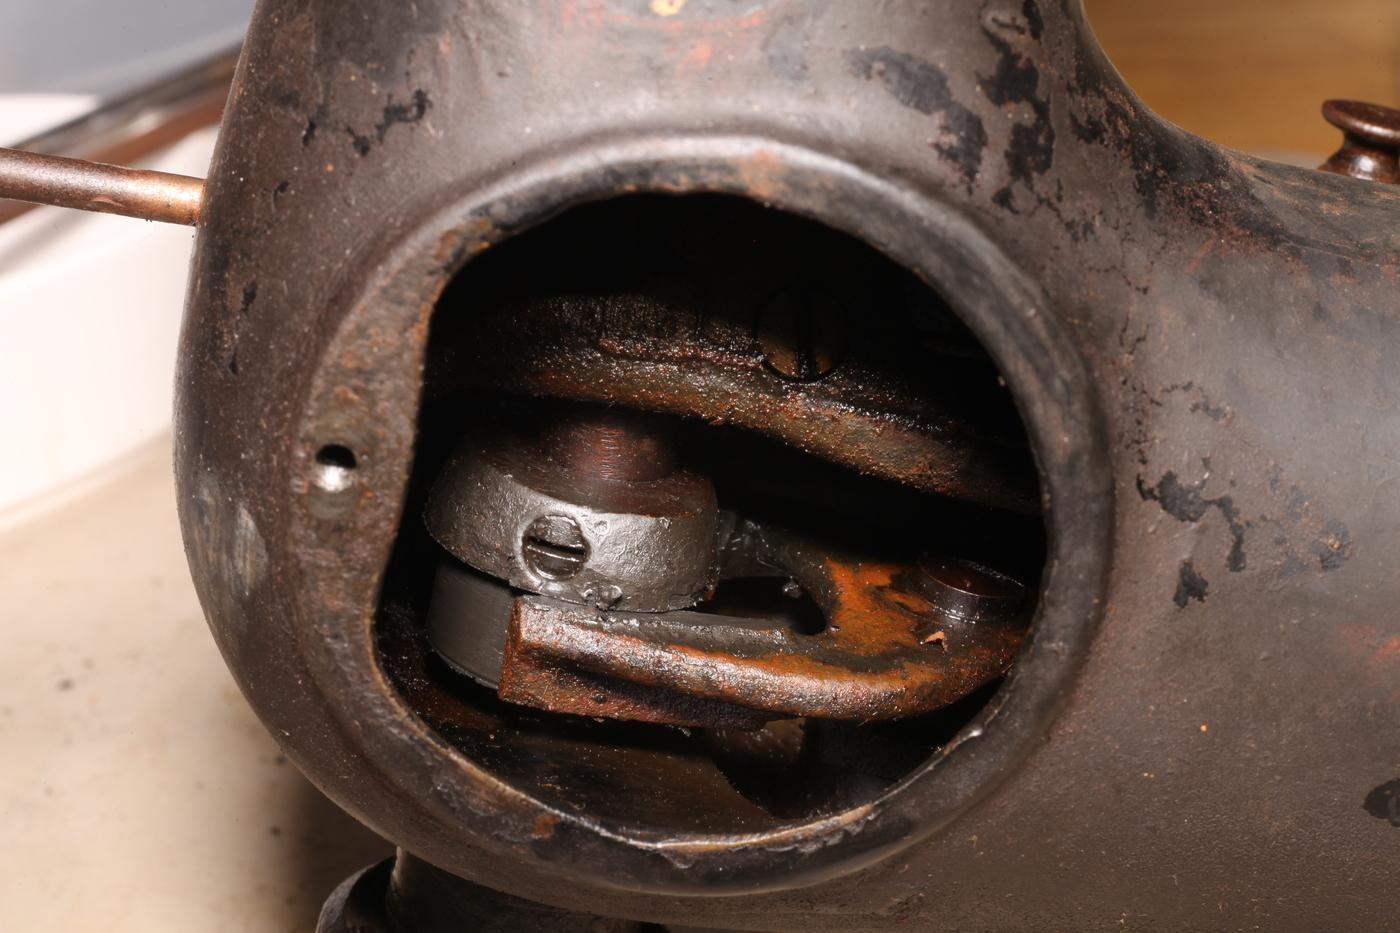
How to remove the arm shaft from a Singer 27 ? Normally, I repair machines leaving them mostly assembled. To step outside of my comfort zone I decided to take one apart. I'm already dreaming of how clean I'll be able to get all the pieces ✨ But it's not clear to me how this arm shaft comes off. In the picture on the left, those two holes go all the way to the shaft. (Oil holes, I presume) 27-arm-shaft.mp4 There are few things inside that have to come loose also, but I'd like to get the arm shaft on its way out first: I think the arm shaft comes out the front of the machine. I removed the set screw just to the left of center in this photo: Inside the nose, with needle bar and presser bar removed: A couple interesting things about this machine, is it has a cam for the takeup lever, and a shuttle for the bobbin:


-
What browser are you using?
-
Is the brake optional on a clutch motor? I've been working on my clutch motor skills. In part to be better qualified to write this blog article: https://leatherworker.net/forum/blogs/entry/516-option-c-clutch-motor/ , and in part to satisfy curiosity. I've greased the pivot points and the main slide sleeve to improve the control and feel. I've slowed it down. I've backed off the slack adjuster in the brake far enough that I can consistently release the brake pressure when I want to use the hand wheel. But I keep asking myself, "Do I really need this brake?" The universal motor with triac speed control (aka "analog servo" aka "brushed servo") that I had for a few weeks also came with a brake shoe that activated whenever I was not on the gas. With that motor, I liked it better after I removed the brake shoe entirely. So I've been wondering, what is a straightforward way to remove the braking effect from a clutch motor, and are there any known downsides to doing so?
-
What error message do you get when attaching
-
Do you mind posting a photo of the top of your machine?
-
On my singer 144, the needle top of stroke happens 55 degrees before the takeup lever reaches its highest point. This video by @Gymnast is also informative:
-
You might look at Adler 669 Adler 105-25 Cowboy cb246 Jianglong 246 Jianglong 341 Jianglong 1341 Cowboy cb227r cowboy cb341 cowboy cb1341 Techsew 4800 Cobra class 26 Pfaff 335 Typical TW3-P335 Necchi 840-100
-
Tell us about the leg bags. Boat seats are typical "upholstery" which works great on a flatbed walking foot. But when you start talking bags then you have gussets. And if you've ever stitched a stiff gusset on a bag with a flatbed machine you will wish for a cylinder bed or post bed. 😀 What type of images? What is the filesize? Sometimes there are filesize restrictions, so scaling the image down to 1000x1000 pixels gets it under the bar.
-
Ah yes. On other machines, this is called the needle guard. Its purpose is to prevent the hook from stabbing the needle. Whereas the hook is very hard and fairly brittle, the needle guard is soft and malleable. You can bend the needle guard out of the way just a smidge, move the hook saddle closer to the needle so the hook point rubs a little on the needle, then bend the needle guard back so that the needle guard pushes the needle to the side just a bit as the hook comes by and the hook point just misses the needle. Here's a video by Uwe, known as "Stuffing the Hook" And some references: https://leatherworker.net/forum/topic/47477-211g155-do-i-have-the-wrong-machine/page/6/#findComment-304044 https://leatherworker.net/forum/topic/65973-video-how-the-hook-catches-the-thread-loop/#findComment-428831 https://leatherworker.net/forum/topic/65973-video-how-the-hook-catches-the-thread-loop/#findComment-428844 https://leatherworker.net/forum/topic/65997-video-sewing-veg-tan-leather-on-a-consew-225/#findComment-429071 https://leatherworker.net/forum/topic/131796-singer-211-u166a-walking-foot-problem/page/3/#findComment-785084
-
Trust the machine. (not the motor haha) To understand when is an appropriate time in the stitch cycle to pull your material free, you can stitch slowly (handwheel!) with the bobbin cover removed. I both start and end my seams with the takeup lever at the top of the stroke. Depending on which model of digital servo motor you have, there may be adjustment within the menu to configure how much rotation happens between what the servo considers Needle UP vs Needle Down. I suppose in my wildest dreams a needle positioner might default stop for needle down a little after the hook point grabs the thread. Then when I heel tap it would first rotate to where the takeup lever is at its highest point (to lock the last stitch), then reverse ten or twenty degrees and come to a stop when the needle is at its highest position so it's easy to pull the material out. ☺️
-
This cradle that I built to support the machine while working on it works fairly well as an assist for dropping the machine into the hole. That means your table is too pretty. Make it work! And I've been dragging things across the table, enough that I got a remark, "We're going to have to repaint that top" 😁🫢

-
Looks like two good machines to me! I'm also considering selling a head unit, as I don't have enough tables. To really outfit someone well, I would sell them a head unit + table + digital servo motor.
-
I'm not sure what you mean by hits the hook washer. Perhaps you can include some close-up photographs? On my Jianglong 341 I had to slide the feed eccentric farther down the hook driving shaft before I could move the hook close enough to touch the needle.
-
 More specifically, what do you want to make out of the ballistic nylon and harness leather? What is the maximum total thickness (folds included) that you want to be able to stitch? The Pfaff 145 is a flatbed machine which is fine for upholstery jobs. Cylinder bed machines are more versatile for making three-dimensional objects, like sewing gussets on bags. Wiz' famous topic is worth a gander:
 -
Singer 29k60 front hand wheel installation
friquant replied to Dlane's topic in Leather Sewing Machines
Hi Diane, Sounds like a complex operation. How about posting several pictures of the parts you bought and the machine it's going into? -
Would enjoy seeing pictures of the machine in its disassembled state, as well as how you've got the parts laid out for remembering how they go back together. The most I've removed on the singer 144 is removing the needle bar rock frame so I could grind a passage into it for a screwdriver to access the needle bar pinch screws. Everything else I fixed in-place.
-
Welcome to the forum! On my singer 144 I replaced all the wicks I've found with small pieces of polyester felt. I suspect any kind of yarn or absorbent fabric would work. It just needs to hold the oil as a reservoir so the oil can slowly feed the shaft.
-
Your video showed as much, but you beat me to it 🏅
-
Link is not loading for me..
-
Love the sound! Looks like you're having trouble getting the machine to let go of your thread when you have finished a seam. Here is what I recommend: Before you start your seam, turn the handwheel so that the takeup lever is at its highest point. Otherwise, the takeup lever may try to snatch the thread out of your fingers. (You can do the opposite---takeup lever at lowest point---if you want to experience the snatch firsthand!) At the end of your seam, before you pull the material out from under the presser, turn the handwheel so the takeup lever is again at its highest point. This does two things. First, it locks your final stitch. Second, the top thread will not be wrapped around the bobbin when you go to take the material out. Since you ended your seam with the takeup lever at its highest point, it's already in position to start the next seam 😊
-
@AlZilla here is a smaller version of the above video if you are able to replace it hemiyota-01_small.mp4
-
What size needle did you use for your initial timing? Does your machine require the shuttle to be shimmed when changing needle size in order to maintain the same hook-to-needle distance?
-
Is there any visibility into that machine, for instance removing a cover so you can see the skipped stitch with a flashlight as it's happening?