
friquant
-
Posts
516 -
Joined
-
Last visited
Content Type
Profiles
Forums
Events
Blogs
Gallery
Store
Everything posted by friquant
-
Try this: Start and end each seam with the take-up lever at its highest point. (Otherwise the machine will yank the thread out of your hands when the seam begins) Also post a photo of how you've got the top thread threaded, from spool to needle eye. Just in case it's misthreaded. And check the timing. I like to check where the hook shoulder is when the take up lever is at its lowest point. If the timing is retarded too much, the take up lever will yank hard on the thread before the thread reaches the apex of its path around the bobbin. And if the timing is advanced too much, the hook will grab the loop of thread every turn (instead of every other turn) and lock the machine up. If still not working, can post a close-up video of the needle and bobbin area with the bobbin cover off. Turn the handwheel very slowly for the video, on the order of ten seconds per revolution, so we can see the interaction of the different pieces. Hope this helps!
-
Have not found a perfect match between my this machine and one of the 144 submodels. In most respects it appears to be a Singer 144w103. That is, it has ten inches to the right of the needle, single needle, 8-inch hand wheel, 7x3 needle system, with stitch length regulation done by turning a screw on the feed eccentric. But this machine appears to have the reverse mechanism from the 144w305, which is "controlled by a treadle" see this manual: https://web.archive.org/web/20190820161643/http://www.parts.singerco.com/IPinstManuals/144W305.pdf So I could call it "144w103 with the reverse mechanism from 144w305" or "a 10-inch version of the 144W305".
-
Try pressing down (with your hand) on the bar that the knee lift pulls down on. Press all the way till you feel it stop against something. How far do the presser feet raise in this case?
-

How to assemble 96k sewing machine thumb screw
friquant replied to depodarcom's topic in Leather Sewing Machines
Check whether there is a separate spring attached to the reverse lever for holding it up. Perhaps it disconnected when the thumb screw was removed. -
Singer 111w155 stitch length issues
friquant replied to Glaciersew's topic in Leather Sewing Machines
Do the arrows line up now? Any increase in stitch length? -
You can long press on the screen to lock the focus. See https://www.youtube.com/watch?v=twl_V_vlq2Q You can shine a flashlight from underneath to illuminate the scarf. You can put a black mark on the scarf right where you want the tip of the hook to cross. See Uwe's video on timing:
-
How to assemble 96k sewing machine thumb screw
friquant replied to depodarcom's topic in Leather Sewing Machines
Do you normally press the reverse lever up or down to achieve reverse feed? -
Easy fix: Loosen the screw at the top rear of the inner presser foot, rotate the foot till the needle is centered in the hole, tighten the screw. Would you mind taking some close-up shots of your hook point from above? My Singer 144W103 (built in 1943) had a dull hook point: https://leatherworker.net/forum/topic/131846-best-angle-to-sharpen-a-hook/#findComment-784869
-
Pfaff 545-H3 missing parts!!! Help please 🙏
friquant replied to darkhornsleather's topic in Leather Sewing Machines
As soon as you get some presser feet on it, I would suggest oiling the machine and then turn it over slowly by hand to see what is functioning vs not. Go easy on it just in case something binds from being disconnected. Do the presser feet walk Does the needle bar go up and down Does the feed dog move Does the hook pick up the top thread Does the bar in the back (for a knee lift) pick up the presser feet Does the stitch length regulator effect more / less feed dog movement Anything anomalous, take a close-up video and post on here to get some ideas 📹 -
Singer 111w155 stitch length issues
friquant replied to Glaciersew's topic in Leather Sewing Machines
Is there a groove under that collar to set the position of the collar? -
How to assemble 96k sewing machine thumb screw
friquant replied to depodarcom's topic in Leather Sewing Machines
Can you post photos and/or videos? I don't have a machine like this for comparison. Perhaps by seeing the actual parts someone will be able to suggest how to put them back together. -
Singer 211 U166A walking foot problem
friquant replied to NowhereMan01's topic in Leather Sewing Machines
Whoo whoo!! 🎈Congratulations! 🔔 Those safety clutches need to tell us when they trip 📯 I decided to back mine off today because it never trips. But as I started stitching thicker and thicker material, the safety clutch needed a higher and higher setting in order to stitch it without tripping. So I'm almost back to the setting I started with 😂 -
Singer 211 U166A walking foot problem
friquant replied to NowhereMan01's topic in Leather Sewing Machines
I've been meaning to ask you, when you tightened the position screw (rounded tip that goes in the groove) and the set screw (flat tip that goes against the wall of the shaft) on that feed eccentric...By any chance did the screws end up in different holes than originally? If they did, the feed mechanisms that run on that eccentric would be out of time. (Hook timing would be unaffected.) The feed mechanisms could be made to run either way, but may be quicker to get it all straightened out if it's the same way as original. -
Singer 211 U166A walking foot problem
friquant replied to NowhereMan01's topic in Leather Sewing Machines
Let's get it to where the hook reliably picks up the needle thread. If the thread breaks when it gets picked up, we'll solve that when we get to it. How to stuff a hook Meaning how to use the needle guard to ensure that the hook point is always stuffed into the scarf regardless of material thickness, forward/reverse, stitch length, slightly bent needles, machine speed, etc. Correct needle system Brand new needle, of the size that you use most often Make a black mark on the inside of the scarf of the needle indicating where the point of the hook should cross. (Usually about 3mm above the top of the needle eye, the manual will say for sure) Needle fully inserted. (Look in the window to verify) Needle orientation: Scarf facing hook Sharp hook with clean angles Bend the needle guard slightly out of the way, or remove it temporarily Set the stitch length to whatever you use most often Loosen the hook saddle Move the hook closer to the needle, until the interference with the needle is approx 0.5mm - 1mm Tighten the hook saddle into position Adjust the needle bar height such that the hook point attempts to bisect the needle at the black mark you made on the needle scarf. (This height is important because it affects how much of the needle rubs on the needle guard) Bend the needle guard so that the needle guard deflects the needle such that the hook point just kisses the needle, or is VERY CLOSE to kissing. (0mm - 0.05mm away) Set hook to needle timing (also known as "needle bar rise"). You'll probably have to reset the needle bar height in the process Reference: https://leatherworker.net/forum/topic/47477-211g155-do-i-have-the-wrong-machine/page/6/#findComment-304044 -
Kitchen Scale for Measuring Thread Tension
friquant replied to friquant's topic in Leather Sewing Machines
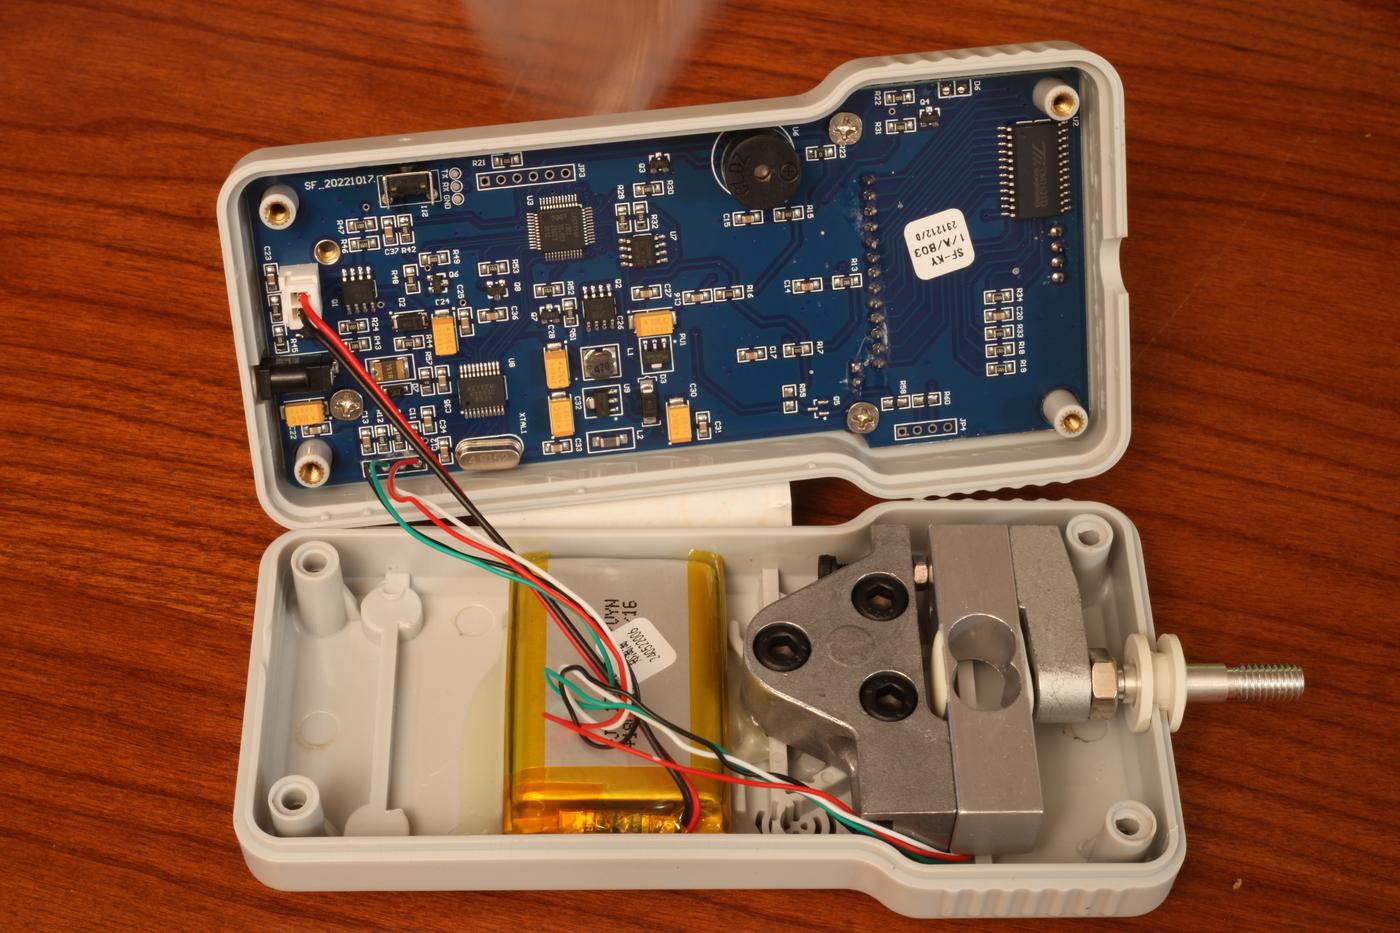
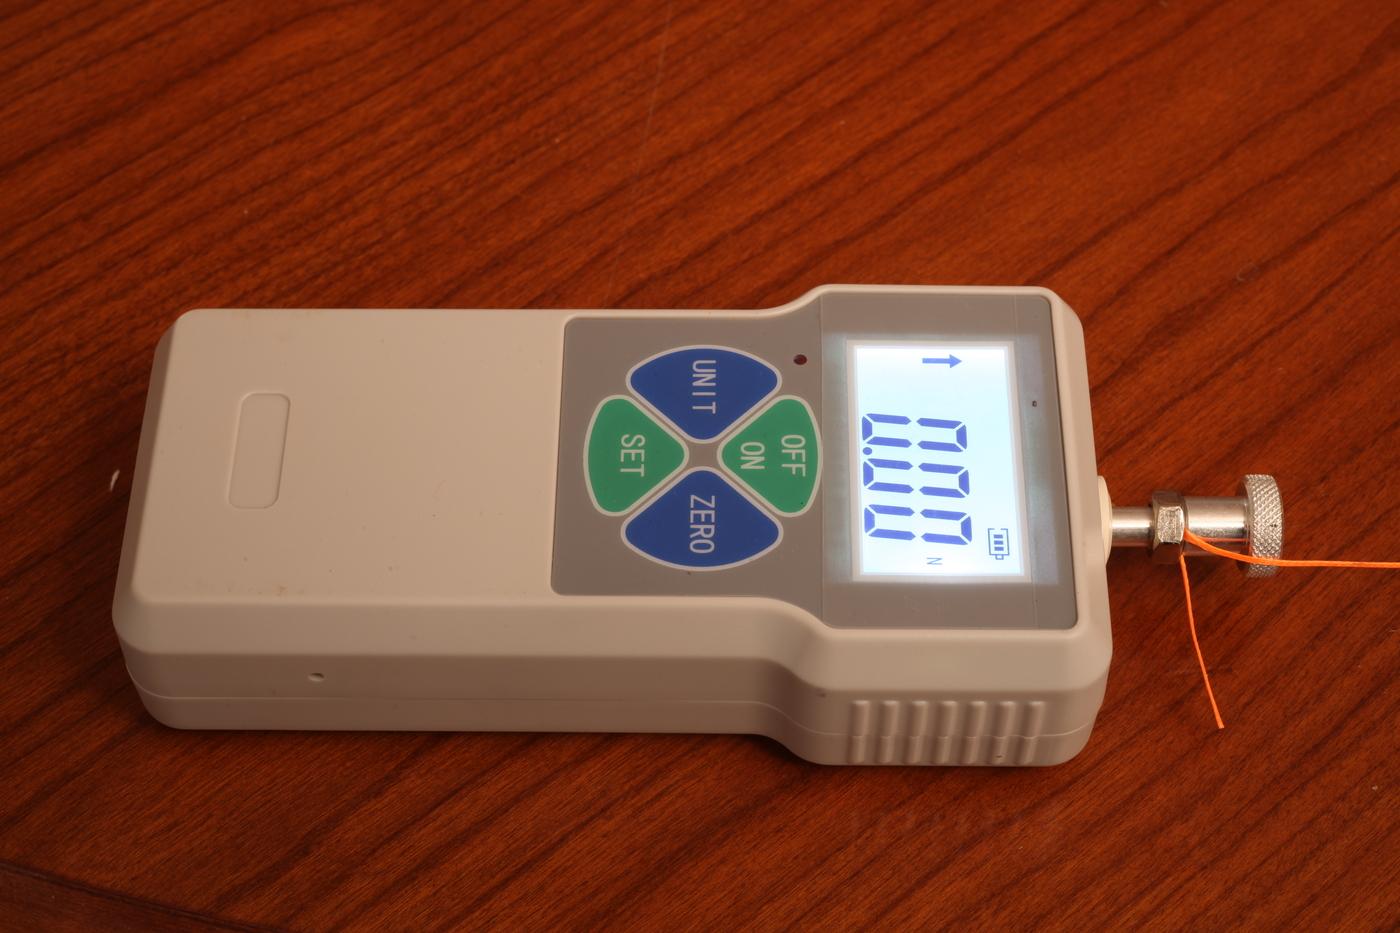
I like the adapted kitchen scale from my original post, but I found myself wanting to be able to measure both bobbin tension and top tension, and the kitchen scale maxed out at 500g. A couple days ago this digital force meter arrived, and I'm using that now to measure thread tension. It has a broader range (50g minimum, 10kg maximum) so I can measure both bobbin tension and top tension with the same tool. It cost $16 from amazon: https://www.amazon.com/dp/B0CYCHKJ75 The 50 gram minimum load is unfortunate. It registers 0 grams until you pull/push hard enough on it to get above 50g. But most of the time I'm running more than 50g in the bobbin anyway. And way more than 50g in the top thread. For reference, with TEX 135 in my Jianglong 341, the bobbin tension can be adjusted from 25g (screw 1.2 or more turns out) up to 370g (screw all the way in.) With the same thread the top thread tension (measured coming out of the thread check spring) can be adjusted from 6g up to 2700g. Notable "features": - defaults to Newtons every time you power up, but you can change to kg or lb - rechargeable! - Startup is slow (5 seconds to power on) - Very fast updates between readings compared to other kitchen scales and fish scales I've used - Buzzer is loud but can be de-soldered from circuit board for peas and quiet - goes all the way up to 10 kg (even though advertised only to 5kg) - It comes with some end attachments and a nut, so I clamp the thread between them which is easier than tying a knot Here is a photo of the insides. The load cell looks quite dramatic. It even comes with a "do not disassemble" sticker which I wish I had kept for nostalgia.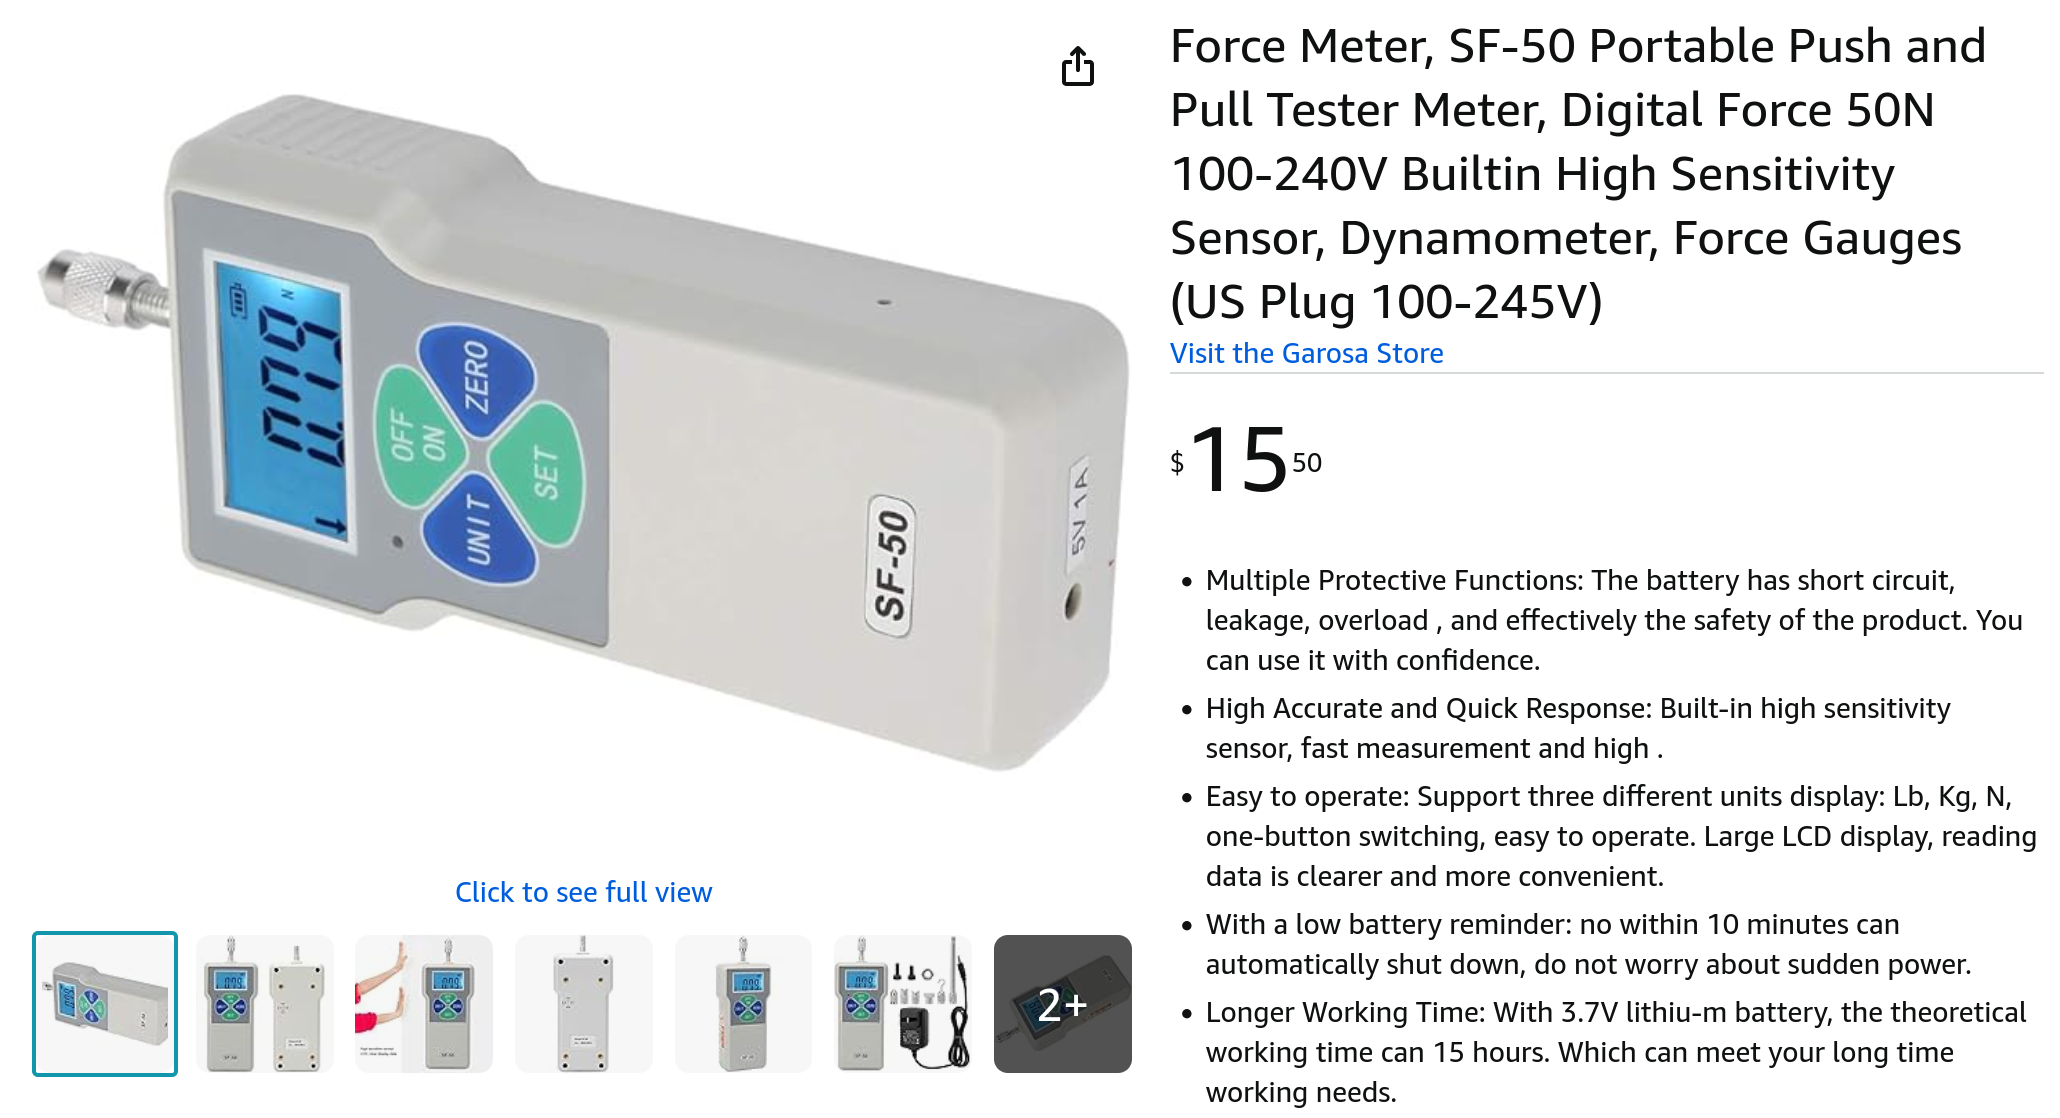
-
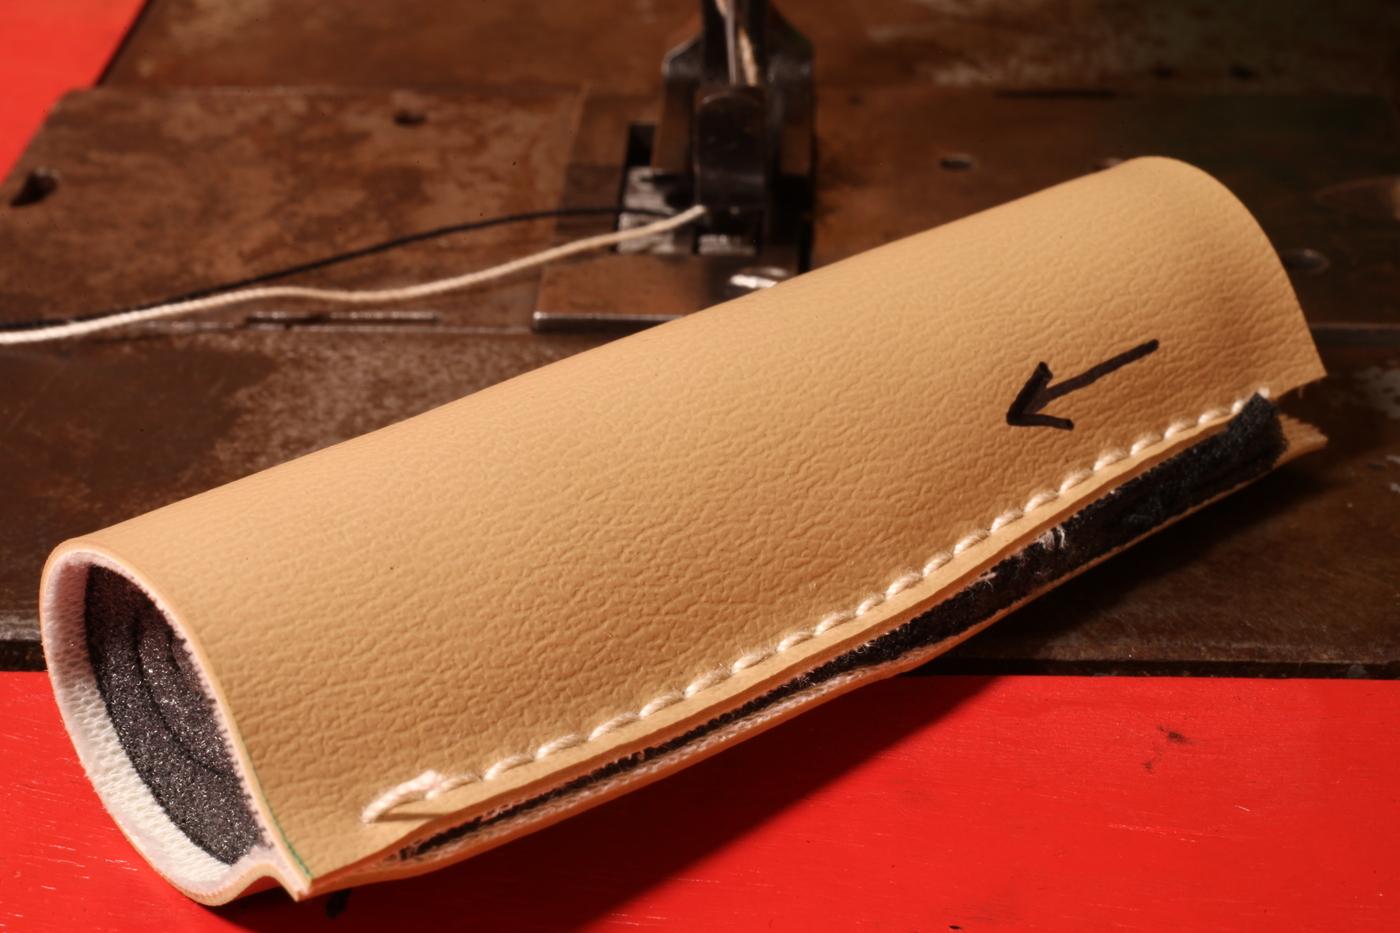
What is the total thickness (including folds) of all the material you need to stitch for the collar? You can measure the width of the needle right above the scarf to see what size it is. I use calipers to measure. If you want to improve your sewing game with your Activa 230, I suggest getting some size 100 and size 110 needles, and buy some TEX 70 thread. Here are the needles I bought, which includes both 100 and 110 sizes: https://www.amazon.com/dp/B09V136BDJ And here is the thread I commonly buy: https://www.amazon.com/dp/B06Y5V3W25 The TEX 70 we use in both industrial and domestic sewing machines. Larger thread we use only with the industrials.
-
Now you have a reference! And can see if parts from one fit the other 🪚
-
The Pfaff 545 is a common one that comes up on marketplace for me. It's a flatbed triple feed. (You will want to research "triple feed" and learn to identify it.) The Singer 111 series is one I hear a lot about, but they don't come up on marketplace for me. You can take some of your thickest dog collar material, and some of the thread you intend to use, when you go to evaluate the machine. Make sure the machine you buy can sew your materials with ease.
-
I've been ordering belts from amazon. Here is an example: https://www.amazon.com/uxcell-Classic-Wrapped-Outside-Circumference/dp/B0DR767RWV You can also get them in white: https://www.amazon.com/dp/B0BK1FQHRR Other options include adding a wooden block between the table and the motor (a spacer) so you can use the longer belt. This may require longer bolts though. Or 3D printing a larger machine pulley, which has the added benefit of slowing it down and increasing torque. Lots of folks have swapped clutch motors to servo motors. Any particular questions you have about the swap?
-
How are you and the machine doing? You mentioned a tension issue. Once you start holding the top thread when you start a seam, if there are still loops on the bottom then you need to add more top tension. I should have mentioned that before.
-
The biggest issue going on is the top thread is not being pulled up all the way to form a tight stitch...rather, the loops of top thread are hanging free on the bottom. As kgg said, tighten the top thread tensioner, and if that does not clear it up, post photos of your top thread path so we can see if it is threaded correctly. The other issue is that it is skipping stitches. Here you will want to make friends with the service manual so you can set the hook to needle distance, the needle bar height, and the needle bar rise.
-
Singer 211 U166A walking foot problem
friquant replied to NowhereMan01's topic in Leather Sewing Machines
I believe you are on the right course. Here is a parts manual for a similar machine that seems helpful to understand the pieces: https://www.manualslib.com/manual/153942/Singer-211a165aa.html?page=15#manual The following page has descriptions of each part. The way I'm interpreting is that each of those three fat screws on the end has a spring underneath it. Together, those three screws through their respective springs provide pressure to the plate that has a detent for the ball. Someone may have screwed those adjusting screws all the way in, not knowing they were adjustment screws.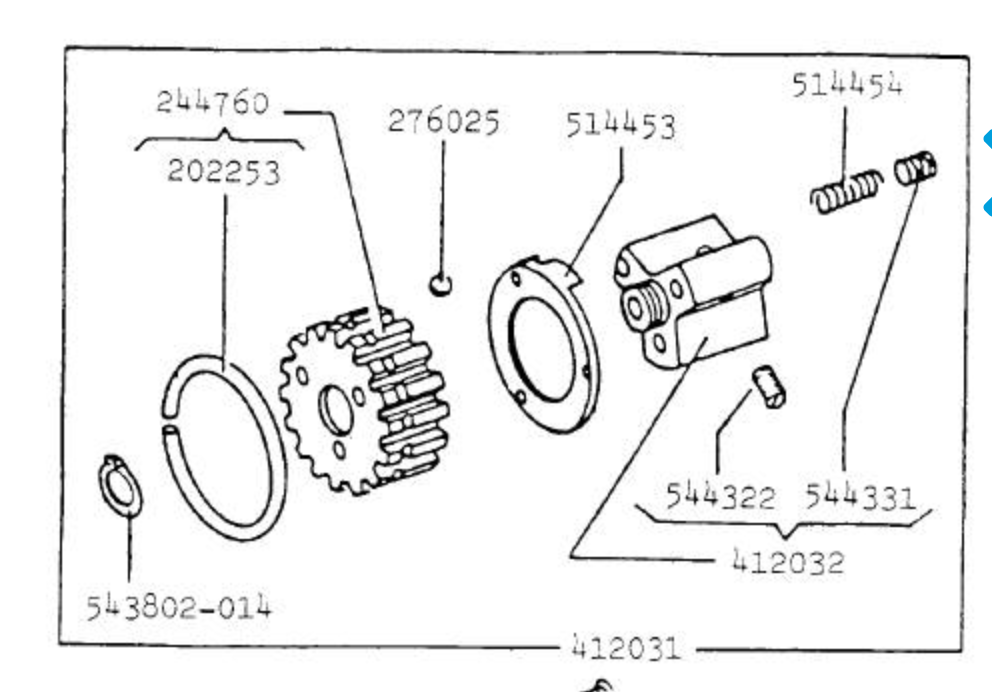
-
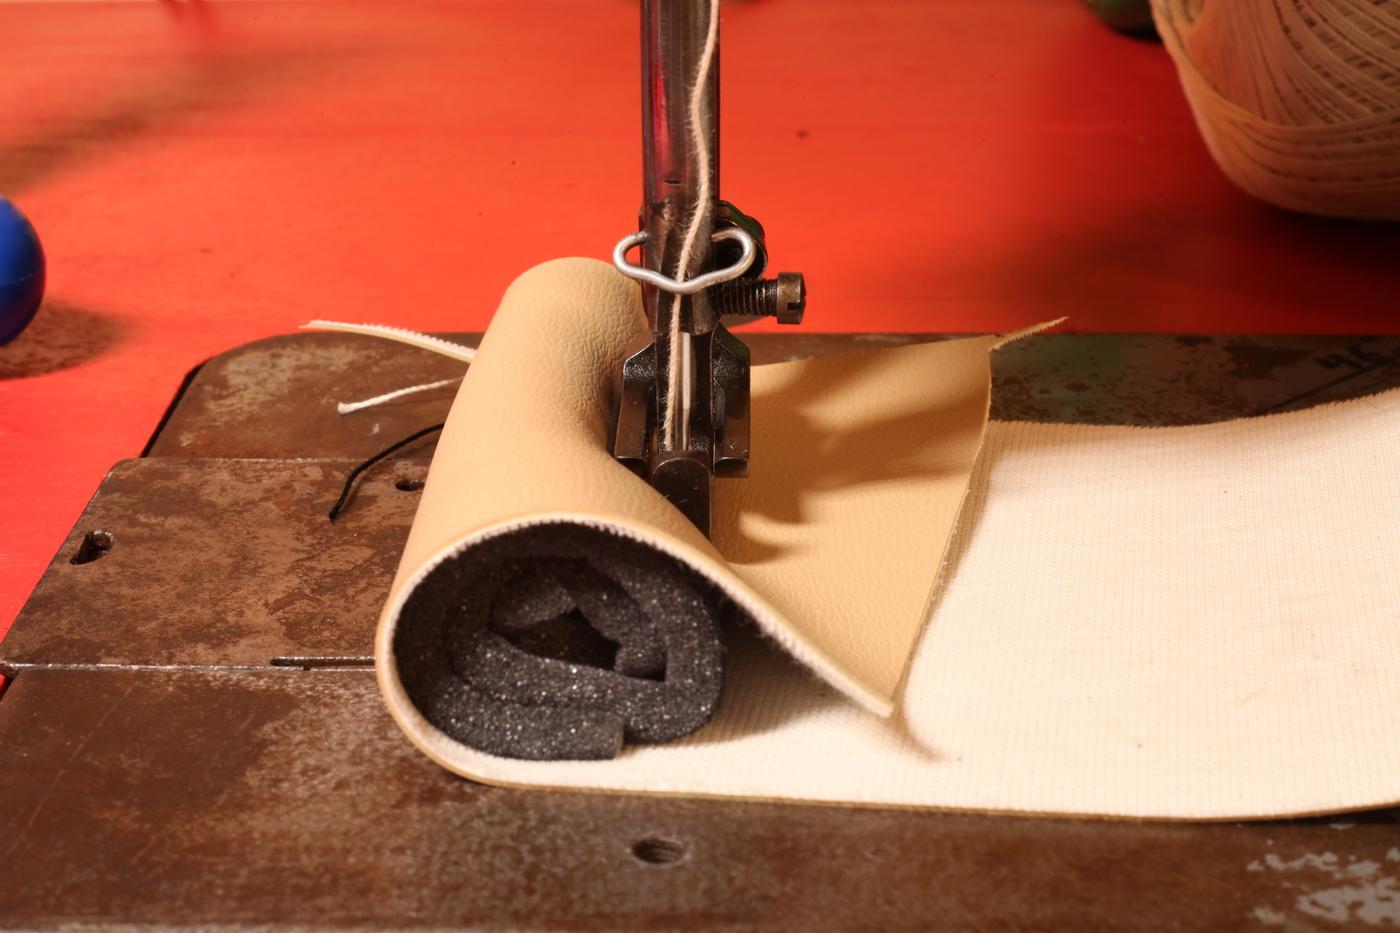
Working great! Took some readjustment to get the hook stuffed again, but now it's stitching like a champ. Here is an example of the type of stitching that would make it skip like crazy before. That is, stitching a lump of foam where the foam is off-center and opposite the hook. (There is some play in the needle bar rock frame, that may be how it manages to stitch differently with different geometries under the presser feet.) But it nailed every stitch this time
-
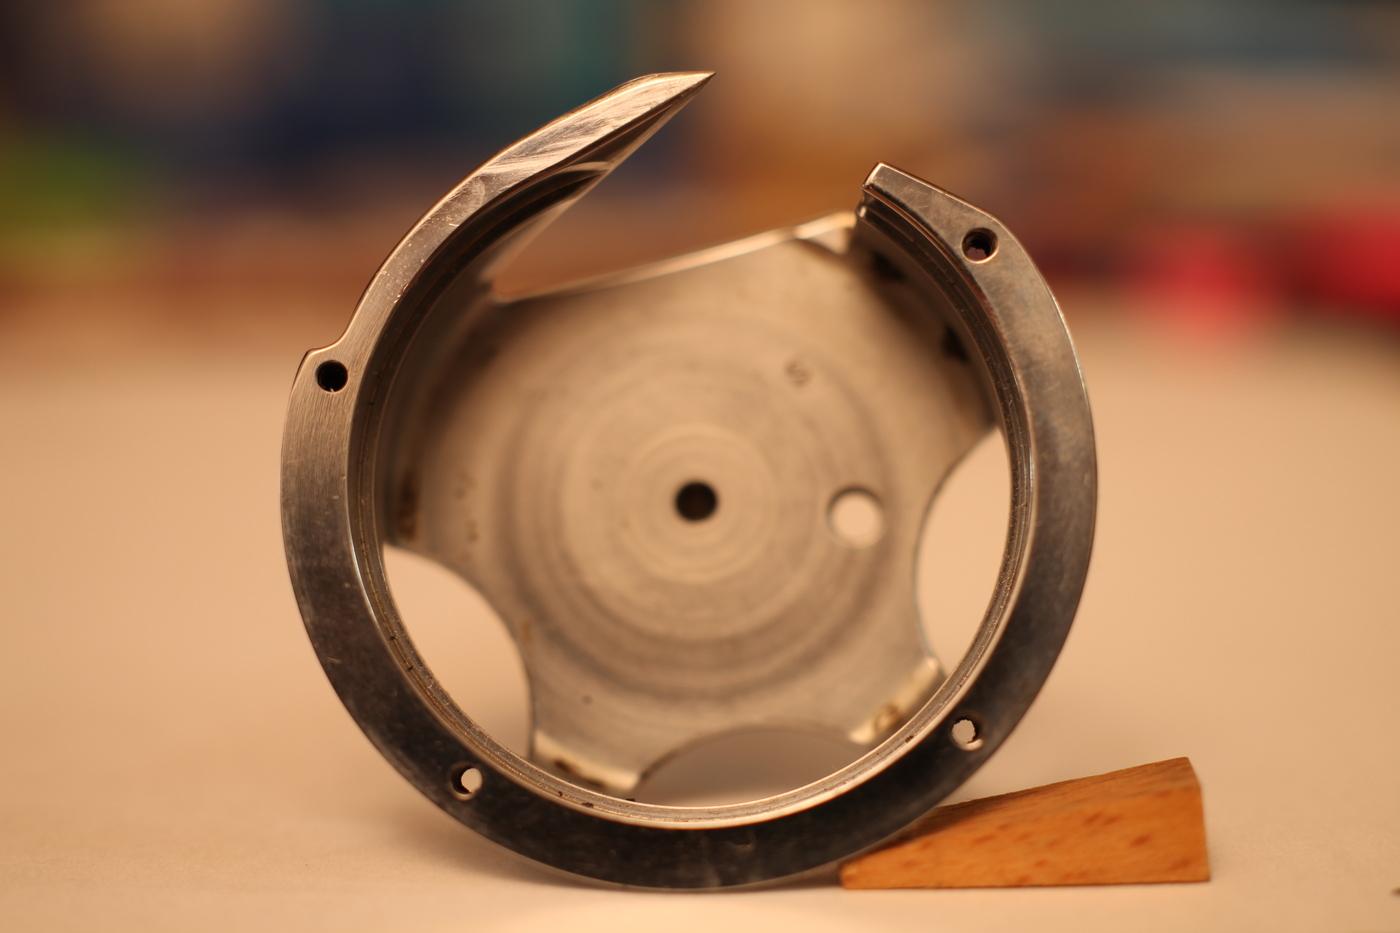
I did get the hook back in the machine, but it's not adjusted yet. I need to bend the hook's needle guard so it doesn't protrude out so far, now that the hook has been filed. I have not figured out a good way to adjust needle guards. I've seen people use a screwdriver as a pry bar, pressing against the machine head. I've done that in the past, but it felt clunky. Not finding something good to press against today, so may need a custom tool. Or maybe pry against the feed dog support 🤷♂️ UPDATE: From the top side I was able to pry against the frame.

-
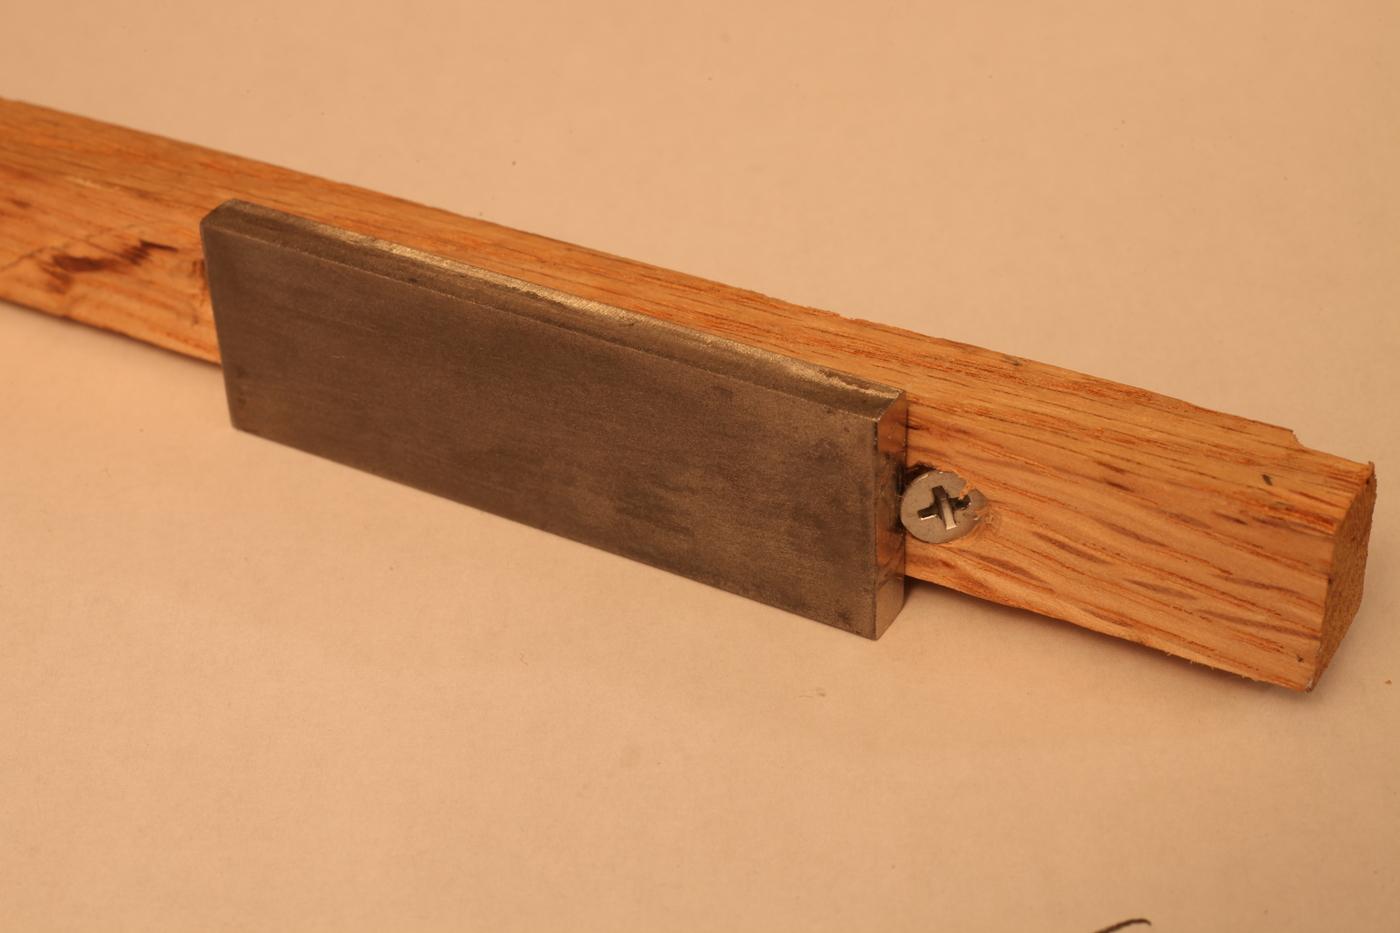
Here is the after photo: I can see now that the camera is not looking directly down the hook axis. Oh well..at least the before and after shots got the same treatment 🤷♂️ I faced the inside and outside edges of the hook using a diamond sharpening stone. Stone is 25x75x6 millimeters, on a 320mm stick of oak.