


friquant
-
Posts
518 -
Joined
-
Last visited
Content Type
Profiles
Forums
Events
Blogs
Gallery
Store
Everything posted by friquant
-

Help! Singer 111w155 stripped / stuck screw
friquant replied to matthew123's topic in Leather Sewing Machines
Missing lock nut? My singer 144 has a lock nut on that stud.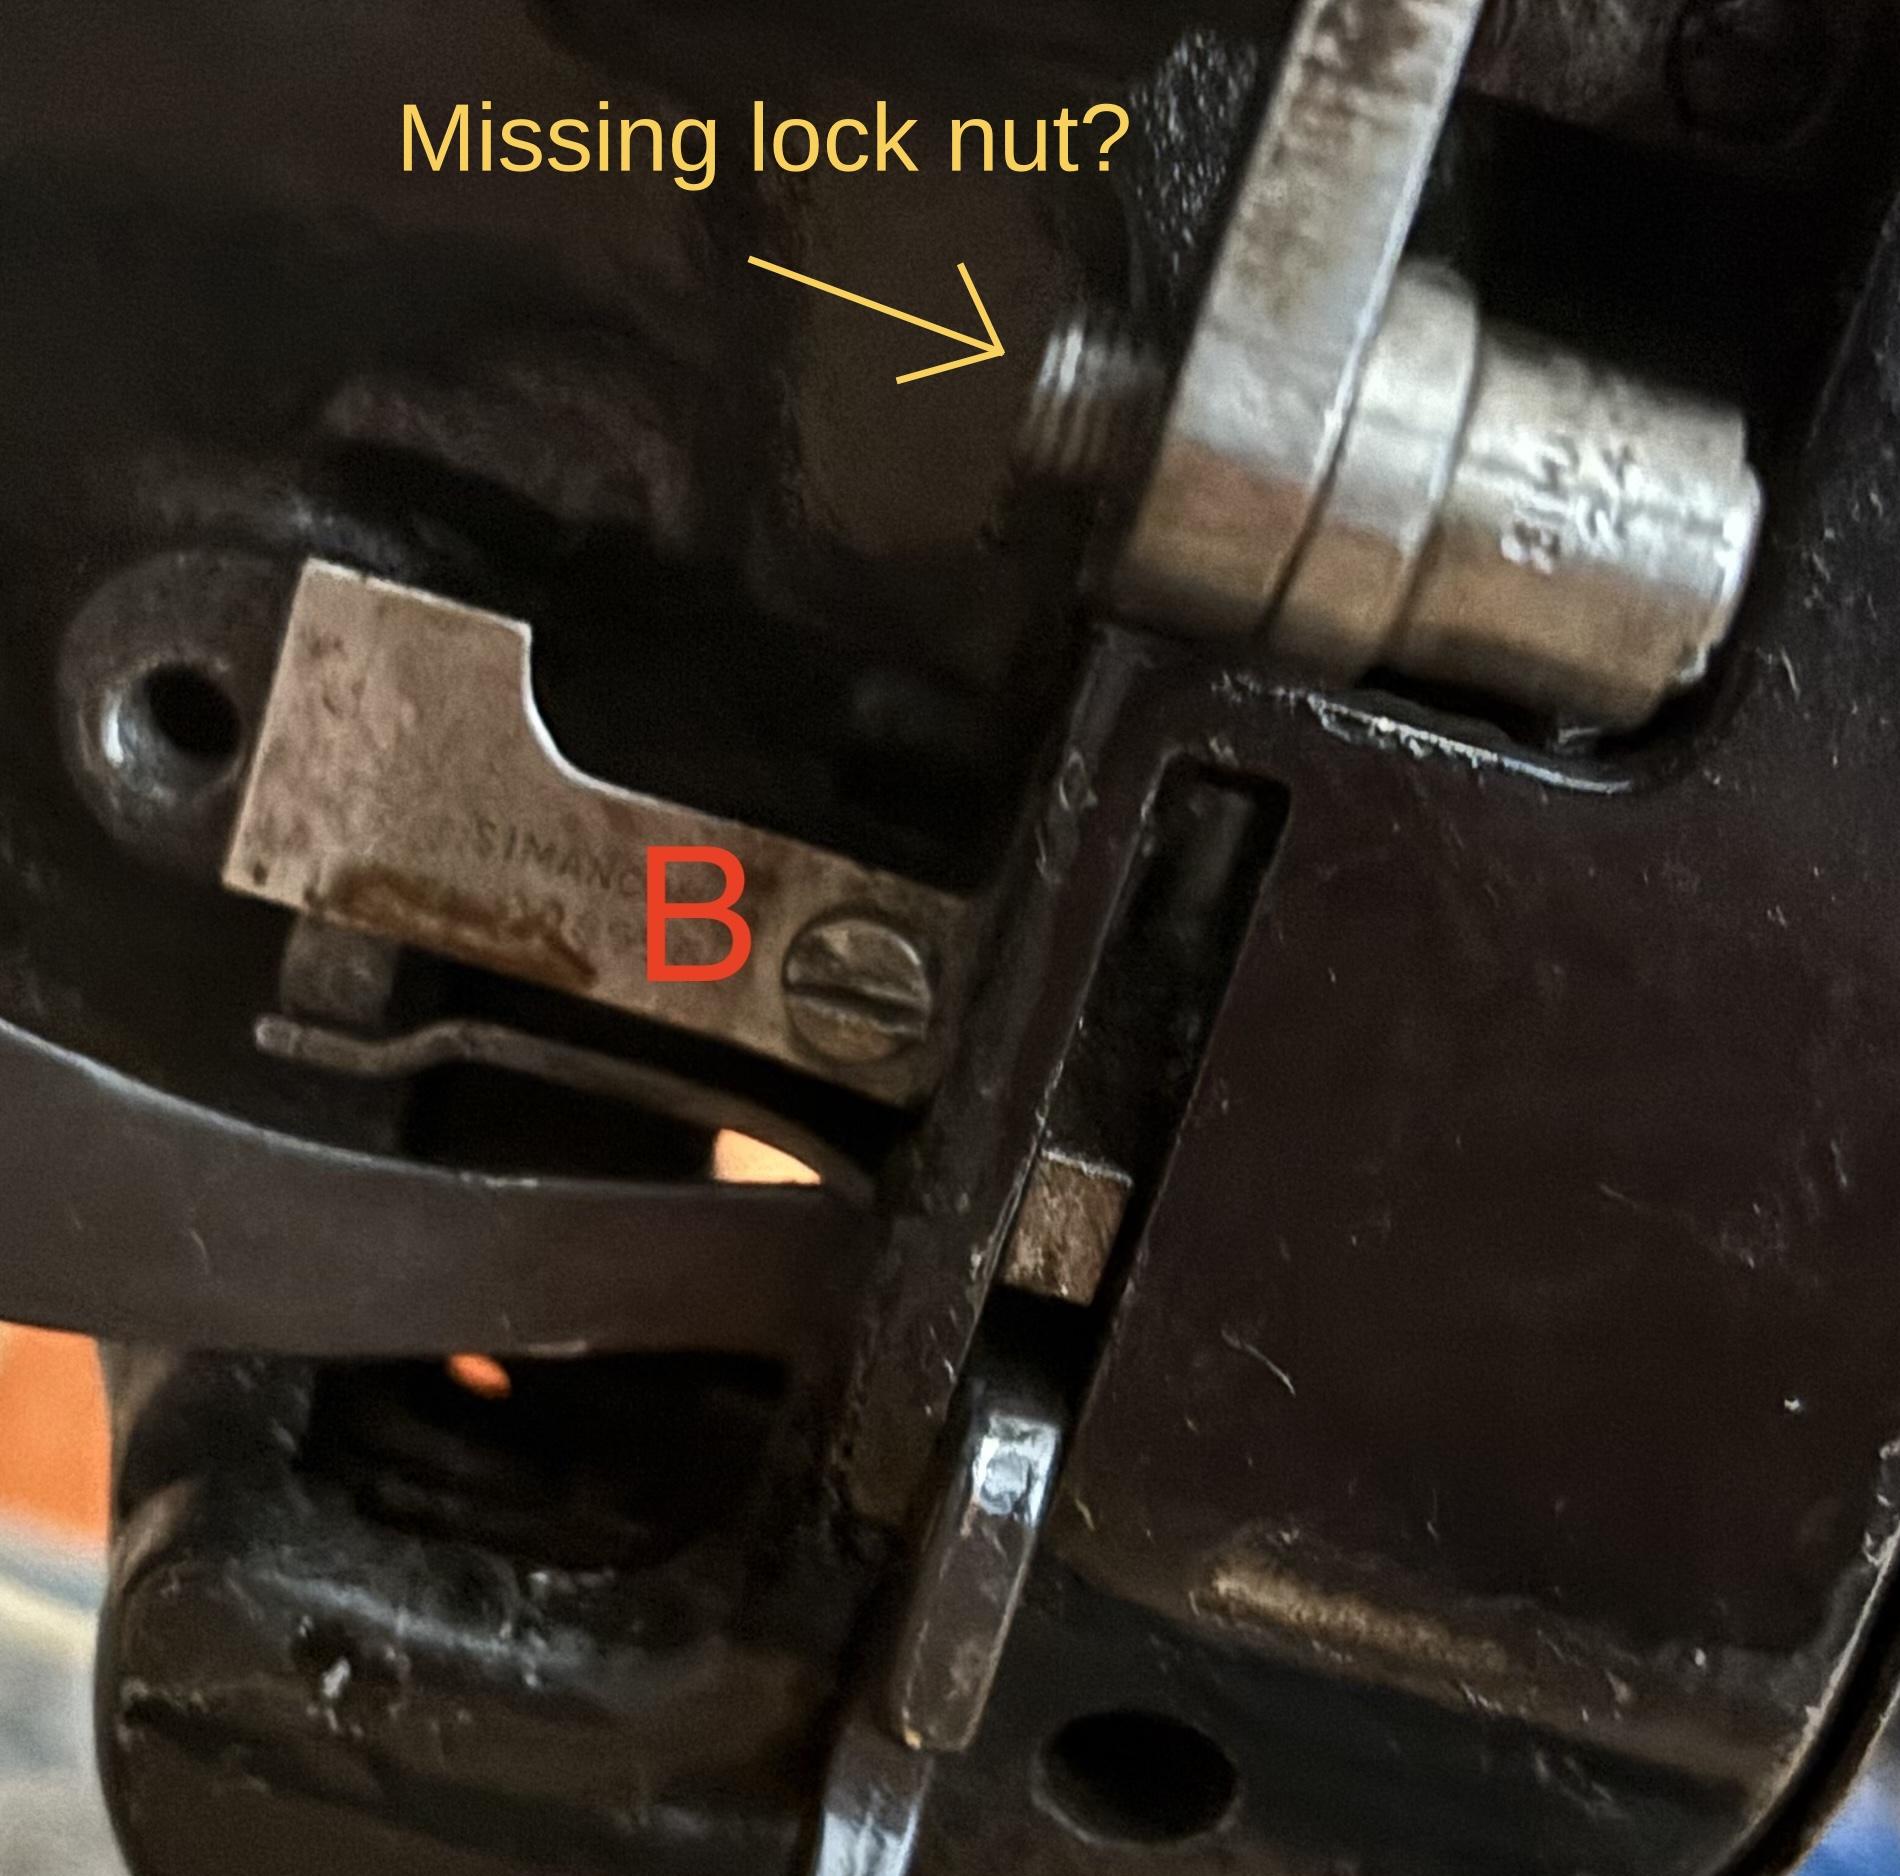
-
Help! Singer 111w155 stripped / stuck screw
friquant replied to matthew123's topic in Leather Sewing Machines
Genius! -
Hear, hear! 🛠️
-
How about a close-up photo of the dial you are wanting to replace?
-
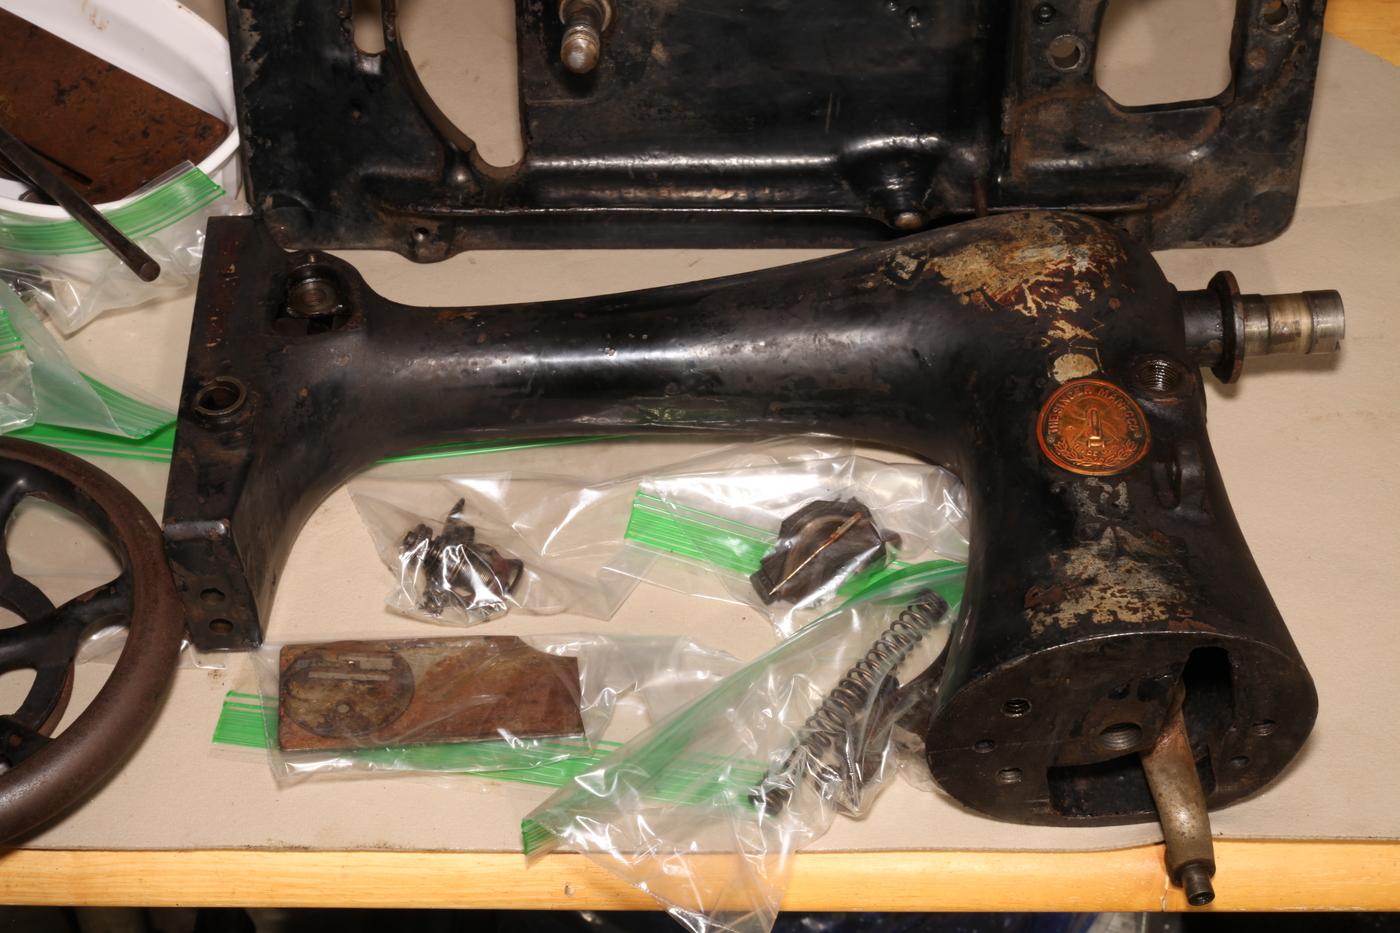
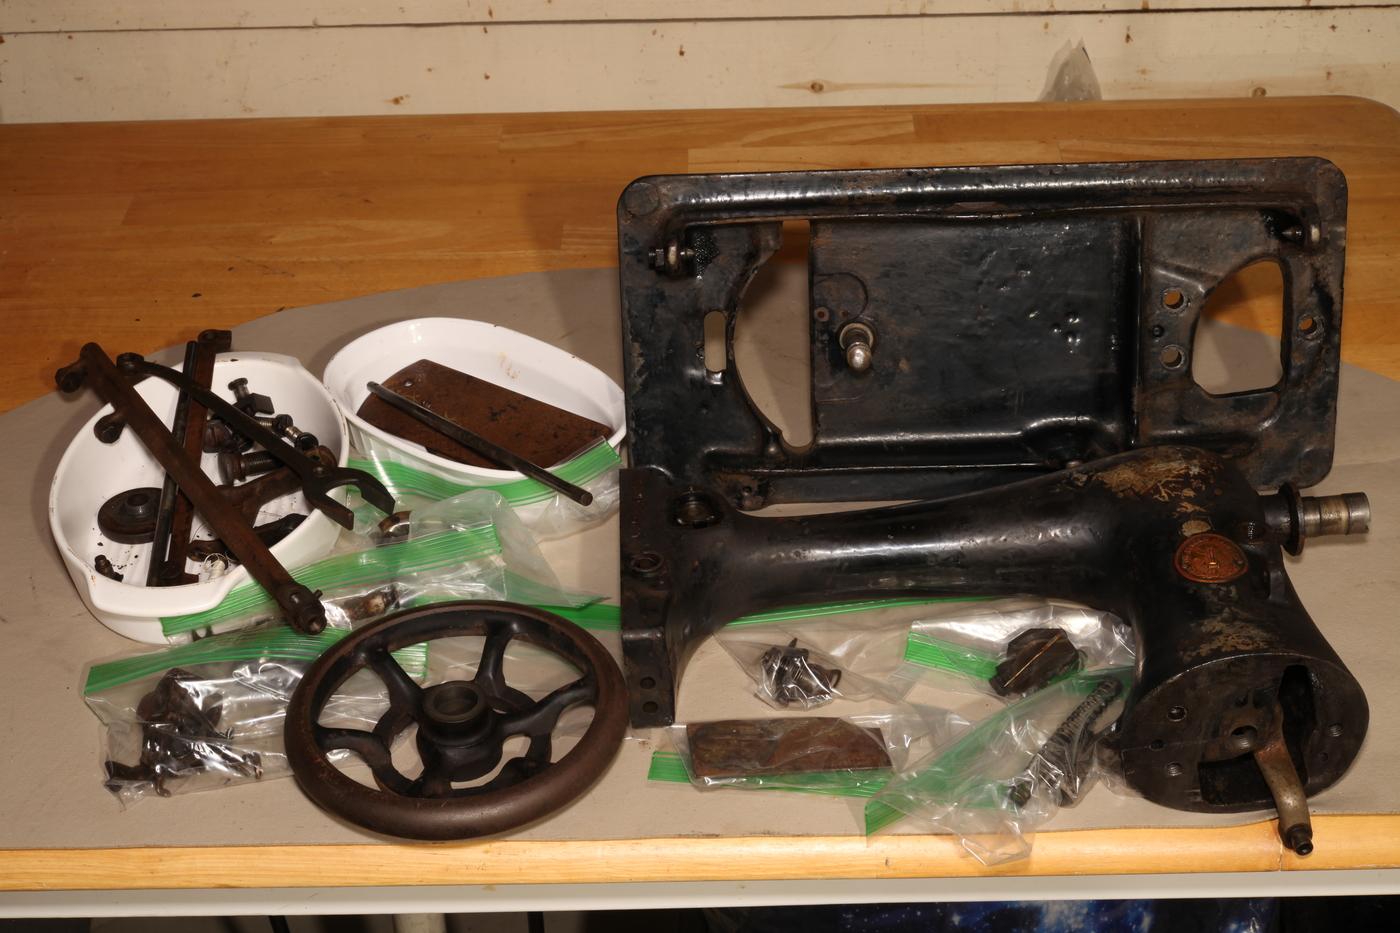
I did try to get the pin out...but the pin prevailed. Here is my "disassembly spread", inspired by @gottaknow's early post.
-
Help! Singer 111w155 stripped / stuck screw
friquant replied to matthew123's topic in Leather Sewing Machines
If you want equal lift, here's how to do it.
-
You could put a crescent wrench on the block to gently rotate it
-
Help! Singer 111w155 stripped / stuck screw
friquant replied to matthew123's topic in Leather Sewing Machines
That's in the ballpark.. Is the inner toe still lifting higher than the outer toe? -
Can you post a link to Uwe's video, and post photos of the block you're trying to move?
-
Help! Singer 111w155 stripped / stuck screw
friquant replied to matthew123's topic in Leather Sewing Machines
Agree this seems weird. How much lift do you have now? -
Help! Singer 111w155 stripped / stuck screw
friquant replied to matthew123's topic in Leather Sewing Machines
Depends on how hard you hit it I suppose. -
So you can focus on buying a class of machine that does what you want, since you can fix it up. Most "fixing" is actually adjusting, with some cleaning and oiling along the way. I have bought a new hook for a machine where I broke the hook trying to get it out. But there were aftermarket parts available.
-
I haven't seen much good about the portable consews. https://leatherworker.net/forum/topic/111864-consew-cp206rl/#findComment-731591
-
I like that singers have documentation. If you buy a clone, you end up finding the documentation for whatever it was cloned from. The 211G is shown on this page: https://ismacs.net/singer_sewing_machine_company/model-list/classes-200-299.html Do any of the machines you're looking at come with a variable speed motor? That would bring the overall cost down.
-
The cutline looks interesting. Anybody know if a manual is available for those? I put in Asheville, NC and started searching. How about some of these: Tacsew gc6-6: https://www.facebook.com/marketplace/item/1217068313162876 Adler: https://www.facebook.com/marketplace/item/1256624485648626/ Unknown walking foot: https://www.facebook.com/marketplace/item/1411826190265789/ Nakajima: https://www.facebook.com/marketplace/item/1685486795446778
-
Post some photos of the machine.
-
Cheap! Has it sewn recently, or has it been stored in a barn? (affects how much cleaning it needs). You could ask sellers of any of these to demo sewing five layers of vinyl. Another option is to post your own ad. By the way, do you enjoy fixing things?
-
Help! Singer 111w155 stripped / stuck screw
friquant replied to matthew123's topic in Leather Sewing Machines
Do you have any parallel sided screwdrivers? (Hollow ground) My first set of hollow ground was just whatever I could collect from all the stray screwdriver bit sets. Eventually had a variety of sizes.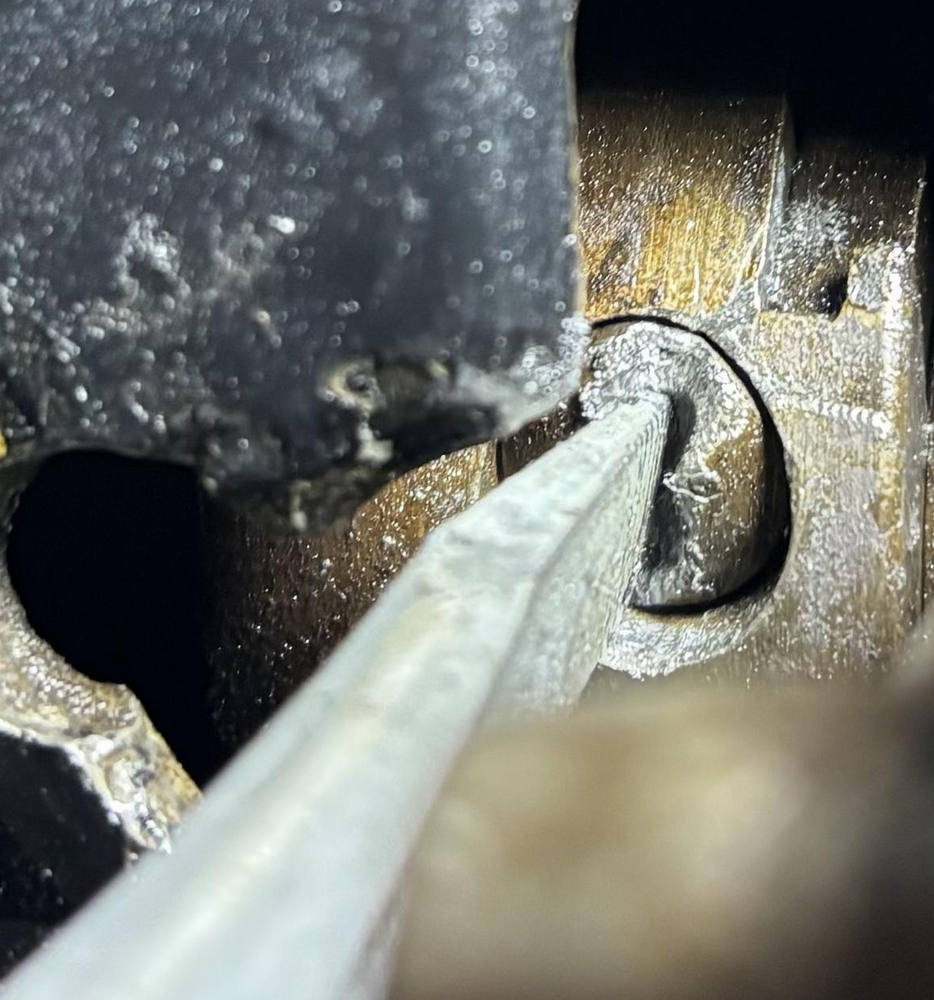
-
Help! Singer 111w155 stripped / stuck screw
friquant replied to matthew123's topic in Leather Sewing Machines
The easy way to get even lift between the inner vs outer toe: Release the foot lifter Turn the handwheel forward until the needle point comes down and meets the plane of the throat plate Loosen the screw I pointed to in the photo. (If either presser was airborn, it will now drop to the throat plate) Tighten the screw -
True. They show up pretty well with the macro camera lens, or through a jeweler's loupe. A tiny bit of progress..
-
Help! Singer 111w155 stripped / stuck screw
friquant replied to matthew123's topic in Leather Sewing Machines
When dremeling the slot, I would go all the way to the edge of the screw head. If you overrun and go into the eccentric a little bit that's okay too. Make the sides of the slot as vertical as possible. Do you have a flat-ended burr? You may be able to scrape the sides into better shape (with a flatter bottom) using a smaller flat screwdriver or the pointy end of a file. Can you post a photo of the screwdriver bit that you are using, next to the screw you are trying to remove? Ideally the bit would be the full width of the screw head, and the full thickness of the screw slot minus just enough to get in there. I would lay the machine on its front (make sure it's supported well, not resting on any delicate parts) so you can press down from above using your body weight. I've started using a drop of diesel instead of PB blaster. When removing stuck screws, I go one way then the other. Add more heat. We're talking kitchen-sized torch, not cigar lighter. And consider the manual impact driver. -
Help! Singer 111w155 stripped / stuck screw
friquant replied to matthew123's topic in Leather Sewing Machines
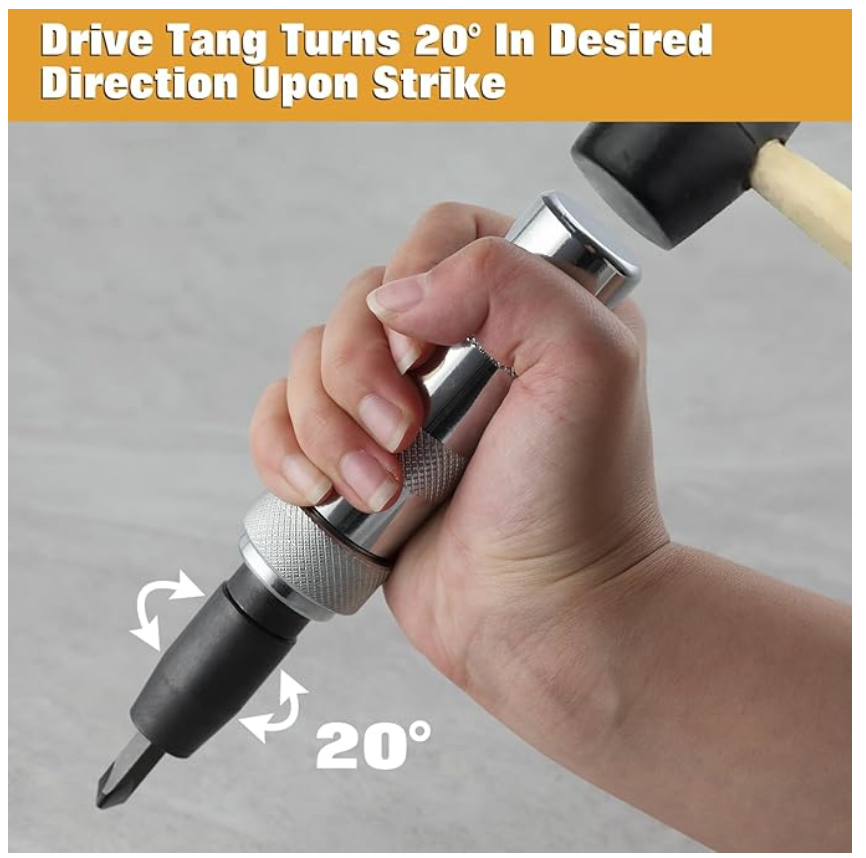
As for removing the screw with the mangled head, has anybody tried a manual impact driver on their sewing machines? https://www.amazon.com/LEONTOOL-Extractor-Reversible-Screwdriver-Fasteners/dp/B0CTXD91YW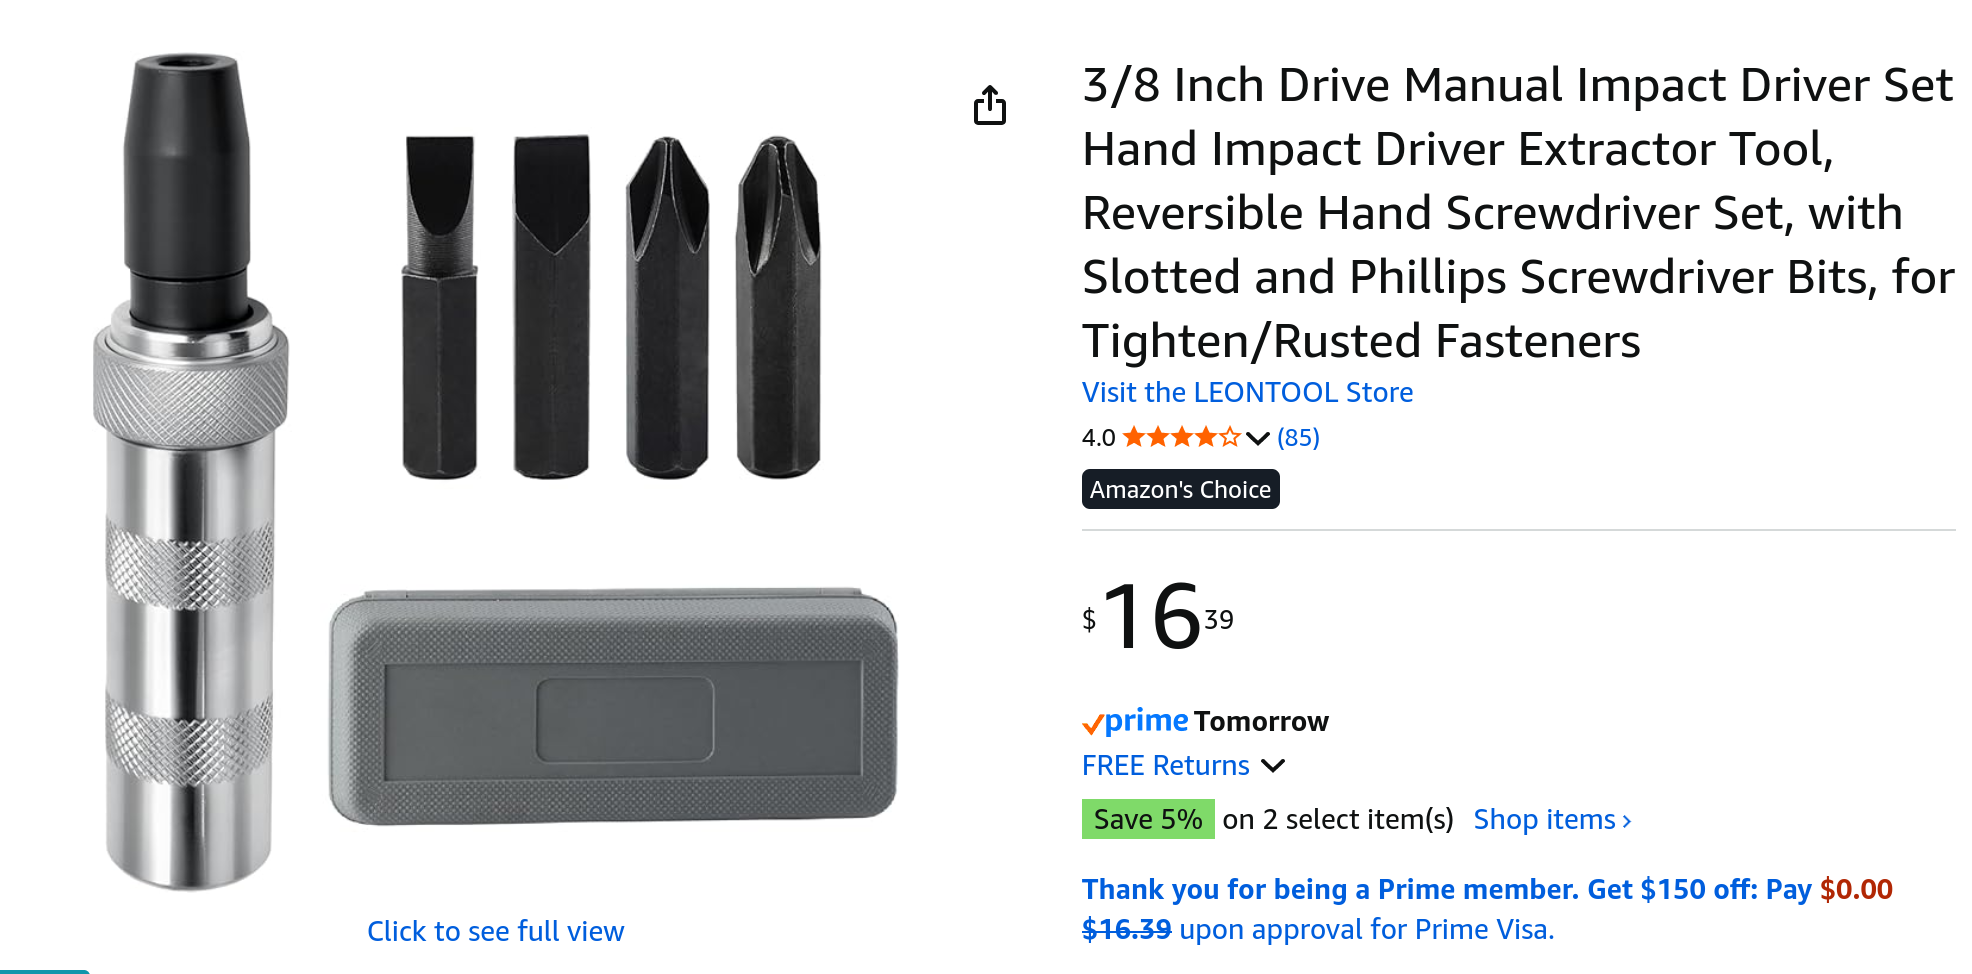
-
Help! Singer 111w155 stripped / stuck screw
friquant replied to matthew123's topic in Leather Sewing Machines
To change the relative lift, you will need to loosen the clamp screw at the top of this crank arm.
-
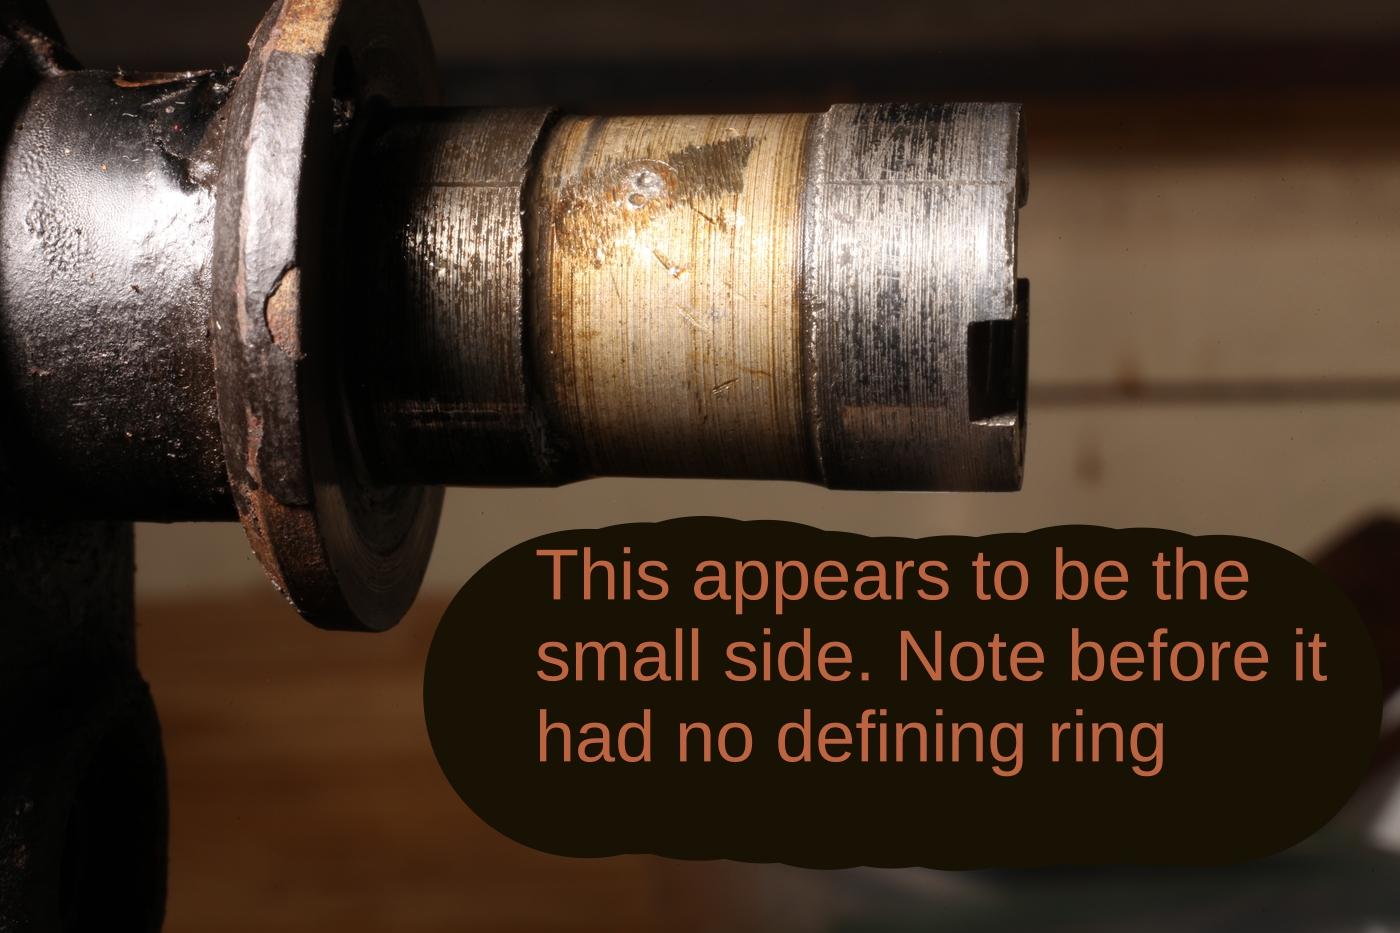
Okay I see it now. As though they pounded a pin in, then ground the ends off. That would explain the surrounding texture. Here's a view of each side
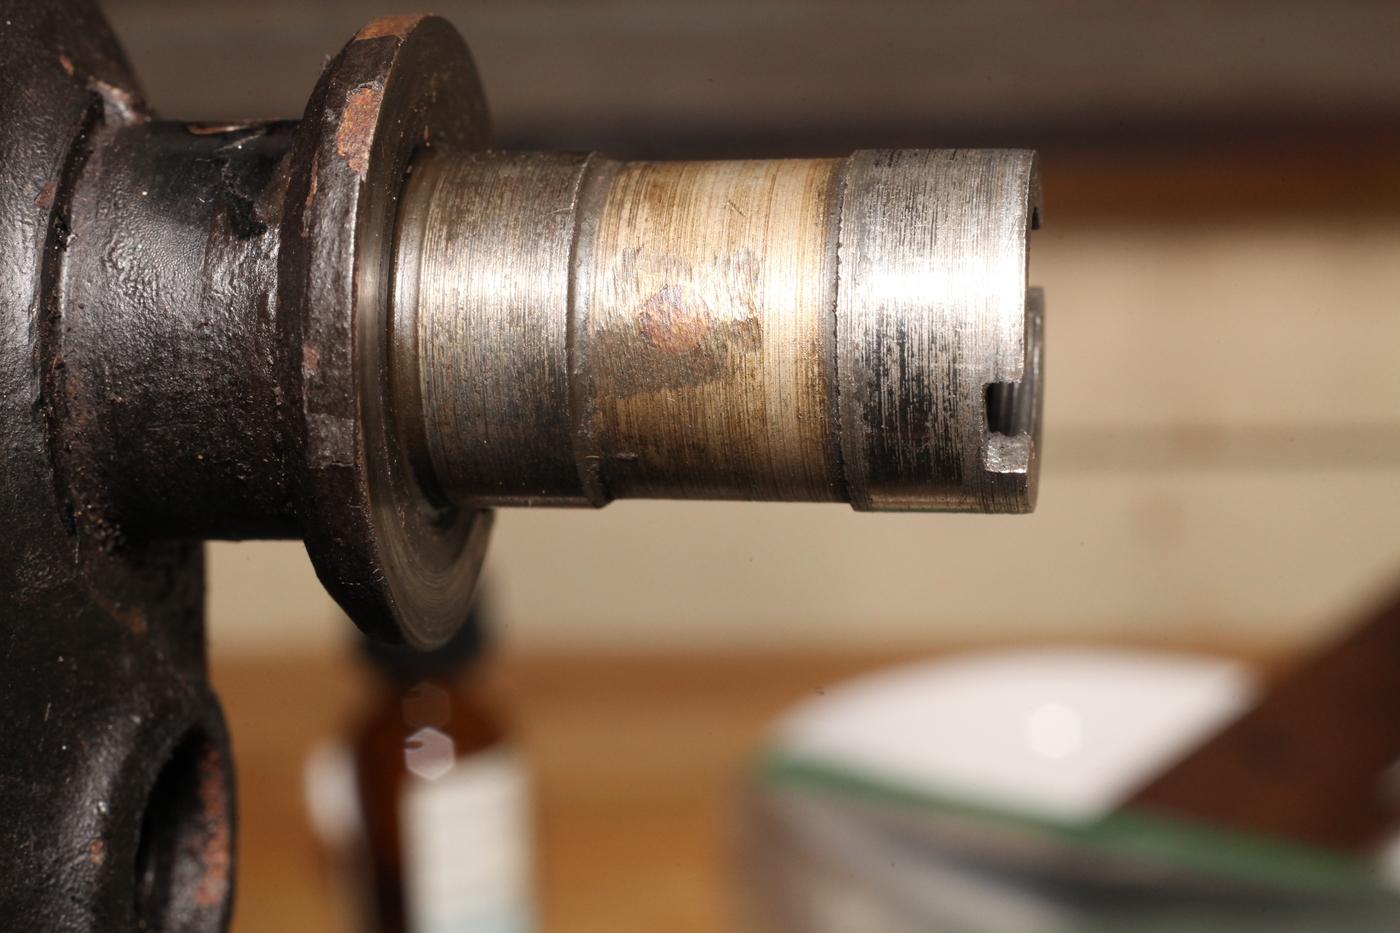
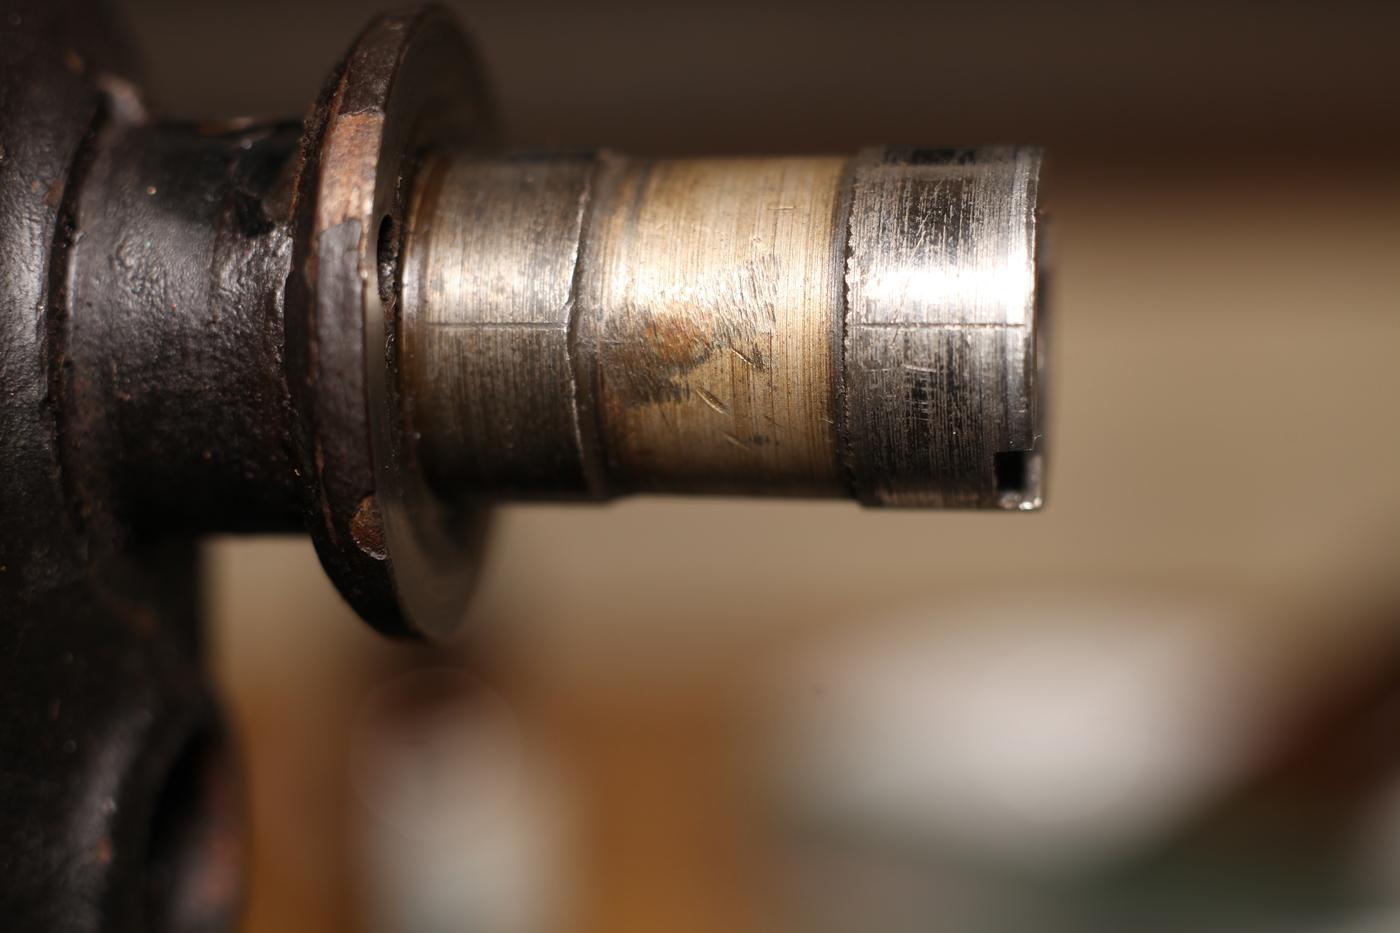
-
I see it now, too. Sort of a brown circle, midway of the shaft on the left. It's a tapered pin and I can't tell you which way. Are y'all talking about the two brown patches on opposing sides of the shaft, as seen in the video? 27-arm-shaft.mp4