


friquant
-
Posts
516 -
Joined
-
Last visited
Content Type
Profiles
Forums
Events
Blogs
Gallery
Store
Everything posted by friquant
-
Some needle bars appear to accept either shank diameter (1.6mm or 2mm) but the hook to needle distance is affected. Also where the needle lands in the throat plate is affected. When using round shank needles of the wrong diameter, you may be able to make up the geometry difference by rotating the needle bar a certain amount. (Meaning the needle clamp would protrude at some odd angle instead of protruding straight to the right) At least that was my fix at the time when I thought I had a bent needle bar in my Singer 31-15. Eventually I checked the needle bar on a thick piece of glass and found it to be straight, and ended up determining that the machine actually needed 2.0mm shanked needles for the needle to line up with the throat plate. That was such a happy discovery ⭐
-
That is a beautiful pulley!
-
Can we get photos of the screw?
-
You could do a bit of science here and move one tooth back to the original, to confirm that it's quiet in the original configuration and loud being one tooth off.
-
I have not done this, but this would be the process: Mark your starting position on both gears. Slide the larger gear left, advance one tooth, slide it right, check for noise. Keep cycling through the teeth until you find the one that is quiet. On mine (Singer 144) the smaller gear has 15 teeth, so that's 15 positions to check. But unless you did some screw swapping (set screw for position screw) I expect you to only need to go one tooth over to find the original position.
-
I just realized that you are running the machine under power without the throat plate in place. That is generally a bad idea as the machine could bind. I don't know if that will affect the sound It's safe to turn by hand without the throat plate though
-
You might try sliding the gear on the hook driving shaft all the way left (so it no longer drives the hook). Then see if it still makes noise when you move the hand wheel. That will tell you if it's hook related or not. While the gear is out of the way, also try rotating the hook by hand and check for noise there. Before all that: if your teeth are still matched up as from the factory, I suggest marking them before sliding the gear out so you can but them back in the same place.
-
Yes, do post some pictures. 🤩
-
Here is the comment that contains the video: https://leatherworker.net/forum/topic/36127-pfaff-545-safety-clutch-and-timing/page/2/#findComment-442262 It's the video that Adler 67 GK 373. Don't remember how far through
-
Photos Please 📸
-
 Did you find a manual? https://www.lrcrafts.it/manuals-vintage-singer-sewing-machines/ has manuals for similar machines, though I'm not seeing one for the 111W103 specifically. You can even read the manuals for the 111W144, 111W155, 111W156 they'll be similar.
 -
Congrats on machine ownership! I've you've got a vinyl/rubber belt with correct sized teeth but just too many of them, I've read you can shorten the belt: https://leatherworker.net/forum/topic/59855-singer-307g2-problem/page/2/
-
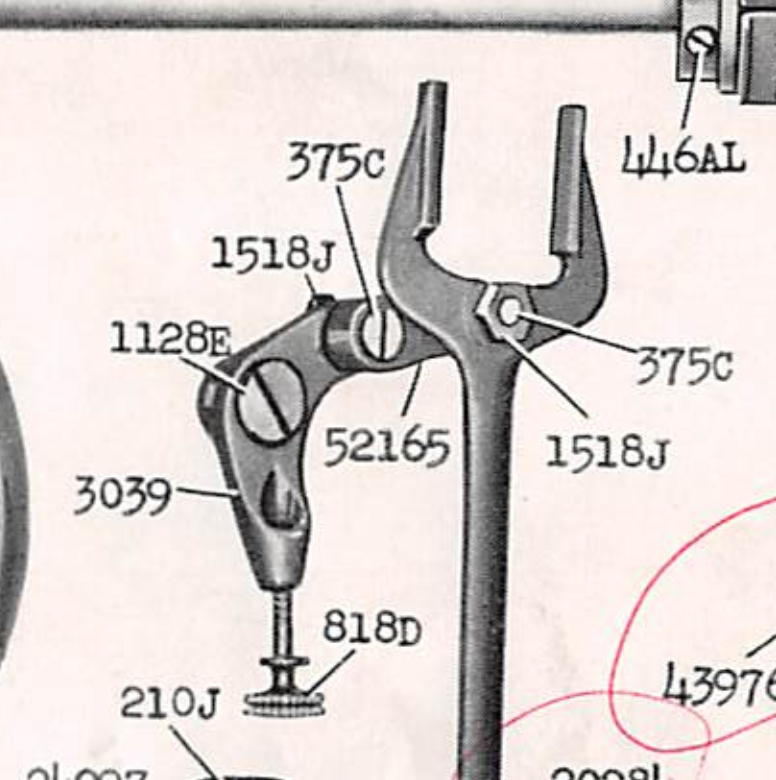
Here's a video where someone removes that fork from a Singer 31k15:
-
The parts list for my Singer 31-15 shows more of these parts together as a group, which might be useful. Have you tried removing the stitch length adjustment screw (818D in this screenshot) ? With that removed maybe the whole cluster will slide out toward the camera..
-
How about diesel or other penetrating oil on the stud? How about tapping the tip of the stud with a long steel rod and a light hammer?
-
upgrading to oldschool singer 132k6 and 132k7
friquant replied to VinnyK's topic in Leather Sewing Machines
Working on one of these old machines will give you confidence to make adjustments on your new machine. For example, you could take one of these machines and oil it up and make sure it sews...then locate all the possible timing adjustments on it (there are several) and one by one adjust them to match factory spec. Not much disassembly is required to make timing adjustments. -
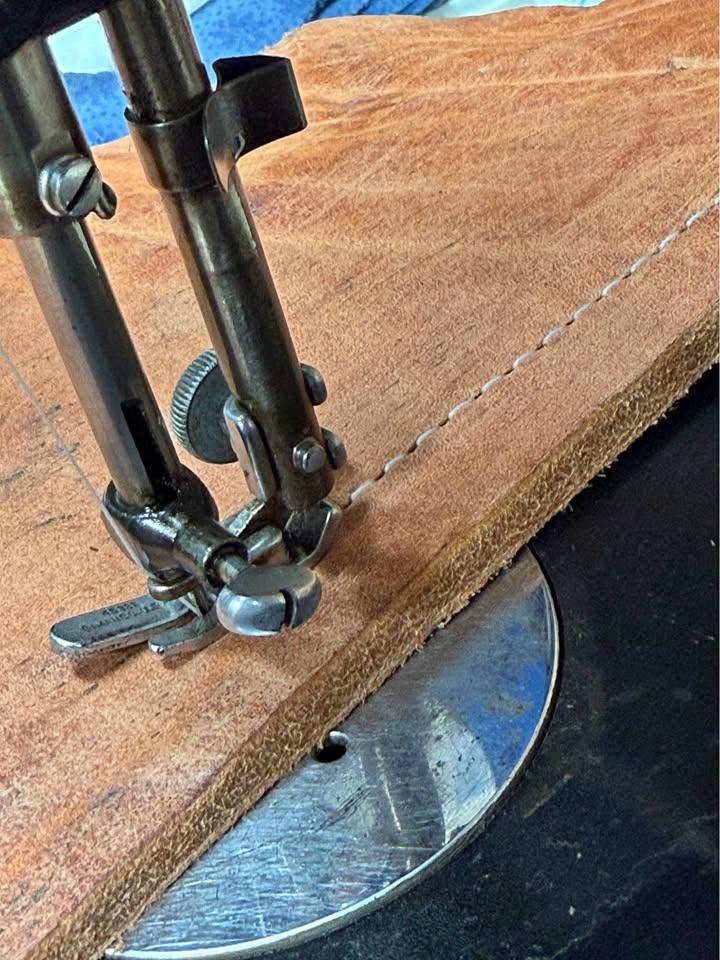
Your stitch length is unequal as you go around the bend. Maybe that is affecting the tension. In that tight corner, try doing all your turning with the needle down. That is---stitch, turn, stitch, turn, stitch, turn. That will get your stitch lengths to match. And see if that fixes the tension issue as well.
-
Do you have a user manual? These three separate adjustments work together to form a stitch without splitting the thread: Needle bar rise (how far the needle has risen from bottom dead center when the hook point crosses the needle) Needle bar height (where in the scarf the hook crosses the needle) Hook to needle distance (How much space between the hook and the scarf...ideally none)
-
How about some photos/videos showing what it is doing? My first guess is you will need to balance the lift of the inner toe to the outer toe. If that is the case, this video by Uwe may help: https://www.youtube.com/watch?v=iiaaT1npYrQ&t=192s
-
What sewing machine should I purchase?
friquant replied to J Kellar's topic in Leather Sewing Machines
What machines are you sewing with now? What kind of triple feed machines come up often in your local marketplace ads? -
I don't have a Singer 18-2, but I do have a Singer 31-15 which has a similar-looking mechanism. I have not taken it apart though. I'm not sure if the stud is threaded into the fork or if the fork just slides over the stud. With the nut off, I would check if the fork can be gently pryed away from the other linkages. Meaning, in your last picture you would pry the fork toward the camera.
-
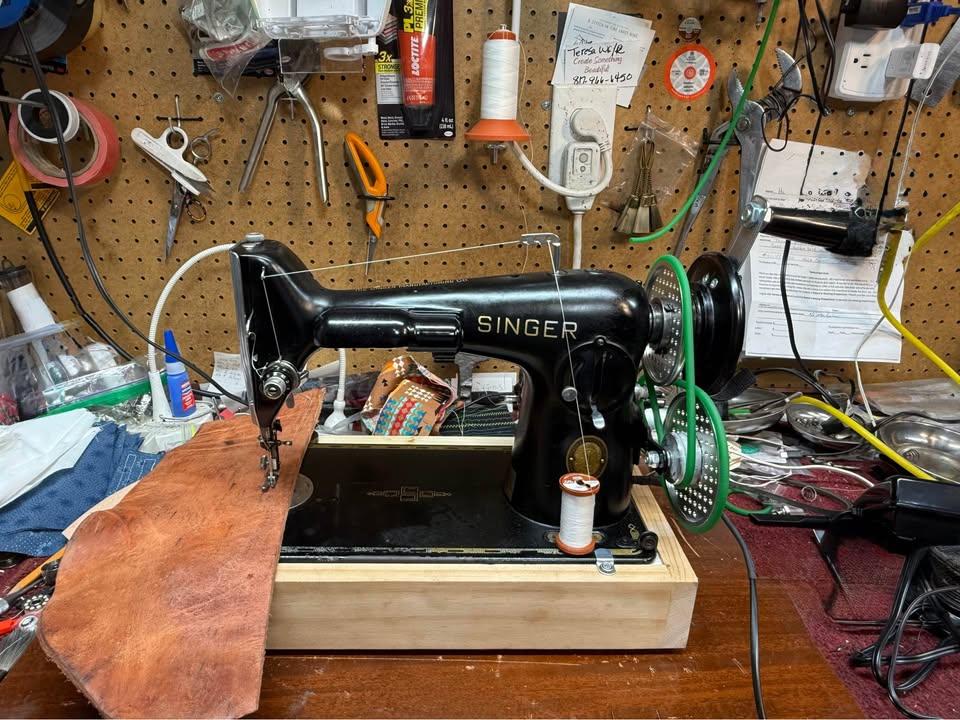
Option E: Domestic Sewing Machine Motor See the parent article: Choosing a Motor A domestic sewing machine motor is a small, compact universal motor that is typically used on domestic sewing machines. 1. What is a Domestic Sewing Machine In this case, “domestic” means “for home use”. But you can think of it as a “dainty” sewing machine. That is, often used for sewing thin materials together with skinny needles, TEX 20 - TEX 70 thread. On this photo you see a common configuration, with the motor mounted directly to the body of the machine. 2. What is a Universal Motor In a nutshell: it’s a motor that can run on AC or DC voltage, and whose speed and torque can be varied together by varying the input voltage. See this page on wikipedia: https://en.wikipedia.org/wiki/Universal_motor Note universal motors always have brushes. Typical universal motors seen on domestic sewing machines draw 1-amp @ 115 volts (or ½ amp at 230 volts), and have a maximum speed of 5000 - 7000 rpm. Some are a little beefier. 3. What Kind of Speed Controller A domestic sewing machine motor typically comes with a foot pedal that has a built-in variable speed controller. Some use a “carbon pile”, meaning a pile of about 50 carbon discs, and when a spring pushes them tighter together, more current flows through them. Carbon piles do get warm in use. Others use a TRIAC speed control. See this page on wikipedia: https://en.wikipedia.org/wiki/TRIAC#Application You can usually replace the foot pedal (speed controller) separately from the motor. So if your foot pedal does not provide a good linear response, try a different one. 4. Is a Domestic Sewing Machine Motor the right Motor for me? Domestic sewing machine motors are a compact, inexpensive alternative for powering your industrial sewing machine. They are intuitive to drive. They will excel in situations where not a lot of torque is required. So pretty much any non-walking foot sewing machine could be a good candidate for a domestic motor, especially if you gear it down. 5. How to Gear Down You can improve the pedal response of a domestic sewing machine motor by gearing it down. This gives the machine better low-end response so it won’t bog when crossing thick material at low speed. The motor pulley that comes with a domestic sewing machine motor usually fits well with 5mm polyurethane “PU” belt, which can be cut to length and hot-fused. You can put an oversize handwheel pulley, see examples: https://leatherworker.net/forum/topic/132445-domestic-motors/ More info on making wooden pulleys: https://preciousww.com/making-big-v-belt-pulleys-from-plywood/ Or you can add an intermediate gear reducer, see example: https://leatherworker.net/forum/topic/132447-glove-sewing-machine-advice/#findComment-789023
-
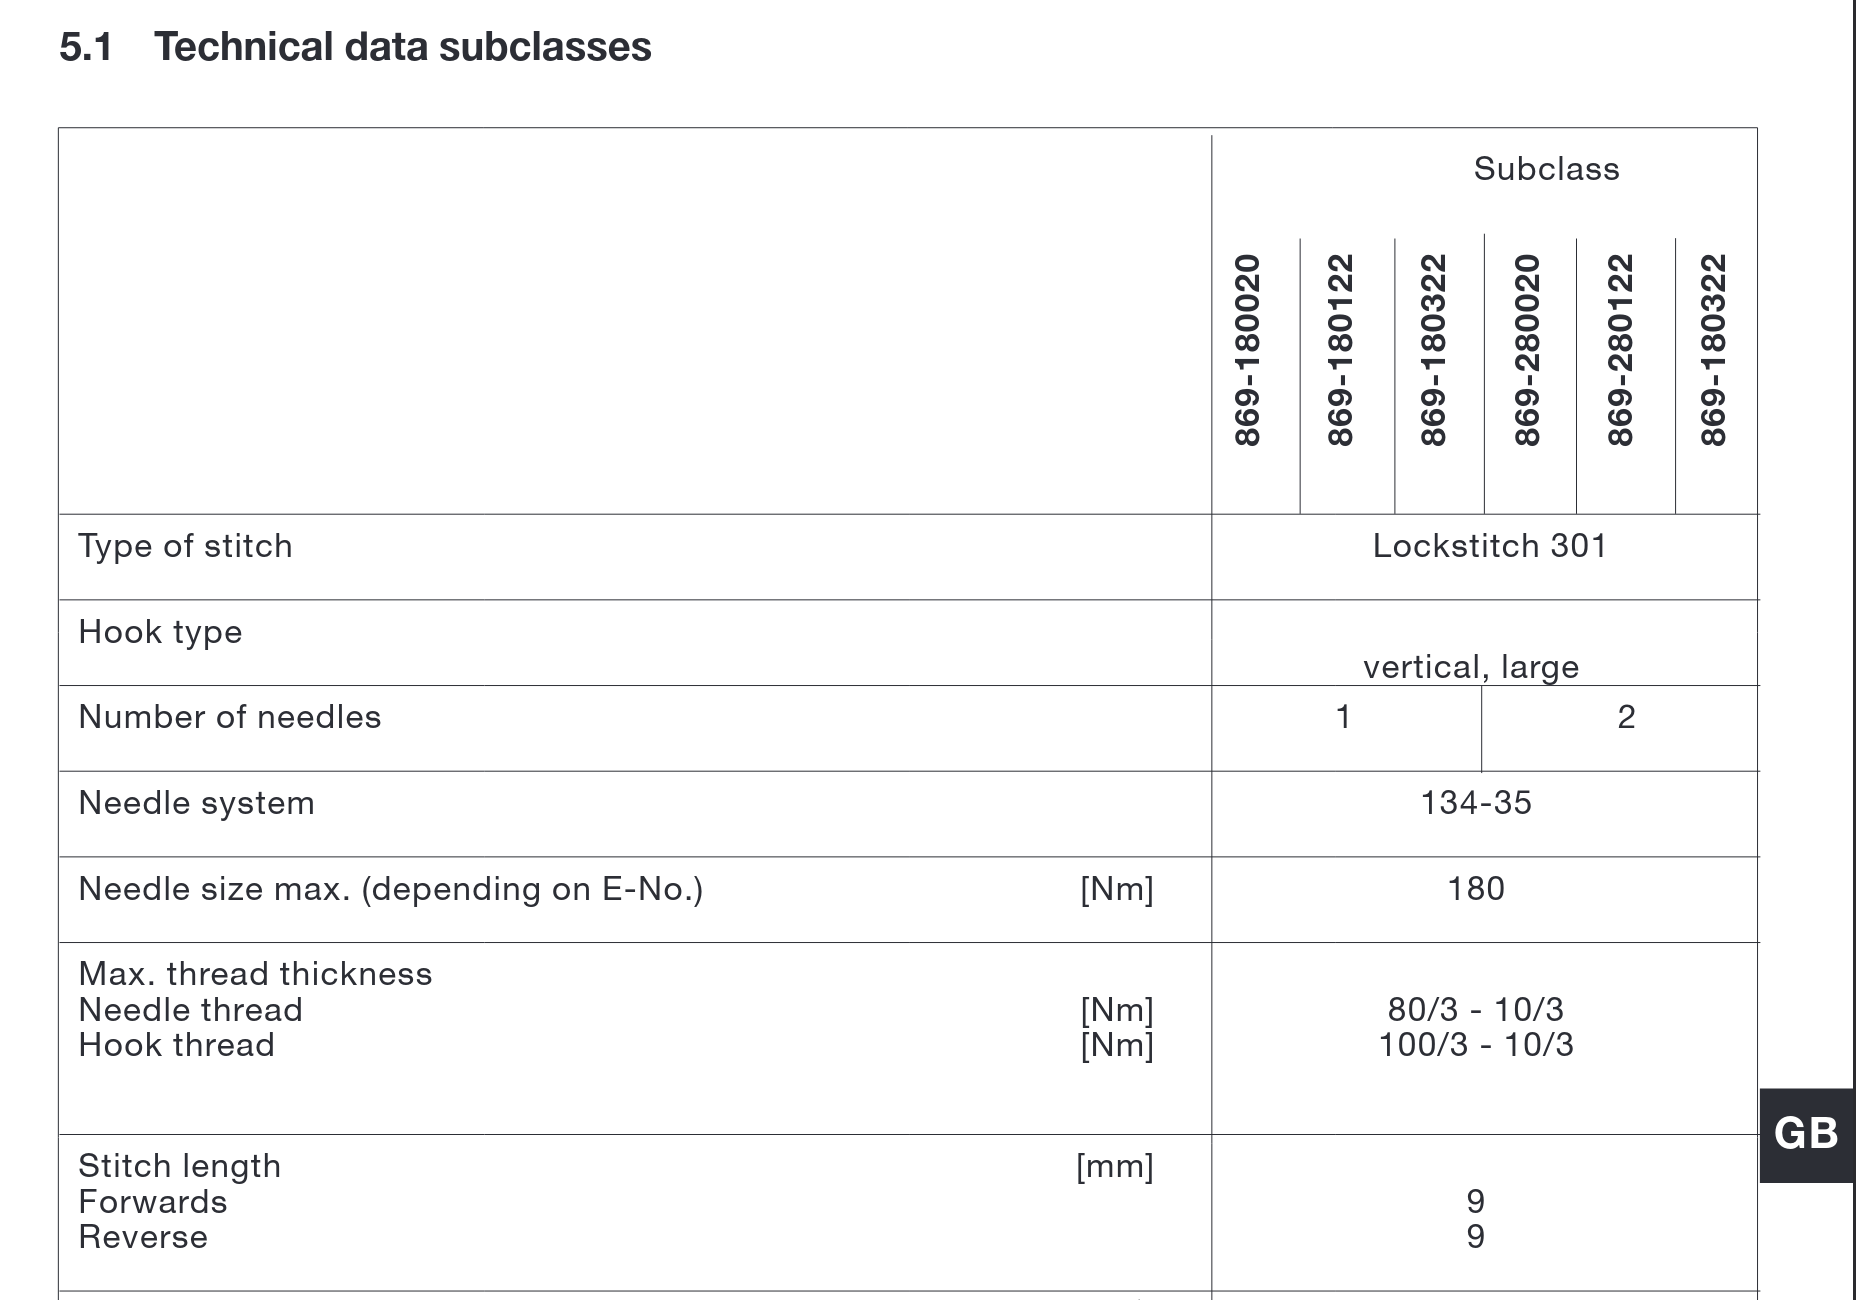
I'm not seeing reference to the "-M" part of the 869. Looking in this user manual: https://partner.duerkopp-adler.com/commons/download/public/869/B_869_DE_EN.pdf on page 89 (as viewed from the pdf reader), or page 9 (as viewed in print from the english section) it shows several subclasses and they are all specified with a max needle size of 180. Here is a screenshot: It also says "(depending on E-No.)" but I'm not seeing reference to "E-No" elsewhere in the manual. 🤷♀️
-
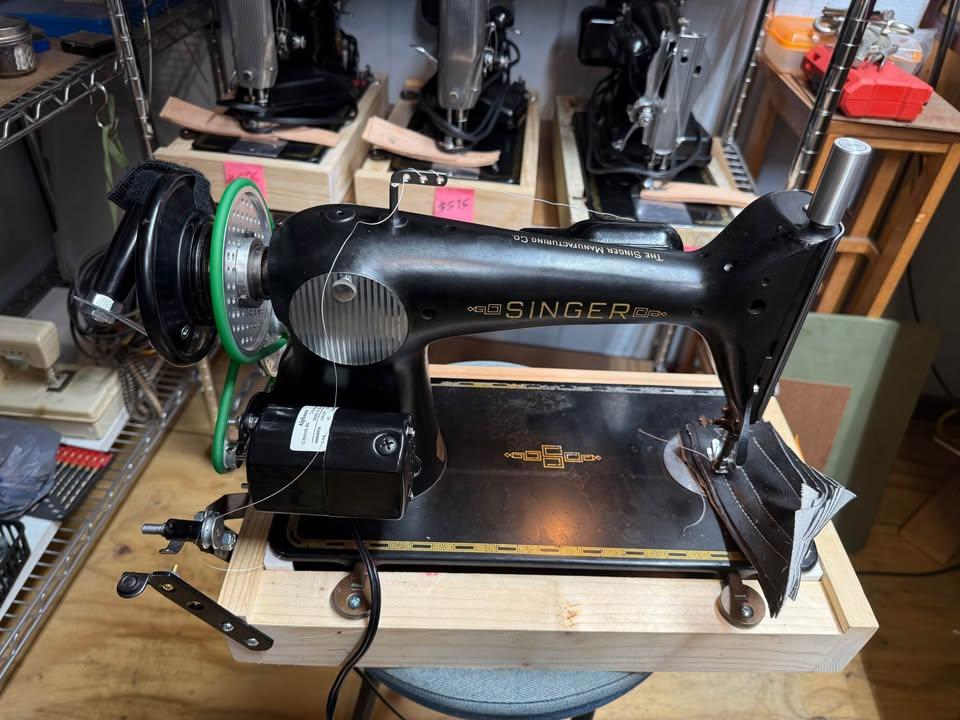
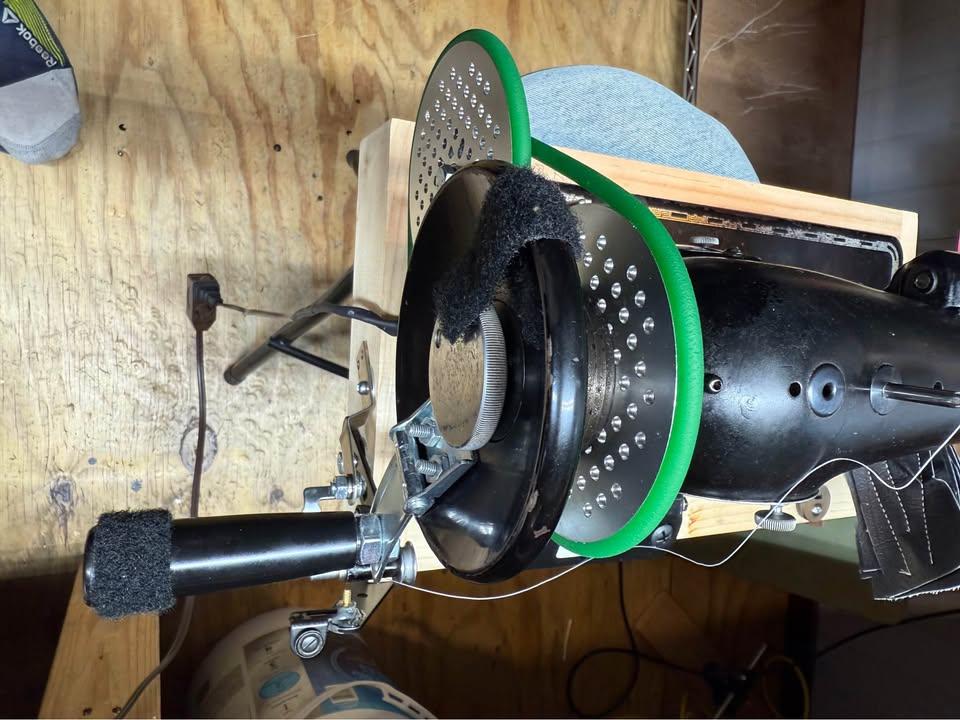
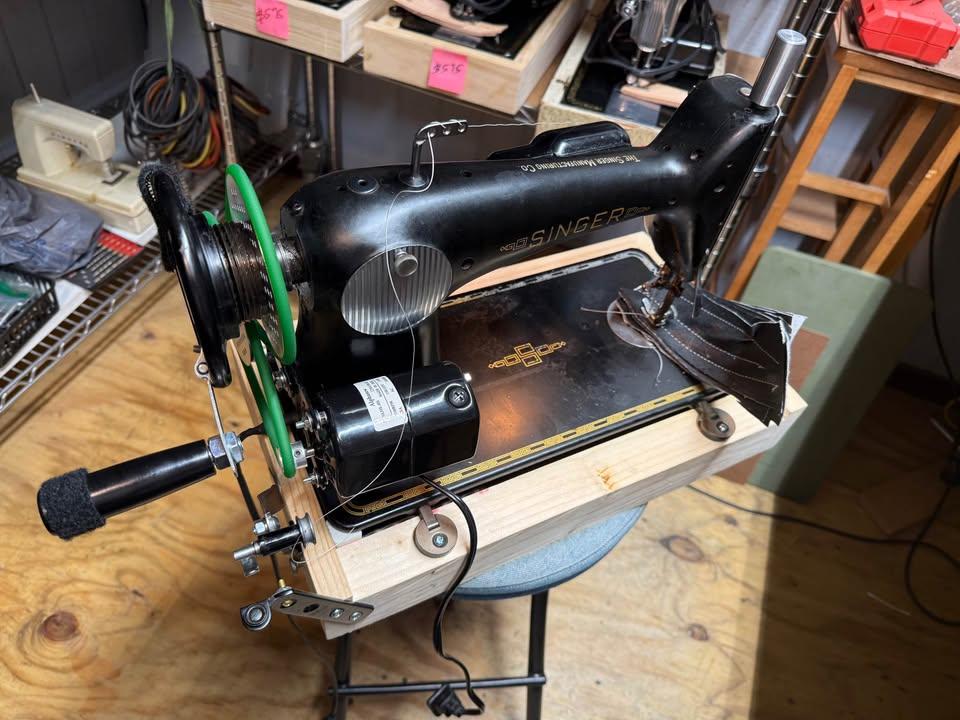
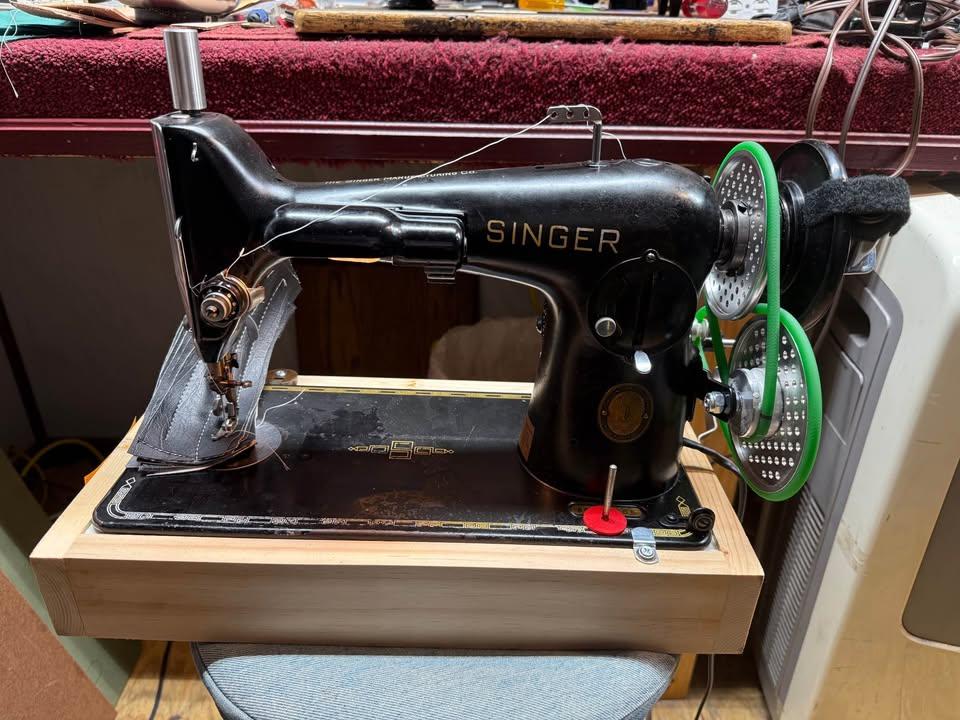
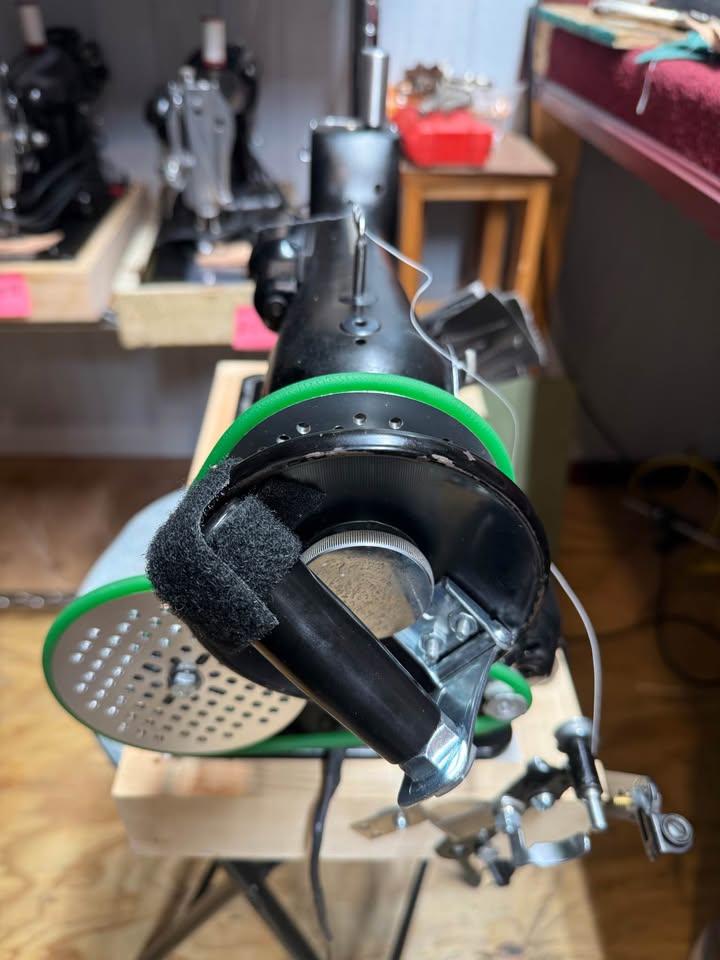
Looking forward to seeing pictures and videos of your solution! In the past I have 3d printed a motor pulley, but have not done the larger hand wheel pulleys. (My printer can print within a cube 180mm on a side) By the way, I took some of my inspiration from this slick item I found for sale on marketplace: https://www.facebook.com/marketplace/item/678066578496084/ That link will likely go stale soon so I'll post the pictures from the ad here for posterity.
-
Can you upload the user manual? That hopefully will show us how to set the start speed and the maximum speed. Also it may say what the absolute slowest the start speed can be set to. Once you know how slow the motor can go, you can do the math to figure out what pulleys will get you to your goal of 60 stitches per minute when the motor is at its slowest setting. As others have indicated, smaller motor pulley, larger handwheel pulley, and/or gear reducer in the middle are all options to get you to your goal speed. I also like what @nejcek74 said about a needle positioner giving you "as much time in between [stitches] as you want".