-
Posts
517 -
Joined
-
Last visited
Content Type
Profiles
Forums
Events
Blogs
Gallery
Store
Everything posted by friquant
-

will juki 1341 accessories fit this Typical tw3-343?
friquant replied to TakashiOkada's topic in Leather Sewing Machines
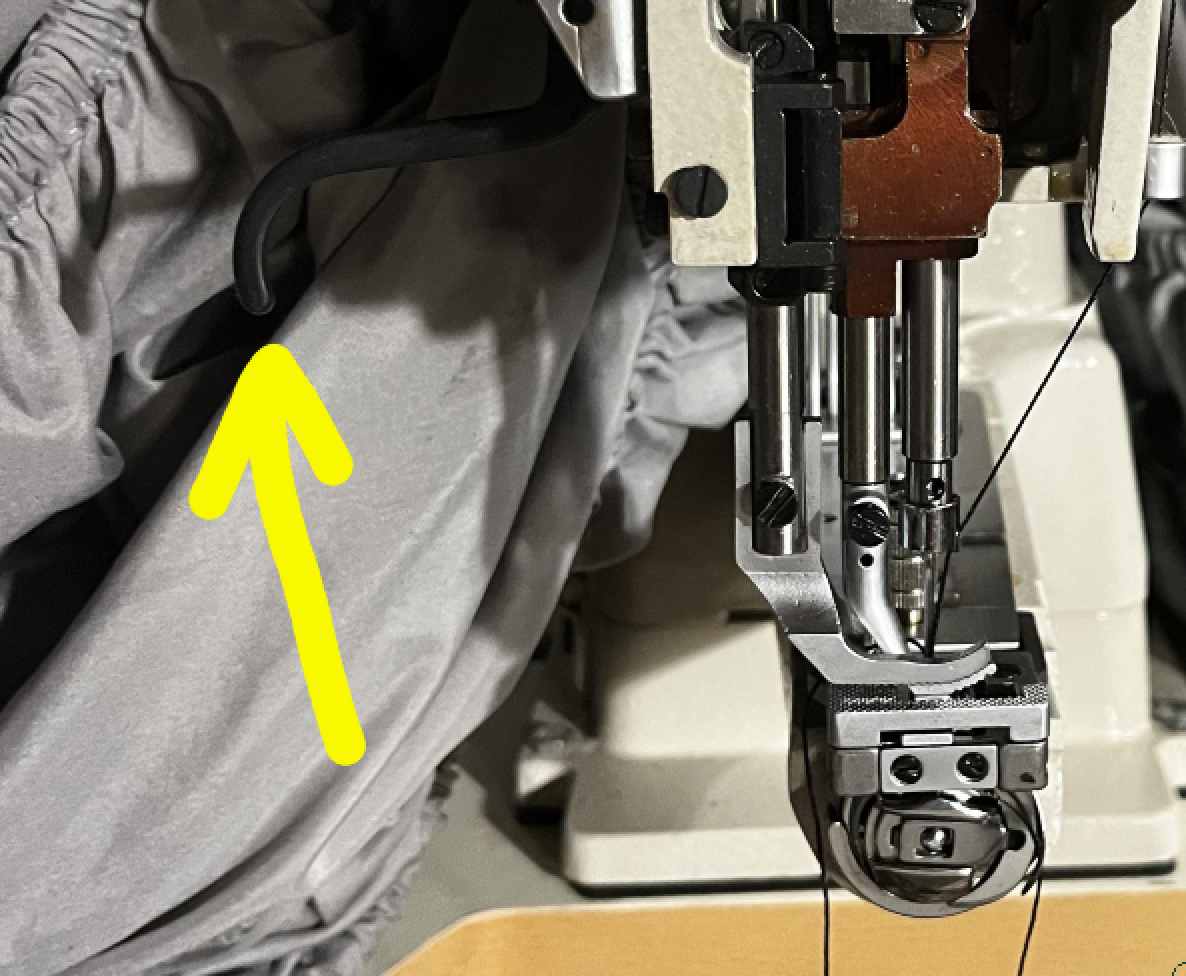
Looks very sturdy. What is the diameter of the bobbins? Your chain is rubbing on the table. If willing, you can drill a hole closer to the machine that will be a straighter shot to the pedal. Also, if the chain still rubs, replace it with a cable, and make a slide for the cable out of some vinyl and grease the vinyl. Also at the foot pedal end, the chain is installed in the default (but unfortunate) position of out at the tip of the pedal. You probably don't need that much lift. Mine I drilled a new hole a couple inches down from the tip and it gives me enough travel will less force. Another help is to reduce your presser foot pressure. For very low pressure, I remove the presser foot spring, but on very thin fabrics I need to keep the spring installed. -

Seems I broke my Juki-LS-341, again... (Bobbin Shuttle)
friquant replied to Yoshi888's topic in Leather Sewing Machines
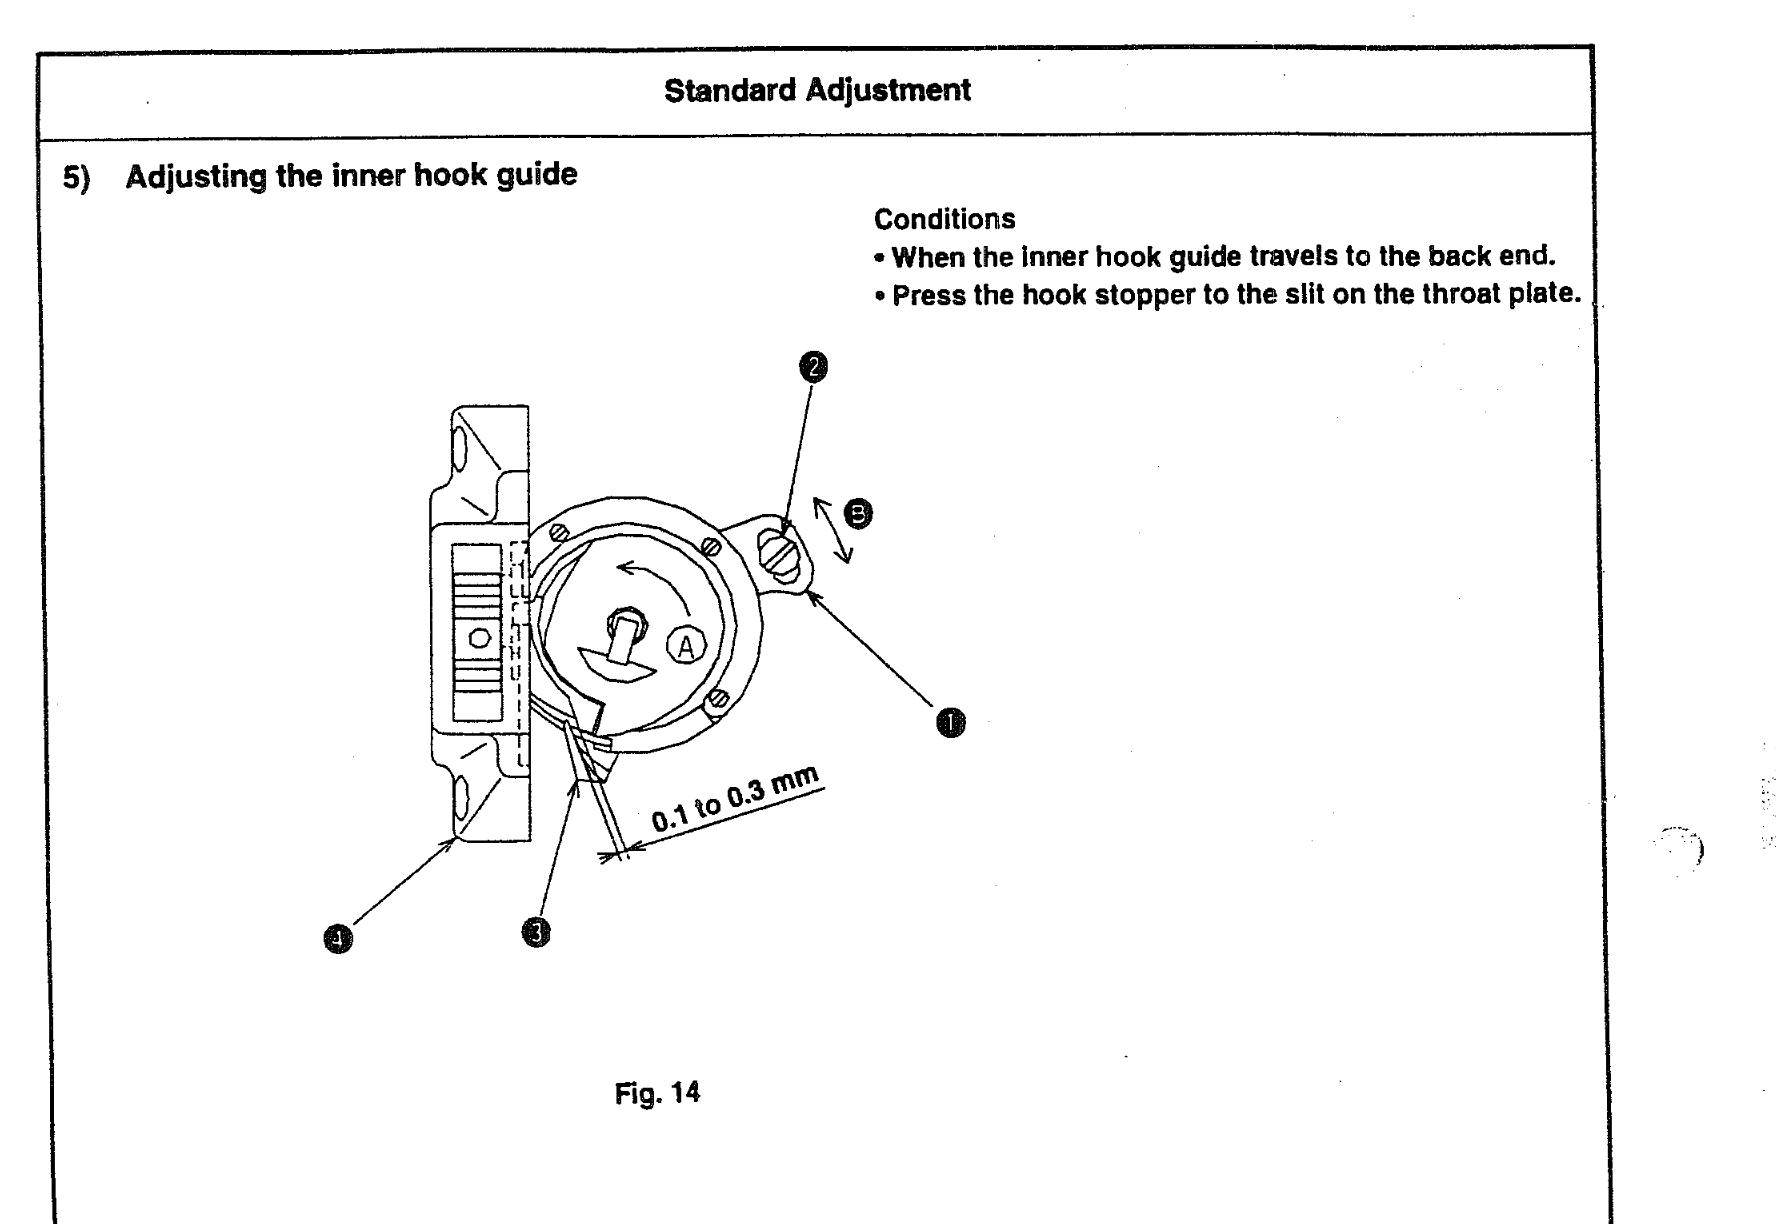
Here's the image from the engineer's manual. I don't bother with measuring this adjustment---I just make sure the latch opens far enough to allow thick thread pass through, and make sure the latch doesn't bind. By the way, it's the needle thread that goes through the latch, and the latch should open to allow the needle thread to go through as soon as the needle thread is ready. (Otherwise there will be some popping sounds as the thread gets forced through a closed latch) -

Seems I broke my Juki-LS-341, again... (Bobbin Shuttle)
friquant replied to Yoshi888's topic in Leather Sewing Machines
Can you post a picture of the inner hook guide? I'm not familiar with this term. -

Stitchman Servo Motor (The Missing Manual)
friquant replied to friquant's topic in Leather Sewing Machines
See this post: https://leatherworker.net/forum/topic/125148-replacement-pulley-for-tapered-shaft/#findComment-770958 -
I posted about this here:
-

Baby Lock EA-605 Service Manual and Timing Adjustments
friquant posted a blog entry in State of the Servo Motor
I've been working on a couple of Baby Lock EA-605 overlocker machines. Here is the service manual for the Baby Lock EA-605 and Baby Lock EF-205. (Also known as the "instruction booklet for maintenance") babylock-ef205__ea605-service-manual.pdf And here is a video I made of how the mechanisms and timing interact in slow motion: -
@Cwagz396 Start your own topic, post close-up photos of the hook. Also post photos of the entire top thread path from spool to needle eye. We will help you figure it out
-
I posted a 4-month review here: https://leatherworker.net/forum/topic/131750-review-of-jianglong-341-after-4-months/#findComment-784187
-

Seems I broke my Juki-LS-341, again... (Bobbin Shuttle)
friquant replied to Yoshi888's topic in Leather Sewing Machines
If you cannot get the gear to move, you could loosen the shaft again, and move it over the right number of teeth to bring your timing back to what you had before. -

Seems I broke my Juki-LS-341, again... (Bobbin Shuttle)
friquant replied to Yoshi888's topic in Leather Sewing Machines
There are three set screws to loosen. How many did you loosen? Once all three are loosened, if still not moving you can add a few drops of diesel and let it sit to dissolve some of the corrosion, if that's the issue. You can also screw one of the set screws partway out, then place an end wrench (or spanner wrench) around the gear, using the protruding part of the set screw for the wrench to grab onto. (Go gently though) -
You can measure the width of the needle just above the scarf. That will tell you the metric needle size. (1.4mm, for example is 140Nm)
-
I removed the brake from my brushed motor, and preferred it that way. I didn't like having to press on the treadle in order to move the handwheel freely. Try removing it, and see how many revolutions it takes for it to stop from the speeds you sew at. Then you can decide what you like.
-

Seems I broke my Juki-LS-341, again... (Bobbin Shuttle)
friquant replied to Yoshi888's topic in Leather Sewing Machines
Nice work finding the offending bushing! 💥 Here are a couple of excellent videos by Uwe on the general practice of setting timing: https://www.youtube.com/watch?v=1wNBPX8i524 - video by Uwe of Consew 225 https://www.youtube.com/watch?v=pL9WiZeKZAY - video by Uwe of Adler 67 Since these videos are conducted on a different machine, what you actually loosen and adjust will differ but the overall principle is the same. Your juki user manual will have factory specs for needle bar rise, needle bar height, and hook to needle distance. These will be adequate to get you sewing again. After you become a pro at timing by the book, you might also enjoy How to Stuff a Hook and New Way to Measure Timing. -
Skipped stitches are when there is a hole in the leather but no knot for that hole. That is, the hook did not catch the top thread and drag it around the bobbin. I don't see any skipped stitches in your photo. What I do see is the vertical position of the knot varies from stitch to stitch. Needle size, thread size, material composition, stitch length, and thread tension all affect the vertical position of the knots. Usually the goal is to have the knot hidden somewhere in the middle of the material. Doing this reliably seems to be easier when the overall material is thicker, and when there are multiple layers involved. To start off your experimentation, get a feel for the range of thread tension offered by the bobbin tension spring---then choose a bobbin tension on the low end of the range. From there, experiment with different top tensions. Higher top tension will pull the knots all way to the top of the material. Low top tension will leave the knots all the way at the bottom of the material. Too low of top tension will leave loops of top thread hanging down below the material (sometimes the hook will grab these and your machine will bind.)
-

Seems I broke my Juki-LS-341, again... (Bobbin Shuttle)
friquant replied to Yoshi888's topic in Leather Sewing Machines
Oh I see...if you can get the correct tooth to match between the gears, you wouldn't have to loosen the bevel gears at all 😃 I want to put a mark next to my gear teeth (and between the shaft and the gear) so I can take apart and put back together the same way, without having to measure timing. But I haven't done it yet.. -

Seems I broke my Juki-LS-341, again... (Bobbin Shuttle)
friquant replied to Yoshi888's topic in Leather Sewing Machines
@Yoshi888 Excellent video! As you have already concluded, whatever is supposed to hold the (horizontal) hook driving shaft in place left-to-right has come loose, which has allowed the two bevel gears to disengage and therefore lose track of time. First you need to get the (horizontal) hook driving shaft fixed in place left to right. Then you will need to set the hook-to-needle timing. I expect you won't need to purchase any parts. -

Seems I broke my Juki-LS-341, again... (Bobbin Shuttle)
friquant replied to Yoshi888's topic in Leather Sewing Machines
Agreed. -

Seems I broke my Juki-LS-341, again... (Bobbin Shuttle)
friquant replied to Yoshi888's topic in Leather Sewing Machines
@Yoshi888 Can you turn the machine slowly by hand and identify what/how it is actually binding? The situation I suspect the most is that the set screws that hold the bevel gear in place (and keeps the correct timing) are loose, and the bevel gear has moved laterally away from the other bevel gear a little bit. The way to check would be to loosen the three set screws in the bevel gear and press lightly to slide the bevel gear to the left. If done carefully you may be able to do this without changing the timing much. (But if they actually are loose, then who knows how much they have already moved... Do you have a manual for this machine? I'm using this one: https://leatherworker.net/forum/applications/core/interface/file/attachment.php?id=139088 but you can probably find one in German too. Some general videos on timing: https://www.youtube.com/watch?v=1wNBPX8i524 - video by Uwe of Consew 225 https://www.youtube.com/watch?v=pL9WiZeKZAY - video by Uwe of Adler 67 -
I'm using this on an old singer treadle table, using the original treadle as the gas pedal. The treadle is fairly heavy. The heavy pedal, in concert with reduced spring preload on the clutch, effectively takes the brake out of the equation. Meaning the spring preload is enough to counteract the weight of the pedal, but not enough to apply the brake. (Adjusting for a large amount of freeplay between where the brake engages vs where the clutch engages also helps this work out.) That makes sense. This is a three-phase, two-pole clutch motor and I'm powering it with a variable frequency drive (VFD). The highest I ever set the VFD with this setup is 17Hz, which spins the machine head at 310 stitches per minute. At that speed, even with no brake it comes to a complete stop 1.5 revolutions after letting off the gas.
-

Seems I broke my Juki-LS-341, again... (Bobbin Shuttle)
friquant replied to Yoshi888's topic in Leather Sewing Machines
Take a look underneath at the hook driving shaft. Check if the bevel gear on the (horizontal) hook driving shaft is snugged up against the bevel gear on the (vertical) hook shaft. If there is a wide gap between the two bevel gears, I could imagine it binding up. Also verify: No missing teeth on either of those two gears. Three set screws tight on bevel gear on (horizontal) hook shaft Set screws tight on feed dog vertical movement eccentric (mounted on horizontal hook driving shaft). No interference between feed dog vertical movement eccentric and either of the bevel gears -
What country are you in? You can buy machines through alibaba, but I would find out how much the import duties will be.
-
Have you already verified that you are using a new needle of the correct system? In my Singer 31-15 my needle looked off in the throat plate until I discovered that I was using 2mm shanked needles, and the machine actually needed 2.5mm shanks.
-
Once you get your allen wrench in the screw circled in red, rock it both ways. That is, attempt clockwise, then attempt counterclockwise, then clockwise, then counterclockwise. Make sure you have the correct sized allen wrench. Also make sure you are NOT using the ball end of the allen wrench (if your wrenches have that), as the ball end only provides a small contact patch.
-
Do you have anything stronger? Are you saying it's a hex type, like allen wrench? Is there a lock screw holding it in place, by any chance? Can you send a photo?


