

Janice
-
Content Count
66 -
Joined
-
Last visited
Everything posted by Janice
-
Thank you for the help, not confusing at all! Never thought to take the lid off, that will make a difference. BTW, what do you use for a final top coat finish on yours? Thanks again, Janice.
-
Hi all, I made my first toilet seat top. I am now wanting to attach it to the actual seat, and was wondering if anyone had some tips or "must know" remarks for me before I attempt it. I was thinking I would use a good glue first, and then upolstery tacks, the kind with the dome top, and go around the outside edge of the leather. If anyone out there has any tips for me, I would really appreciate it. I am a little worried that the tacks, wont go into the wood very well.
-
Oops Rookie Mistake, Stirrup Leathers.
Janice replied to Janice's topic in Saddle Identification, Restoration & Repair
Thank you so much for the quick reply. I didnt think of that stitch line, and willl add that in as well, good tip! Thanks again! -
So I got distracted and made a totally rookie mistake today. I am replacing the leathers on a western saddle. They are the shorter, close contact kind, where the fender supports some of the wieght. They have the strip sewn along the holes for reinforcement, and end at the top of the fenders, with 3 copper rivets. So I go ahead and make up the new ones. Problem is, I sewed the reinforcing strip to the wrong side. It should be on the rough out side, and it is not. Question is, from a safety standpoint, can anyone see a problem with putting them on this way? Any other concerns? Wear and Tear etc? This saddle is used for cattle penning, and is needed tomorrow morning. I have only to attach them at this point, or should I start over? What would you do?
-
Hey, I am 1/2hr east of you LOL I do leather work, but I dont make saddles. However, I do know a couple of good saddlers for you. Try Ron Stolp. He is in langley-aldergrove area. http://www.stolpsaddles.com/ Or, go to Merritt and see Andy Knight http://www.knightssaddlery.com/ or Don Lowen. http://www.saddle-maker.com/ You can see don lowen at the mane event in oct in chwk, he usually has a booth there.
-
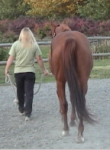
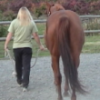
Hi all! I finally got around to putting in an avater. I am with my filly Phoenix, who was about 3 in this pic i think. Mostly just been lurking for the past few months. Watching the winter olympics on TV, even though they are just an hour or so from me here. LOL Did some renos on our living room, and got a nice brindle cowhide for the new floor. I keep looking at it and wanting o cut it up!! I will try and post more, with pics of recent creations, rather than just lurke.
-
Very nice. Beautiful balance between the hide and leather, both with color and size. Well done!
-
Hello I have always found the ones that fit my saddles best are made so that the top of the bags are at a 90 degree angle to each other, when you lay them flat on a table. If the piece in the middle that joins the bags is too straight, the bags just dont hang nice at all. Also, dont forget to put on some dees or some method to tie the bottom of the bags down. Keeps em from flopping around or comming off. hope this helps Jan
-
Coffee cup wrap
Janice replied to wildrose's topic in Purses, Wallets, Belts and Miscellaneous Pocket Items
I am glad to see you made one Holly! Nice job! They sell quite well for me, but just through word of mouth, not at a market. (yet) People see mine, and I get nothing but positive feedback. I think at Christmas, when the weather is cold, they will be a popular item. What did you use for the final finish, and have you spilled coffee on it yet???? How did it stand up? I am still playing with finishes, to find the best one. -
Wow, you dont see a brand new pair of 40 year old boots everyday. Yes, Justin boot co is very alive and well.
-
"They are now my most prized and much loved collection, along with another prized LCM mag, a Jan/Feb 1986 issue with Ann & Al Stohlman, at their ranch in British Columbia, Canada on the front cover, that I found previously at a S/H shop." I dont have 10 years worth, but when I bought all this stuff, there was a few mags in with everything, and that green one with Ann and Al was one of them! I have friends that live up near that ranch, and am lucky enough to ride that beautiful country each summer! The magazines I have are very interesting reading, and as someone mentioned earlier, I also love the old advertisements. I am now looking in the second hand book stores for more as well What a thoughtful gift from your friend.
-
I need to find a finish for an item, that is basically the toughest thing going. I dont care if the item cant be conditioned later on, just that it can stand up to liquid spills as well as possible. Anyone got any ideas? (this all started from having a bit of coffee dribbled onto a piece, and finding the antiquing and tan coat rubbing off with the coffee)
-
Hidepounder, When you mentioned the sharpening jig, do you mean the likes of the one tandy sells, that keeps your blade on the correct angle as you strop it, or someting entirely different? I do have a strop, but am going to make a better one. I bought some white rouge, it is Samona brand, #5. Do I need any other colors? For patterns, that last piece I did, the one on the shrub in the pic, it was traced off the fiebings book cover, fantastic finishes. I just had to bend it a bit to fit. The noseband was from the A Stohlman book how to carve leather, and was pieces of the ladies belt with the roses on it. Again, I just made it to fit what I needed. Is this what you mean? Or do you want me to find a real piece to copy, not a book? I have a few saddles I could try, my old Eamors are hand tooled. Thanks for all your help!!
-
New Rodeo Chaps and a set of slobber straps
Janice replied to Tkleather1's topic in Clothing, Jackets, Vests and Chaps
Those are some nice edges thats for sure! I also like the tooling pattern on the chaps too, with the basket weave & floral being mixed. Nice and even. Very nice finish. What got you to that finish, which products/methods, if you dont mind sharing? I like the way the belt is laced in at the back. You do nice work. -
Hidepounder, If this forum was a university, you would be one of the professors! You are not being presumptuous at all. A person would be a fool not to take very seriously the advice you offer. I do have more to ask/say, but since I just lost the reply that was to go here,(stupid comp) I have now run out of time. I shall return!
-
rhall, thank you. I love my cowboy, his days of being a fountain are long past, but he is a fine statue sitting on my raised brick deck in my yard. (He is actually signed and numbered even)
-
Pino, very nice work you have there! Keep it up. Here is a link to a slang list for you, the most popular ones like LOL, are darker print. Enjoy! http://www.web-friend.com/help/lingo/chatslang.html
-
Hey I like that! Very nice. Never thought of using a mulefoot that way.
-
So, I have been hanging out here for 55 days now. Yesterday I finished my 6th work. 6.) I decided to try sheridan style here. It is far from perfect, but I am happy with the result. I will just keep on practicing. I need to practice my carving. Learned alot from the antiquing process, STILL need to slow myself down. Bought a halter and cut of the noseband, didnt feel like making on from scratch (Lazy) I will just shut up now and post pics (hey, like my cowboy fountain I saved from the dump?)
-
Thanks Bob 5.)Second noseband. You can see it carved in the pic above. I condensed the pattern to fit better, and paid more attention to its layout. I read about the order of tool use, and applied some of that theory here. This time I had bought some antique finish, and some tan coat. Tried them out on this item. Took my time better as well. Lesson learned- Velum paper is fabulous stuff, I could use my same pattern again, even with the modifications! (time saver) -I should just cut it a bit bigger, as it is a 2 layered piece. then trim edges, and my edges would be exactly the same, and edge work would be less. (not as happy with the edges, they are not perfect) -antique really comes off with the tan kote, take it easier next time. -starting to get a better feel for casing.
-
4.)Roses. I wanted to do a bronc halter hoseband, so I decided on some roses. The first one I made, the pattern was too long, and the noseband too narrow, so I made another, and my dad kept the unfinished one. Lessons- Used velum paper THANK YOU WHOM EVER IT WAS THAT TURNED ME ON TO THIS PRODUCT! YOU ARE A SAINT! -be MORE careful about pattern layout. -look at piece when you think it is done. I didnt like the un-pear shaded petals on the rose, when I looked at it dried. I should have ignored the pic in the book, and pear shaded them anyway.
-
3.)So now I wanted to do some flowers again. I still used the ziplock, as I hadnt gotten to the stationary store yet. I traced some flowers from a magazine cover, and managed to get them onto the leather. Casing was better this time, but still need to develop more of a feel for it. Carved my design, and went to work. Turned out ok for my 3rd attempt, but the slimmer scroll type leaves are not pretty, flowers are not cut or beveled deep enough, but at least are sorta presentable. Used snow proof as a protective coating, to see what it would do. (everything is an experiment). Lessons learned- Still gotta slow down a bit -carve deeper -bevel deeper -finish differently -need WAY more practice on those scroll type things!
-
I have been doing leather work, for a few years now, but NO tooling. I've made some chinks, and pillows, done lots of repairs for my horse friends, and made lots of tack. I have relied on fancy stitching, applique, or hardware with bling to dress up most things. Since I have been on this forum, I have been bitten by the tooling bug. Tons of reading, asking a few questions, and a few attempts at projects, have gotten me started. (I already own a ton of tools and equipment, learning to use them is what lead me here, but that is another thread.) THANK YOU TO EVERYONE FOR ALL THE INFORMATION ON HERE! 1.)The first attempt was rather pathetic. I took a scrap of leather, and decided to make a cover for my head knief. It was soooo bad, I almost threw it out. Then I remembered reading (I think it was Bruce or Bob) keep your first works, to show yourself your improvement later on. So I quickly soaked my leather,traced on my flower pattern, using plain tracing paper, (somehow managed that) carved my design, and got busy with the stamps. Lessons learned-dont soak your leather too much, wait for it to dry to the right level, learned alot about casing. _put pattern in ziplock bag next time. 2.)Second attempt, made another run at the knief cover. Decided to try something a bit less complex, and drew a leaf pattern. Read up a bit on how to tool leaves (thank you A.S.) used a ziplock this time for my pattern. Leaves turned out presentable, can actually show people this one, not perfect, but a good learning experiance. Lessons- Still need to slow down, take pride in even small jobs for self. Should have cut it out more carefully, put effort into making it even, not hurry to get to tooling stage. -learned (on here) about velum paper, need to try some. -Pay attention to the angle of the viener, see how one is backwards?
-
This is a wonderful discussion everyone, thank you for this. "It is when we think we have it all figured out that we stop learning!" SO true Chuck!
-
I would LOVE more info on this topic. I know how to do rapid rivets, and copper rivets with burrs, but need to learn about tubular, as well as the splash kind. I have all of the above, and probably the right machines to set them, but have never been shown how, or which hardware goes with what machine. Pics would be fantastic!