Wizcrafts
-
Posts
7,804 -
Joined
-
Last visited
Content Type
Profiles
Forums
Events
Blogs
Gallery
Store
Everything posted by Wizcrafts
-
Yes. As a matter of fact, you can buy a three piece set that includes the roller presser foot, single row feed dog and a single slot throat plate. You just need to find the combination that fits a Singer 111W102.
-
Jimbob; Ur welcome! I also have a 15-91 that I bought from the local Sally Ann store, equipped it with an even feed attachment, and was using to sew Naugahyde, until I bought a real walking foot machine. All I had to do to it was rebuild the motor and lube it. They are tough little machines! Since 1984 I have worked my way up through a series of sewing machines. I started with a slant needle Singer, that was best at breaking needles in leather, to a Singer tailoring machine (nvg), to a Singer with alternating spring loaded feet (n/g), to a Singer 111W155 (good), to a Juki LU563 (vg), to a National walking foot machine (Great), to a Union Lockstitch machine (Great). I can tell you that if you are sewing garment or chap leather, or Naugahyde, or jeans, you should get a compound feed walking foot machine. There are many excellent flatbed walking foot machines to choose from, including those made by Adler, Artisan, Brother, Cobra, Consew, Cowboy, Juki, Neel's Saddlery, Seiko and Toro. If you intend to sew holsters, knife sheaths, saddle bags, or shaped cases, get a heavy duty cylinder arm harness stitcher, with the throat plate cut off close to the bobbin case cover, and with fairly narrow presser feet. Do not dink around with older machines made to sew textiles; they won't do the kind of job you may have to do, won't properly deal with heavy thread and may go out of time or break if over stressed. Dress belts and guitar straps fall in between and I usually sew then on a flatbed walking foot machine, where they can be turned around and laid flat. Weight belts and rifle slings with foam padding between the layers are best sewn on a cylinder arm or post machine. I happen to have a Union Lockstitch, needle and awl machine, which is used on all heavy leather projects. It sews 3/4" without blinking, with #346 or larger bonded thread, all the way up to 12 cord linen thread. It can even sew soles onto shoes (I've done it)! A walking foot is really only needed when you are sewing multiple layers of slippery material, or items with thick seams and second levels. The outer foot lifts up and grabs the upper level, or walks down to a lower leveel, while the inner foot presses down on the work, and usually pulls the work with the needle and feed dogs. You can actually hold the work tightly on a walking foot machine and it won't slip, unless you have really backed off the presser foot tension springs (there are 2). If you are only sewing flat layers of belt or harness leather together (no big seams to go over), a heavy duty flat foot, drop feed machine will do the job. These are usually knock-offs of the venerable Singer 45K series. These are available in flatbed and cylinder arm types. Names like Cowboy and Techsew come to mind. These machines will usually sew a bit over 3/8", with #346 thread, run through a silicon lube container. Whatever machine you end up purchasing, if you intend to sew any thick leather, you'll want to get either a speed reducer, or a servo motor. Most industrial machines come with a clutch motor, which can be difficult to control for slow speeds. You must learn to feather the clutch to slow down. Servo motors are electronically controlled by the position of the foot pedal and are easier to use at slow speeds.
-
James; No, to my knowledge that machine is not convertible without a major parts addition operation. The casing itself would need to be altered to hold the walking foot lifter shaft, on the back. It is a good straight stitch machine though.
-
Sometimes, I will double loop the top thread through the tension disks, and/or, triple wrap it around the guide post. This adds more top tension, which you can counterbalance on the bobbin spring.
-
Bobby; Thanks for the advice, but, how do I find Bob Douglas? Does he have a website? How about a handle on the forum?
-
I am looking for a new or used French Edger tool, one half inch (1/2) wide at the blade. I intend to use it to skive a channel for sight tracks in fold over holsters. No chipped or rusted blades please. Call "Wiz" at 810-422-5301, or reply through the forum if you are a member, if you have a 1/2" French Edge tool for sale.
-
Questions About Tension And Thread Choice
Wizcrafts replied to becky's topic in Leather Sewing Machines
Becky; I happen to have a Singer 15-91, which is pretty much the same machine you have. Mine has the Pod motor built into the case, whic I rebuilt. Before I bought my walking foot machine I used that 1950's Singer to sew everything from leather to vinyl, up to 5/16" thickness. I found that the machine does not want to sew with anything thicker than V92 /T90 bonded nylon on top and V69 /T70 in the bobbin, because of the same tension issues you found. But, I unwound the top tension disk assembly and rethreaded it so the spring and front numbered plate went all the way around and it did indeed squueze the thop thread sufficiently to get the knot in the middle of a 1/4" thick belt. Another trick is to use a #20 leather point needle, which I found on eBay. That needle makes a bigger hole and makes it easier for the thread to pull up the knot. I hope this helps you out. Don't expect anything more from these little old machines, as they were designed for light duty sewing. If you ask around I'm sure you can find a dealer on this forum who sells used leather sewing machines. Bob Kovar, of Toledo Industrial Sewing Machines is one who does. He has lots of old and rebuilt machines in his warehouse. A Singer 111W155 is a good starter walking foot machine that can be had dirt cheap. Have a servo motor added, in place of the clutch motor, and you can sew up to #207 bonded nylon on top, in these machines, with #138 in the bobbin. Bob also sells all weights of nylon thread and all needles and bobbins and has lots of spare parts. I get stuff from hime all the time. -
If you want to get serious about sewing leather you'll need a motorized walking foot or jumping foot industrial sewing machine. Ask Bob Tovar about the Cowboy stitchers, which are available in flatbed and cylinder arm versions, with needle feed, some with walking feet, others with jumping feet, some capable of sewing up to 3/4" and able to use very heavy thread. You really need to define your goals, communicate them to Bob and see what you can afford and buy the best you can for the money. This usually means buying new or rebuilt, rather than plain second hand. A Boss is a manually operated stitcher, with a pull lever. If you expect to use a manual machine to crank out chaps you better have a tough arm! Do yourself a favor and invest in a decent motorized machine that is setup to handle real leather, all day long.
-
Wiz's Sewing Machines
Images added to a gallery album owned by Wizcrafts in Our Leatherwork Galleries
Photos of my industrial sewing machines -
-
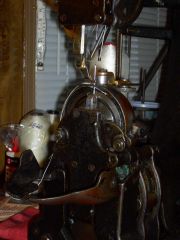
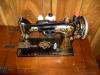
1916 Singer 66-1 Red Eye motorized stitcher
Wizcrafts posted a gallery image in Our Leatherwork Galleries
From the album: Wiz's Sewing Machines
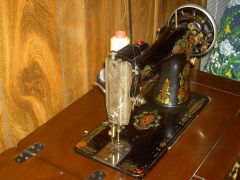
I bought this beauty at a local Salvation Army store, for a song. I took her home and cleaned her up and oiled her, replaced the belt and AC cord, and she sews like a champ. If I can find some decals with the large SINGER I will replace the worn name tags.© © leatherworker.net
-
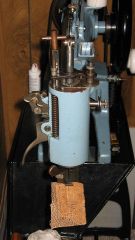
1916 SInger 66-1 Red Eye motorized stitcher
Wizcrafts posted a gallery image in Our Leatherwork Galleries
From the album: Wiz's Sewing Machines
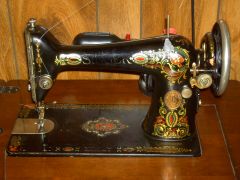
I bought this beauty at a local Salvation Army store, for a song. I took her home and cleaned her up and oiled her, replaced the belt and AC cord, and she sews like a champ. If I can find some decals with the large SINGER I will replace the worn name tags.© © leatherworker.net
-
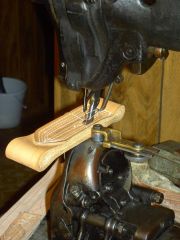
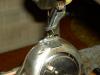
From the album: Wiz's Sewing Machines
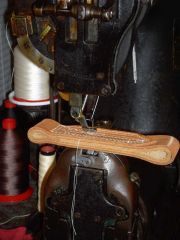
Here, I am having some fun sewing 3/4" (48 oz) of veg-tan belt leather together with my Union Lockstitch Machine. The thread is #346 bonded polyester from Campbell-Bosworth. The needle is a #2 and the awl is a #2.5.© © Wizcrafts 2010
-
That is different from the machine I had, in 1985. It resembled a walking foot machine, was sold as one, but was not. The outer foot moved backwards in concert with the material being pulled by the feed dogs. When it reached a certain point, with the needle now up, it began to raise off the material. At that moment a heavy leaf spring behind the outer foot shot it forward, to its starting position, ready to come down and repeat the process as the needle came down. The needle moved up and down, as did the inside pressor foot. Because the outside foot was pulled by the top layer of material, layers in between could shift and go out of alignment. When I stitched belt edges, for appearance, the polished surface of my hand stamped and waxed belts acted like wax paper under the outer foot. The poor machine couldn't maintain a constant stitch length as the moving foot slipped and snapped all over the work. A roller foot is nice, but will leave a heck of a track in vertan leather. If you back off the top spring pressure to alleviate the marking, the leather might lift when the needle comes up. Or, it might not. It should be perfect for chap leather.
-
If it is a driven walking foot you are good to go, up to the thickness you can fit under the feet. But, if it is a spring loaded outside foot you will find that it slips on smooth leather. I had one of those spring/jumping foot machines when I started in the leather sewing business, and the stitch length varied all over the place on anything remotely slippery.
-
Art; I have one of those SewPro 500GR 300 Watt motors driving my National Walking Foot machine (a Consew 206RB clone). I thought it was under-powered too, until I realized that the belt was slipping on the hand wheel pulley when starting to sew thick leather. After tightening the belt more than I first thought it needed, the slippage disappeared and there is no problem penetrating thick leather with heavy thread. The gear reduction servo motor has 3000 RPM max, with the speed pot on full clockwise. It is fitted with a 2" output pulley, so it slows down the top speed even more. This is a bit less than the clutch motors it replaces. It definitely has more torque than the 1/3 horsepower clutch motor, with a 2.25" pulley, that it replaced. And, it can sew so slowly I could almost fall asleep waiting for the machine to complete a cycle. Q: Are these 31-15 machines spring foot machines, or walking foot machines?
-
Thanks for the good answers. I do believe I'll tell Charlie to add a gallon of Lax Wax to the order I placed today! I'll ask again: do any of you guys or gals have any spare/extra/unwanted parts for a Union Lockstitch machine?
-
Aw, shucks, no luck. All Campbell has is Lax Wax and Charlie says it isn't water based. Darcy, can you get the brand name from your gallon can and let me know what it is?
-
I am curious if anybody uses a water based stitching wax for securing linen thread in a needle and awl machine? I used to have a solution known as Super Cyroxilin, but that was years ago. When it thickened too much in the wax pot I just added some warm water to get it liquefied again. Cleanup was a snap also, with hot water left in until the wax became runny and could be poured out of the pot. Does anyone know where I can get this type of stitching wax and what it might cost? I suppose I could try rubber cement - LOL Thanks
-
Andrew; I use a variety of pressor feet on that National walking foot machine you saw at my house. But, the set I use the most has a smooth left toe and inner foot. If you want to add feet, I'd recommend a 1/4" welting foot set and maybe a double split toe foot for added hold-down force. As for the stitch-in-the-ditch foot, you may have to make your own with a small grinder or sander to modify a regular inner foot. Or, just use a hand groover before you sew and an edge guide while sewing. The Adler you got from me has a nice edge guide. One type of foot I used to have for my previous ULS machine was a stepper foot (set). This was a right toe only foot that had a half round protrusion with narrow points on the bottom, on the back of the toe. The points were spaced to push the thread down, behind the needle, at the preset spi setting (5, 6, 7 ,8, etc). It acted just like a hand rolling overstitch wheel. It was hell on the leather if you turned a corner or sewed an English point on a strap, because the overstitch points would move out of the thread track and mark the leather.
-
I am restoring a 1916 Singer 66-1 and need some decals to finish the job. The large name decals (SINGER) are worn off and some of the red eyes and scrolls are damaged. If anyone knows where I can get some very old design new Singer decals please let me know.
-
The usual solution for sewing thick leather on a walking foot machine is to change the motor to a speed reduced SewPro 500GR servo motor, with a 2" pulley on the end. This will bring the top speed down to around 400 or 500 stitches per minute, maximum. The gear reduction is built in and gives a lot of low speed torque, needed to penetrate hard leather. The motor has variable speed and can be foot controlled to sew one stitch per second or less. The motor is a drop in replacement for the standard clutch motor that normally ships with industrial machines on k-legs tables. If you don't already have a source for these motors, Bob Kovar sells them at Toledo Industrial Sewing Machines. Steve may also have them, but he will have to chime in about that.
-
If that machine is a portable walking foot machine, the maximum thickness it will sew, without modifications, is 5/16". Also, if you attempt to sew over 1/4" vegtan belt leather on such a machine you will need to install the Monster Wheel, from Sailrite. The portable Chinese walking foot machines can be modded to handle up to 3/8" under the feet, but require the Monster Wheel for the necessary punching power.
-
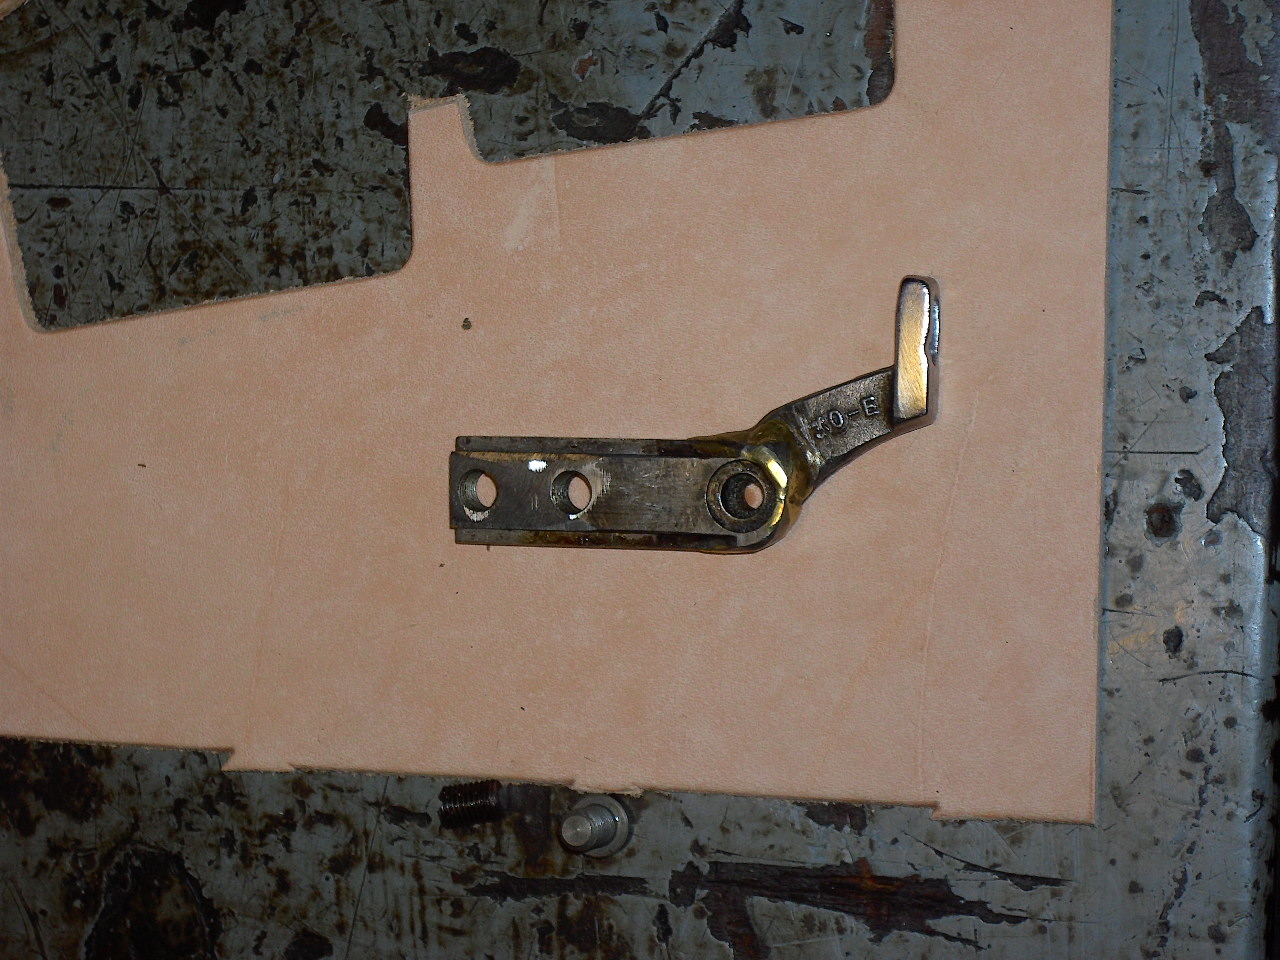
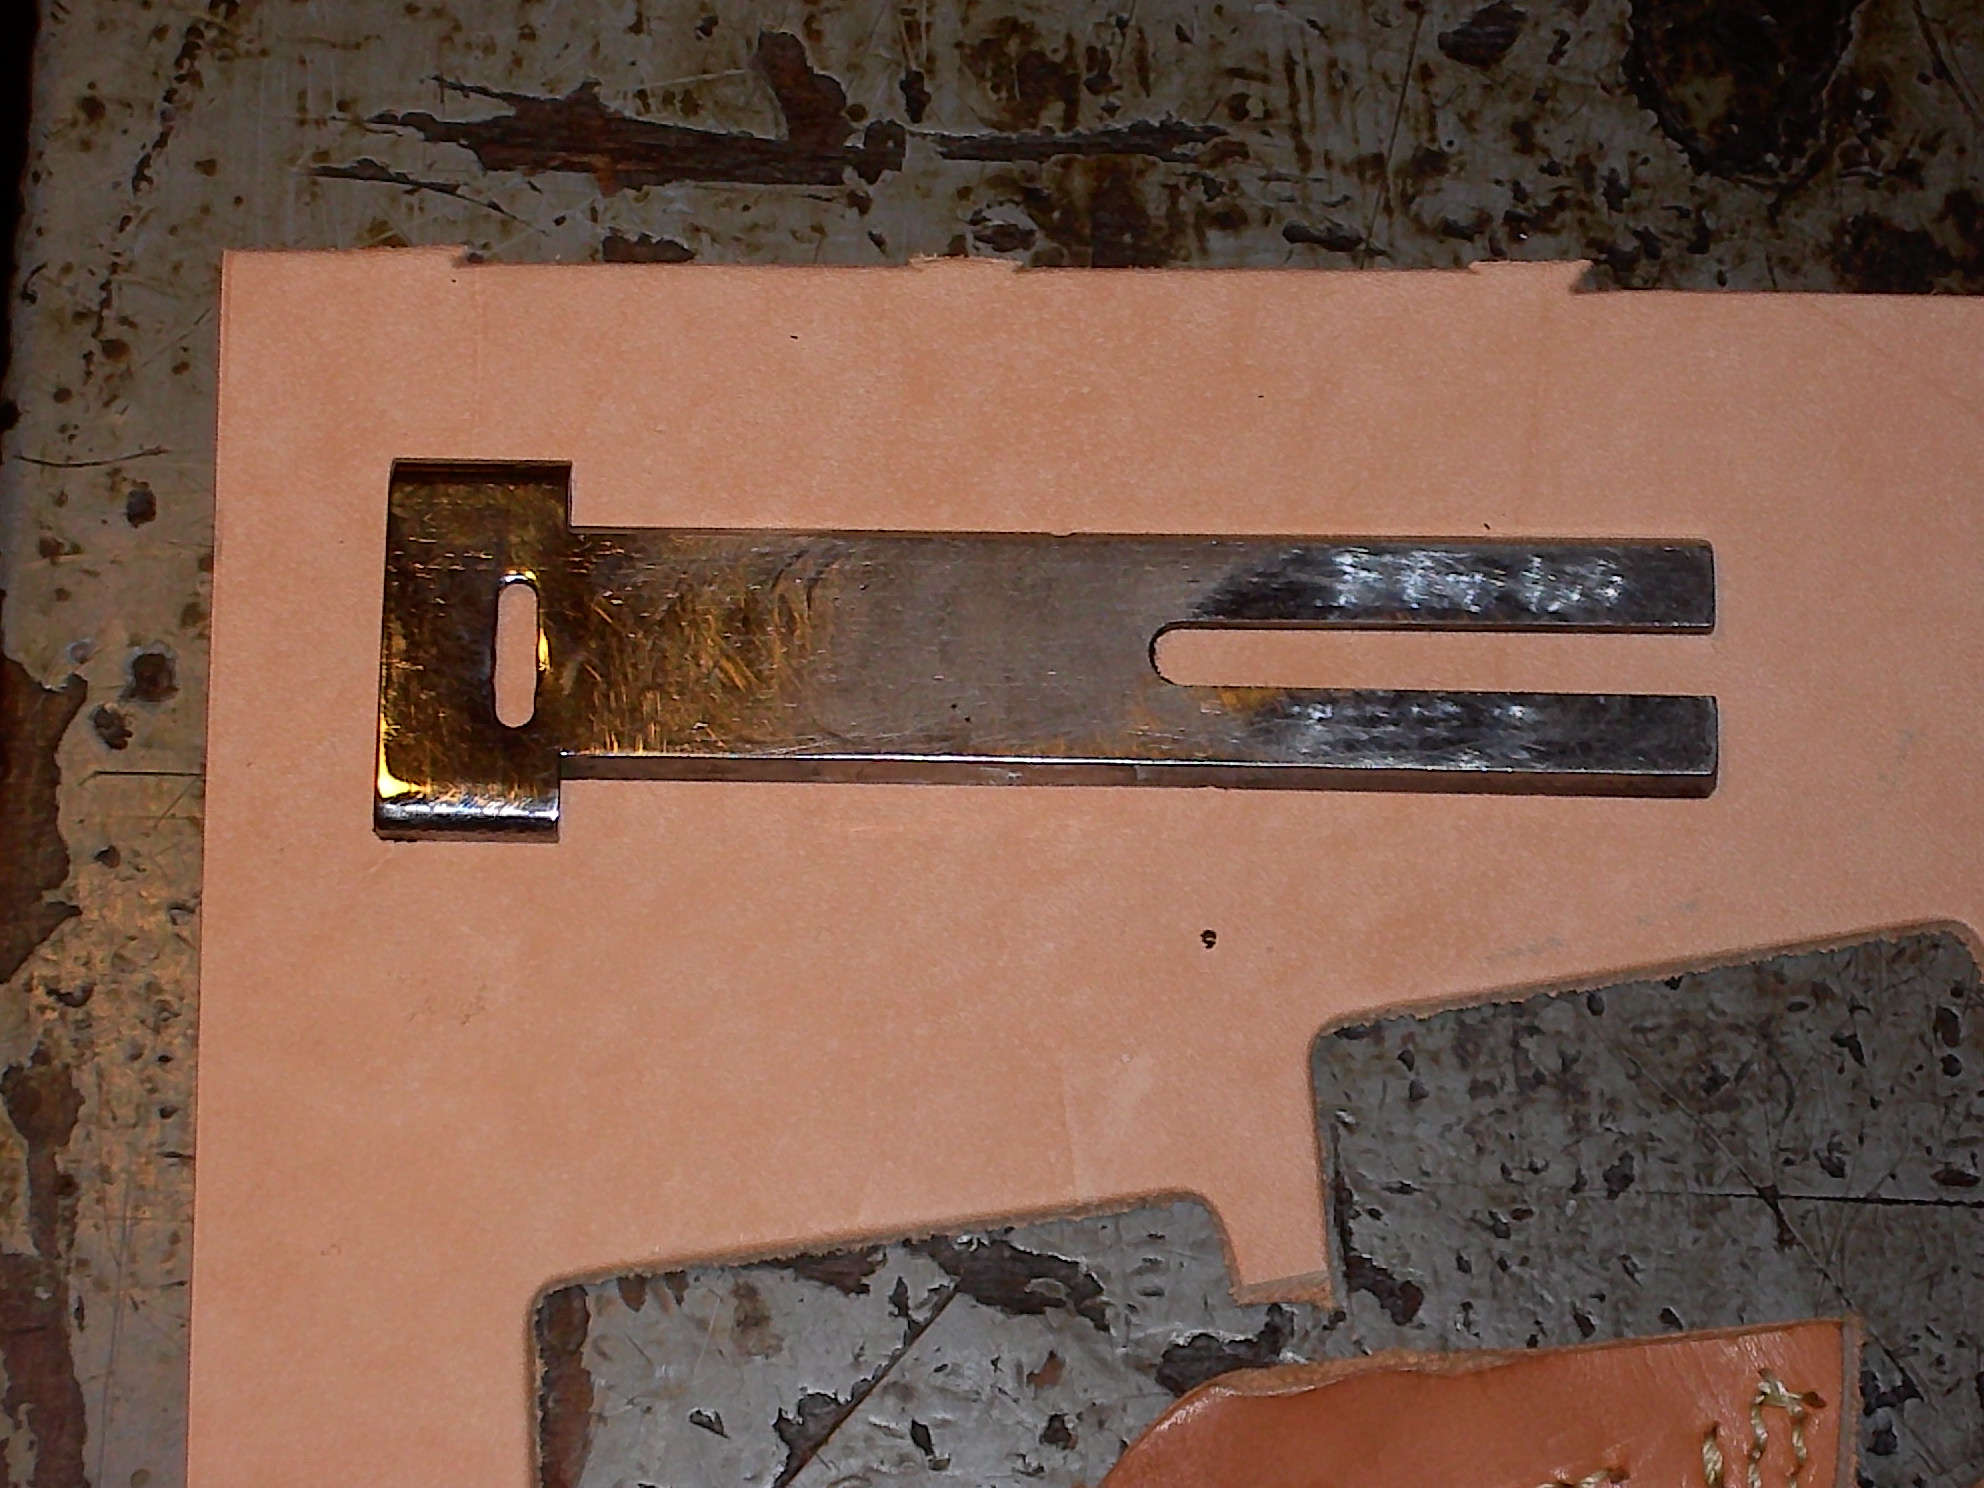
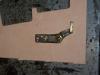
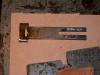
I have an old (1930's) Union Lockstitch machine in need of pressor feet and throat plates. Nobody here appears to have any spare parts, so I am hoping to get some made for a price I can afford. Are there any members of this forum, who have a Union Lockstitch sewing machine, who are able to fabricate pressor feet for a ULS machine? If so, can you mill them from stainless steel, to avoid discoloring wet leather? I am looking for various pressor foot types, including left toe, right toe and double split toe. I even need a standard, closed ULS pressor foot, like this one that is on my machine now (but better made): . For throat plates I am looking for plates with raised ends (for holsters and cases), with narrow needle slots (for a number 3 (200) needle and 4 (220) awl and 4 spi maximum), with and without long edge guide slots on the right side. I could also use a throat plate with a 3" long left end - to support heavy work - and long right side slots for my edge guide. Here are samples of long and short throat plates for a ULS machine: If you, or a friend, can recreate hard steel pressor feet or throat plates for a Union Lockstitch machine, please contact me through the forum links, or by phone, at: 810-422-5301.
-
Get ahold of Henry Veenhoven, in Toronto, Ontario, Canada. His phone number is 416-231-1870. He may still have needles for the Frobana-Gritzner sole stitchers, for which he was a dealer. He currently sells Junker & Ruh hand operated sole stitchers.
-
That foot controller is for a home sewing machine motor, not an industrial motor. That's what threw us for a loop. When we think of a foot pedal we are thinking about a large mechanical pedal that pivots on a steel floor bar - on a steel k-legs frame, that has linkage going up to an arm hanging down from a servo or clutch motor, mounted under a 48" x 20" x 1.75" sewing table.