KnotHead
-
Posts
934 -
Joined
-
Last visited
Content Type
Profiles
Forums
Events
Blogs
Gallery
Store
Everything posted by KnotHead
-
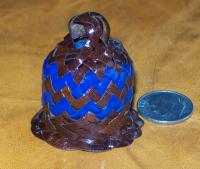
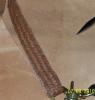
A most interesting braid to say the least. This one was fun, but a bit tedious to braid. The start of the braid requires 4 individual strands. The end result is worth the work I think. It does produce a 4 bight top and bottom. To close the ends off at the end of your braid requires a little tolerance. The other 4 ends are just tucked under the rest of the braid to hide the ends, while the other 4 strings are tucked in a back braided fashion by following the pattern. I like this one but do not recommend it for those just starting out braiding. The start of the braid is a very clumsy mess if you don't know the braid that well. But after getting used to the braid and how it works, the braid tends to go real nice with just about anything you put it on. I enjoyed this one. I am making another dog leash from this braid.

-
Hi Megabit. I don't know for sure how much more rope would be required. I don't have horses and have no idea about horse gear and how it all works to be honest. I saw that knot and just had to try it out to see how it looked. Some day I'll get to be around horses and learn all I can about the equipment that is used with them. Brian...
-
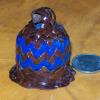
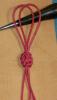
Sorry this one is in string. But I didn't want to waste any leather. This one was an interesting knot to tie. This one is from More Western Tack Tips by Tom Hall.
-
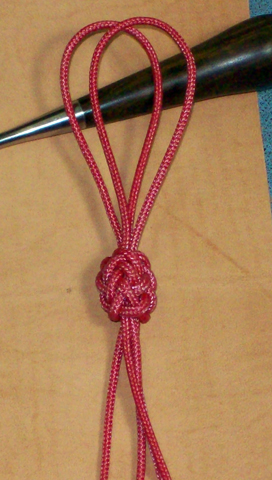
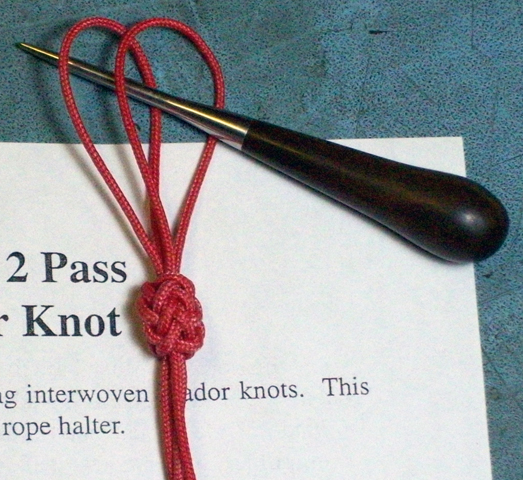
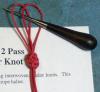
First thank you for the kind comments about my site. But really, it is all the members who make it work. Like skyout said, it does not matter where you start the PK from. But if you were say to be starting the PK interweave at the standing end, then you would always start the PK interweave to the right hand side of the standing end. The more passes you make on a type 1 PK, the more the knot will fill in around a sphere. Much like a Heel knot does. By making more passes, this will in turn close up the ends much tighter because the PK is causing the middle of the knot to bulge out because of the building of the knot. The more build out you have in the center of the knot, the more the ends will close up. You will also have to compensate when you make the base TH for how many passes in the PK interweave you plan on doing. If you don't do that you will have a base TH that is too short for the object you tying around. Hence, the ends will be too short and ride down the object. Make sure when you tighten and dress the knot that all the chevrons, or crossings are straight in a vertical fashion and that all the chevrons are close to each other and tight. This part is the toughest to achieve. I know from experience. Well, I hope that helps answer your question and a few others. Thanks once again for the kind comments about my site. Brian...
-
Hi seveneves, All of what I am about to suggest is dependent upon the size of your core at the end of your project. Also, you can use this advise as you will, or not at all. I believe your base casa knot is correct. Like I said above this part is dependent on the size of the core. My suggestion is that you should keep the 3 pass heel in place. The over 3 - under 3. Loosen the over 3 - under 3 heel to make room for a couple more center passes in the middle of the heel where all the gaps are. What you're going to do here is make the passes for the heel knot in the center of the casa knot. This will fill up the gaps you are seeing in your heel knot. Maybe make 3 more passes to fill in the gaps. Again, that part being dependent on the size of your core in your project. Basically, from this point all you have to do is eye ball it to see if you need to continue to fill the center in with more passes. With heel knots, it is not unheard of to go all the way out to 5 passes or more. That may be what is required. Simply put your are trying to cover an object that is not a normal geometrical shape. The shape you are covering odd and weird. So, it will require more work. Brian...
-
Not a prob skyout. B...
-
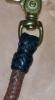
Just got done with this dog leash. At the clasp point I did this 8 strand braid. Sequence, U1-O2-U1 from right to left / O1-U2 from left to right. It does not give a defined gaucho look like the round braid does in 8 strands. But it does look good for the area I put it in.

-
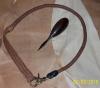
Well folks, here it is all done. My friend is quite satisfied with it also. It's not perfect & I know what to do next time.
-
The reason as to why your braid is coming out square looking is because you most likely have not pulled the para-cord core out. Decore the para-cord and try the braid again. You will most likely have to use a core on the inside of the braid in order to keep the braid from caving in on itself. You can always use a couple of cut to length pieces of para-cord as the inside core for the braid to sit on. That's just my recomendation for that type of braid. Another 8 strand type of braid is the Gaucho braid. This one the core of the para-cord will have to be taken out as before so you can get a semi-flat cord as you would with lace. Taking the core out of the para-cord itself will stop that square braided look. The thing is with para-cord, you have a round cord and you are trying to produce a rounded braid. That does not work in the braiding world. You have to take the core of the para-cord out in order to get a rounded braid. Any braid over 6 strands will require in most cases a core to be inside the braid you are making. Brian...
-
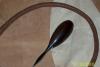
Hi. It's made of Delrin. Hard as steel and don't rust like steel. My friend PJ is selling them. Here's his page address if you're interested in one, PJ's Marlin Spike Shop... His email is at the bottom of the page. Best regards, Brian...
-
Hi Calvin, All the hemostats I have are grooved. The leather used in that project was smooth calf skin. I treated that lace prior to braiding the leash with Pecards Leather Dressing. By doing that the lace became more accepting and forgiving than roo hide is with hemostats. Just about everywhere I had to use hemostats in the braid, there was no teeth marks left behind after awhile of working with the strings. Most of the hemostats I have now were given to me by others that were in the medical field. But I do have an online source for them at this web address; All Heart Hemostat Supplier... My problem was not the phones, it was just the damn JOB gettin in the way. Seemed like every time I'd start working on the leash, there'd be something that would come up and would take most of my day to fix.
-
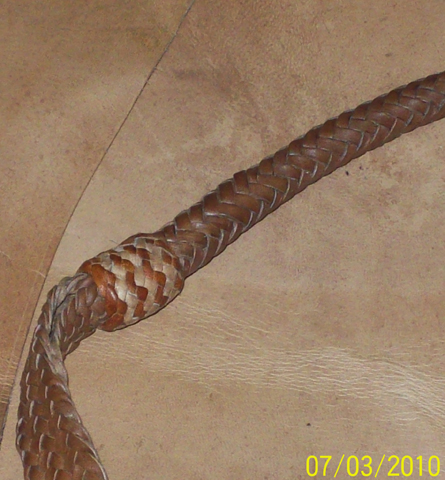
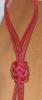
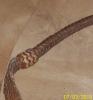
Hi folks. Well here's an update on the dog leash. I am almost completed with it. I just thought you all would like to see how I handled the back splice phase. Below is the complete progression of the back braided splice. And the final stage of the back braided splice. All's left is to cut and flush the ends and add a T-Shaped PK at the transition points and add a PK at the latch area. I will post more later on the finish of the dog leash. Hopefully with a happy camper on the other side of the camera. Brian...
-
Super job.
-
This one is mine that I use. A demonstration video of the beveling part of it. Raw hide is a bit different with this type of tool though. From what I have found in my use with my tool is that it is better to just cut a wider 90 and then moisten your strings and then cut the 45 or 30 degree. But I don't use raw hide strings that much.
-
Can you write down the time at the minute point of the videos where that happens? I will then be able to locate it. It could also be because of the conversion from one video format to the another. So I need to know where that is located at in those videos. Thanks for spotting that. Brian...
-
Well, I got all the project recorded. But I am still uploading videos. Here's the link, Fid Work by lilpep The first 4 videos are of my cutter/beveler and lace prep in goat skin. The next ones are 15 videos of the fid work being done. I have all videos uploaded to YouTube now. Some will find this a really good source for learning. Brian...
-
Well you all were asking about instructions. Well, I have videos of just about the whole process of this project. I have them separated in two sections. Lace Prepreation - 4 Videos The Fid Work - 15 Videos ( 7 are now posted of the 15 )... Here's the link to the page. Fid Work for a Fid Hope you all like what's up so far. Brian...
-
Be patient all. I am working on a little something that will be really awsome when done. And thank you all for your kind comments on Jorge's work. It was so nice having a colleague in the shop, not to mention the shop talk and the beer we shared together. This project was really worth it to me to get to know another braider.
-
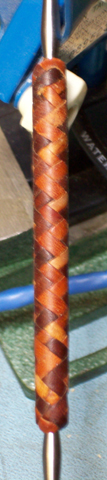
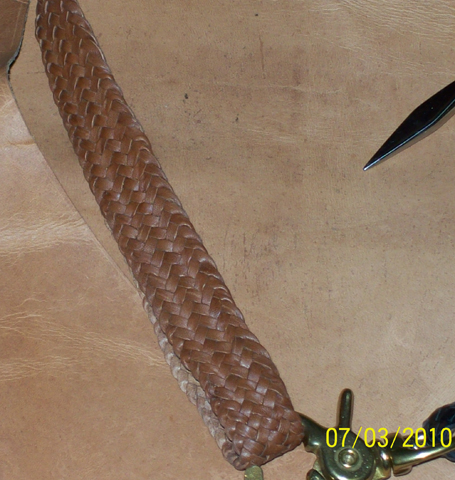
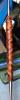
Here in my shop I had the pleasure of a visitor. lilpep decided he wanted to do a project in the shop and share it with you all. I am proud that all this fine work was done right here in my shop. lilpep deserves all the credit behind this work. The only thing I did was provide the materials and some tools and off he went like a racing horse. Close Up of the whole handle. Close Up of the Top end of the Handle. Not a complete view of the fid itself. This is a complete view of the handle. Me and Jorge both hope you all really like the hard work that went into making this project. Best regards, Brian & Jorge...
-
Not a problem. Here ya'll go... Brian...
-
Your question has been answered over in the IGKT forum where you posted. I also left you a few options. Brian...
-
Noooo canned beer for me. LOL... That's like canned brisket of the finest quality... LOL!
-
I've never used horse hair before. So I could offer up any advice on that one. Sorry...