


amuckart
-
Posts
577 -
Joined
-
Last visited
2 Followers


Recent Profile Visitors


amuckart's Achievements
Leatherworker (3/4)
-
Singer 211G156 vs Seiko STW-8B (Consew 226R) for heavier thread.
amuckart replied to beefy's topic in Leather Sewing Machines
If it’s any consolation, 132k6es aren’t all they’re cracked up to be, especially for leather. they were good in their time, and there are still some jobs they excel at because of their durability but the feed mechanism is nowhere near as good as the compound feed on more modern machines. I have a Seiko SK-8 I had high hopes for which I’m going to end up selling. It’s annoying because I want a machine that takes a needle in-between the 135x17 of the 111-derived machines and the 794 needles of the 441, 7 class etc. -
Thank you, that’s very relevant to my interests.
-
The PDF manual I typeset is attached to this post.
-
Those Chapman sets look good. I bought a Winchester branded set from a gun shop. Gunsmith sets are nice because they’ve got heaps of different size flat bits, and importantly they’ve got multiple widths, so you can get the right size without marring the edges of the hole the screw is in. if you’ve got a good variety of hollow-ground flat heads then the rest are all pretty standard. Extra-long shaft drivers are good for getting to needle plates etc. but are harder to find.
-
Is the Singer 29-4 an advisable choice for someone on a budget
amuckart replied to Jiggity's topic in Leather Sewing Machines
I wouldn’t go near a 29-4 unless I specifically wanted a difficult rebuild job. If I were on a budget I’d look for a used Pfaff 355 or similar walking foot small cylinder bed machine. -
Keeping Northmount’s point about cantilevering and balance in mind, the way I would do this is: - Take everything off the table and take the table top off the stand. - Remove the rubber edging. - Flip the table top so your marking etc. is on the underside and also so any tear out of the laminate is on the bottom. - Mark the line you want using a pencil. - Cut the end off the table using a track saw if you have access to one, or a circular saw and straight edge guide if not. Leave about 1/16th” extra. “Diablo” blades are good for cleanly cutting through the laminate but make sure you use a new, sharp, blade with a decently fine tooth pitch and only just enough blade extension to get through the material (assuming you can adjust that on your saw). - Take the sawn-off end and use it to mark out the rounded corners on your cut edge and saw most of the waste off leaving about 1/16th” clearance to the marked line - Get a straight 1/2” router bit that is long enough to cut the full thickness of the table top and has a guide bearing at the tip. - Clamp the off cut in place lined up with your marked out lines and use the router to trim the corners and cut lines straight and square. If you’ve never used a router before get someone else to do this. It’s not a great cut to be making for a total beginner. - If the edging is fit into a slot, use a slot cutting bit in the router to machine the slot and reinstall the edging. - Reassemble everything. If you’re borrowing a saw to do this it’s polite to buy a blade, IMO. Cutting laminates blunts blades quite fast. with that servo motor you can get rid of the speed reducer too and get some space back. Using that space for a needle position synchroniser would be a better quality of life improvement unless you have a particular need for _really_ slow stitch speeds.
-
Mine came with the toothed one for crepe soles. I made a knife one from a bit of old hacksaw blade, just guessing at the dimensions but it seems to work Ok.
-
Thank you so much, that information is greatly appreciated.
-
Watch how the thread is coming off the spool as you sew. If it’s not despooling cleanly and catches at certain positions that’ll cause a tension spike in the top thread. The solution if it’s just catching at a certain point is to make sure the thread guides are exactly centred over the spool and to make sure there’s enough distance between the top of the spool and the thread guides. if the thread is catching because the bottom of the spool has rolled or collapsed a bit I don’t know how to solve that.
-
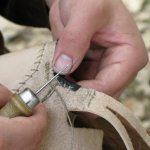
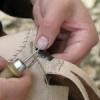
They’re great machines, you can still get needles for them. At two cranks per stitch it does get tiring though. I need to put a motor on mine. I would love to see more pictures of the alcohol burner! Mine is missing that and I wasn’t aware it was even an option. What style of feed dog does yours have? There are two - a toothed one for crepe soles and a channeling one for leather.
-
Find info on number 6 sewing machines
amuckart replied to Bobbymagee53's topic in Leather Sewing Machines
G’day! Whereabouts are you? If you are on FB there’s a Pearson group on there that’s currently the best source of knowledge on the machines. I know a bit about the machines (I’m in Wellington) and gordond on here is probably the NZ expert. I re typeset the manual and redrew many of the pictures a few years ago. I see Tigweldor had linked it above. -
Looking for info Pearson & Bennion A2 Leicester
amuckart replied to JLA1913's topic in Leather Sewing Machines
What a cool machine! I have a Pearson & Bennion A1 but wasn’t aware there was an A2 as well! Exact dating isn’t possible but it’s Pearson & Bennion it is pre-1896 or thereabouts. Pearson & Bennion were acquired by British United in 1896, and after that machines were marked British United Sewing Machine Co. or BUSM. No idea what it’s worth, depends entirely on the collectors in your vicinity. If it were near me I’d pay a couple hundred NZD for it, just for the novelty value and interest. -
If you’ve ever wondered what workplaces without OSHA and EPA would look like, here’s your answer. I feel sorry for that painter, and his family, and I don’t want to think about the poor sods working wherever those parts got chromed.
-
I think this is sound advice. If you have a dedicated binding machine, you have a dedicated binding machine; if you have a small cylinder arm machine with a synchronised binder attachment you have a flexible tool that can be adapted to multiple purposes.
-
Adding pulleys to slow down a Consew 206RB
amuckart replied to melinda's topic in Leather Sewing Machines
I second Northmount’s advice to ditch the clutch motor and replace it with a servo if you can possibly afford it. If you’re going to go to all the work you’ll get a much better experience from a servo than a speed reduced clutch motor. You’ll also be able to add a needle position sensor, which is a big quality of life improvement. They aren’t terribly expensive really are worth saving up for. I will never go back to use a clutch motor on any machine I own now.