-
Posts
180 -
Joined
-
Last visited
Content Type
Profiles
Forums
Events
Blogs
Gallery
Store
Everything posted by impulse
-
Tannin, That IKEA shelving and toy storage looks ideal! My biggest tip is to LABEL everything. As I accumulated tools and hardware I found this essential. Also my shelving (which I rescued from the dump) is reasonably close together, so everything is easily accessible at a glance. To all space- challenged leathercrafters - please keep the ideas coming. I'm sure that I can learn more! Cheers, Lois
-
Thanks all for your comments! Please share any ideas that I can improve on. Eglidiride - Lead block is the best way to preserve the edges on punches. It is firm enough for one solid wack when punching, but being a soft metal, it cushions the punch. After one side is pock-marked, I flip it over. It is easily melted down to refresh the surface when necessary. I do this outside on a camp stove to avoid fumes. Cheers Lois
-
Running out of floor space, so the only option is UP! Rolls of leather are stacked on a plastic pallet which can be winched up and down. Each hide is wrapped in plastic and/or paper to avoid color bleaching and a sample is attatched to each.
-
-
-
-
My leather work has been allocated just 10' x 13' within a 25' x 12'6'' shed - strictly no overflow allowed! The roof is insulated and the floor concrete. My bench is a solid old boardroom table which I have raised with a brick uder each leg. Steel shelving helps greatly in the "art of sardining", with everything clearly labelled. 2 ex shop display slat wall partitions give additional tool hanging space. There is no room for a dedicated cutting table, so I have hinged a fold up/down extensions to my bench and a trolly on castors (which is also storage for lighter leather, eg kangaroo, pigskin).
-
Hi Stumpy, welcome to the addictive art of leathercraft. For wallets I would recommend kangaroo hide. It is exceptionally strong, whilst being thin but firm. The hides are small, so a great starting point. When you cut off the edges that will give you some pieces for practice. I agree with TinkerTailor that it would be best to use your laser for cutting templates, or for engraving a makers logo. Cheers, Lois
-
Tried to access your videos, but came up with "this video is not available"
-

Centering And Stitching Around An English Point Strap End Punch
impulse replied to Juliette's topic in How Do I Do That?
Ditto sbrownn - by far the simplest and most accurate method!- 9 replies
-
- hand tools
- bag straps
-
(and 2 more)
Tagged with:
-
Check out this maker from eBay: Isis-design(58) from China. They are laser cut brass stamps of varying design, suitable for veg tanned stamping or burning onto all other leather types. And the price ranges from $23 with free postage! I bought a couple and tried fixing to my soldering iron - works very well. Received my order after just 9 days, so I can thoroughly recommend this seller. Cheers Lois
-
You could probably get away with using cheap "splits" as lining. Cut it oversized and glue to the inside of the collar, whilst curved in the shape of the dogs neck - if glued flat, the lining will wrinkle. Trim to match the collar, then stitch along both edges. The glueing and sewing will add strength and greatly limit any stretching. Cheers Lois
-
The number of holes required for all those rivets weakens the leather considerably - it would actually be stronger all stitched instead. The slots for the buckle tongues are also too large, in fact using a 2 tongued buckle produces another weak point as there remains little leather holding the buckle. Regarding the lining: yes, cut it over-sized initially, but before sewing use a fast setting craft glue to stick to the main collar, but with the leathers curved around as if on the dog - this avoids wrinkles on the inside. After stitching, cut off the excess liner with a sharp knife or a scalpel (the ultimate in sharpness). I note that you have used a stitch groover, but this goes too deep for the thickness leather used and creates another weakness. Interesting design and a good effort. Bulky hardware is not what makes for strength though. I make, amongst a variety of things, leather buggy harness which needs to be strong enough to pull up to a tonne weight. It is all stitched, without a single rivet! Keep at it, we all learn as we go. Cheers, Lois
-
Check out this maker from eBay: Isis-design(58) from China. They are laser cut brass stamps of varying design, suitable for veg tanned stamping or burning onto all other leather types. And the price ranges from $23 with free postage! I bought a couple and tried fixing to my soldering iron - works very well. Received my order after just 9 days, so I can thoroughly recommend this seller. Cheers Loiy
-
By far the best surface for round, oval or belt end punches is lead. I melt down scrap lead and pour this into a mold to make an approx 8" x 5" x 1" block. This surface is firm enough for punching, but soft enough not to dull the tool's cutting edge. After a while, I flip the lead over and when both sides are getting rough, simply melt the lead for a brand new surface. WARNING: lead fumes are toxic, so melting needs to be done outside - I use an old camp stove. Punches last so much longer, and my lead block only needs re-melting after 2-4 months constant use.
-
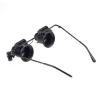
For very fine work I use watchmaker glasses which have x20 magnification and a light. Available on eBay from China for the princely sum of A$5.35, free postage!
-
I shy away from using contact adhesives on my leather work - it is too hard to successfully clean up any excess blobs or spills. Instead I use the fast drying PVA craft glue, clamping the edges together with bulldog clips for 5 to 10 mins. Excess is easily wiped clean with a damp rag. The edges can then be sewn, before buffing on my bench grinder to make the layers appear as one. Joins done this way are easily burnished with no visible evidence of adhesives being used. Cheers, Lois
-

How To Cut Straight On A Scribe Line/pen Mark?
impulse replied to DavidL's topic in How Do I Do That?
I often use scalpels, as they are the sharpest knives available, AND they can be stropped between cuts many times before the blades need changing. -
My thanks also for the tip. I like to keep a considerable pressure on the foot pedal to achieve a sharper imprint and I found that the leather strap that is recommended with the machine tended to stretch a little giving an uneven result. I have now replaced this with a light chain and am happy with the consistency. Cheers, Lois
-
I would never recommend just oil on leather. Too much will actually weaken the fibres and also makes it impossible to get a sheen on the leather. However after wetting to tool or mold, it definitely needs dressing. I make my own leather balm with bees wax, paraffin wax (equal quantities) melted together with about 1/4 neatsfoot oil and a few drops of eucalyptus, as a mould repellent. There are proprietary leather creams around, but as I live in Australia, I can't recommend a brand made in US - just look for something with the above ingredients. Just a little will suffice for your project, but if you need to really soften leather, massage plenty into the flesh side. BTW my leather balm recipe renders the leather almost waterproof. Cheers, Lois
-
As I said, I have around 30 designs including basket weave, Celtic, Navaho etc. I don't intend purchasing any more at this stage unless you wish to order 100+!cheers, Lois
-
Dianne, Below are pics of designs i have in florals. These are available in 38mm to suit 40mm trophy buckles or 28mm. I can do in natural or black leather. Postage is approx A$20 for 1 to 3 belt blanks ( standard post) - if you need more let me know and i shall make further enquiries. Please note that these blanks are not pre-stitched nor come with burnished edges. Cheers, Lois
-
Hi Dianne I have an Embosser and around 30 different designs. I sell embossed 4mm quality veg tanned belt blanks for A$15 to A$20 depending on widths. I live in Australia, so if you are interested I will enquire re postage cost to Arkansas. ,
-

Restore/clean Leather Top Coffee Table
impulse replied to Brian321's topic in Leatherwork Conversation
Try using an automotive restorative paste wax with carnauba wax, such as Johnsons "Kit". This has a mild abrasive to resurface the sealant that would have been used, but leaves a sheen that will not harm the leather and should not affect the gold foil. I restore antique horse drawn carriages and have found this wax amazing. Cheers, Lois


