-
Posts
180 -
Joined
-
Last visited
Content Type
Profiles
Forums
Events
Blogs
Gallery
Store
Everything posted by impulse
-

Lambskin Dog Collar - Question On Finishing Seams And Lining
impulse replied to lightingale's topic in Sewing Leather
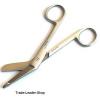
For trimming the lining I recommend a pair of bandage scissors, available on eBay under medical supplies for around $8-$9. -

First Truelly Self Designed Corset
impulse replied to Windrider30's topic in Clothing, Jackets, Vests and Chaps
Very good effort, particularly as you had no pattern to work from. I checked out eBay Australia, and a used, adjustable dressmakers model can be sourced for around A$50. Your design would be really professional if you were to use this to wet form the leather. Keep the rivets for decoration, but the wearer would be more comfortable if the seams were sewn. Love the use of those bag latches on the front! Has your wife tried sitting in this corset? You may need to shorten the "tails " at the back. Show us more of your work soon. Cheers, Lois -

Rubber Mat Suggestion For Crystal Rivet Setting?
impulse replied to JerseyFirefighter's topic in Hardware and Accessories
I have successfully used a piece of softwood like pine, and with a countersink drill bit, made an appropriate sized hole to hold the crystal. The advantage over rubber or veg tanned is that the crystal is kept in an upright position whilst hammering on the rivet backing. Cheers, Lois -

My Very Fist Project
impulse replied to Nandy's topic in Purses, Wallets, Belts and Miscellaneous Pocket Items
Nandy I was a little reluctant to offer advice as your post was in the "Showoff" category. If you would like future help, please go to the "Critique my work" forum. -

My Very Fist Project
impulse replied to Nandy's topic in Purses, Wallets, Belts and Miscellaneous Pocket Items
Not a bad effort for first project. You definitely need a leather needle and the top and bottom tensions need to be adjusted. This bag would benefit from trimming the edges closer to the stitching - this would then appear to straitened the stitch lines. Burnishing the edges would also give a more professional finish. I also notice that the left side panel is too long but can be rescued by cutting off the excess. I actually love that this is made From remnants as the colors blend well together. Practice your sewing on leftover scraps and you will be well on the way. Btw what sort of machine do you have? Cheers, Lois -

English Pony Bridle And Breast Girth Set.
impulse replied to Baileyhoss's topic in Saddle & Tack Maker Gallery
Well done Fiona! Stitching excellent with just the right stitch length, and finish is spot on. I also make English style bridles and sulky harness, but am self taught so my first effort was not nearly as good as yours. When I get time I'll post some pics of my latest efforts. Don't be discouraged by lack of training facilities nearby as so much can be learned now on line. It's practice, practice, practice that gets you there. Cheers, Lois -
I had to experiment after reading this post. Being an Aussie I have easy access to kangaroo leather, so gave it a try. Kangaroo is very thin (0.5 to 0.6mm) whilst being moderately stiff. It works a treat! The roo for making lace is a natural, veg tanned leather and takes the ink well. Lois
-
Interesting idea! However my mind can't get past the hilarious sight of a kilted Scotsman walking along with this sporran bouncing between his thighs!!!!"......
-
As an Aussie, I can testify that kangaroo leather would be superb for wallets. It is also used in top-of-the-line handbags as it holds shape well. I often give my dogs (Hungarian Vizslas) scrap ends of straps to play tug-of-war with. Cow hide lasts maybe 2 mins, while very thin kangaroo is virtually indestructible! Best place to buy is on Australian eBay (ebay.com.au). Kangaroo hides of a variety of colors often come up for sale at half price that you would pay from a tannery. Best way to promote your sales is to emphasise the quality of the leather. Good luck to you. Lois
- 11 replies
-
- kangaroomarketing
- protest
-
(and 2 more)
Tagged with:
-
With a 5 braid, add approx 25% more to the length.
-
Rather than trying to get your printer to accept leather, have you thought of trying Inkjet Iron-on Transfers? These are available for not only white or light coloured T-shirts, but also for dark/black fabrics as well. The instructions advise allowing the transfer to dry for 30mins, but it is best if using veg tanned leather to iron on immediately (using baking paper between the transfer and iron). Chrome tanned leather is different and will not absorb the ink - in this case, let the transfer dry before ironing and spray with a matt fixative, as used in protecting watercolour paints. Have fun! Lois
-
I was in a shop which specialised in handbags and luggage. I often browse through to get ideas for making custom handbags and was looking at a rack of bags advertised as "genuine leather". On close inspection, I could tell that the materials used were synthetic BUT there was one small piece that WAS leather - a tag on which were stamped the words "genuine leather". I found the same fraudulent claims on a gents belt. It looked good when new, but the holes for the buckle tongue failed after 2 weeks wear. On disassembling this belt, the outside surface was thin synthetic made to look more substantial with a layer of cardboard and lined with tissue thin real leather on which was stamped "genuine leather". Be guided by feel, smell and price. These goods were being sold by top retail stores, which were probably ignorant to the misrepresentation and it is definitely a case of BUYER BEWARE!
-

What Is Best Surface Material For Hole Punching On Bench.
impulse replied to shadowryder's topic in How Do I Do That?
The only surface that does not dull the cutting edges of punches is lead. This metal is solid enough to ensure a clean hole but soft enough to provide little resistance to the punch. With practice one can feel when the punch is through the leather. I make my lead punching pad by melting down lead roof flashing or any other scrap lead eg fishing "sinkers". This is then poured into a round or rectangular metal saucepan or such to the depth of approx 15mm(1/2"). When one side is too badly pock marked, flip it over and use the reverse side. This will last for months and when needed, just melt it down again for a new, smooth surface. Warning only melt down lead in the open - I use an old camping stove. Guaranteed that your punches will stay sharper for longer. Can also be used for strap end punches etc. Cheers, Lois -
I made an efficient stamping press from an old portable electric drill press stand that I bought on ebay for $5. Where the drill normally sits I rigged up an old brace chuck (adjustable for different size stamp handles). I then added an adjustable guide made of perspex for stamping straps etc.
-
I have both the large and the Mini embossing machines from Bunkhouse. There is one modification that I have made to the large machine - the suggested leather strap to the foot pedal tensioner tended to stretch when in use, leaving an uneven result. Problem solved when I replaced this with light chain. The Mini Embosser, as is, did not apply enough pressure with just the supplied spring. I made a foot pedal with light chain link. Both embossers now work splendidly, with the pattern wheels leaving crisp impressions and are not showing any signs of wear. I could not be happier with the price and quality of these machines. Casing the leather is per normal but I would recommend using slightly wetter than for hand stamping or tooling. Hope this helps, Lois
-
I have tried a new approach to edge burnishing which is so quick and simple. Why buy expensive heating equipment when a canvas clad DIY burnisher creates ideal heat for melting in wax? I make my own leather dressing from beeswax, neatsfoot oil (50/50) and a dash of eucalyptus oil to inhibit mould. This makes the beeswax workable and leaves a waterproof surface with a good shine. After bevelling and sanding the edges, I stain if desired, apply the beeswax mix and then use the canvas burnisher. I do not use water or gum trag as these cool the edges. That's it! The beeswax penetrates the edges and hardens with the heat, leaving a smooth, shiny finish. Lois
-
Moody I'm very impressed with your test sample, but it have one question. What is the advantage of hot stamping to normal embossing? Lois
-

What To Do With The Wibbly Wobbly Edges Of Hides?
impulse replied to ERoyal's topic in Leatherwork Conversation
Wetting the leather is the way to go. Use a rolling pin to help flatten, then weigh down until dry. The edges are more stretchy than the middle of the side, but if you check out pinterest.com and search under "leather scraps" there are many ideas for using this. Cheers, Lois -

11/12 Oz. Leather. What Is It Good For?
impulse replied to Phoenix63's topic in Leatherwork Conversation
I use this weight leather for durable tooled belts and large dog collars However you must bevel and burnish the edges otherwise the finished product will look too "chunky". Cheers, Lois -

Leather Hide Storage/organization
impulse replied to Silverctack's topic in Leatherwork Conversation
I too have limited space in my workroom, but store my hides on a plastic pallet. I purchased a used boat winch via ebay, to which I attached cables and pulleys hung from the ceiling. It is so easy to lower the pallet to eye level, make my selection then winch it back up out of the way. There are currently approx 30 sides up there. My leather is rolled and wrapped in brown paper. I have a small sample of each hanging from the ends so that I can quickly identify what is there. Smaller hides of sheepskin, pig skin and kangaroo are stored rolled up inside 90mm plastic storm pipe, cut to 75cm lengths and bundled together under an island table on castors. My working space is only 13ft x 9ft in which there are a Cowboy 4500 and a Singer 132K6 sewing machines, an 8ft x3ft work bench and shelves on 3 walls. Cheers, Lois- 13 replies
-
- organization
- storing
-
(and 3 more)
Tagged with:
-
LHi Weezy. Ebay often has listed 20 different shaped filigree punches from China for around $30 per set. (Listed under "leathercraft" - sellers name is shanghaimagicbox4) I use scalpels for most of my cutting and shaping as they are about the sharpest tool available. They are cheap and come in straight, curved or hook shapes and can be stropped many times over before discarding. My head knife hardly gets used now. Regarding leather for inlay - I often use kangaroo as this comes in a wide variety of colors and, while thin is very strong. You can use textured leather ( eg snake skin, emu, crocodile) or even hair on hides (eg rabbit, calf, deer skin). It is preferable to use a thinner leather to filigree so that the inlay really stands out. ............Cheers, Lois
-

Masking Off Problems
impulse replied to RavenAus's topic in Dyes, Antiques, Stains, Glues, Waxes, Finishes and Conditioners.
Hi Raven. As A fellow Aussie, it may be useful to know that brushable latex is available from Adelaide Moulding and Casting - amcsupplies.com.au.............i would paint a little of this around the edges of your stencil, press onto the leather then clean away any oosings with a cloth dipped in soapy water. This provides a good seal, as long as you spray LIGHT coats of dye. Hope this helps. Cheers, Lois -
Suggest you try black tea to color brown - works quite consistently.
-

Darkening Natural Veg Tan Without Stains/dyes?
impulse replied to zaynexpetty's topic in How Do I Do That?
Just a word of caution using any sort of oil! Yes, it makes it darker and supple, but too much can affect the strength of leather, and leaves the surface dull. I make my own leather dressing from beeswax, paraffin wax and neatsfoot oil, melted together into a creamy paste. This works into and softens the leather ( applied both sides, particularly the flesh side). Then, after leaving for an hour or so, buff up with a cloth to a glowing shine. Natural leather turns to a golden tan and is also water resistant, due to the bees wax content. To make this a darker brown, treat with cold black tea and allow to dry overnight before applying the leather dressing. Lois -
The best way to remove stains/ discoloration, grease etc is to clean the leather with oxalic acid. This is a very mild acid which also has a mild bleaching effect. It is sold in most hardware stores as a "Rust and Stain Cleaner". It comes in powdered form, so mix 1 tspn in 200ml water. Clean the entire surface, wipe dry, then follow up with sodium bicarbonate ( baking soda) solution to neutralize the acid. I have used this for years on greasy, neglected saddlery- it works miracles. When preparing leather for tooling, I always use oxalic acid to even up any discoloration caused by light exposure before casing...................hope this helps!


