.jpg.d60258221c476480a6e073a8805645bb.jpg)


Art
-
Posts
4,138 -
Joined
-
Last visited
Content Type
Profiles
Forums
Events
Blogs
Gallery
Store
Everything posted by Art
-
I thought he was posting about the 901M111, a very rare machine. Art
-
Steve has a good idea. These machines do get gummed-up over time. With the WD-40, stay off the screws as much as possible, but it won't be a problem if you don't. Also stay away from the belt with the WD-40. I have never thought of WD-40 as a lubricant, but more as a cleaner. Spray it on, run it in, even spray while running, then wipe it off. Repeat as necessary. Oil pretty well afterward to force any WD out. One thing you might want to know. Singer used some of the damnedest thread pitches in their long production life. They must have owned a tap and die factory. I've never had to replace a screw on a 111, so I am not sure if they are the exception. Good repair shops like Bob, Steve, or a local old timer usually keep a box of old screws for their own use when they lose or bugger one up; keep that in mind and get a magnetic dish for screws. Singer bearings on the shafts are often hand lapped to the shaft, if you don't know what that means, don't take the shafts out, if you are going to paint, just leave the shafts in and mask them off. I have seen some way cool paint jobs over the years, but I can tell you that a black 222 will sell for more than a pink one. Art
-
Tex, That is a copy of the old Randall, it is meant to be set at one thickness and used that way. It doesn't like to change and you waste a ton of leather setting it. The blade is also a pain to reinstall. Seriously, get a band splitter. If you are going to use it a lot for different settings, then the band splitter is worth the extra cost, which is significant. Art
-
A trick when sharpening a flat ground edge (hollow ground works too but is different) is to paint the edge with magic marker or something similar and then remove some metal. This will allow you to see where you are grinding. I have shown this to folks and they were really suprised to find they were removing metal from the shoulder and not getting anywhere near the edge. This is ok if you're changing the edge geometry, but you are going to have to grind longer to get to the edge. For use older folks, a 10x loupe is a handy gadget too. Art
-
That model has a direct drive motor that will be expensive to replace when it burns out. It will work for a while with 69 thread, don't know about the 92. Those are nice little machines that produce a stitch far superior to the machines of today, save it for quilting, you will just loosen it up sewing thick leather. Art
-
Chris, I apply the burnishing ink cold and the Yankee with hot irons. However, I don't use Yankee on wearables. I use beeswax or carnauba wax as a top wax. The carnauba is very hard, and the beeswax somewhat soft, the carnauba definitely requires a hot iron, beeswax you can use cold. I am thinking of mixing beeswax and carnauba, but the carnauba works for now. So: Wet Edge Trim edge or sand Cold Burnish edge While still a damp edge (not wet, damp) Apply Fiebing's oil or spirit dye for the color you want let dry some, should still be a little damp from original wetting not from dye Apply burnishing ink, it is just ink with some wax in it, again let dry Heat burnishing iron, when hot apply carnauba wax and or Yankee to iron, irons need to be hot enough to melt the wax as it goes on the iron, but not hot enough to throw the wax off, you can usually smell carnauba, it has a sweet smell, if you can't smell it the iron is either too hot or too cold Hot burnish the wax top coat, use neutral carnauba or Yankee if worried about rub off, but carnauba is pretty hard and doesn't rub off easily. Sounds complicated, and it is a little, but it leaves a nice colored edge. For the production environment, an enamel painted edge might be easier. Burnish cold then paint. Art
-
Smallest thing I've tried is 6oz which worked fine. I don't have irons for anything smaller. I use burnishing ink first cold and then Yankee wax with the hot irons. For small stuff and holes, I'm back to hand burnishing or using a rotary tool in the drill press or just a smooth elk antler tip. Art
-
Leather Skiving Machine "nick-O-Sew 801-St"
Art replied to philippe's topic in Leather Sewing Machines
No, I don't have a bottom feed and don't want one. The top/bottom feed will skive anything veg/chrome/latigo/deertan without changing to a steel bottom roller or any other modifications. You have the right machine, now you just have to learn to use it. Get a bunch of crap leather, cut it into strips, and practice and adjust until you can skive perfect edges. Buy a bag of scraps from Tandy and go to work. Art -
Leather Skiving Machine "nick-O-Sew 801-St"
Art replied to philippe's topic in Leather Sewing Machines
Wiz, It doesn't have a foot. The top and bottom feed machines are production machines that pretty much do one thing, hence the top roller is the foot. The only accessory I have seen is different rollers, and you cut them on a lathe as needed, the machine then uses that one forevermore. I've never used any but the roller that comes with it. I have seen a clutch that allows the blade to run constantly and the feed intermittently. I do remember seeing guards before, but they seem to get lost, even in factories. Art -
Leather Skiving Machine "nick-O-Sew 801-St"
Art replied to philippe's topic in Leather Sewing Machines
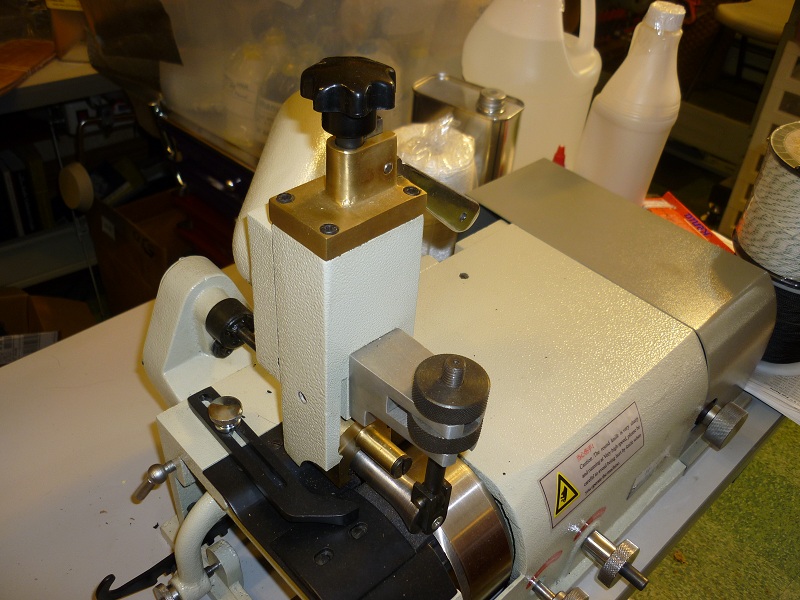
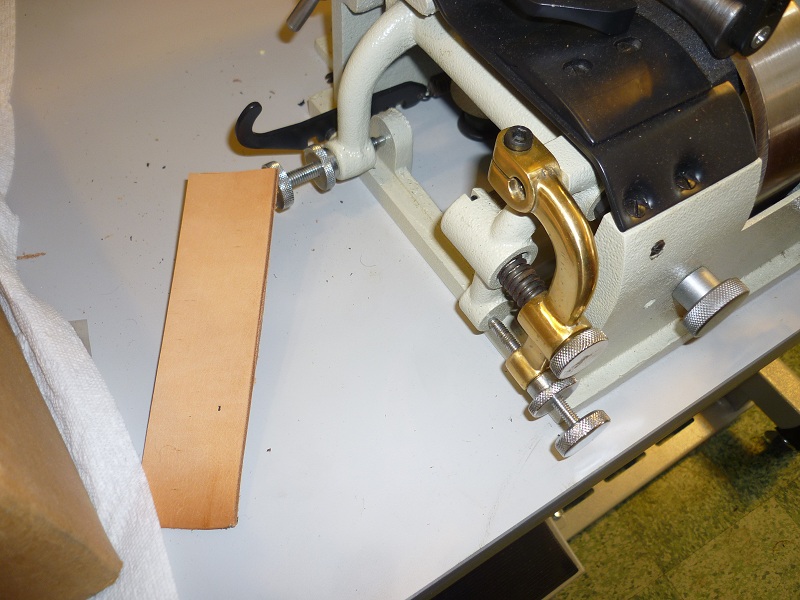
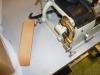
As everyone has said, the knob on the top is the place to start: If you need to go further, the knob pointed to by the leather strip in the picture below can be used to raise or lower the feed roller which will lessen or increase the cut. The big black hook will increase or decrease the tension on the spring resistance to the roller being depressed when cranking down on the knob on top of the machine in the first picture. Please do as little adjusting as necessary. Do not go further than the top knob until you understand just what effect it has. For adjusting a 3oz skive, little should have to be done if the machine was set up correctly in the first place. Is there a reason you bought from a dealer who doesn't know a lot about the machine? Was it set up or prepped in any way? The best way to start is to run a piece of leather through the machine and see what it produces, then make adjustments till it does what you want. With a properly set up machine, you put the machine on the table, screw it down, put the belt on, and skive something, make a few adjustments and you are cooking. The machine you purchased is more difficult than the bottom feed ones, because there is only one top roller with one profile. The bottom feed only ones have feet with different configurations. The one you have however will do veg tan all day and night, not always so with the bottom feeders. If you need more help, take a couple of pictures so we can try to help. Art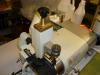
-
Isn't that the 1/2 million antique blanket from the Antiques Road Show? Art
-
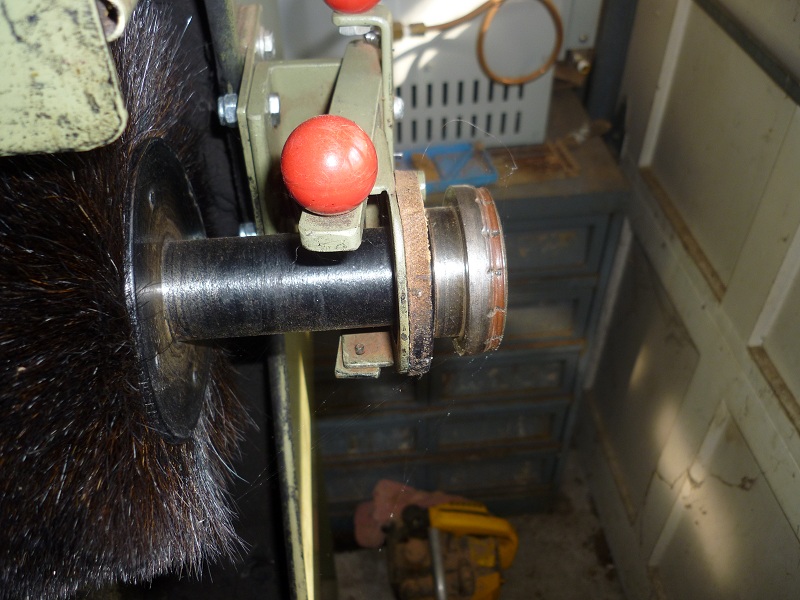
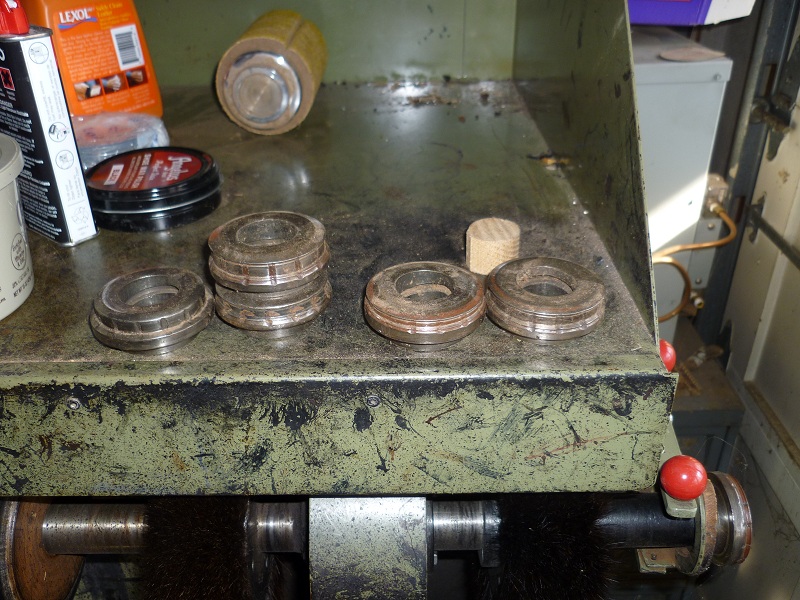
Since you have a finisher, do you have a bayonet for burnishing irons on it, like this. The part with the red knobs is for heating the iron. The actual irons off the shaft look like this. These work pretty well with compounds like Burnishing ink and Yankee Wax. Art


-
The LU-563 Subclass 3 DOES NOT have reverse. The switch? may be the knee lift for the presser foot, other than that I can't be sure without pictures. The 563 like so many of it's class have the intermittent reverse lever (paddle) on the right front of the machine, so if that is not there, it doesn't have reverse. It is a well designed machine, copied by many, with a few mods it makes a great medium weight leather sewing machine, I am not as impressed by the N model of the 563. Gregg at Keystone deals with these machines a lot and can tell you a lot about them. I might recommend you use a dealer if you have to be asking these kind of questions. These machines were a big part of the upholstery business and it is possible to get stuck with a dog. Real dealers (not the Internet variety, although some play in both arenas) have mechanics who will go through your machine and fix what ails it, you won't find that on the Internet. Art
-
Hi Chris, Mine are Leather, I have not seen the canvas ones in years. They do make ones of felt, both 5 and 8 inch. The duck wheels were made like the leather ones, like a flap wheel but packed tightly so they don't flap, but they do lay down some with use. The felt burnishers work pretty well too, but I think the leather ones are better. I have never seen drawstrings on anything but a consumer polisher. Any wheels I get are manufactured with hubs. It is hard to tell from the picture what you have there. Art
-
I'm A Newbie...need Help Identifying Leather Type.
Art replied to ValleyEquine's topic in All About Leather
Sounds like Latigo to me. Usually Burgandy in color on saddles at least, but black is also common. It does tend to bleed when it gets wet. Art -
The best way to lock off without reverse is to turn around (the work) and go the other way. Seasoned sewers lift up and go back two stitches and continue. For critical work you can leave your tails long and saddle stitch (or lock stitch with an awl) or do a surgeon's stitch. In my opinion, you really don't need reverse, but it is an easily implemented selling point such that not many new machines are made without it. Art
-
Sewing Holsters With A Machine
Art replied to Sixer's topic in Gun Holsters, Rifle Slings and Knife Sheathes
You're not a sissy if you draw or groove lines on your holster to follow. The machine will stitch the same stitch whether you are going fast or barely crawling. Slow down and don't ever turn the handwheel backwards till you understand the machine. Then almost never. If you have to start by handwheeling the machine then so be it. You have to learn to turn curves when the feet are up. If you horse it and turn with the feet down, then a skipped stitch is often the byproduct. Crawl, stand-up, walk, run. Art -
Hi Harvey, I have burned up my share of Dremel Tools and wore out a Foredom (which will be rebuilt) finishing knives. I now have (I am a hard person to buy for so I end up with things like this) a NSK Emax EVO with a 4:1 reduction drive. I imagine it cost every bit of a grand, but I guess she asked them for something I couldn't burn out. Great tool, way overkill. Art
-
How Do I Properly Set A Brass Finial For Holster Flap?
Art replied to DonBurch's topic in How Do I Do That?
Don/Mike, I use JB Stick for that type of application, it is easier to control than liquid epoxy, and you can get the finial out before it sets, you just make the impression in it and it will set that way. Knead it, stick in in the hole, push in the finial and pull it out. The washer from Mike is a nice touch, I will try that next time. Art -
How Do I Properly Set A Brass Finial For Holster Flap?
Art replied to DonBurch's topic in How Do I Do That?
They (Weaver) used to make an anvil with the proper depression for setting Sam Brown studs. I have not seen it for a while. I just milled a hole in an anvil with a 1/4" round end mill and use that. I think a hole for the acorn finial might be a little more challenging. You could rough out a depression with an end mill and then finish it to depth with a Dremel type grinding stone. Art -
Please don't do that anymore. Almost everyone eventually starts using the "View New Content" link at the top of the page on the right under the ads. So one post on a subject will be seen by most. I use Neat Lac (no longer made under that name, but available as WyoSheen at Sheridan Leather Outfitters and under the LCI brand from Springfield Leather) and I spray it. If you spray, get a can of thinner for it, and you might want to do it outside too. Art
-
How Do I Properly Set A Brass Finial For Holster Flap?
Art replied to DonBurch's topic in How Do I Do That?
Hi Don, By "Brass Finial", do you mean a Sam Brown Button Stud? Can you show us a picture of the stud or give a url? Art -
Hi Angie, The Tippmann has an advantage; you can take it apart and move the pieces, and on any of them that is a handy dandy thing. My Hydraulic needs a pallet jack, but moves easily that way. Inconvenient things about the Tippmann; personally I think the 7 ton is too small, none of them have a swing away top platen, and they have slow recovery, and use a LOT of air so an 80 gallon 5-7hp compressor might be in the works. You'll never regret getting a hydraulic, especially if you are a production shop. I got mine from Steve at Cobra, and I haven't regretted the bit of extra cost as it is sooooo fast. Art
-
Hi Brian, That is probably some form of protection that is put on to withstand the trip over salt water. When I used to receive machine tools from Taiwan, they would be coated with it in places that were exposed. I found that regular gasoline did a wonderful job of dissolving it. Ethyl Acetate worked too, but was awfully expensive. Of course standard precautions should be observed with flammable and highly volatile compounds. Art
-
I haven't had any problems with W/C either. I pretty much get whatever I order, but if it requires finishing, I don't expect it the next day or even the next week. Art