FHL FERG
-
Posts
188 -
Joined
-
Last visited
Content Type
Profiles
Forums
Events
Blogs
Gallery
Store
Everything posted by FHL FERG
-
Posted this in the Motorcycle section but thougth I'd try hear too: I was looking at some seats from a guy and noticed they're not tooled. They look like they were printed. It remonds me of Decoupage, or maybe some sort of tranfer like a heat tranfer for a t shirt or a temporary tattoo water transfer. Anyone seen anything like this and can point me towards some resources? his description says: "This is a new Distressed Tattoo Seat with a Bomber Plan and Pinup design, that is embedded into the veg-tanned tooling leather. The image is water resistant, very fade resistant and very abrasion resistant. The process gives the seat a tattooed look." Any thoughts?
-
I have done quite a few seats but I was looking at some stuff from Rich Phillips and it dawned on me it's not tooled! It's Printed! What techniques is he using to print on the leather to give it this distressed aged look? Thanks! FERG
-
 Dig that makers mark!
 -
Also, I'm finiding that the white background here on leatherworker.net plays with the contrast as well. When I have the above photo on a screen with a black or brown background my photo appears MUCH brighter with a lot more visible detail. Interesting...
-
Thanks for the input everyone. I agree its still a little dark, but it's moving toward what I want. I have a bunch of others from the shoot I did that I am playing with on the editor. I'll post something up in the next few days when I get some time at home. Ferg
-
I think I am getting the hang of it, this is more in line with what I wanted....
-
Thanks man, I appreciate that. Despite all of the obstacels I really feel like it's the most interesting piece I have done. My photography doesn't do it justice. After some concult with some photog friends and playing with the lighting and camera settings I got this.... Much Better!
-
Thanks! I am still having some problems with glare off the leather and the background getting washed out in the photos. Today I am going to ue a piece of 1x2 to move the light out a little farther and see if that reduces the glare some. Here is the full pic with my trusty sidekick hard at work....
-
No prob, GOOD LUCK! Post some pics of the progress in this thread. I'd like to see it.
-
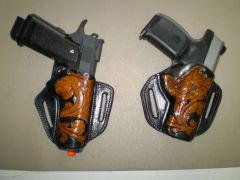
ccw hip holster 001.JPG
FHL FERG commented on r t warren's gallery image in Our Leatherwork Galleries
 Nicely Done!
 -
Drill out the rivets, pull the old cover off. You can create your own template or you can take apart the old cover at all the seams and lay it or flat to create a template. That will take care of you r new cover, as for lining up holes; use some paper on the seat pan to create a template then transfer that layout to your new leather.
-
Built me a new photo box to capture my work. Now I just gotta learn a new hobby, photography......
-
I struggled a LOT with this seat. I was trying new techniques at every phase of the build and was met with all kinds of lessons learned. I am looking forward to the next one, I think it will blow this one away.
-
Gracias. (< Cause its a mexican braid)
-
Thanks again rickey. I will give them a look and see what I can find on the foam. I will have to find the details on that braid somewhere, it's not in my books.
-
Spot on man, I really like the way the Dios De Muerta Skull turned out. Very clean knife work.... I got to figure out how to keep mine so clean and smooth looking, my knife work is way rough....
-
Those are top notch Rickey. Thank for sharing the lacing layout technique as well. What lacing pattern are those. I really dig the way the braid lays out and how it's in tight to the holes. Also, what tyoe of foam are you using and where do you get it? I am having a hell of a time finding anything locally otehr than your typical fabric store foam thats waaay to soft.
-
Great Seat and fantastic Write up David! I tooke some cues from this for my current seat project. My seats have always been raw on the back side and just screwed to the pan. I really like what you did with the bottom panel and riveting etc.. I was in a position with my current project to make the change it's really looking good and starting to come together for me. Thank you so incredibly much for sharing your trade secrets. Ferg
-
Thanks, I'm pretty proud of the tops of them. The bottom side however leaves little to be desired. At the time I didn't have a resource like this forum to help me through the process. So the bottoms are raw and unfinished really. Now, after reading one of the how to's in the motorcycle section I have started making bottom plates and riveting them to the pans, then lacing together. I am almost finished with my first one of this style, I have had some problems with it (we'll call it a learning curve, lol) but it;s coming along.
-
Thanks JD, You up around Bonham?
-
Google turned this link up, I may try it today: http://forum.horsetopia.com/tack-apparel-equipment/123599-removing-excess-oil-leather-tack.html
-
Wow, that is a deal! Everythign here is 250 and up
-
Thanks for the direction on it, i will look for an engraver that might be able to do it. I may give a go at making one myself. Who knows....
-
Great idea thanks for sharing. Man I love this place!