Eaglestroker
-
Posts
653 -
Joined
-
Last visited
Content Type
Profiles
Forums
Events
Blogs
Gallery
Store
Everything posted by Eaglestroker
-
Edge Waxing Question
Eaglestroker replied to rccolt45's topic in Gun Holsters, Rifle Slings and Knife Sheathes
I'm betting he uses whatever you would use to make a colored candle? Just a thought, colored wax seems intriguing! -
Latest Shotgun Case
Eaglestroker replied to rmr's topic in Gun Holsters, Rifle Slings and Knife Sheathes
Would you happen to have any plain cowhide examples for us to see? That is gorgeous but I'll admit far out of my skills set! -
P7Psp With Full Frontal Shark
Eaglestroker replied to Denster's topic in Gun Holsters, Rifle Slings and Knife Sheathes
I really enjoy your work and this one doesn't disappoint, great looking holster! -
I hate to derail this thread anymore but I'm glad I checked back in on it. I recently acquired a 'Wild Bunch' style holster that was ragged out, $4 at a show and I like the design. I take it over to my grandad's to show it to him since I thought he might like it and he liked to of talked my ear off about this movie with William Holden in it (I'm a young guy, never seen it). I appreciate the pictures posted in this thread as they give me some good ideas of my own. Sometimes a thread derail is just what you need to get the creative gears a'turnin.
-
Three More Off The Bench
Eaglestroker replied to Sanch's topic in Gun Holsters, Rifle Slings and Knife Sheathes
From my very limited works I've found that molding the trigger in from the backside can greatly increase your retention without causing the front lines to loose aesthetically. Kind of like in my recent K frame thread for reference. I personally like the front of the trigger or at least a portion to be exposed. To the OP, the Ruger carving is very nice. If you back off on the molding some It would make it an extremely attractive holster as well! -
Edge Waxing Question
Eaglestroker replied to rccolt45's topic in Gun Holsters, Rifle Slings and Knife Sheathes
Hey Ray, I've made my own mixture but would be willing to buy a 'kit' simply to have it. Would love to send her some more business as well and I sure made a mess of my kitchen during the last mixing process! I started with straight beeswax but after trying the 50/50 mix and seeing it's results it is definitely a much better finished product. -
Some Recent Work
Eaglestroker replied to particle's topic in Gun Holsters, Rifle Slings and Knife Sheathes
The holsters all look great, but man that badge holder looks awesome! -
S&w K-Frame
Eaglestroker replied to Eaglestroker's topic in Gun Holsters, Rifle Slings and Knife Sheathes
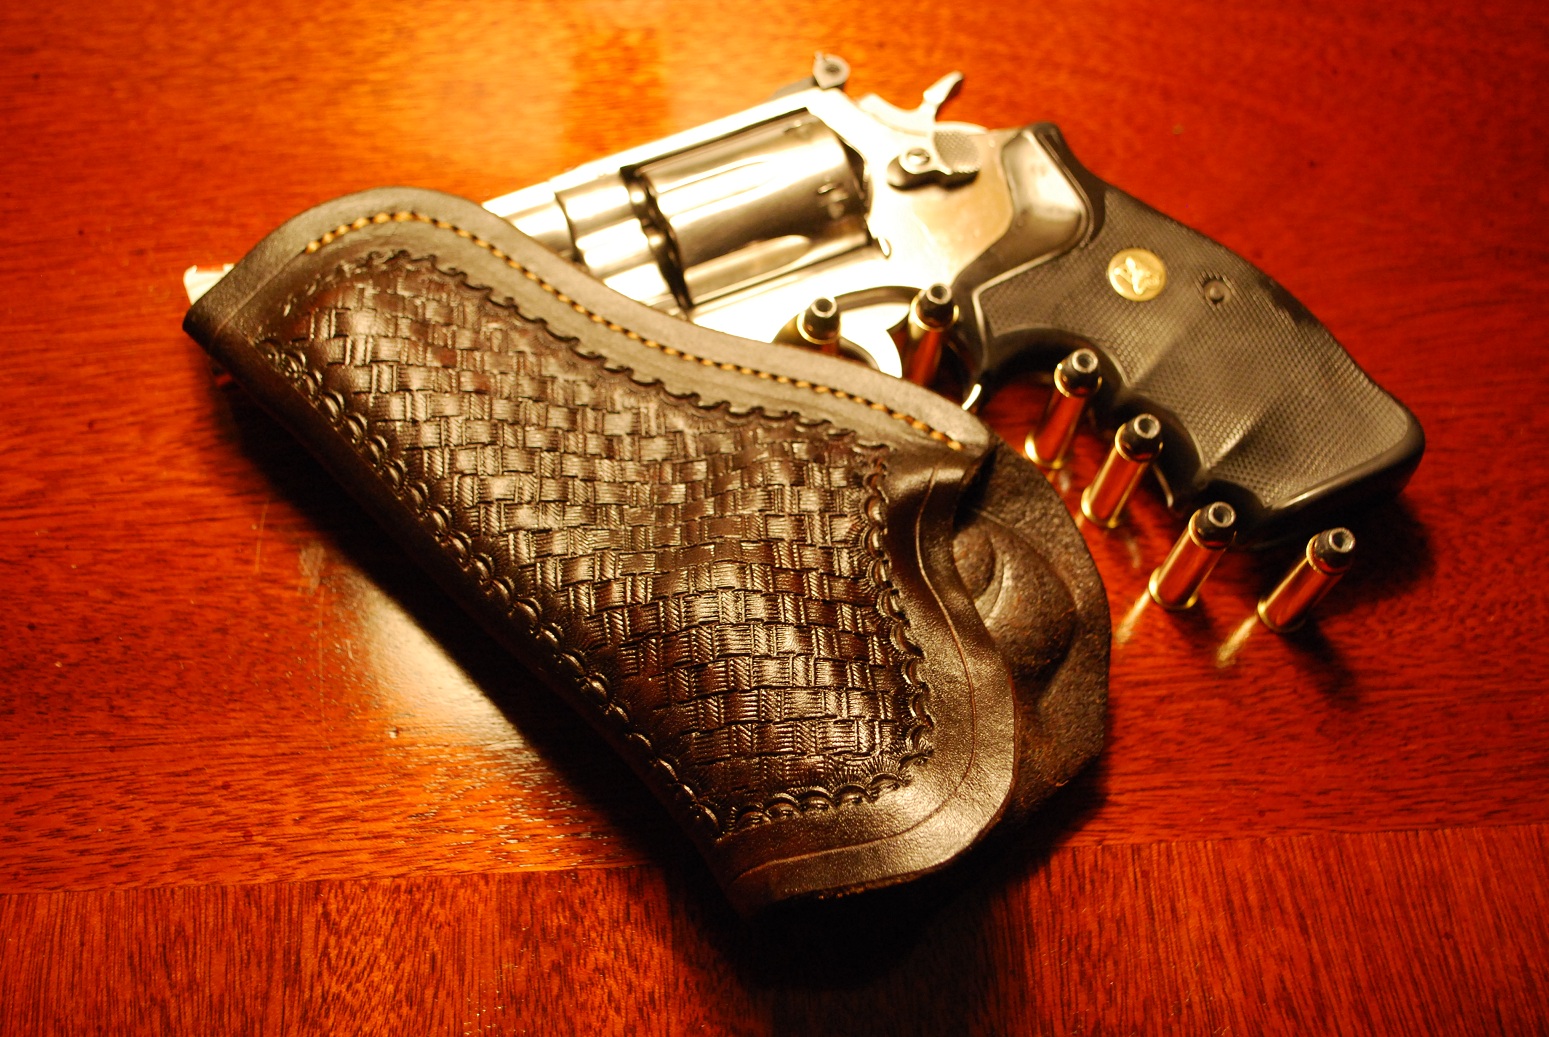
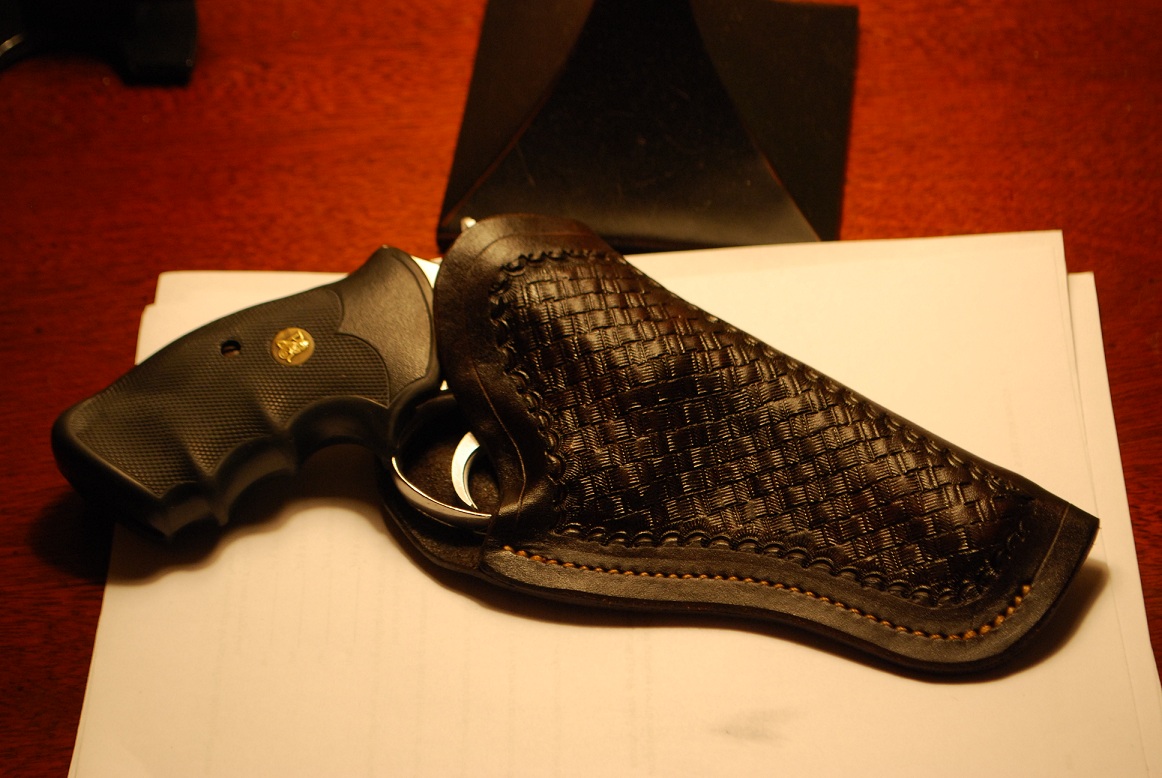
I appreciate the compliments on the tooling. It has definitely progressed as I have - I'm not an artistic person which tells me with enough time anyone can get good results from it! This was the first time the border took me longer to stamp than the basketweave! I call the color 'I'm running out of dyes, so I'm going to put lt brown, saddle tan, dk brown, and a pinch of mahogany into my bowl and let it ride' - to be exact! Then I forgot to buff it out and when wet the dye bleed a little and stained my beautiful white stitching The fact that there is not a stitch line following the revolver is why I think this design 'needs' a strap so good eye there, that's why I was hoping for a little feedback and design modification from everyone here! Hey Ray, glad to hear your input it's always welcome. I've still been having problems with not being satisfied with how my boning turns out so I returned to doing it all by hand. At least it is not over done then. I did like the way the trigger guard turned out as well, it looks a little unusual in person as the top of that hoop flares out for re-holstering, but I think that gives it some attitude/personality. The center welt is not something I had previously considered on this design but poses an interesting question from me - with the stitch line so far out AND a center welt, would this allow the holster to maintain retention over time? In any case I think being able to tackle a first design like this shows improvement on my end. I'm just happy to be stitching! Hey Mike, a later good morning to you from the stressed out due to finals college student. Your reasoning is the reason why I don't fool with retention straps on pancake style holsters. After listening to a few of you pro's I believe a properly made holster is the key.In any case thanks for the reassurance there. This was/is a police trade in gun so I suppose it's on appropriate for a home similar to what it is used too! -Robert -
Ever since I dug this pattern out of my grandfathers old leatherworking cabinet I've been dying to try it. I'm not sure what you would even call it. Picked up this M66 last week and any self respecting hobbyist can't have a naked gun! I think given the stitching pattern this really needs a retention strap and my next try will probably have a sweat guard as well. I didn't want to just 'stick on' a strap and have it look unplanned so I will have to carry this around for a little while and go from there. I also tried a new desigin with the border stamp and I think it's a lot less boring than the way I used too. I do know after this project one thing was blatantly clear - I really need to invest in some quality edgers. In any case, as always critiques and criticism are welcomed.


-
Pro Stitching Groover Set
Eaglestroker replied to Reaper's topic in Gun Holsters, Rifle Slings and Knife Sheathes
Where did you get yours from? -
Boss Is Here!
Eaglestroker replied to Reaper's topic in Gun Holsters, Rifle Slings and Knife Sheathes
I just switched from 346 to 277 thread on my Boss - thought it looked a little tidier and the machine seemed to be a little more consistent as far as stitch spacing goes. Good luck with the machine it sure beats doing it by hand! Just remember: ALWAYS sew with it on scraps before moving to your project - something always needs a little fine tuning. -
My Last For Awhile
Eaglestroker replied to dickf's topic in Gun Holsters, Rifle Slings and Knife Sheathes
The Cordovan for the P64 is my favorite, that's gorgeous! -
Airbrushing Dye, Etc.
Eaglestroker replied to Sixer's topic in Gun Holsters, Rifle Slings and Knife Sheathes
My recent post shows the two that I dip dyed light brown and can be found here: http://leatherworker.net/forum/index.php?showtopic=31224 I haven't gotten any more dye to be able to do a comparison just yet though! -
Some Recent Work
Eaglestroker replied to Eaglestroker's topic in Gun Holsters, Rifle Slings and Knife Sheathes
I can't edit my original post so maybe a moderator can - I realized I posted the wrong links so sorry about that guys! -
I recently used the railed 1911 and it worked well for me, I need to pick up their Beretta 92 to keep in the drawer.
-
Well I am still attempting new things and think I may have stumbled on a combination that I'm extremely satisfied with. My first new change was dip - dying. I'm really happy with the way the coloration turned out. My next change was moving from 346 thread top/bottom to 277 with a chisel point needle in my Boss. Not only do the results look more 'professional' to me but it was much easier to work with and the machine skipped less/had less variation when it came to stitch length than when I sewed with 346 top/bottom. Here they are - as always critiques wanted and welcome:
-
Airbrushing Dye, Etc.
Eaglestroker replied to Sixer's topic in Gun Holsters, Rifle Slings and Knife Sheathes
Well to keep this thread updated - from now on I am dip dying with an airbrush top coat. I'll have to take pictures when I am not on a time crunch but the results were so much better. On black when I cut the slots I didn't even have to go back and dye them! I was still able to get a pretty light coloration as well which was quite a surprise. I was even able to run the stitch groover AFTER dying with no noticeable difference in color.. -
Main And Winchester Holster
Eaglestroker replied to wolfeyes's topic in Gun Holsters, Rifle Slings and Knife Sheathes
That's really nice! With a barrel that long you don't really have to worry about it flying out. -
Newest Holster/ammo Pouch Combo
Eaglestroker replied to troop's topic in Gun Holsters, Rifle Slings and Knife Sheathes
Beat me too it, I was going to ask the same thing. I like the 'drain' in them as well, neat detail. -
Kooky Question On Leather Pistol Grips
Eaglestroker replied to Fredo's topic in Gun Holsters, Rifle Slings and Knife Sheathes
I recently read an article about making armor using this method but can't find the link. He suggest 180*F for 30-60 seconds. It changes colors and after it drys it is very strong/brittle. -
Airbrushing Dye, Etc.
Eaglestroker replied to Sixer's topic in Gun Holsters, Rifle Slings and Knife Sheathes
I gambled that it was going off the name Grizz! I think that would work fairly well IF you could get even enough coverage with a light shade (maybe that's just a problem I have?). You would need to pop for a double action brush off the bat if your only using it for detail work though. -
Airbrushing Dye, Etc.
Eaglestroker replied to Sixer's topic in Gun Holsters, Rifle Slings and Knife Sheathes
My workspace is limited to a kitchen table - but next time I have the airbrush set up I'd been happy to oblige as I was going to attempt the same thing anyways! I'd be interested in seeing other methods such as dipped or your wool. I haven't attempted dipping for the simple fact of mess/clean up in my little area. Without a doubt the dauber has better penetration though. I recently tested some coffee based dyes and will include a sample of that as well. -
Airbrushing Dye, Etc.
Eaglestroker replied to Sixer's topic in Gun Holsters, Rifle Slings and Knife Sheathes
I had been having a conversation with someone elsewhere pertaining to this so I'll put it here as well. Obviously I'm no pro but it seems to me that the dauber penetration is so inconsistent I'm not sure if it really wears any better or worse than just the airbrush assuming all else is the same. This picture is a few test pieces done, then cut in half. Top is the brush with 3-4 heavy coats, middle is a dauber and bottom is bare: Now that I've ended up with an airbrush you'll be hard pressed to get some sort of sprayer out of my hands, it just looks better! -
Airbrushing Dye, Etc.
Eaglestroker replied to Sixer's topic in Gun Holsters, Rifle Slings and Knife Sheathes
Did I miss a post? Are you having issues with that not holding up or is it just a preventative thing? -
Wish my first attempt looked so good!