IngleGunLeather
-
Posts
512 -
Joined
-
Last visited
Content Type
Profiles
Forums
Events
Blogs
Gallery
Store
Everything posted by IngleGunLeather
-
1911 Commander Holster
IngleGunLeather replied to IngleGunLeather's topic in Gun Holsters, Rifle Slings and Knife Sheathes
Thanks JL! Thanks Hays! -
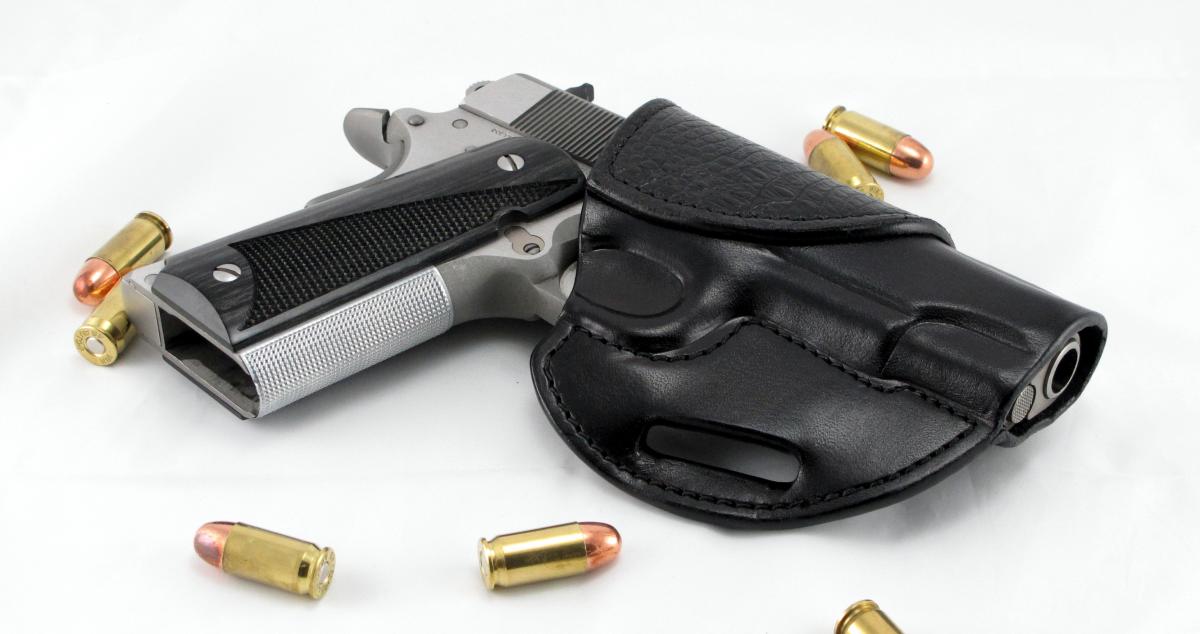
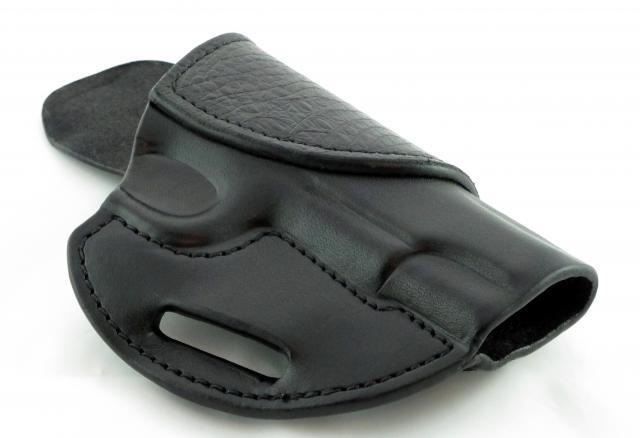
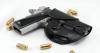
Hey folks. I posted this up in "Show Off" a few days ago. Well, anyway, here's an avenger style holster that I recently finished. Today I was playing around with the camera settings and thought this one turned out pretty good. The pattern is from Eric Adams of Adams Leatherworks.
-
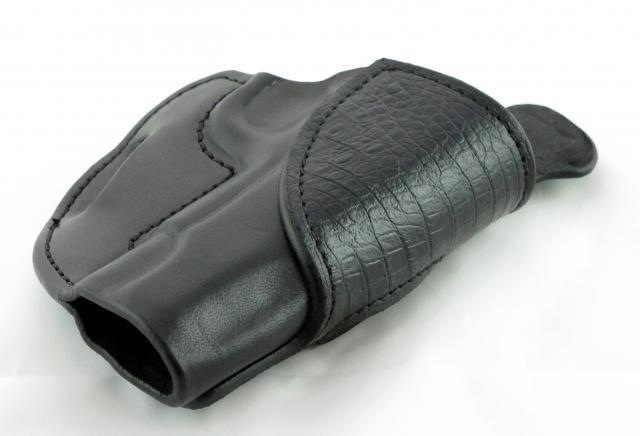
Thanks Nappers! Thanks Particle. I've had that faux gator lying around for a long time now. I'm glad I got around to using it. Thanks for the pattern. Oh, I used 6/7 HOfor this. What weight do you typically use? The 6/7 was very snug.
-
1911 Iwb Pattern Fore Sale
IngleGunLeather replied to Boothill Bob's topic in Gun Holsters, Rifle Slings and Knife Sheathes
Congrats on the publishing! Looking forward to the arrival of my pattern pack. See ya on the boards! -
That's good to hear as well. It seems to be a popular style with some of the major holster makers. I'm at least gonna have to give it a shot.
-
Thanks for the information Chief. I'm gonna continue research and try a few variations out. It does look like the holster would lift or twist with the weapon during a draw.
-
Thanks for the reply Triage! That's the info I was looking for. I think this type of holster would be a great addition to my line up. Now it's time to hit the drawing board.
-
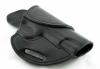
I'm looking around the web and seeing several options available for quick connect/disconnect for Outside Waist Band holsters. For those makers that are making these style holsters, what are some of the ways you are doing this? I've seen the ones on Brigade's website and they are very nice looking. They look like a pancake style holster, but instead of having slots punched for the belt, they have what appears to be a wrap with snaps. Are these type of holsters selling better than the belt slide holsters? I'm asking because I want to have more options available. I just finished the holster below for my personal use and as much as I like the looks of it, I'm not happy with having to undo my belt to put it on/take it off.
-
Newb Leather Questions
IngleGunLeather replied to Mike 257's topic in Gun Holsters, Rifle Slings and Knife Sheathes
Hey Mike. Thanks for your comment of the FB page. I have heard and read great reviews in regards to W&C leather. However, I have never used them. I exclusively use Hermann Oak. Most of the time I order Grade B sides from Springfield Leather. With Springfield you can order some squares at a relatively decent price. I mainly use the shoulder area of the hide for holsters and the back area for belts. Both W&C and Hermann Oak are superb tanners and you won't go wrong with either. Single and double shoulders are probably the most common cuts for holsters. -
Thanks!
-
Been away for a while due to moving and I'm just now getting around to setting everything back up. Needless to say, I was anxious to get a holster done for myself. This is an Avenger style holster pattern by Eric Adams of Adams Leatherworks.
-
EDIT: This happens frequently with 3rd party hosting. SO DON'T DO IT!
-
Cutting Belt Holes In Holster
IngleGunLeather replied to hestes's topic in Gun Holsters, Rifle Slings and Knife Sheathes
I use a dead blow hammer from Sears and an oblong punch for belt slots and an oval punch for the buckle tongue holes. From top to bottom here's my pounding stack: Project to be smacked Scrap leather Poly cutting board Marble slab Rubber mat Note: the dead blow hammer is way better for punching in my opinion. -
I made one out of a standard two hole. Just drill your third hole large enough for the snap to sit in but not go through.
-
Belt Measurement
IngleGunLeather replied to SooperJake's topic in Gun Holsters, Rifle Slings and Knife Sheathes
I measure from the buckle's tongue as Al Stohlman books describe. Not too long ago when I was doing my first and personal belt I had that same question. Several people and companies go from the fold. I took the advise of the buckle tongue from Chris "Slickbald" Andre and it worked great. After doing it this way I understood why it needs to be done this way because it reflects the "true" measurement of the waist. -
I hand sew my keeper together as seen in the above video. Mine "float" I guess. They aren't fixed to the belt.
-
Problem Cutting W & C Leather
IngleGunLeather replied to JeffGC's topic in Gun Holsters, Rifle Slings and Knife Sheathes
Hmmm. I'm baffled then. I wish I could recommend something else, but water and several cutting passes usually works for me. Maybe a conditioner? I wouldn't recommend oil as that may affect you when you go to dye. -
New To Forum And Leather
IngleGunLeather replied to JDMcCall's topic in Gun Holsters, Rifle Slings and Knife Sheathes
Welcome. I see that there is a Tandy store in West Columbia, SC. Not sure how far away that is for you though. I'd look at purchasing one of Tandy's kits to get you started. The tool collection will evolve over time as you progress. But here's some of my most used tools: -round head knife -utility knife -edgers in various sizes 0-5 -various dyes and finishes to include applicators -hand stitching? then you'll need needles and thread -lace and stitching pony will come in handy But you'll more than likely aquire your tools along the way as most of us do. You'll get started on a project and find out you need a special tool for it. At least that's way I've aquired most of mine. For example, lest's say you want want make a belt. Depends on if you're making a single layer or double layer. On a single layer, you won't need needle and thread. For a double layer you will, plus some glue. If you're not doing carving or stamping on said belt, you won't need those tools. But a couple common tools/hardware for either single/double or stamped/nonstamped will be neccessary. Like rivets, snaps, or chicago crews and a buckle. Knife Sheath kit This kit for example, lists all additional items needed to complete the project. More than likely, you'd need a basket stamp if you want to stamp as pictured. So, I'd have to recommend these or similar kits to get started. Other than that it's pretty much a lot of research, books, and videos. Youtube is a decent source of how-tos. The Tandy website has a video library and most of the books can be downloaded to your PC. Smartflix is also a source for instructional material. I haven't used it yet, but I have seen several people recommend it. On this forum, there are a bunch of how-tos pinned. For example, there's articles on how to finish edges, stitching, lacing, making holsters, belts, etc. One last thing, check out the chat room. Several of us holster and strap makers stop in routinely. -
Problem Cutting W & C Leather
IngleGunLeather replied to JeffGC's topic in Gun Holsters, Rifle Slings and Knife Sheathes
Did you try any of those suggestions in the original thread? I recommended moistening the underside (flesh) with water. Additionaly you could rough cut the leather with a utility knife, case it properly, and then do a final cut with head knife. I really think water is the solution here. -
Hello From Wherever The Corps Sends Me.
IngleGunLeather replied to smokeeater722's topic in Member Gallery
Welcome Devil. I'm packing up and moving from Pendleton to New River next week. Gimme a holler if you get back on the east coast. Good luck in recruiter's school. If recruiting don't work out, DI school is center of the parade deck. Semper Fi, CT 0911/2002-2005 -
Blue Guns With Free Shipping
IngleGunLeather replied to lowlife's topic in Gun Holsters, Rifle Slings and Knife Sheathes
Some may disagree with my comment here. But, isn't this type of thread considered to be promotional in nature? It may have been posted with good intentions of saving people some shipping fees, but nonetheless, I don't think this is the correct area for this. -
Yeah, I occasionally run into this as I don't put out very much product. I've gotten in the habit of misting the flesh side with water. Don't need to soak it, just use a spray bottle and make a couple of passes. I spray the flesh side because the grain is usually the easiest part to cut through as it's less fibrous. Makes for an easier and cleaner cut.
-
? About Making A Ccw Belt
IngleGunLeather replied to lowlife's topic in Gun Holsters, Rifle Slings and Knife Sheathes
Again, just as a reminder,I've only done a few. I would think 2 layers of 4/5 might just be on the thin side. 4oz = .063in, .063in x 2 = .126in or just over 1/8in. Do you have access to a splitter? If so, you could split your 10/11oz down. On the belts I've done, I finished them with Fiebing's Carnuba Wax. I have recently purchased an aerosol can of Fiebing's Leather Sheen. I've only tried the Leather Sheen on some small 6 inch sample pieces and it seems to be pretty good. Both layers on this belt were finished with Carnuba. -
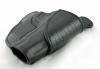
Latest Clip On Iwb
IngleGunLeather replied to IngleGunLeather's topic in Gun Holsters, Rifle Slings and Knife Sheathes
Thanks Michael. I initially riveted and then sewed, but the cover piece wound up having to be wider than I wanted. Although I was sewing with the left and center presser feet. -
Latest Clip On Iwb
IngleGunLeather replied to IngleGunLeather's topic in Gun Holsters, Rifle Slings and Knife Sheathes
Thanks. The leather is not drum dyed. It is Hermann Oak B-grade 6/7oz and dyed with Tandy's Pro Water Stain. I purchase my leather from Springfield Leather Co.