Matt Alsaker
-
Posts
186 -
Joined
-
Last visited
Content Type
Profiles
Forums
Events
Blogs
Gallery
Store
Everything posted by Matt Alsaker
-
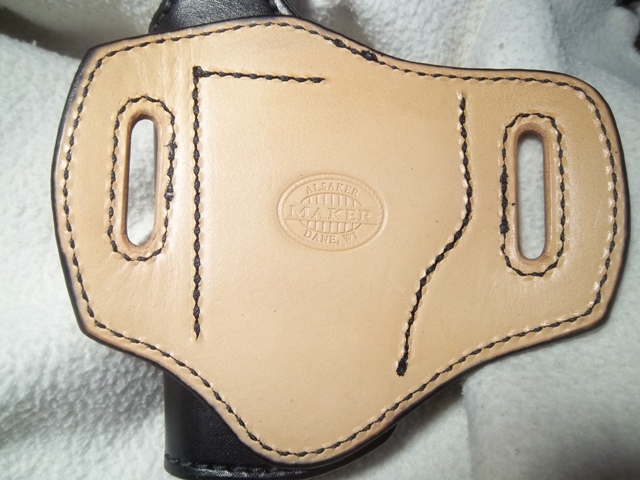
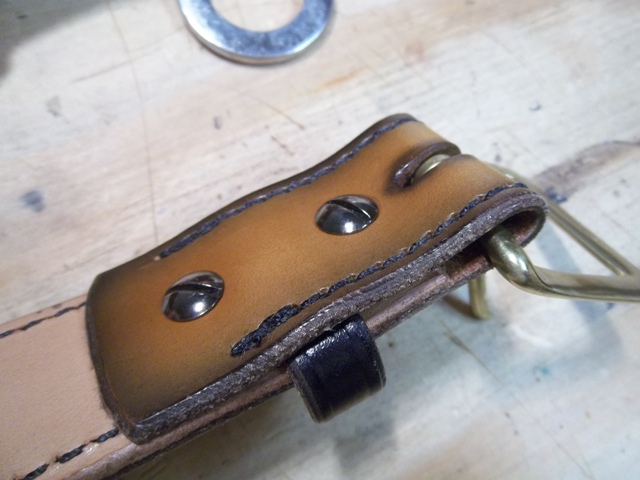
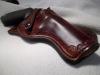
 That cross draw holster is already out the door. Here is the back of one of my regular holsters, the construction method is the same. This method was taken from the "Hugger" style holster Will Ghormley did in his 1911 Pattern Pack. With the body of the holster still open, it is sewn to the back plate (the "L" shaped stitch line). The body is then folded over and the two edges along the trigger guard and bottom of the rail are lined up. These edges are then stitched together all the way through the back plate (the curved stitch line). The Blue Gun is then inserted into the holster body and it is molded. Hope this helps.
-
Reinforcement Steel
Matt Alsaker replied to usmc0341's topic in Gun Holsters, Rifle Slings and Knife Sheathes
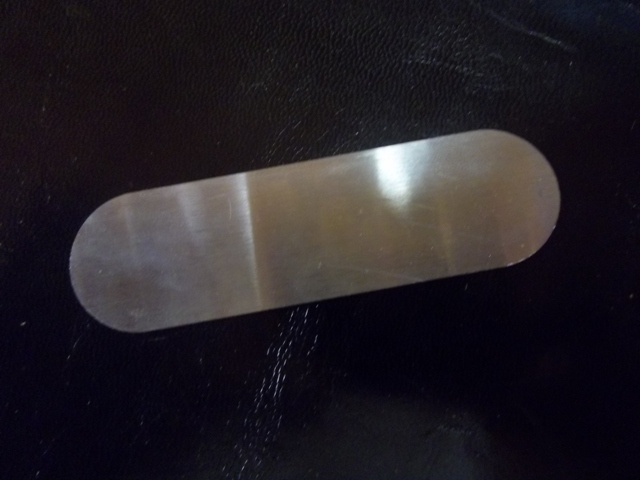
A local machine shop laser cut them for me. They are stainless steel. The dimensions are: 3.5" long and 1" wide. I had to order a minimum of 100, but it was worth the price considering the time it saves me.
-
I just saw these and commented up in the photo gallery. Very nicely done. I've never had any real luck molding a double magazine pouch. That one looks outstanding.
-
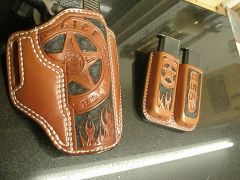 Those are very cool. Nicely done. I've never had any luck molding the leather on magazines like you did. Hard to tell, but it looks like a Springfield Operator in there. Nice firearm to go with that rig.
 -
The belt slot closest to the front sight post needs to be brought closer to the handgun. Laying out the template I had a tough time determining where the leather for the holster body would end up after molding. This is the first time I used Tandy's new Professional Waterstain. I usually use Fiebing's Pro Oil Dye and have not previously had any luck using water based products. I am very please with the Pro Waterstain. It went on evenly with a damp sponge and there was no bleeding when I molded the holster.


-
Belt Measurement
Matt Alsaker replied to SooperJake's topic in Gun Holsters, Rifle Slings and Knife Sheathes
The way I understand it...since each buckle has a different tongue length, (1) If as the craftsman you are providing the buckle with the belt, then you want the customer to measure as described in Al Stohlman's book because no matter what length the tongue is on the buckle you provide with the belt the measurement will be correct. However, (2) If the customer is not going to use your buckle and intends on using a buckle they already have (trophy buckle, etc) then if they provide you the measurement from the fold to center hold on a belt with their existing buckle you can build an appropriate length belt from that. Probably 95%+ of the belts I've made are done using option (1), but I've never had any problems when building using option (2). I hope this wasn't confusing. -
I used a damp sponge and the stain right out of the bottle.
-
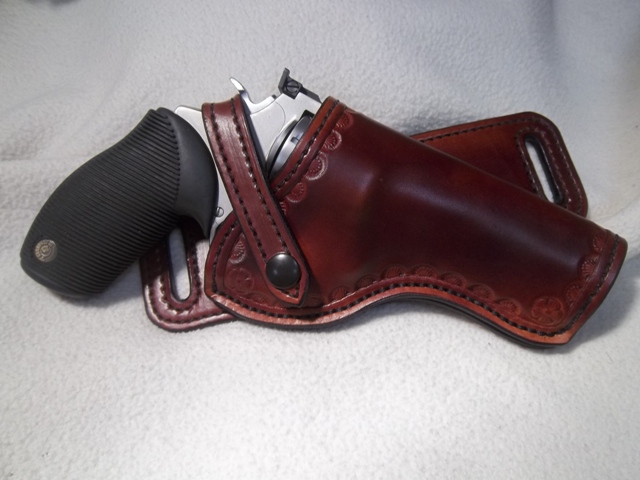
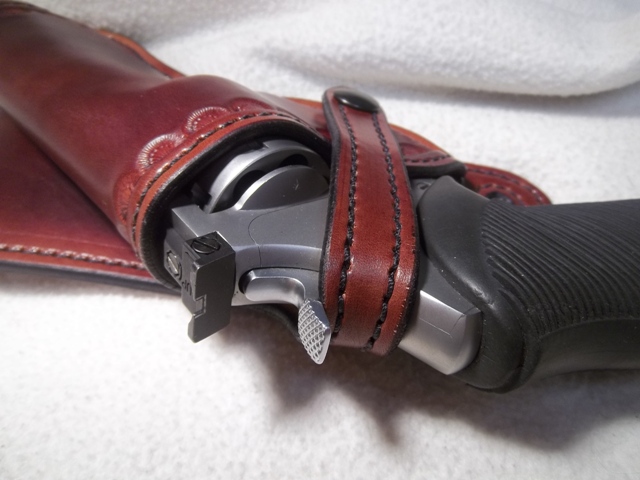
This is my first cross draw and the first revolver holster, but the construction method and style are similar to other holsters I have done. I need to move the belt slot by the front sight closer to the firearm a little bit to provide more support to the firearm. I wasn't sure where the holster would end up after molding it when I made the template. When making the template, I wasn't sure how to measure to about for the cylinder. The holster got a little tight, I will probably add another 1/8" or so to the holster body. I've always used Fiebing's Pro Oil Dyes. I was skeptical about using Tandy's Pro Waterstain, but gave it a shot after seeing some stuff Particle posted. I am very happy with the Pro Waterstain. There was good penetration into the leather, the color went on easy with a sponge, and there was no bleeding when I wet the holster to mold it. This is the dark brown color. I'm going to give a couple other colors a shot down the road. Any feedback or advise for either cross draw construction or making templates for revolvers would be great. I have Al Stohlman's book and followed the directions in his holster pattern making section.


-
Thumbbreak Stiffener
Matt Alsaker replied to usmc0341's topic in Gun Holsters, Rifle Slings and Knife Sheathes
I use a tubular rivet with cap from Ohio Travel Bag. -
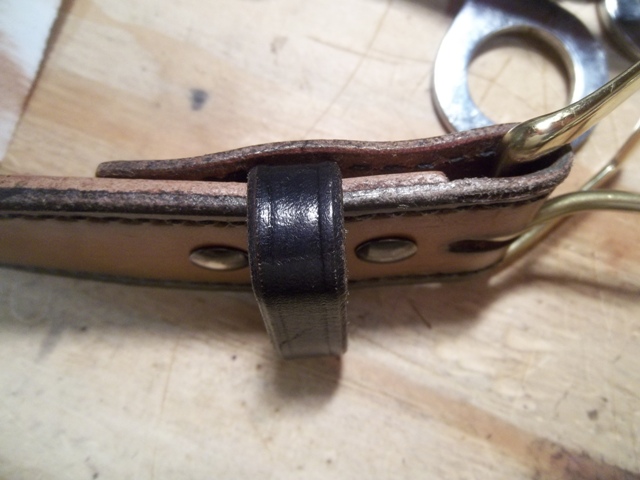
Attaching The Keeper On A Gunbelt
Matt Alsaker replied to SooperJake's topic in Gun Holsters, Rifle Slings and Knife Sheathes
I hand stitch mine. I'm not a fan of staples. I guess you could say mine are "anchored". They are not attached directly to the belt, but are held in place between the two Chicago screws that hold the part that bends around the buckle and back onto the main part of the belt.

-
Modifications To Blueguns
Matt Alsaker replied to Matt Alsaker's topic in Gun Holsters, Rifle Slings and Knife Sheathes
The JB Weld worked great. I just sanded it down and it worked perfect. Thanks. -
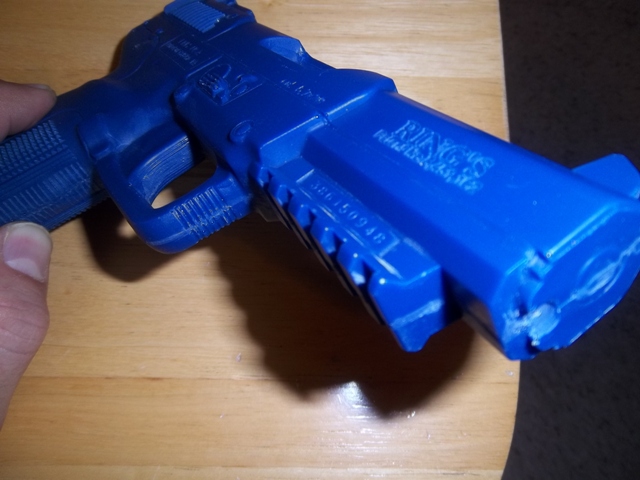
I'm looking for suggestions on how to "clean up" the edges the rail has on this FNH 57. Basically, I think I want to fill in the gap between the rails so that when I mold the holster it molds smooth along the rail. When molding the current holster (and first one for this firearm) I found small ridges the rail made inside the holster. As it is now, I'm pretty convinced the real firearm is going to scrap along the inside of the holster tearing the leather. I was thinking of putting small wood blocks made to fit better the rails so everything is smooth. Will contact cement hold small pieces of wood to the Bluegun?

-
Very nice work.
-
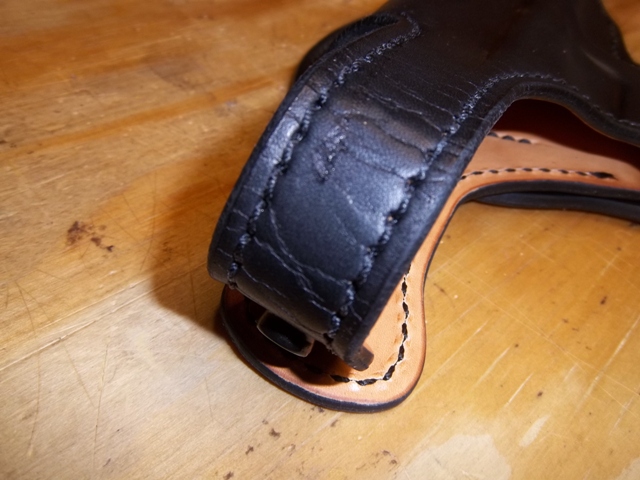
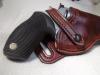
The cracked or peeling look on this thumb break...what caused that?? I've seen this happen on some of my old horse tack, but this is brand new. I've never had it happen before and didn't do anything differently. I cut from backs and shoulders, didn't see anything unusual on the hide when cutting it. Is it from a fatty part from the hide??

-
Round Knife Vs Box Cutter?
Matt Alsaker replied to schwebel's topic in Gun Holsters, Rifle Slings and Knife Sheathes
I have a round knife, curved trim knife, utility knife, and exacto knife on the bench. I probably use the round knife to make 95+% of my cuts (I also don't have a case for it) and the exacto knife for the rest. I rarely use the curved trim knife, for me that was a waste of money. When I first started out I used a utility knife to cut everything. With practice, I found the round knife to be more efficient. Like CountryTrash, I don't cut through on the first pass, I just score the line. Switching from pulling a utility knife to pushing a round knife took a little patience and practice, but I am more comfortable with it now. I know a lot of people prefer to use a utility knife. In the end, it's more personal preference than anything. Three to four times a year a friend of mine makes custom knives sharpens my round knife for me, he has the equipment and skill to keep it sharp - I couldn't do it on my own. -
Padding For A Rifle Sling?
Matt Alsaker replied to Matt Alsaker's topic in Gun Holsters, Rifle Slings and Knife Sheathes
That is a very cool collar. I used to supervise the K9 Unit at my LEO job. I've been trying to find time to make those guys something special. They would love the wide collar for agitation and tracking work. I'll check out the adhesive foam, thanks for the tip. -
Padding For A Rifle Sling?
Matt Alsaker replied to Matt Alsaker's topic in Gun Holsters, Rifle Slings and Knife Sheathes
I went to Joann's today. I was looking at the green foam (I think that was the closed cell), but wasn't sure how it would hold up. I'm going to wrap whatever I use in suede. Is the closed cell foam pretty durable? I was going to cut up a pressed pure wool saddle pad my wife has, but I got a pretty nasty look so I'd better find something else. -
I'm finishing up my first rifle sling and want to pad the shoulder strap. I've considered neoprene and wool felt. I'm leaning toward 1/4 pressed wool felt covered with suede. Is there any other type of padding I should consider? I haven't found any pressed wool locally, I can only find fabric, which is very thin and I don't think it will be durable. Any other suggestions?
-
Thumb Break Rivets
Matt Alsaker replied to SooperJake's topic in Gun Holsters, Rifle Slings and Knife Sheathes
Looks like a tubular rivet. I use a two piece (rivet and cap) tubular rivet from Ohio Travel Bag. They are stronger and smaller than something like a rapid rivets, double caps, or other similar rivets. I've never tried to set them my hand. I use a press with dies. You can get just the rivet part from Tandy, but I've never been able to get caps from them. -
Simple Glock Iwb In Horse
Matt Alsaker replied to MADMAX22's topic in Gun Holsters, Rifle Slings and Knife Sheathes
Put a hole through all three pieces of leather. Insert the t-nut into the back of the holster. Set the snap stud on the belt loop and use a machine screw through the stud into the t-nut. I use 3/8 or 1/2 screws depending on the thickness of the leather. I use removable (blue) Loctite to hold the screws in place. I place the t-nut between the two piece of the holster leather so the t-nut is not visible on the back. Some snap studs need a 6-32 screw, others will take an 8-32. Buy a couple cheap from your local hardware store to see what will work for you before you go by the premium screws / t-nuts in bulk. Hope that helps. -
Iwb Mag Pouch - First Attempt
Matt Alsaker replied to particle's topic in Gun Holsters, Rifle Slings and Knife Sheathes
Eric....your stuff always looks great. The lines and edges are clean, the stitching looks great, and I really like the boning work on the firearm frame. Some of the guys that test new holster designs for me did not like the single belt loop in the back IWB stuff, neither on the holsters or the magazine pouches. They reported holster / mag pouch would twist when drawing causing binding. Now there is a good chance it was a design issue on my part, but if so I could not get it straightened out. I make most my IWB's just like what you have pictured with the front and back belt loops. On the really small stuff, I put the loops directly over top the firearm or magazine - like the IWB Model 1 pictures you have on your website. I you have good luck with the single belt loop at the back, you'll have to share your secret. Also - I tried some Eco-Flo Leather Dye about a year ago. The dye ran all over the place when I wet the holster to mold it (I know that should have been obvious to me.). Are you doing something to protect the Tandy Pro Waterstain prior to wetting for molding or does that dye not have the bleeding issues?? -
Ostrich Over Elephant
Matt Alsaker replied to Shooter McGavin's topic in Gun Holsters, Rifle Slings and Knife Sheathes
Looks outstanding Dan. -
"screw" Line 24 Type Snaps
Matt Alsaker replied to Russ's topic in Gun Holsters, Rifle Slings and Knife Sheathes
Grainger Industrial Supply offers them also. If you have a Grainger supply house in your area, you should be able to get them there and avoid the shipping fees. -
This is my first attempt to inlay exotic hides. A couple previous posts from Katsass really helped. I don't know if the exotic hide is a snake or lizard, it's from a remnants bag from Springfield. I cut the window, then took the piece of window that I had cut out and trimmed it down some. I then glued it to the back of the exotic hide. I glued and stitched the hide into place, then put the lining leather on the back of the entire thing. The trimmed piece from the window that I glued to the back helped push the exotic hide forward, raising it up some. Feedback would really be appreciated. Trying it on a scrap piece of exotic hide is one thing, doing it on something that costs me a pretty penny is another. Should I reduce the size of the exotic hide? Is there too much? Thanks in advance for the feedback.
-
I experienced many of the same frustrations you are when I was getting started. There are tons of threads on here, you'd have to use a variety of different key words to find them all. I've settled on Fiebing's Pro Oil Dyes, but might try Tandy Pro Water Stains down the road. I didn't like the water stains I initially tired from Tandy, but it wasn't the professional line. I started with a sponge, then daubers, and then a brush. I never got the finish I wanted. I now dip dye to get the base coat and then airbrush on any accents I want. If because of the color pattern I can't dip dye first, I just airbrush everything. The only thing I don't like about airbrushing is the thin coat of dye, meaning limited penetration into the leather.