Matt Alsaker
-
Posts
186 -
Joined
-
Last visited
Content Type
Profiles
Forums
Events
Blogs
Gallery
Store
Everything posted by Matt Alsaker
-
A Country Boy's Battle Belt
Matt Alsaker replied to chiefjason's topic in Gun Holsters, Rifle Slings and Knife Sheathes
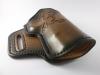
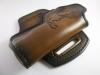
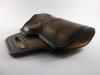
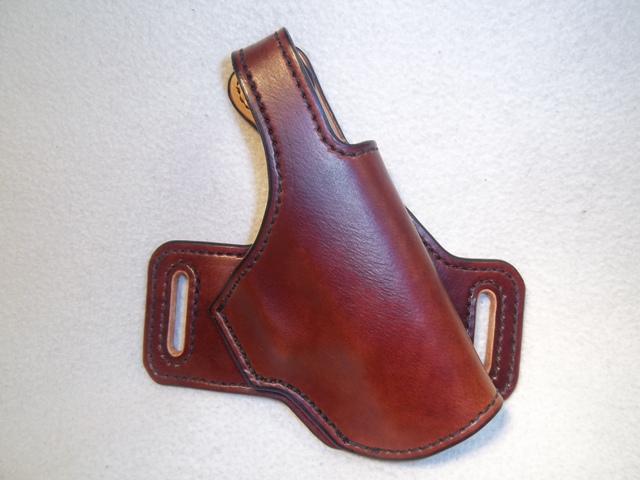
I initially put the "thumb" break or safety strap behind the hammer (as pictured on this cross draw). The feedback I got was that the strap placement slowed or got in the way while drawing. The strap drags along the back of the hammer. Maybe a shorter safety strap would not, but I've switched to placing them where Mike does. The strap placement being more forward seems to keep the strap out of the way or at least the strap does not hang up on the firearm. I don't do many revolvers either, so I don't really speak with much authority on the matter.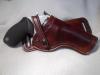
-
First Time Using An Airbrush
Matt Alsaker replied to RoseWolf's topic in Gun Holsters, Rifle Slings and Knife Sheathes
I airbrush pretty regularly also. The airbrush puts on such a fine coat that the only issue I've had with using an airbrush is dye penetration. A little nick should not expose the natural leather below the dye. I use Pro Oil dyes and cut them all to varying degrees with denatured alcohol. This allows me to start with a little coat and build successive layers to get to the color I want and gets more dye penetration. When doing a single color, dip dyeing is the best way to get an even color and dye penetration - I'm just not set up yet with enough dye. -
I love this forum. It's great to see people so willing to share their experiences and try different things. I use the white saddle soap and know of the haze (kind of a dull finish) you are talking about. It's just one part of the process I use to finish an edge. I might go through to many steps to accomplish the same thing as others, but this process gets me a consistent edge that I'm very pleased with, 1 - sand the edges 2 - dye the leather 3 - stitch the pieces together (there are some items because of the construction method that this has to wait until later, but I prefer to stitch prior to finishing the edge) 4 - bevel the edges 5 - dye the edges (I use Pro Oil Dyes) 6 - dampen the edge with water 7 - rub on saddle soap paste with a piece of canvas 8 - run it over the burnishing wheel 9 - let it dry (30 - 60 minutes, the edge should have been damp not soaked) 10 - rub the edge with 50/50 beeswax and paraffin wax 11 - run it over the burnishing wheel 12 - hand rub with a clean piece of canvas (helps lift any left over wax and puts a nice shine on the edge) One of these days I'll work on wrapping canvas around my burnishing wheel. I see several others do that. As the old saying goes, "There's more than one way to skin a cat."
-
I prefer the paste saddle soap over the bar or the liquid. It gives me more control over how much and where I apply it. I am prone to getting liquids all over the place. I apply the paste with pieces of canvas.
-
Retirement Gift For An Old Friend
Matt Alsaker replied to jackd942's topic in Gun Holsters, Rifle Slings and Knife Sheathes
He sounds like a great guy. All the time I get to spend in my shop is relaxing and rewarding, but anytime I get to put together a gift to honor someone else it's a blessing. You've honored your friend well. Nice job. -
On my IWB holsters, I use a piece of 22 gauge stainless steel between the holster body and the leather reinforcement piece. I have a local shop laser cut them to the size and shape I use. The edges are smooth and the size is exact. I've read the pro's and con's of doing this also. If someone didn't want the SS reinforcement piece, I would just leave it out. I've never had anyone make that request though.
-
I generally stitch with a Cobra Class 4. I've always over-stitched or back-stitched to lock in the ends, then I've always melted or singed then ends. I'm not sure why I've always done it that way. I've seen plenty of makers do it both ways. I the last two months I've burned up two soldering irons (one inexpensive and one expensive). I'm trying to decide if there is a benefit to singing the ends before I sink more money into another soldering iron.
-
Biggest Rig Yet For Me
Matt Alsaker replied to Matt Alsaker's topic in Gun Holsters, Rifle Slings and Knife Sheathes
Two coats of neatsfoot oil about 12 hours apart. Then rubbed with Aussie Leather Conditioner and lightly buffed after it sat for about 8 hours. -
Biggest Rig Yet For Me
Matt Alsaker replied to Matt Alsaker's topic in Gun Holsters, Rifle Slings and Knife Sheathes
The customer wanted the natural color - as light as possible. The vast majority of the stuff I do gets dyed. My preference is walnut. -
Biggest Rig Yet For Me
Matt Alsaker replied to Matt Alsaker's topic in Gun Holsters, Rifle Slings and Knife Sheathes
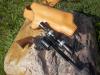
I always enjoy reading your posts, so thanks for the feedback. I've learned a lot from reading your stuff. The tow is open. The holster got a little long under the trigger guard and along the bottom of the barrel. There is a 1/2" wide welt that runs the entire underside of the firearm. I stitched right down the center of the welt. I spent a lot of time preparing the template for this thing. With the amount of leather involved, I didn't want to do it twice. I was pretty worried I would end up short when folding the leather around the firearm. The scope is so large I had a hard time deciding how much to adjust the template to make room for the scope. -
This is my first attempt at a holster with a sling and at a holster with a scope. The sling wasn't to bad to figure out. The "extra" holes punched on the wide part of the sling that goes across the chest will be to secure different accessories to the sling. I won't get to it for a few months, but a sheath for a ka-bar and bullet loops are the accessories the owner wants to be able to change out. He's just happy to have the sling / holster back before the gun deer season here in Wisconsin. The holster is huge. The gun is a Ruger .44 Magnum with a 7.5" barrel and the scope was nearly as big as the firearm. There's a lot of cow and a lot of time in this thing. Feedback, suggestions, or other ideas are always appreciated.
-
I found small syringes that were pricey at several local drug stores. I was a pain (and expensive) measuring with the small syringes. I settled on 20 ml and 60 ml syringes. The cheapest I have found them is at the local farm store in the veterinary section for treating farm animals.
-
I use pint and quart size glass canning jars (mostly pint). I get a great seal and can replace the lids for cheap if I get concerned the seal is not working. I purchased disposable veterinary syringes in various sizes from a local farm store to transfer mixed dye to smaller containers (i.e. for airbrushing). The syringes are labelled in millimeters so I can use them to measure if mixing a small custom batch. I mark each syringe with what color dye it goes with, so I can reuse them.
-
Winter is quickly approaching here in Wisconsin, meaning my ability to sun tan leather goods out in the sun is going to end soon. The opinions I've read about why sun tanning works range from the heat, the UV light, or a combination of both. I've been considering setting up a booth with UV lights in the basement to get me through the winter. Has anyone tried this or have suggestions?
-
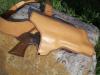
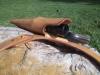
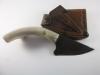
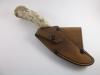
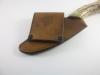
Cross Draw Knife Sheath
Matt Alsaker posted a topic in Gun Holsters, Rifle Slings and Knife Sheathes
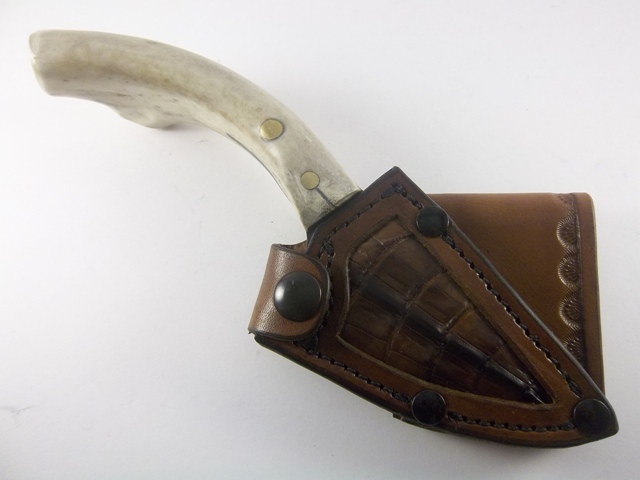
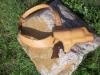
A buddy of mine started making his own knives about a year ago. I hadn't done many sheaths at that point, so I built a few basic belt loop sheaths for strong side carry. Then he started asking for cross draws. I built a few belt loop style using the method Al Stohlman shows in his book and tried a few pancake style. I saw this style cross draw posted by a few other members (I think Camano Ridge was the most recent). While each blade is different and I have to make new templates for each knife, I really enjoy making this style and the people buying my buddies knives are very pleased with the sheaths.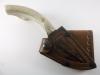
-
Thanks for all the input. I've settled on dyeing the veg-tanned leather on the inside of the wallet black, so you don't notice any dye transfer. I tried using the spray you can get to seal suede shoes. It did not work.
-
I've done lids for smaller bags using 6/7 and lids for bigger saddlebag style bags using 8/9. I wouldn't go any thinner than 6/7. I lined both lids with 2/3 (lamb or calf). I use 2/3 for all credit card slots.
-
Negative Degree Angle?
Matt Alsaker replied to Jeff L's topic in Gun Holsters, Rifle Slings and Knife Sheathes
Sixer...here's the original post from when I built the holster for the revolver. Hopefully the description and picture (both near the bottom of the post) help. http://leatherworker.net/forum/index.php?showtopic=45402&hl=%2Bcross+%2Bdraw -
Negative Degree Angle?
Matt Alsaker replied to Jeff L's topic in Gun Holsters, Rifle Slings and Knife Sheathes
Sorry, here are pictures...

-
Negative Degree Angle?
Matt Alsaker replied to Jeff L's topic in Gun Holsters, Rifle Slings and Knife Sheathes
I can't help you with a standard, but 30 degrees for a 1911 sounds about right. I did two cross draws about six months ago, one for a Taurus .357 revolver and the other for a Glock 19. The Taurus drew nice and concealed better at 45 degrees (well, for as much as you can conceal that thing). The Glock was uncomfortable to grip and draw at 45 degrees, but was very nice at 30 degrees. Both holsters sit at approximately the same location when on the belt. No complaints from either customer. -
A Couple More
Matt Alsaker replied to Frank's topic in Gun Holsters, Rifle Slings and Knife Sheathes
Always like your stuff Frank....absolutely love the color on that antiqued holster. -
Thanks guys. I've never tried Angelus products, but have been considering them. I've been very happy with Fiebing's Pro Oil Dyes. There are so many other things I want to try with leather, I just haven't had the time to play with the dyes much.
-
I've been kicking around and researching different spray booths since last winter. I have two relatives who are research doctors and have each spent 25+ years working in labs. They reviewed the MSDS sheets on the Pro Oil Dye. I don't pretend to understand what they are talking about, but the gist was to get an industrial booth with an explosion resistant fan before airbrushing these dyes. I guess because of the size of the alcohol particles specific filters are needed and the alcohol is flammable. The MSDS sheet specifically says to use "explosion proof equipment". So for now they have sufficiently scared me (more so my wife) while joking about a 6 foot flames shooting out the side of my house and explosions that singe off all my hair. I'm going to stick to wearing a breathing mask and doing this out in the driveway for now. The booths they recommended started at $1400. I can't justify that expense right now.
-
I saw Eric was using the Pro Waterstains. I tried a couple colors earlier this year. I did not try airbrushing them, just put them on with a damp sponge. I thought the color turned out great and they went on evenly using the sponge. I wasn't getting the dye penetration into the hide (using HO "B" grade) I was hoping for. Not that the dye rubbed off, it didn't, the dye just didn't penetrate into the hide a deep as I hoped. Even under light wear, it seemed pretty easy to expose the natural hide under the dye. I've always been happy with Fiebing's Pro Oil Dye, so I just stuck with using them.
-
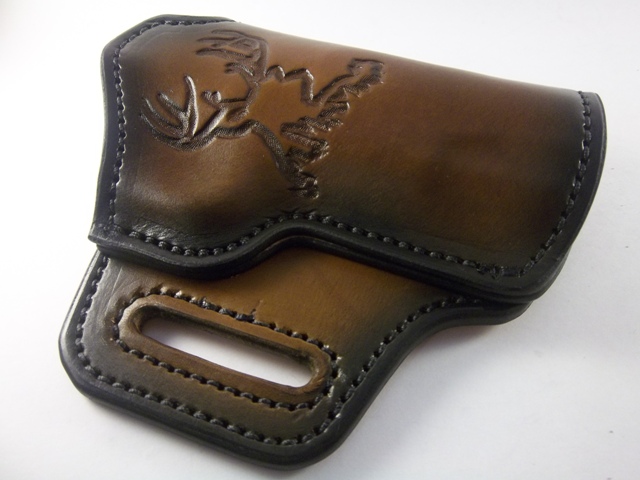
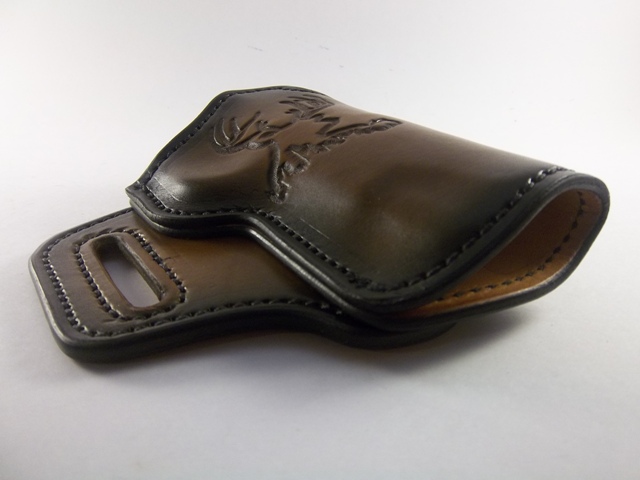
I used Fiebing's Walnut Oil Dye (cut 2:1) and Fiebing's Black Oil Dye for the edges. I airbrushed on most of the dye, except the edges which were done in black with a dauber. I really enjoy using the airbrush and had fun making this one. Too bad the winters are long here in Wisconsin and I don't have a safe place to airbrush inside.