immiketoo
-
Posts
2,372 -
Joined
-
Last visited
Content Type
Profiles
Forums
Events
Blogs
Gallery
Store
Everything posted by immiketoo
-
Why not? It's fun!
-
I know man...just teasing!
-
 Yeah! Rastafarian man!!!
 -
Lol...was an explanation needed?
-
-
-
-
-

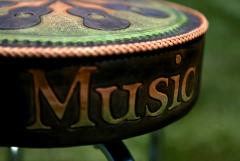
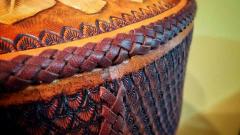
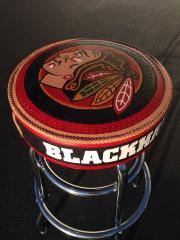
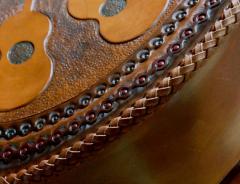
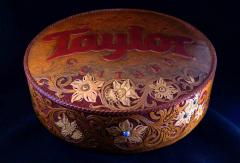
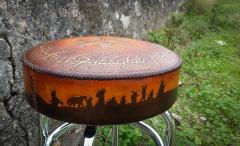
Barstool for Taylor Guitars visitor center
immiketoo posted a gallery image in Our Leatherwork Galleries
-
-
Because someone asked
-
Very clever use of leather. I love the wood textures..
-
You also need good ventilation to get the toxins out of the room. Otherwise you take off your mask and still breathe the fumes. Get a 3M vapor rated mask and you'll be fine, but ventilate the room too.
-
-
-
-
-
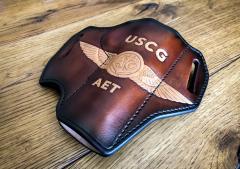
Working hard this week... wish me luck!
immiketoo replied to YinTx's topic in Gun Holsters, Rifle Slings and Knife Sheathes
Absolutely sellable. Good luck at the show! -
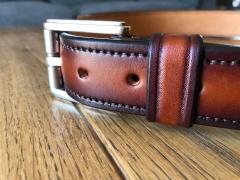
This item would be mostly useless to me. Even if I was going to make a large run of belts, it would never give me the control I want for my edges. I use the cone shaped cheapie as well, but I took the cone out of the handle and roll it between my fingers.
-
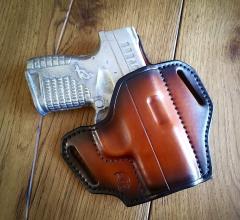
I use four oz lined on all my holsters. I won't build an unlined one anymore due to the strength and rigidity that comes from lining. It's almost like wood when its dry, and there is "click" retention on most firearms. That would pair nicely with your kydex paddle.
-
-
-
-
-