-
Posts
34 -
Joined
-
Last visited
About queenslander
- Birthday 10/08/1955
Profile Information
-
Gender
Male
-
Location
Cairns,Qld.Australia
-
Interests
Travel,Camping/Water skiing ,Horse's and Cattle.
LW Info
-
Leatherwork Specialty
Bridals,Halters,Belts and Holsters
-
Interested in learning about
Sheridan style carving,Anything to do with leather
queenslander's Achievements

Member (2/4)
-
Hi keg Thank you for your reply and did check the fuse all ok.I then started to have a good look around and found the speed sensor lever on the side of the servo motor was loose so undid the 4 screws and took the panel with the lever attached and then found the problem The black plastic blade that moves in the u section of the optical sensor was just layered in the housing so put it back on the shaft played for a little while to get it in the right position and off she went problem solved It appears that it has never been tightened from factory Cheers to all and thanks
- 3 replies
-
- servo motor
- cowboy cb4500
-
(and 2 more)
Tagged with:
-
Hi folks and good morning from Australia I have a slight problem with my Cowboy CB4500 and servo motor The machine is 10yr old but has done very little work and most of that is 8/9oz.Today I have gone to sew and switch the power on everything lights up as per normal the LED on the front has these little [ ] things that just revolve around the screen as per normal no noise at all, have pulled all power connections (plugs) out put them back in switched power off for a while switched it back on again I am at a loss as I only used it a month ago and it was perfect. The only thing I have put it down to is we did loose power for about 2 days due to flooding in the north of the country and I did hook up a generator for that time and the machine was plugged in to the wall maybe a power spike from the generator, but then it should not switch the LED screen on.I DON’T KNOW
- 3 replies
-
- servo motor
- cowboy cb4500
-
(and 2 more)
Tagged with:
-

Couple Of Ranger Belts
queenslander replied to queenslander's topic in Purses, Wallets, Belts and Miscellaneous Pocket Items
Hi Damon, I dyed the background before applying the antique,then a couple of coats of professional finish,then the antique.And as far as how long I have been tooling for is too long with to many breaks in between.Started out like most with the lucky eight book at about 14 yrs old,played around for about 5 years then packed it all away.Then married,children and all of that and then 40 years later dragged it all back out again and have been messin around for about 18 months.Absolutuly love it,but still have so much to learn.I think I may have left my run a bit late.its all expensive but it's all fun.Keeps the brain active at least -
Thought I would keep this simple.Wiil Ghormley pattern of El Dorado Rig.2 Layer's of Veg tan 5/6 oz wet moulded.Turned out ok.All thoughts welcome.
-

Mens Dress Belt
queenslander replied to queenslander's topic in Purses, Wallets, Belts and Miscellaneous Pocket Items
Hi there to ConradPark, Machine sewed and splitter.With the splitter I split 8/9oz in two.The top piece is the thinner of the two,about 1.5 mm.The flesh side then ends up about 2 mm.This belt is 1and a half inches wide ,so I actually cut my piece of leather 2" wide to start.split it then glue your filler in the middle of your bottom piece then glue your top piece on.I then use a small roller to roll down either side of filler to get that puffed up look.Let dry then sew as close as you can to your filler.Leave enough leather on either side of your filler to allow your foot to walk on,then when finished stitching cut of excess as close as you like to your stitching,edge and burnish.The filler was a piece of Austin Dbl/Shoulder8/9oz and I used a number 4 edger on the top of filler only.Filler was7/8"wide.I used a splitter,not a clicker!!Also I don't know if this is the correct way but it works for me and the end result looks pretty smart. -

Mens Dress Belt
queenslander posted a topic in Purses, Wallets, Belts and Miscellaneous Pocket Items
Men dress belt made from Tuscany belt leather 8/9 oz split with splitter,filler glued into place and all stitched back together again.Leather is tan in colour,and achieved this colour once I finished it 50/50 Resolene. -

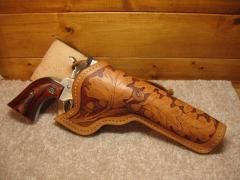
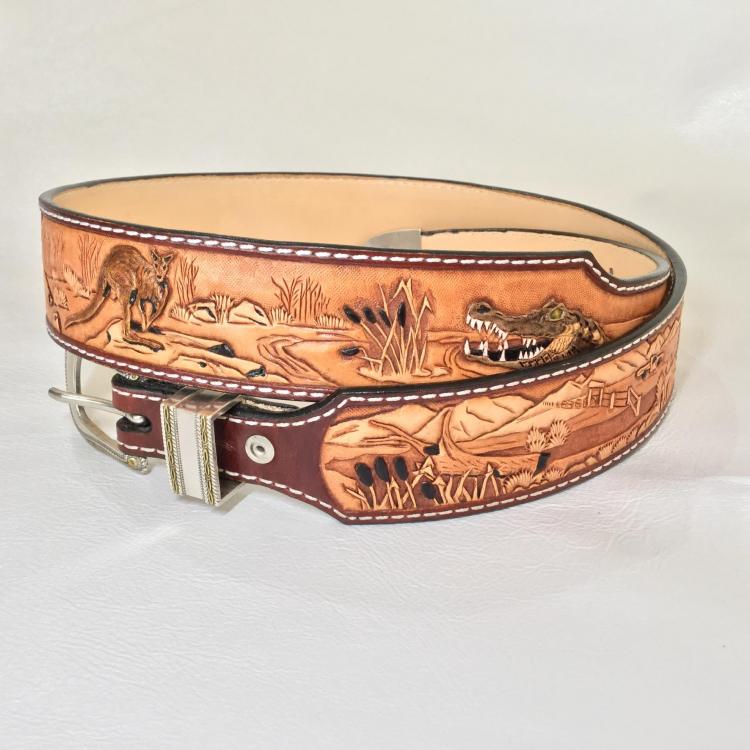
Tooled Holster And Belt
queenslander posted a topic in Gun Holsters, Rifle Slings and Knife Sheathes
-
Hi Phillip I will through in my two cents worth.When I'm making a breifcase my front and back template are the same.I have a couple of breifcase on critique at the moment,they have twin gussets and all three panels are the same size.I have found out the hard way,that when you are stitching them up I start at the bottom centre and go one way then come back to the centre and go the other way.By doing this it stops the gusset from growing.What I mean of growing is that if you start at the top of the gusset and go all the way round by the time you get there your gusset will end up about an inch longer.dont know if that helps but works for me.
-

Ladies Belt
queenslander replied to queenslander's topic in Purses, Wallets, Belts and Miscellaneous Pocket Items
-
New to posting photos on LW Has taken me a while to get some photos on not real computer literate This is one of the belts I made my wife on my Cowboy CB 4500 out of Tuscany leather lined with veg tan 2-3 oz with a Kyoshin-Elle buckle


