chriscraft
-
Posts
300 -
Joined
-
Last visited
Content Type
Profiles
Forums
Events
Blogs
Gallery
Store
Everything posted by chriscraft
-

Opaque Projector For Transfering Patterns?
chriscraft replied to chriscraft's topic in Patterns and Templates
Some people think that using a projector as an art tool is considered cheating or not really drawing at all. Since one is not taking the time to layout your design by hand and making this a speed way of producing art. I guess it all depends on how one uses this tool. I for one use it as a guide and don't always follow and copy every line. That was the way I used my projector when I used to airbrush. I was never taught how to properly use this tool. Well, I was never really taught how to use an airbrush or pencil, pen, paint brush, pastels, charcoals, prismacolors, acrylics and even this swivel knife. I just picked them up one day and started doing it. Tools are designed to save you time and making you get to the fun part faster. Chris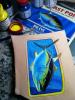
-
Opaque Projector For Transfering Patterns?
chriscraft replied to chriscraft's topic in Patterns and Templates
I agree that with these tools, it's a small chore to set them up when needed. That's the reason I am building a permanent station and this projector tool will always be ready to go as needed. I understand some tools are not intended for everyday use or every project. My current shop is located in my basement so it can get very dark with out lights, great for being used as a dark room. Ever since I've been drawing, I have always found that having more than one way to get something done has worked well for me. Having to just rely on simply one way might get me in a bind if that method would ever fail. I will also try out using velum, onion leaf and other papers you mentioned as I already have access to these that are stored away in my drafting cabinet. I made a quick test run using the photo projector on a scrap piece of veg tan leather. Used an image from a beer label to show how quickly one can set this up.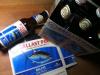
-
Opaque Projector For Transfering Patterns?
chriscraft replied to chriscraft's topic in Patterns and Templates
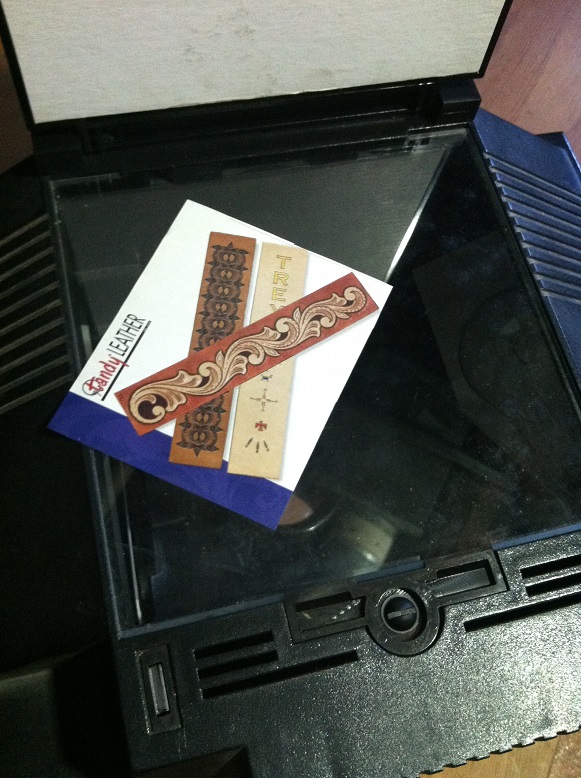
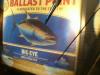
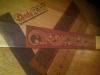
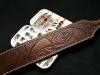
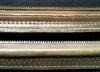
Wow, talk about speedy service. I ordered my projector parts Thursday afternoon and they arrived today. After installing my few missing parts my Super Prism projector is as good as new. A quick test run shows this Tandy catalog small photo insert of a stamped belt. The photo image of this belt is 3/4" wide and I was able to enlarge it to scale on this 1 3/4" belt blank. The picture looks grainy from the dark photo but the enlarged projected image is clear and can now be easily transferred with a stylus directly on the leather project. One would need to use images or pattern designs that are flat. Pictures taken from directly above the item so the image is not skewed and is projected square on your leather project.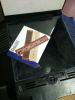
-
Queina, I am using Fiebing's leather products. They make an Antique Finish that comes in a paste. Fiebing's offers these in a handful of colors and size containers, I used the BLACK colored antique finish on this project to get these results.
-
Opaque Projector For Transfering Patterns?
chriscraft replied to chriscraft's topic in Patterns and Templates
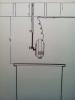
SO I dug up my projector that had been sitting dormant for some time. From all the years of use and transporting it to various jobs, I managed to loose a few clips and parts. They still make this same model and I was able to order the missing parts directly from the company so I will get them in the mail soon. My work space is located in the basement of my home. I have exposed overhead rafters to secure the mounting plate I will be making. Instead of fabricating a new telescoping bracket for this project, I am using one that I already have that has good pivot arms. The .250 aluminum plate pictured will used to mount the projector on, this aluminum plate will then be bolted to the telescoping bracket. The line drawing isn't to scale but represents the mounting bracket and work table. I have already mocked up and projected a few images and this telescoping height will be a good distance for the size lens I have. I can reduce a photo image down to 1 inch and enlarge it up to 16 inches. This will be a good working size for my current leatherwork. If I need to enlarge an image greater than this size, I can always move the work table and use the floor to enlarge my image up to 42".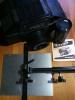
-
Opaque Projector For Transfering Patterns?
chriscraft replied to chriscraft's topic in Patterns and Templates
One of the reasons I thought of this was due to my images not being as crisp after being transferred using the thin clear sheet. One could argue that I'm not using the correct Al Stohlman method and maybe the wrong stylus tool. Your still applying pressure with your stylus through a thin sheet that is spreading that pressure over a wider area (clear sheet). It works but could be improved on. Also, when re using the same clear transfer sheet to apply the same pattern on another project. It's hard to tell if you already went over the line that already has a crease from the last use. My test: I have been getting great results when I freehand my design with only the stylus. It leaves a clean crisp line that I now can follow with the swivel knife and not be confused if its a line to be cut or a natural mark on the leather. I have a strong feeling using an overhead mounted color projector for leatherwork will work great. I've used one for many years on other projects with great results. To check your work and see if all the lines were transferred you just turn off the projector and see your transferred image. If you missed a line, just turn it back on and trace that line. All without moving your work. -
Opaque Projector For Transfering Patterns?
chriscraft replied to chriscraft's topic in Patterns and Templates
Like mentioned, Opaque color projectors is not new technology and has been around for sometime. Those new HD digital art projectors made for artwork would be ideal if I didn't already own my Super Prism projector. I purchased mine new back when they were introduced almost 20 years ago. It still holds its value and has not come down in price. Those New HD LED artist digital projectors come with a hefty $1000+ price tag but just imaging what one can do with these new gadgets. One could store all your paterns in your PC and with the click of a tab, be ready to transfer your image. For now I'm still stuck in the 1990's with my now old model color projector. I'm fabricating a heavy duty overhead bracket that will be mounted over my work table to mount my projector. It will retract when not in use. I will post some pics when its done. -
I know the typical or preferred method to transfer patterns onto leather is using a stylus and a sheet of your favorite thin clear plastic/mylar stuff. That's what I am currently using and its been the most cost efficient way. I was wondering if anyone here uses a projector to transfer your image/line drawing directly on leather to be tooled. When I used to have an airbrush shop, we used to project muscle cars at car shows directly on the t-shirts and trace the image with a light marking pencil. Then we would add color with the airbrush and be done with it. It was a faster way to get the job done vs. taking 30+ minutes just to hand draw the image. By using a projector, this saved us time and we were able to make more cash by having a faster turn around on site. I still have my Artograph Super Prism Opaque projector stored away and I am thinking this might be an easier way to layout the transferred image/drawing onto leather as it allows you to instantly size the drawing to the project on hand. Even If the image is already actual size (less than 7 inches) you can still project it the correct size. I'm no longer airbrushing and working with larger than life wall murals but I know these projectors were also used by illustrators mounted on drafting tables that had average work no larger than 11"x14". What I like about this, one can project actual photographs of your previous work and scale it to size on the new project. Just need to dig up my projector and get a table top vertical stand for it. All I ever had was the horizontal stand for my projector. I recall my projector came with the table top reduction lens and this lens remained new in the box.
-
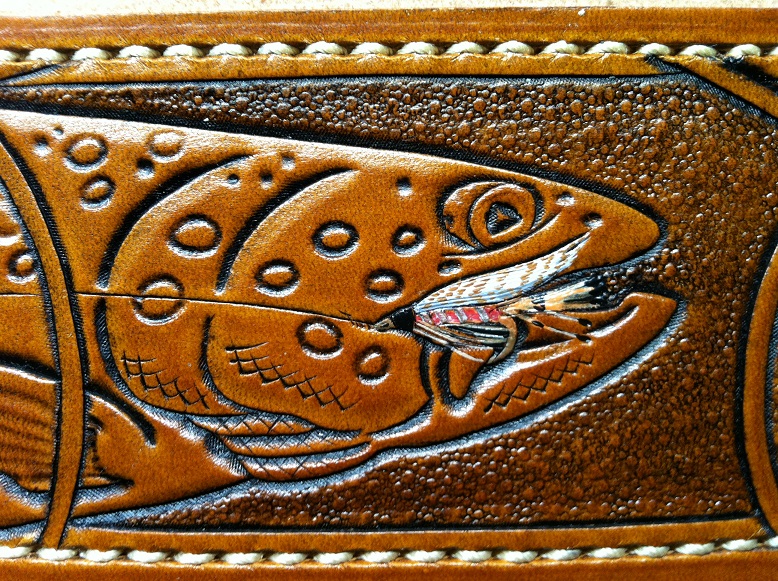
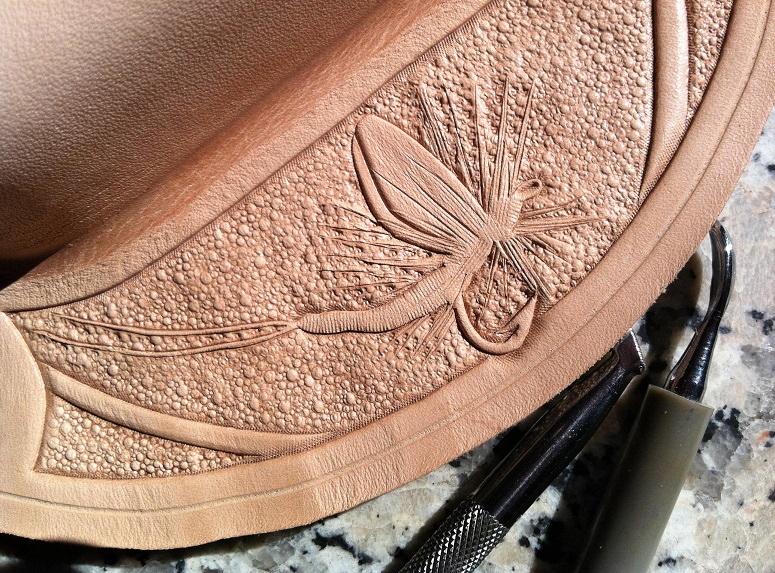
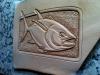
A couple more freehand tooled fly patterns. I am starting to pick up a few orders for my fly fishing leatherwork. One will have an old 1800's fly pattern that I look forward to. Chris


-
I have not added any bamboo rods to my collection yet. I'm using some slow action fiberglass fly rods right now. I've switched to just making fishing related artwork. So from now on if I build any leatherwork, it will also be fish related like this shoulder strap I just completed. I don't get enough time to play with leather as its just a hobby. Hardest part has been just saying "NO" to people that want me to build them leather goods that are not fly fishing related. As a hobby I can choose what I want to make and only hope to get recognized if I stick to a certain style and market. I'm finally taking the advice that was given to me by a local artist over 15 years ago. He saw something in me that I'm just beginning to see. Chris
-
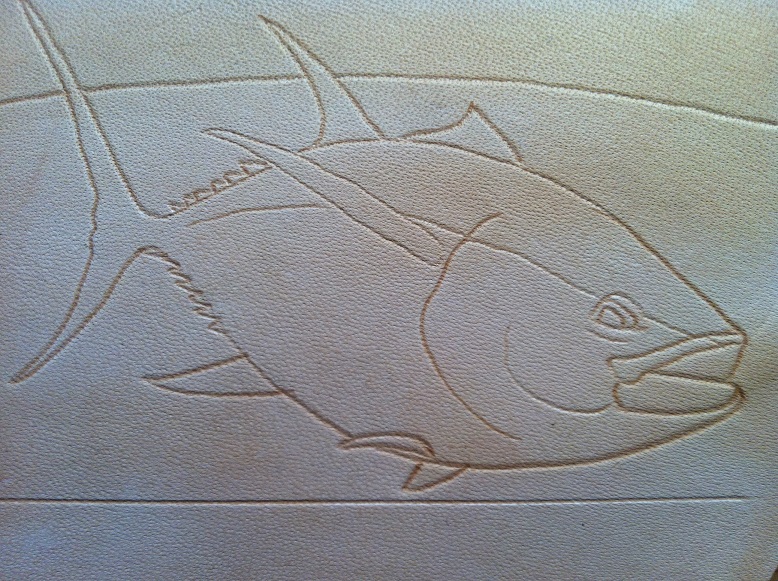
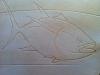
I don't have any patterns of the fly. I have a basic hook outline that I transfer just to center the fly on the leather. Then I'm working from photos of fly patterns, so these are freehand tooled as I work the pattern. The same way you would tie a fly, starting with a hook. They are just too many fly patterns to make templates/patterns for all of them. This also keeps them unique and original. No two will ever be the same. Maybe I do it this way cause I'm mostly self taught. Its also the way I draw using a pen and just feels comfortable to me. My grandfather used Al Stohlman's pattens and would rarely veer away from the pattern. That would be very hard for me to do, just follow a pattern.
-
This rig will have a tooled leather strap with a trout pattern and my crazy Fly line layout. Once completed, It will be headed to its new owner in Oslo, Norway.
-
Working on a new fly fishing leather rig. This one has a Classic Wet Fly pattern, "The Professor"
-
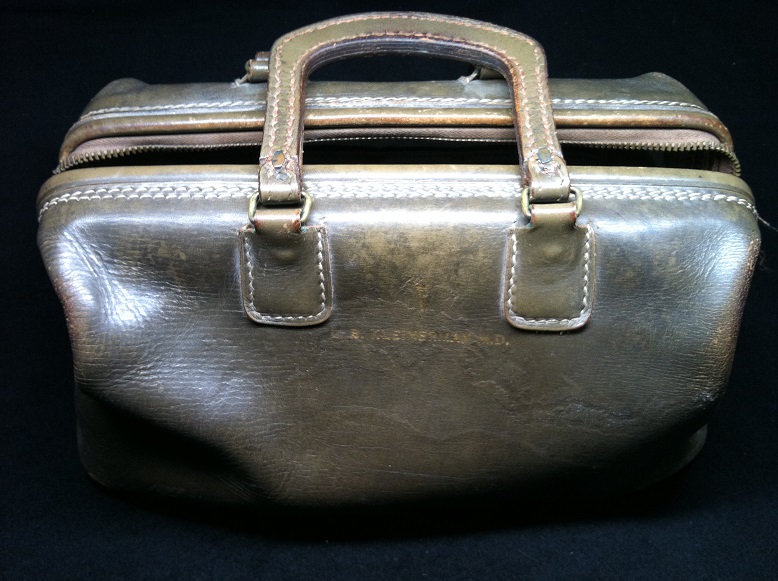
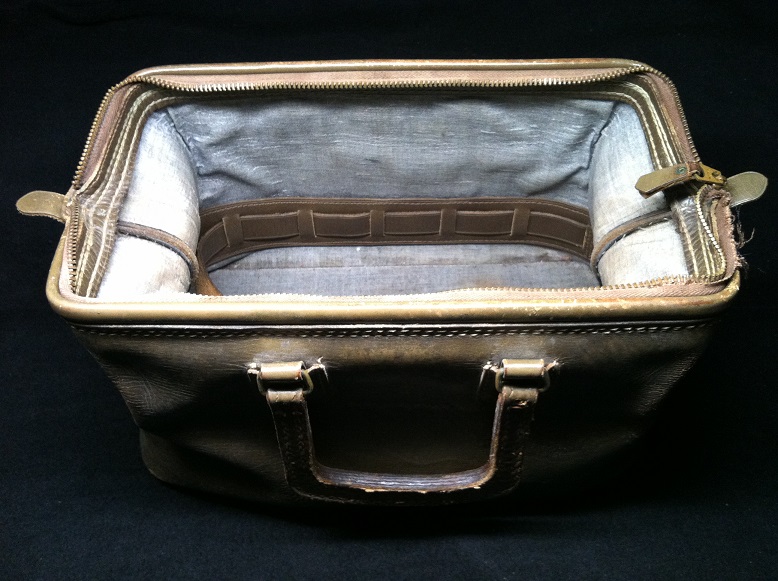
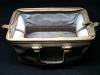
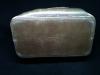
obastable, I'll post my updates on this build. This will be a winter project so it will take me some time to complete. CR, its better that I broke this bag apart. Gives me a better scale of the actual size I'm working with. I only plan to build one bag for myself. I'm still sketching ideas on what I'd like the inside to look like. I'm leaning towards making removable inside panels incase I ever need to make repairs or add more stuff. Want the outside to look like a vintage medical bag and the inside to have modern materials that resemble my current EMS bags. I'll have fun with this project. Chris
-
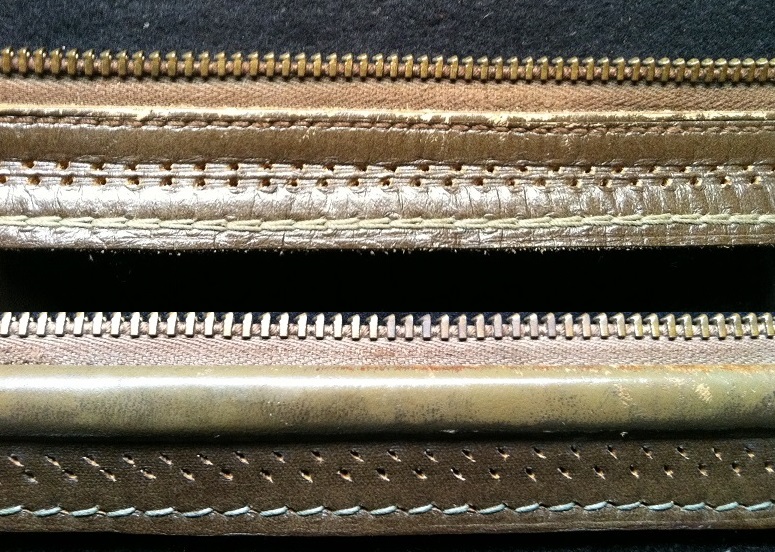
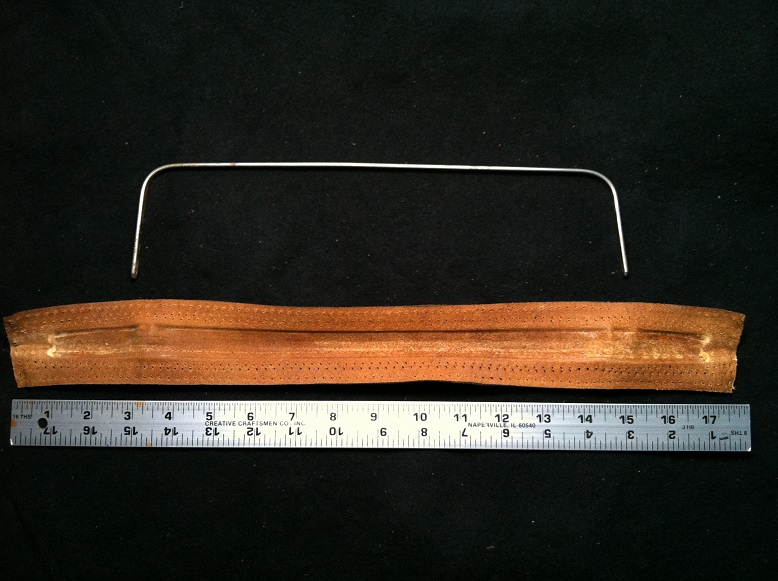
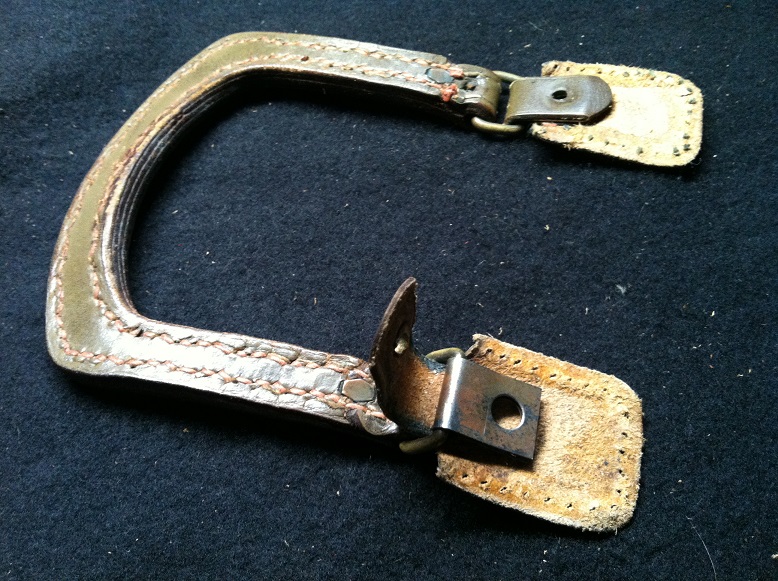
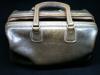
Monica, I've been kicking this idea around for the past three years now. I've even searched to see if someone was already making such a bag so I could just order one and came up empty. Yes, I could have studied this bag without taking it apart but that's the reason its been sitting on my shelf for a few months collecting dust. Just don't have the time to re-invent the wheel or Doctor's bag in this case. Now by taking this bag apart, I'm committed. Also I was able to see in reverse how it was assembled. Now, building my own shouldn't be an issue. Chris After taking this bag apart last night I did research the M.D. name that's embossed on this bag. Was a local M.D. for many years. Turns out he married the daughter of Samuel Benner in 1959. Samuel was a leather craftsman that owned Benner Leather Goods Co. here in Milwaukee. Samuel Benner passed away in 1991. Edith Benner July 15th, 2005 Edith Benner (nee Cohen), a native of Milwaukee, died July 1 of natural causes. She was 97. A 1923 graduate of Washington High School, she became vice president of Benner Leather Goods Company in Milwaukee. She was a member of Beth El Ner Tamid Synagogue and its sisterhood, Hadassah, B’nai B’rith, Order of the Eastern Star, and the Leather Goods Association of America. “Edith enjoyed her business life, friends and hobbies,” including cooking, bridge, mahjong, oil painting, crochet, needlepoint, ceramic art, reading and being a grandparent, according to members of her family. She will be remembered for “her warmth, generosity and marvelous cooking and baking,” family members said, adding, “She never found a recipe into which she couldn’t infuse more calories.” She was preceded in death by husband Samuel Benner in 1991. Survivors include daughter Marcia (Leonard) Kleinerman of Milwaukee; son Alan (Toni) Benner of Solana Beach, Calif.; sister Maxine (Oscar) Jawor of Shorewood; seven grandchildren and 11 great-grandchildren. One never knows what you can stumble upon at an estate sale. I was lucky to find this bag for just a few bucks that day. I'll make good use of these patterns. This Doctor's bag doesn't have the traditional scissor hinge that closes the top opening. The bags top opening met in the middle and zippered shut. That was the only thing that failed on this Doctor's bag, the zipper tore and would have been a bear to repair/replace. So I will eliminate the zipper on my build. Still have plenty of time to decide if I want to incorporate the classic scissor hinge on my build. I'm also not fond of this style leather handles. Will probable use a classic leather briefcase style handle instead.
-
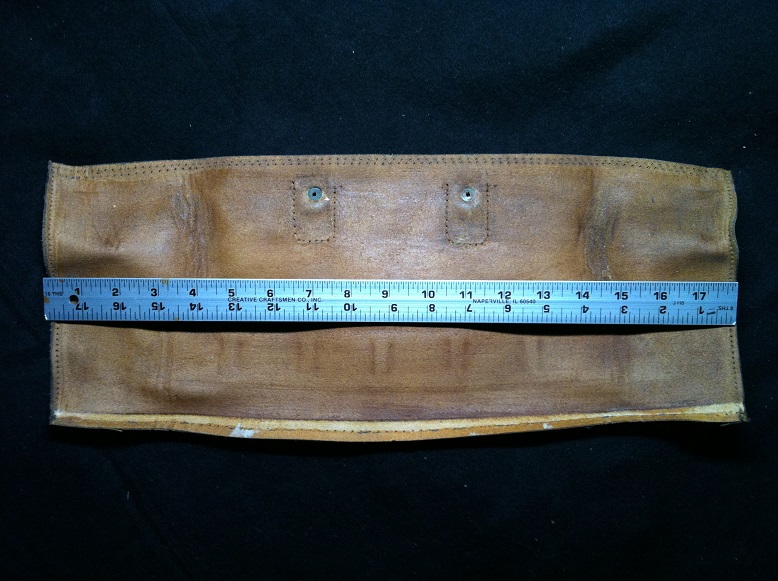
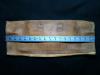
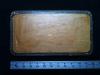
This Doctors Bag was made by Benner Leather Goods Co. here in Milwaukee, WI. The company was established in 1945 and is no longer in business. It didn't take me long with an X-Acto blade to take this bag apart. I had no intention to reuse this leather so I wasn't careful. The bag was constructed from 4-4.5oz. cow hide. Looks to be some sort of stiff card board wrapped in leather that was used for the bottom panel. I'll be using 8-10oz. veg tan leather for my bottom panel and 4.5-5oz. veg tan leather for my side panels.
-
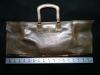
I've been wanting to build a small personalized leather tote bag to keep my stethoscope, trauma sheers, flash light, stylus pen, ink pens, name tags, tooth brush, car keys and a small snack/lunch. I'm a CC-Paramedic and work 24 hour shifts. When in the ambulance, one doesn't have too much room for a typical sized back pack. Especially since I work with a partner and that means two back packs inside a small space. I've messed with the Idea of finding a used vintage leather Doctor's Bag and converting it to my specifications. Instead of going through the trouble of converting one that has a musty smell. I'm just going to build one for myself. I really like the idea that at one time, Doctor's made house calls and would arrive with such bags loaded with tools. I am now that person that arrives at ones home with newer purpose build bags that carry more gear and tools than one from the early 1900's would imagine. This bag I'll be building will only bee seen by other Paramedics at my station and during shift change. It will give my gear a place to live till my next shift and keep these things organized at home. Early this year I began my search for a vintage Doctor's bag to dismantle and make my patterns from. Most antique shops that had one were asking way more than I'd like to spend. I finally picked up this used bag from an Doctor's Estate Sale locally for $5. It's a little smaller than some I've seen but will work great for my purpose as I really don't need too much room inside the bag. The bottom measures 12"X6.5" and is probably from the 1950's. Its also personalized as pictured so its a real Doctor's Bag. I'll start by unstitching the vintage leather bag tonight to form my patterns.
-
I didn't hand stitch these, used a Cobra Class sewing machine. Which reminds me that I need to order sewing needles now.
-
This reminds me of the 1950's traditional tattoo style. What tools did you use on this? What leather weight is it on?
-
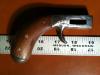
stealfdawg, that is one nice looking knife. I need to start making my own knives. Just have seen too many cool looking knifes and it makes me want to build my own. Something about making stuff yourself that has a different meaning than just buying one doesn't fill. I like making stuff for my own use. I agree on the Tandy round knife not being of quality steel/metal. I have an older Tandy one that needs sharpening after every use. My vintage old Osborne round knife arrived so sharp that I have not re-sharpened it yet.
-
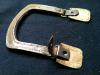
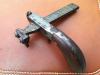
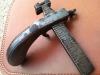
This C.S. Osborne Draw Gauge measures 4.5 inches across or 5 inches diagonal. It's hard to make out but I do see what's left of the top section of numbers 1877. Not sure what anyone else can see. Maybe doing some biolistic investigation where they use magnaflux treatment to see the steel grain pattern on pressure applied serial numbers. But I won't go that far.

-
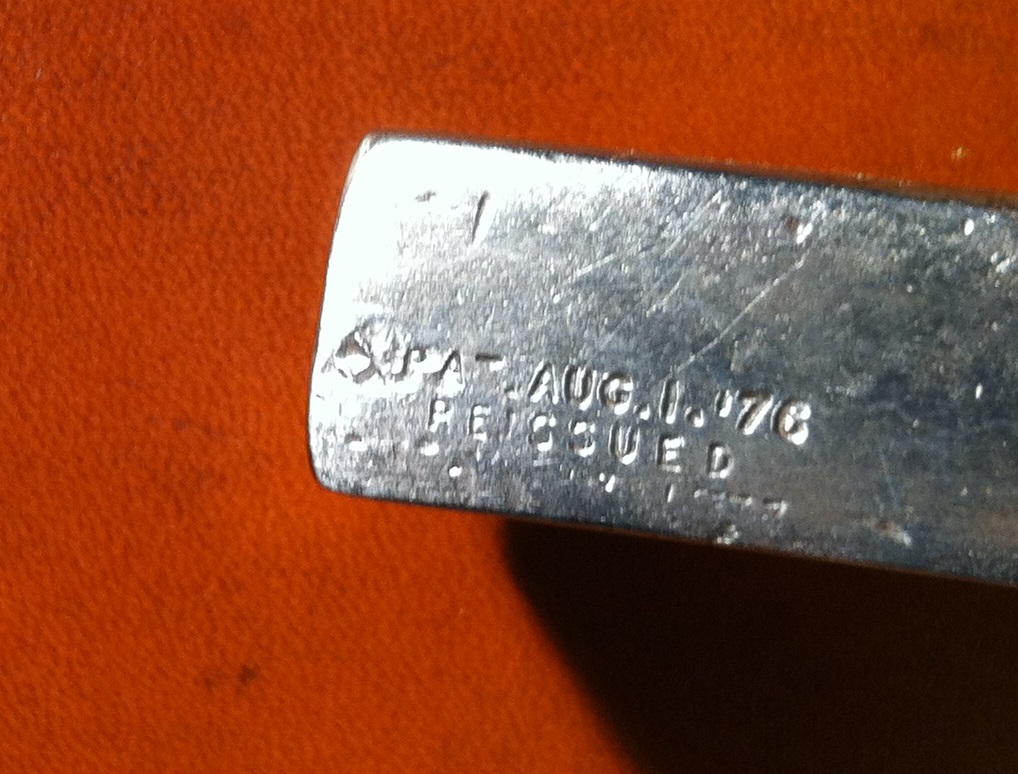
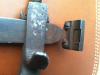
This is pretty interesting Bruce. I also thought it might be a bench made fix with these two bolts. I need to repair this or find another replacement beam with the early C.S.Osborne & Co. stamp. Can't see any 67 number stamp on the bottom of this one yet but I need to clean it up. I just found this on the Davistown Museum site. Toolmakers Information for C.S. Osborne & Co. Osborne succeeded William Dodd after marrying his daughter. the "Est. 1826" date refers to the maker prior to Dodd. In 1906, the company moved from Newark to Harrison, NJ, where it's still run by the Osborne family. Charles had a brother, Henry Frank Osborne, who worked with the company prior to setting up his own in 1876. Patents include a washer cutter attributed to Kirkland 11 October, 1875 (invalid date) and a leather cutting gauge, patented 1 August 1876, repatented 17 July 1877. In 1960, they acquired Mound Tool Co. Identifying Marks C.S. OSBORNE &CO./NEWARK, N.J. (sometimes without city line, sometimes with "EST. 1826" or a patent date); C.S.O. & CO. General Information This company is one of many mass-producers of the area at the time and America’s most prolific manufacturer of leather-working and leather-cutting hand tools. The photograph below is of a leather slitting cutter (ID# 63001T10), marked "Osborne Co Newark NJ Est 1826 Pat Aug 13, 76 Reissued July 7, 1877". It is one of many Osborne tools in the Davistown Museum collection. Bruce, after looking at my draw gauge in better lighting, I was able to see the faint lettering under the word " REISSUED" near the edge. Most of it is hard to make out but I can see the 1877 date at the end. So I can only speculate that going by the deeply struck first date of Aug 1, '76 and the lightly struck reissued date. This must be one of the early C.S. Osborne draw gauges that were produced from 1876-1877. Then after the new 1877 paten received this weak strike. I also read that these early versions were made of steel and the deluxe versions came with rosewood inlayed handles. Nice to know this one was the better one of this era. I can't wait to start using this 138 y/o leatherworking tool and keep it within reach on my work bench.
-
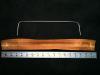
I was just in Door County area here in Wisconsin and due to the inclement weather we decided to visit the many antique shops. I found this old style wooden handle draw gauge I've been wanting for a while. The difference in this one is that the blade mounts by tightening two bolts rather than the typical hand screw type. It has the Pat. date of Aug. 1 '76 and after doing a little research all I can find is this was the first date (1876) that these draw gauges were patented. It has in small lettering under the date "REISSUED" and I can't find any other photos that show this or this style blade mount. Has anyone seen one or better yet, Have one to compare? Chris
-
Few Rifle Sling Questions
chriscraft replied to chriscraft's topic in Gun Holsters, Rifle Slings and Knife Sheathes
Using 8/9 oz. veg tan leather backed with a softer 8 oz. leather. Do slings need to be padded? If so what would you recommend to use as padding. -
Few Rifle Sling Questions
chriscraft replied to chriscraft's topic in Gun Holsters, Rifle Slings and Knife Sheathes
That really helps, thanks Cheif. I was hoping you would reply. I've read some of your previous post before. I'll be using this one clean side I have for this sling. Just finished tooling a short 2 1/2" wide strap that worked out fine so it will not be an issue to carve into this width.