humperdingle
-
Posts
328 -
Joined
-
Last visited
Content Type
Profiles
Forums
Events
Blogs
Gallery
Store
Everything posted by humperdingle
-
OK, i've ordered Al Stohlman's Leather Case series... Hopefully that will help.
-
Anybody? I tried the Aussie conditioner. It turned a cardboard-like moulded bag into a slightly less cardboard-like moulded bag. I really need it to be 'floppier'... Any ideas?
-
If that means the same thing in the US as it does here, i'm in trouble So I need to make a messenger / satchel for my wife. It will be made of approx 3mm veg tan, so will be fairly rigid. I need a video or in-depth photos and description (sorry, text only loses me very quickly!) Does anyone have a link to show all the steps required? I know you can wet form edges, but i'd love to see someone actually do it.
-
Hi folks, I got a couple of sides of larp veg tan (split). Whilst it's not board-like (it came rolled), i'd like to soften it a bit to make a floppy satchel (Same kind of feel as the wartime canvas bags) How would I go about that? I have Aussie Conditioner - Would that help?
-
Will I ever get tired of the smell? Pretty much every time I start a new piece, I have a sniff of the leather... It's like the smell of frying bacon or onions - Irresistible I have a cupboard in the house, with a louvre, slotted front, where I store my leather. Every time you pass, there's a whiff of leather. Nice.
-
Rotary punch?
-
I suppose the problem is not the customising or 'repurposing' in itself, but rather, the intention to sell on the refinished article. Then again... If I was lucky enough to be able to afford an Aston Martin, decided to fit a few other bits and pieces which were non standard... And then sold it... Is that an issue?
-
How To Make A Leather Portfolio/envelope (Hand-Stitched)
humperdingle replied to captain's topic in How Do I Do That?
Thanks. Quite pleased with it as It's only my 4th project so far. The leather should darken with some conditioner and over time. Yes, A4 paper. I used a bigger A4 folder to get the right size, so it wouldn't be too tight. -
How To Make A Leather Portfolio/envelope (Hand-Stitched)
humperdingle replied to captain's topic in How Do I Do That?
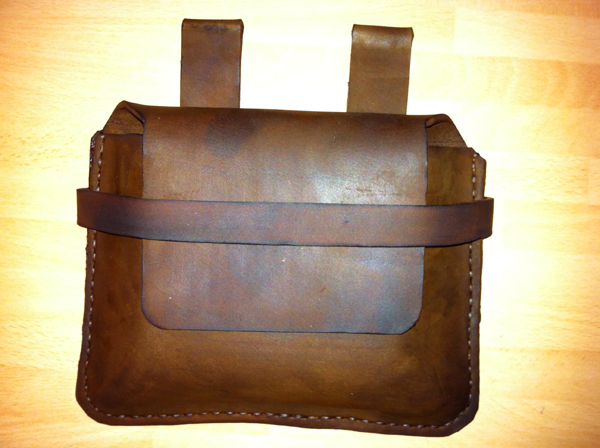
There's a coincidence... I made an A4 sized one today... It's only really two pieces for the main body. I pricked holes in the front part, then glued it to the back with PVA just to hold it while I punched through and stitched.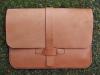
-
Leather People,, The Greatest Group By Far!
humperdingle replied to BearMan's topic in Leatherwork Conversation
Sorry to hear of your loss. I'm new here, but can see it's a great forum with many experienced leatherworkers. What I see above all, is patience. Lots of newbies like me, and lots of the same old same old. I belong to a few other forums (Mostly shooting related) and the membership on (most) of those is the same - Kind to a fault. I've lost count of the number of small items i've sent and received for absolutely nothing - Purely to help others and be helped. No wonder I spend so much time online! -
Hi, yes, that would look good. I made another, much quicker and simpler pouch, which took a fraction of the time and looks better! I think being one of my first makes, I was overthinking things, and turned out looking like I underthunk :D
-
Hi, excuse the newb here, but would you mind giving a brief overview of the steps to do this? I've wetformed a couple of small pouches with blocks, so i'm not overly confident about doing this bag... I have a decent amount of leather to make one, and i'd rather do it right 1st time
-
Ordering leather and other bits and pieces online is fine, but you never REALLY know what you're getting until it has been delivered. This morning I visited a leather workshop not 2 miles from my house - A very old one, which had been passed from grandfather to father and now the daughter runs it. I'd enquired about whether or not they could supply leather, and so went up today to have a look.... Awesome! Like a step back in time - Large workshop, lots of old tools and equipment, big Singer machine, skiving machine... Well, you get the idea... So I walked out with a side of veg tan and some brass bits and pieces (after paying of course :D) And she says she can get me anything I need, or buy the odd fittings from her on an adhoc basis... As well as offer advice on leatherworking. That's very much a result! Right, i'm off to make something
-
The links still work... Looks pretty 'groovy' (Not a word I use often) I'd like to see your progress when you get it going.
-
How To I Properly Apply Finish To My Leather Projects?
humperdingle replied to nicholas482109's topic in How Do I Do That?
Well, I was experimenting with Fiebings spirit dye today on a scrap bit of leather... I tried the mid brown dye, let it dry and then coated half with Fiebings 'tan kote' and the other half just with olive oil (somebody had suggested that on another thread) The tan-kote gave the same, slightly patchy sheen/gloss finish I'd used on a couple of previous projects, and I wasn't particularly happy with those. Managed to get a finish back on them, but only after some work with a wet sponge to even it out. The olive oil... Wow! I really love the matt finish it leaves. It does soak in to the leather readily, but 3 or 4 light coats, and it looks nice. So I made a rifle bolt holder and used the same procedure... I think it came out alright. Not sure about how things will pan out long term, but if it gets worn, another coat or two of the oil will freshen it up. Seems to be colourfast, too, at least with a dry wipe.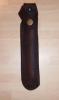
-
How To I Properly Apply Finish To My Leather Projects?
humperdingle replied to nicholas482109's topic in How Do I Do That?
Me too... I've dyed 3 pieces now - Two 'possibles' pouches and a rifle bolt holder - All of which will be worn next to clothing, so i really need to make sure the dye won't run (I used Fiebings spirit-based dyes on all of them, and Fiebings Tan-Kote over the top of that... Just wondering if the Tan-Kote shout stop the dye rubbing off? -
Military Bobber Despatch Bag,
humperdingle replied to shadowryder's topic in Motorcycles and Biker Gear
I like it - Looks the part attached to the bike. Did you reinforce the inside with anything? -
What Can I Do With 200 1.5" Leather Circles.
humperdingle replied to billymac814's topic in Leatherwork Conversation
Stitch 'em all together for an interesting take on chainmail... Or GaGa's latest fashion -
What Can I Do With 200 1.5" Leather Circles.
humperdingle replied to billymac814's topic in Leatherwork Conversation
Checkers pieces? -
I tried the push pins, and they were next to useless going into the pine board I was using. Maybe if a cork block was used as a base? I did make a moulded bag, but I think the wooden mould I made was a little sharp cornered, and had way too much leather at the corners to make a neat job, so had to change things slightly (Had a slight hissy-fit when the 1st attempt saw me ripping the overly-severely trimmed leather off the board and chuck it in the bin Worked out reasonably in the end, though, and will make a more rounded mould for the next attempt.
-
So You Think You've Had An Original Design Idea?
humperdingle replied to humperdingle's topic in Leatherwork Conversation
Hi, the link seems to show a place in England... Looking at the prices - £440 for a 3 day course - Whilst i'm sure i'd learn lots of valuable technique, I can buy loads of leather and tools for that kind of money. Forums like this and online tutorials seem good enough for novices like myself, at least until I find out if it's worthwhile investing more money in. But yeh... Stormtrooper... -
So You Think You've Had An Original Design Idea?
humperdingle replied to humperdingle's topic in Leatherwork Conversation
Oh yeh totally... How cool would a full outfit be! I like the look of that colour, though - Would be like a Star Wars Roman Legionaire! -
Guaranteed somebody else got there first... http://www.likecool....Bike--Gear.html I had a 'eureka' moment, combining my like for all things 'original' Star Wars and my new fondness for leather... A Stormtrooper! How disappointing, whilst coooool to see the possibility.
-
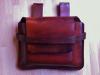
Thanks for the kind words, folks - I was actually happier with the look of the pouch prior to putting Fiebing's Tan-kote on it... I think it suited the matt finish much better. Plus, the Fiebings seems to have given it a mahogany tint, whereas before it was a dark brown (!) The point about the shape of the flap - Yes, if I was doing another, i'd definitely change the shape of that. I'd made it this shape because I wanted to match the flap with the raised wetform part like you say... A rounder front would probably have looked better. The other point about the olive oil... That's interesting... I might try that on a piece of scrap to see how it turns out. Unfortunately, I can't leave anything out in the sun because we never get any Here it is before top coating:
-
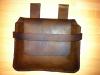
Well, my first attempt at a possibles pouch... Not too happy with it tbh, but I suppose there's plenty of scope for learning in that! Edit: Just to add, the edges aren't burnished yet... Had to put it away before I took up too much time!