jonwatsabaugh
-
Posts
117 -
Joined
-
Last visited
Content Type
Profiles
Forums
Events
Blogs
Gallery
Store
Everything posted by jonwatsabaugh
-
Hallelujah! Finally here they are. I had the files sitting in a folder and they would not extract from the folder...Thanks Bruce! I'm gonna fire my computer guy... Jon attachment=9025:jig_4.JPG]

-
Having trouble here. When I try and up-load the pix, they won't show up in the posting window but do in my "manage your attachments" directory. I tried copy and paste from that but that doesn't work. Any suggestions? Jon
-
Here's one I didn't get attached for some reason. Jon jig_5.JPG
-
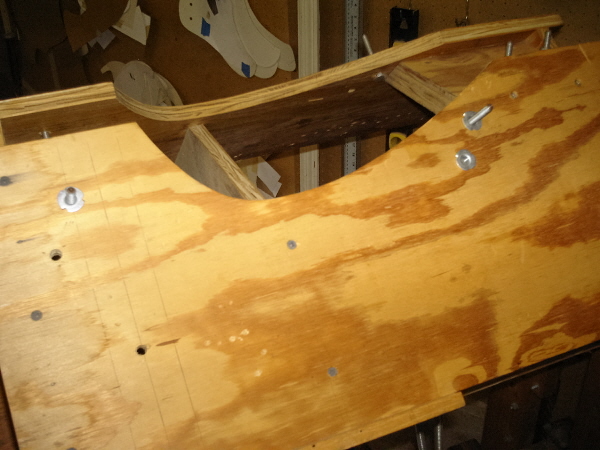
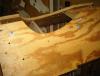
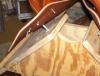
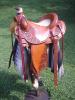
A couple of weeks ago the subject of rigging placement was being discussed as well as different methods of locating and accurately placing the rigging symetrically. I finally got my no account camera back and as I promised, here are some really bad pictures(didn't promise the really bad part but here they are). Hope you get the idea though. The bolts protruding from the plane of the jig on both sides are simply ground to a point and threaded through t-nuts that are embedded into the plywood. These support the tree with the skirts blocked. If you wish, the elevation from front to back can be easily changed to replicate level on the horse. To accurately locate the tree, measure from the bottom of the bar to the bottom of the jig and adjust untill the measurement is the same, and as you are doing this keep the center lines in the back lined up and you're there! I built mine to set atop my draw down stand for convenience and work height. The rest of the pictures should be self-explanitory...if you can make them out. I got to get a better camera...maybe a better photographer would help to... Jon Keep scrolling down, I finally got the pix to up-load.
-
Thanks for all the nice comments everyone! Although positive comments are encouraging, equally encouraging is constructive criticism and I welcome it. This forum has been a great tool for my continuing education and for re-evaluating some of what I previously thought was solid imformation. It has caused my critical thinking skills to increase dramatically, and for all this I am very thankful to all who contribute here! Jon
-
I do block and trim my skirts before I set the tree on my jig. I have the ability to do this with 4 points that protrude out from the base of the jig that are also adjustable. This alows me to change the elevation front to back to simulate correct level on the horse. The jig also enables me to hang the rigging at the exact same depth side to side. This is a very simple tool that is very user friendly and virtually fool proof for symetry. Jon
-
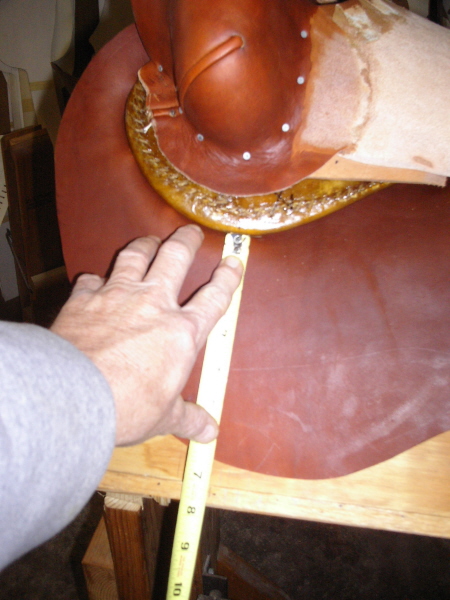
Doug, Rigging placement is somewhat subjective. I've yet to run into any two that place them the same way. 7/8 on one guy's saddle is a little different than 7/8 on another. Although I think horn position should be considered, I rely mainly on a measurement back from the front tip of the bar, that being 3 1/4". This is what I consider full position. 1 3/4"-2" back from that is what I call 7/8. I built a jig I square my tree on to get the rigging placement symetrical side to side. I consider symetry the single most important issue here. Now, looking at the tree on the jig from a profile view, I position it to represent how it sits on the horse. This is also a subjective matter as you "eye ball in" this position. Once I'm satisfied with the placement of the tree, I simply measure back from my point of reference and draw in a perpendicular line for rigging placement. I measure from the front edge of the jig to this point then replicate that to the other side. Using this jig, I can be dead sure they are the same side to side. When I get my camera back next week I will post a couple of pix of my jig with further explanation. Jon
-
Just a word on covering the horn after covering the swell. This is common practice when the horn will have a final wrap with mule hide or latigo. Agreed though, a pleasure saddle should have a standard "wing wrap" before covering the swell. Jon
-
Replacing a broken tree
jonwatsabaugh replied to ryan's topic in Saddle Identification, Restoration & Repair
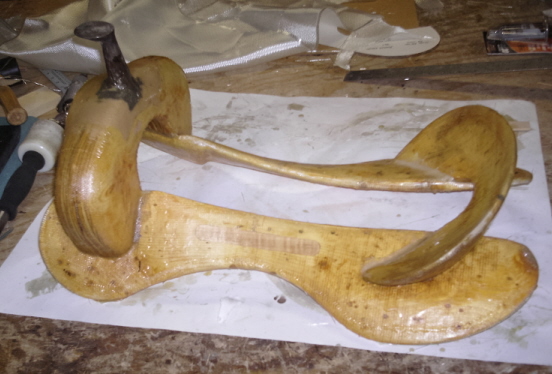
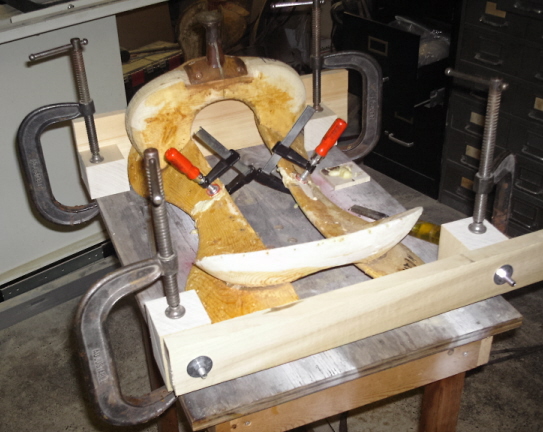
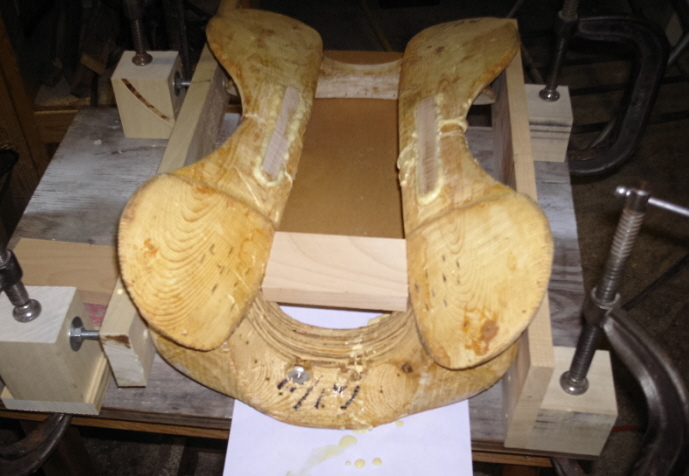
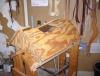
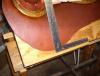
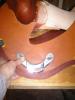
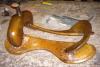
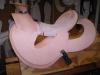
Steve, After I glued and clamped the bars together, I milled a slot completely through the bar and made a beam of hard maple for a light hand press fit. Holes were then bored through the bar edges and pinned with dowels. This part of the assembly was secured with Gorilla glue. The fork and cantle were glued and pinned also. I removed the horn and reset it in Kevlar based epoxy. Photo three does show the tree fiberglassed, semi-finished. There are a lot of those old saddles out there with that useless cheese cloth covering on the tree that could have their life greatly extended by simply doing a quality “glass” job. Good fiberglassed trees just don't break. Ask the steer trippers and calf ropers down in Texas. Troy West has a great story concerning glass trees, I hope he will post it someday for all to read. Jon -
Replacing a broken tree
jonwatsabaugh replied to ryan's topic in Saddle Identification, Restoration & Repair
My computer would'nt let me upload everything the first time so here is another pic Jon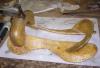
-
Replacing a broken tree
jonwatsabaugh replied to ryan's topic in Saddle Identification, Restoration & Repair
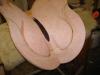
Ryan, From time to time I'll take in a repair job in with a broken tree. Since I make my own trees ,duplicating them isn't a real big problem but I prefer to strip the tree and fix it even if it's severely broken. I have about the same amount of time involved and the repair challenges my thought process, and everything fits back perfect. The last one I did was by far the worst as far as the breakage was concerned. Both bars were broke cleanly in half, and the fork and cantle were both split. From the looks of it, it appeared to be a Hadlock&Fox tree and the wood was pretty crude but it did have a nice bar profile on the bottom side. Since this one was a very extensive repair I took pictures progressively of the process to show how this is done. After final gluing, I double fiberglassed it (some places triple) then covered it with rawhide at the customers request. I have a lot more faith in a good fiberglass job than I do a good rawhide job by the way. He won't break it now unless he runs over it with his John Deere. I posted some pix of the process. I would be glad to help you out if you like. Jon

-
David, Those are nice patterns and a good basic tutorial! The flow is the first thing I emphasize to someone beginning the process of creating their own patterns. Before you draw anything, establish that flow line in pencil first. Whether it's a wave pattern in a belt or a full tooled saddle, I always figure what space I want to fill and put that flow line in. Then draw everything to flow into that wave or circle. In Sheridan style carving your swivel knife cuts are the most important aspect of your piece, and they must ever so gently blend into the flow line. For beginners, I have them study Chester Hape and Keith Seidel. They are two of the masters that exemplify the beauty of the cut line and how it should converge and fade into the flow. In time you will find it even easier to start drawing directly on the leather with a stylus. It seems like a daunting task at first, but the more you do it, you discover how natural it feels. I also encourage everyone to pick up the book, Sheridan Style Carving, by Bob Likewise. This book is worth it's weight in gold. Jon
-
Monthly floral pattern (March)
jonwatsabaugh replied to ClayB's topic in Special Events, Contests and Classes
Redding, now that's just down right nice work! Super smooth, super clean. All your lines converge so beautifully into the circles and radius with excellent flow. Nice! Jon -
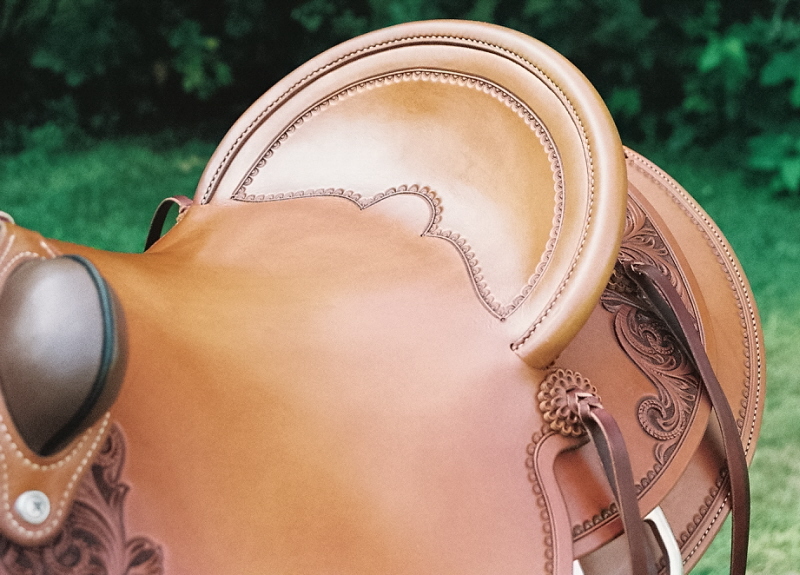
I wanted to add another question to the mix here since the Cheyenne roll topic is in the forefront. I'm desiring to refine the seat where it breaks over the cantle. For instance, if you look at Keith Seidel's rigs, the cantle perimeter has a very defined, sharp edge and the binding fits very close to that edge. My question is this. Do you have to skive the seat leather thin where it breaks over, or put a deep gouge line, or both to get that hard break? Jon
-
Laura, Welcome aboard! You will find this site very informative and very addictive! Jon
-
Steve, Your work is exceptional! All of your inovative small details add so much to your saddles as well as the ultra clean finish. From the inovative billit sleeve on your back cinch to the clean flowing lines throughout prove what an accomplished maker you are! I know function is of supreme importance to you, but this example displays much artistic value also. This is a textbook study for all those desiring a much higher level. Keep'em coming, Steve, you are truely an inspiration! I hope I get to meet you in Sheridan this year! Jon
-
Rod, Denise, daviD A Morris, Of all I've ever read or discussed on this subject, these last two posts are undoubtedly the most eloquent, and the most common sense approach to the philosophy of saddle trees I've ever heard! daviD, I love your analogies. Your subtle humor always makes me chuckle! Jon
-
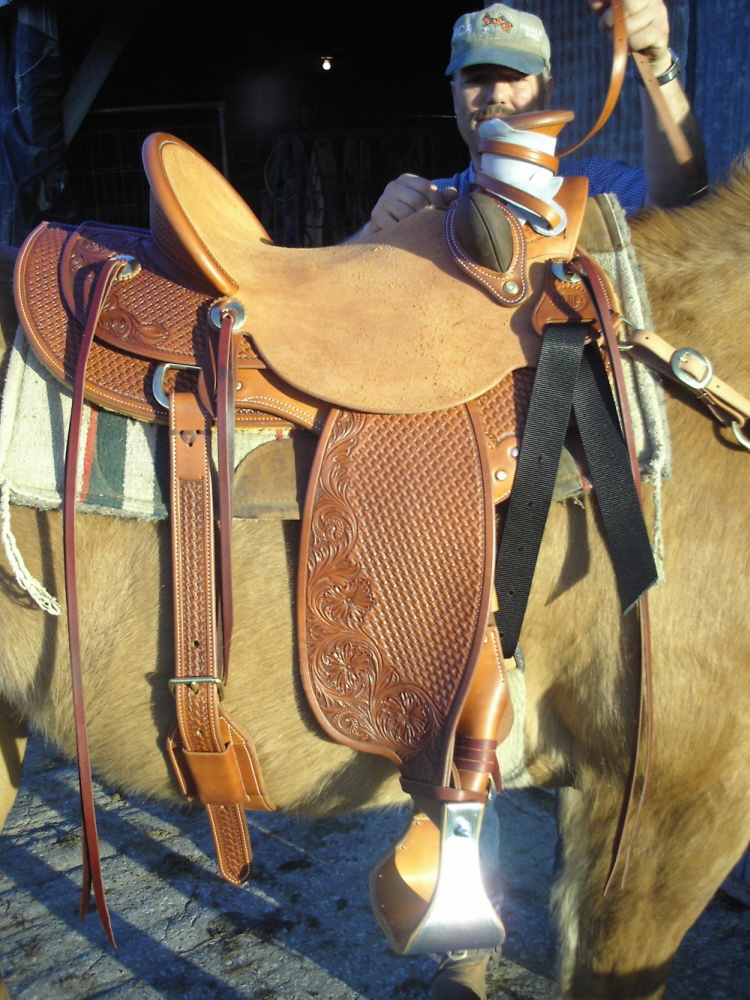
Darc, I found a couple of detail shots of the smooth seater. Here they are. Jon


-
I've used 3.56 MB of global disc space for my attachments and everything comes to a halt when I try to upload any more photos. I was wondering if there was a limit as to how much global space a member is allowed. I only have a dial-up connection so I've been down sizing the file size to facilitate easier up-load, but now nothing. Help! Jon
-
dug a couple pix out of the archives. Built the saddle on the horse for good cowboy and good friend, Jack Day. The other one was built for his nephew. Jon


-
Tim, There are only 2 layers throughout the skirt and rigging system, with the exception of where the rear plugs extend toward the front (no front plugs). This should overlap the rigging leather about 4" and skive to blend. Sewing this all together adds additional strength. I've attached a couple more pix for clarification. Also you might want to look at cowboylegacy.com. There are three saddles on there by Keith Seidel. All three use the 550 ring and clearly display what I consider a premium in-skirt, as well as being some of the finest saddles you will see! Jon
-
AhHah! Jon
-
guess not...somebody help Jon
-
here it is Jon
-
I'll get the pic uploaded pretty soon...having computer issues. Jon