YinTx
-
Posts
3,794 -
Joined
-
Last visited
Content Type
Profiles
Forums
Events
Blogs
Gallery
Store
Everything posted by YinTx
-

-
-

-

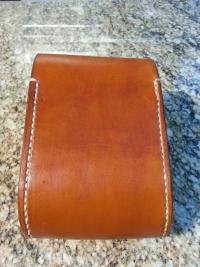
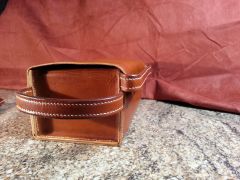
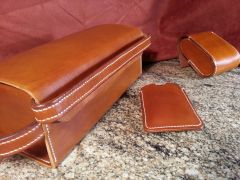
From the album: YinTx DoppKitt
© YinTx
-
From the album: YinTx DoppKitt
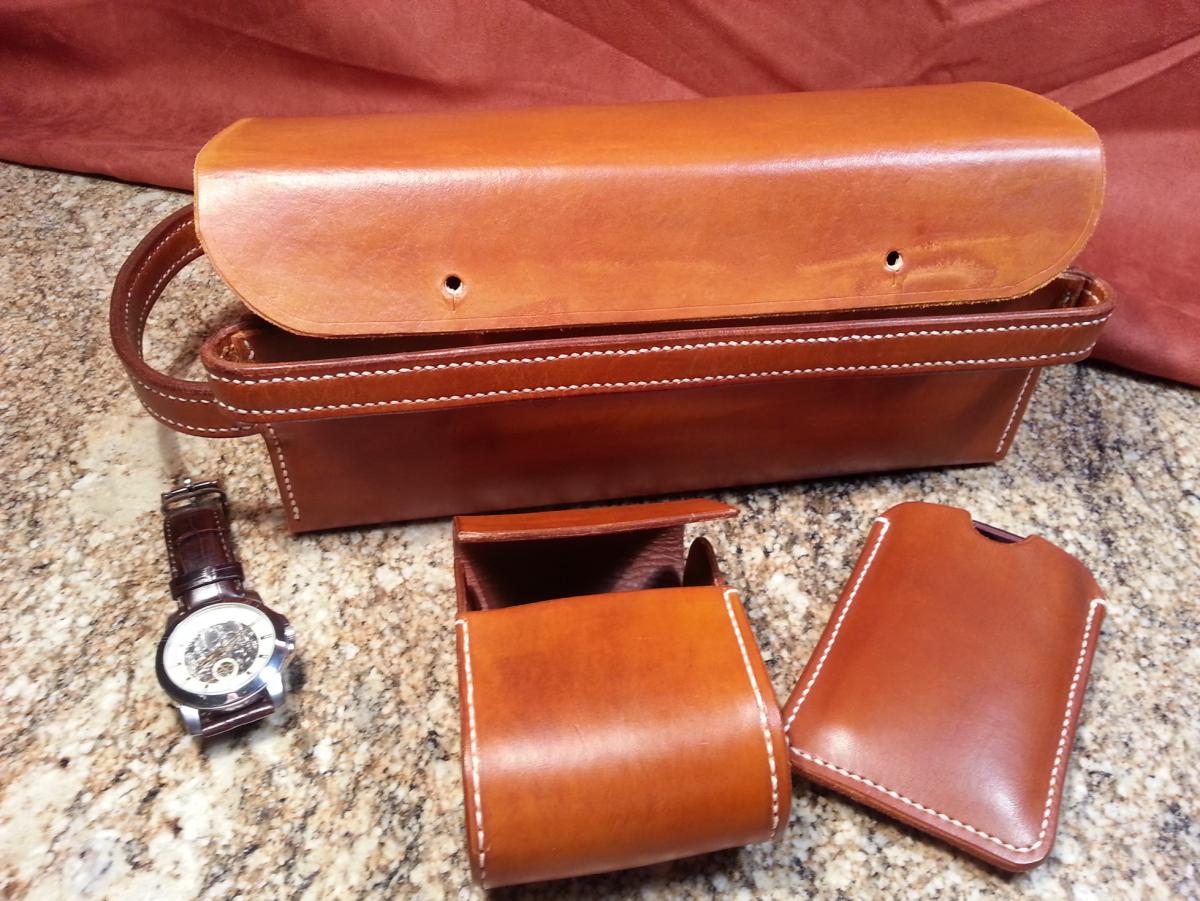
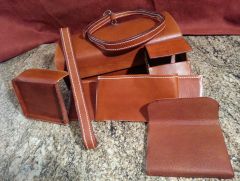
Finally nearly finished, still have to complete finishing and burnishing the edges. There were nearly 18 feet of stitching on this little bag!© Yintx
-

February Keep Making Stuff Challenge
YinTx replied to thefanninator's topic in Leatherwork Conversation
In a word, Yin Been Stitchin! I did not follow the original design, since I started this in December when I picked up a piece of leather and started cutting and dying it for the first time. I could not find something that I liked for myself, so I designed each piece of this on my own from the get go. I have had to learn a lot of things to get this bag completed, including, well, everything since I had never worked in leather before. So design, cutting, dying, treating, burnishing, folded edges, lining, wet molding, sealing, and not least of all stitching, including saddle stitching and box stitching. Did I say stitching. I think there were about 210 linear inches of stitch on this little bag: that would be 17 linear feet! Everything is done by hand, no power tools. I didn’t have a lot of good tools to do this with, just a Craftool 2.5mm stitching chisel to mark and an awl to pierce the leather. The veg tanned leather was not the best, seems I got some of Tandy’s stuff that folks were recently complaining about. And I was wishing I had better thread than the generic spool of braided I don't know what, but I waxed it and used it anyhow. I think a Barbour, Tiger, or Fil Au Chinois would have looked much nicer and been easier to deal with. But overall, the kit it is something I will use and I really like the way it came out. I hadn’t expected to end up stitching quite that much by hand, since I had originally intended to fabricate this with a stitching machine, but there it is, all by hand. The kit is a bit larger than typical, mostly because I wanted to be able to put standard sized items like shaving cream cans, hair brushes, toothpaste, etc. in there without having to resort to “travel size” items. I hope everyone enjoys it. The edges are not completed, as I would like to spend more time to make them nice, but still wanted to enter into the February challenge. I will put more photos in my gallery as I get them uploaded. Items used: Veg tan leather pigskin liner Dye vegetable oil D-Rings O-Ring Button Studs Resolene Round Knife Ruler/straight edge glue brush needles thread beeswax awl Craftool 2.5mm stitching chisel scratch awl Hole punch edge beveler burnishing stick pliers Wet form: Wood Saw Screws Screwdriver small hammer contact cement sand paper Stitching pony YinTx


-
 Pg043, Thanks for that, but there is no stitch groove on this particular item. I did groove one of the items I stitched, and you are right, it does force the thread into a nice straight line. I've been practicing, some of my stitching is getting better, but I do still struggle with getting a perfect stitch on the reverse side. I am trying to avoid using grooves, this helps me to see my errors and try to improve. Also, I think grooving weakens the leather a bit. I believe most of my error is in the use of the awl, although on this particular item, I stitched before I owned an awl, and so the error was in my needle and thread technique. I may try to restitch this item and see how it turns out now that I have had some practice. YinTx
 -
February Keep Making Stuff Challenge
YinTx replied to thefanninator's topic in Leatherwork Conversation
Hah, I hope you don't mean me, I don't want to be barred! And I've looked at your works, Monica, and have been in awe. You definitely have skill and a great style, should have no fear of my work, lol. YinTx -
February Keep Making Stuff Challenge
YinTx replied to thefanninator's topic in Leatherwork Conversation
Bound and determined to finish this thing. Lots of stitching to do tomorrow though! Hopefully I will get to finish the edges by then too, if not I'll enter as is. http://leatherworker.net/forum/index.php?app=gallery&album=2474 I picked this hobby up last weeks of December, so this has all been learned in the two months since then, and almost entirely using Leatherworker.net. Handstitching still has a bit to improve, but significantly better than day 1. Looking forward to putting up images of it completed sometime tomorrow! It will be one of the first projects I have ever completed - the others are on the gallery as well - cell phone slip case and a checkbook cover as I was learning. YinTx -
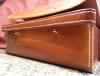
From the album: YinTx DoppKitt
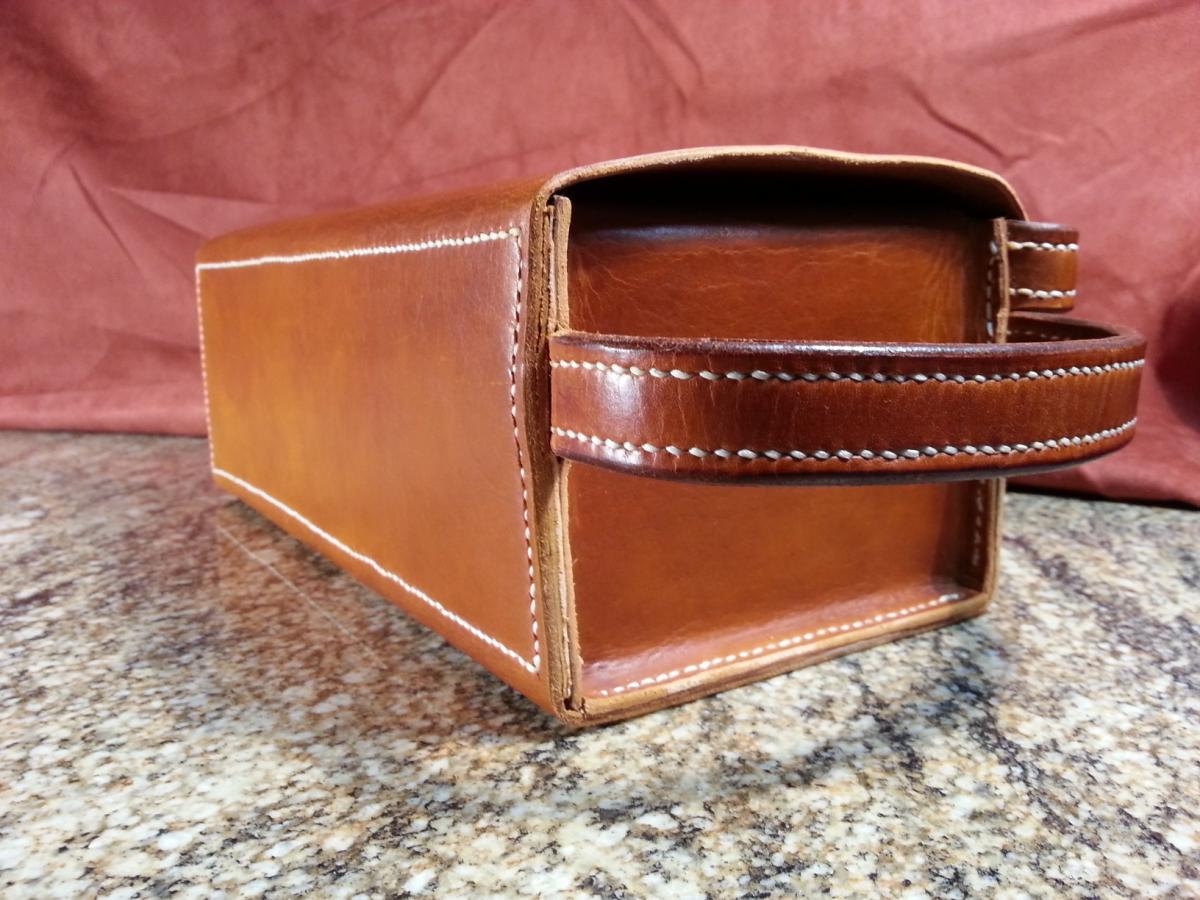
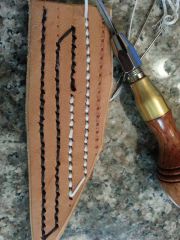
All the parts are made... time to get stitching and burnishing the remainder edges! YinTx© YinTx
-

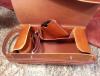
From the album: YinTx DoppKitt
Working on the handles for the Dopp kit. Hand stitching gradually improving. Burnishing this leather is not working well though, rather nappy and squishy.© yints
-
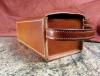
From the album: YinTx DoppKitt
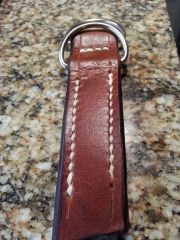
Practice run to attach d-rings on a strap end, for the Dopp kit. Not sure I'm happy with it, is there a better way of doing this? YinTx© YinTx
-
-
February Keep Making Stuff Challenge
YinTx replied to thefanninator's topic in Leatherwork Conversation
Been working diligently on mine, but seeing it may not happen by the end of a short month. What is the deadline? YinTx -
From the album: YinTx DoppKitt
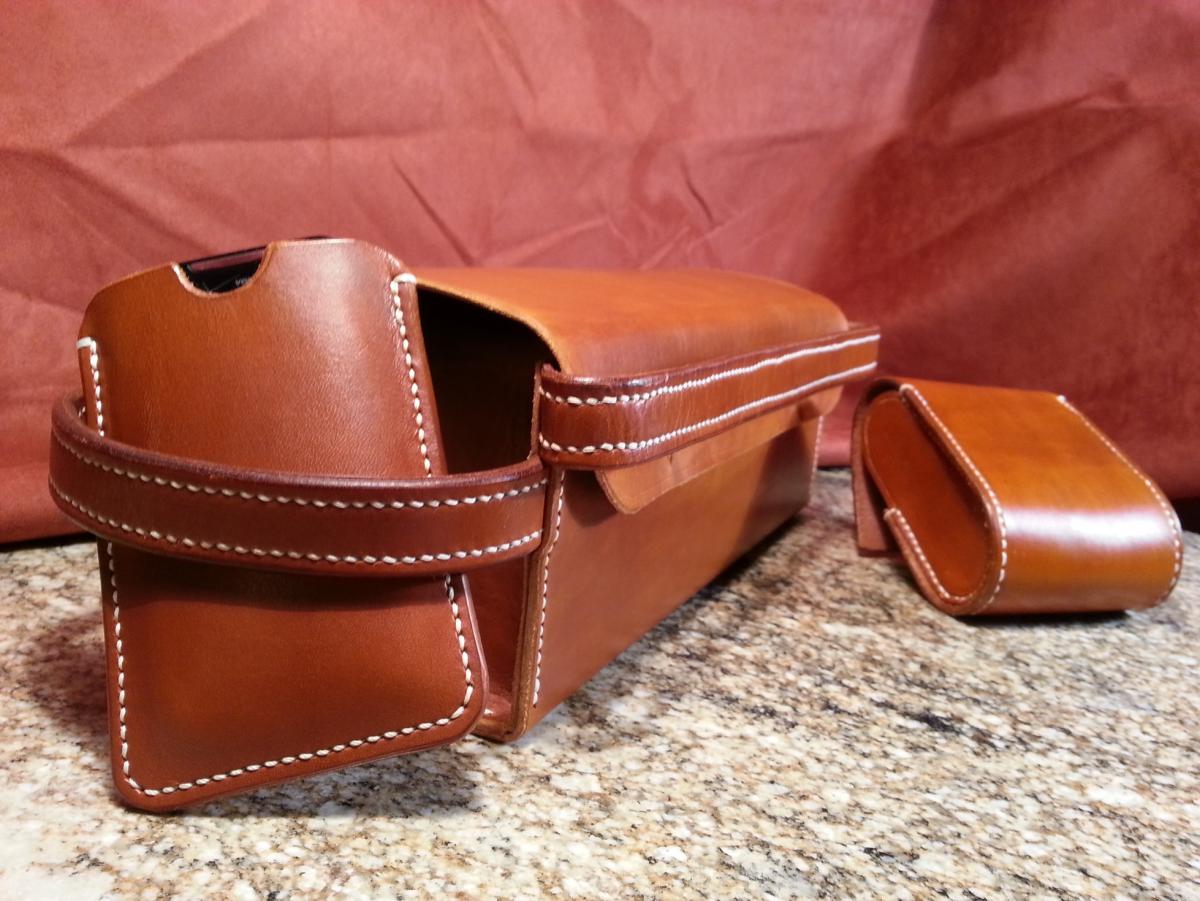
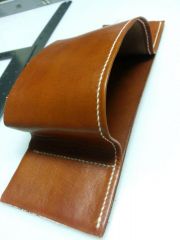
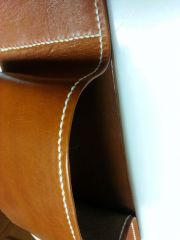
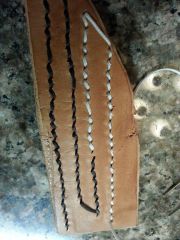
Progress on the Dopp Kit. Certainly not a simple project, but it has required me to learn a lot of skills, such as dimensioning, edge finishing, lining, skiving, folded edges, dye, rejuvenate, and seal leather, wet forming, and most challenging is hand stitching, in part due to limited tools (Craftool 2.5mm from Tandy) and developing skill with an awl. So far a box stitch and a saddle stitch. I think my stitching has gotten better. This is the first folded edge I have ever done. Skiving with a round knife is most effective when you can easily shave with the knife: ie must be really sharp! Hoping to be done by the end of the month. YinTx© YinTx
-
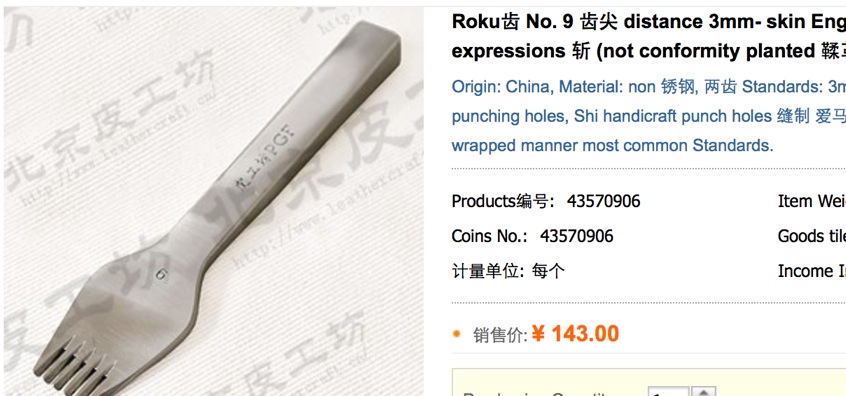
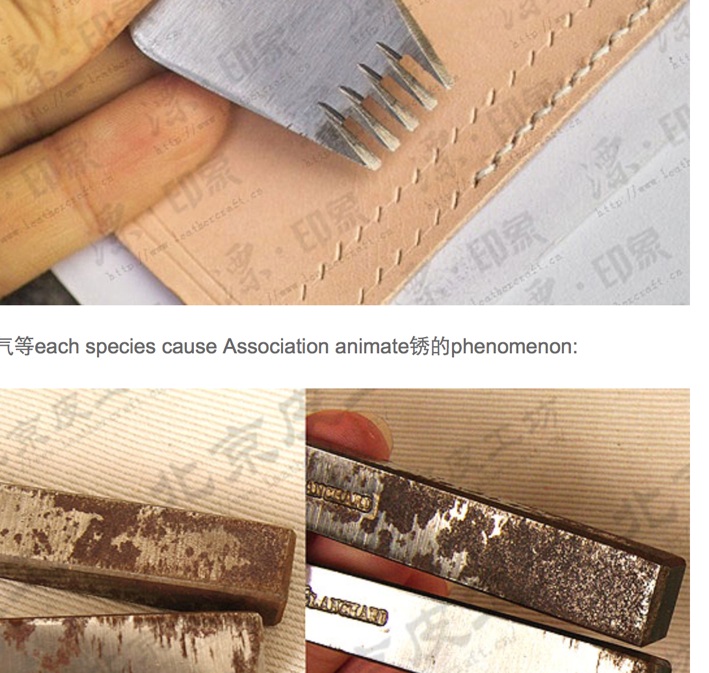
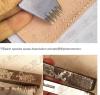
Found this on the 'net. makes one wonder. I didn't know Blanchards had that rough a finish on them. But I've never owned a set, maybe someone that has some can comment. http://translate.googleusercontent.com/translate_c?depth=1&hl=en&prev=search&rurl=translate.google.com&sl=ja&u=http://www.leathercraft.cn//%3Fproduct-17686.html&usg=ALkJrhiul0hgBymZLW0YJCwKamSKsz2C-g YinTx

-
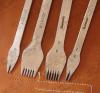
Nigel, Thanks for all the reviewing work on your videos. Very useful as I am trying to improve my stitching as you might note from my other postings, and all I currently have is a Craftool 2.5mm with 6 tines and a 1 tine (agree with you, one tine is pretty useless, not to mention it makes an entirely different sized mark/hole despite the size marking). I noted on Goods Japan's web page, that the Kyoshin Elle irons are "made for Kyoshin Elle." This sounds to me like made by someone else, somewhere else, and sold by Goods Japan with Kyoshin Elle's name on them (perhaps made in China?). Which makes me question all the other stuff they have. Was there any indication on the packaging to say where they were actually manufactured? And in their correspondence did they ever indicate they might improve the rigidity of the tines? YinTx
-

From the album: Stitching Practice
See http://leatherworker.net/forum/index.php?showtopic=61874&hl= for details.© YinTx
-
From the album: Stitching Practice
See http://leatherworker.net/forum/index.php?showtopic=61874&hl= for description© YinTx
-
From the album: Stitching Practice
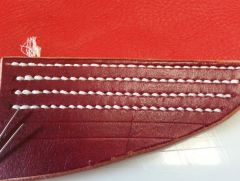
This is the back side. It is not as straight, I believe due to differences in the angle of the awl as it went through the nearly 1/2" of (old and very hard) veg tan leather. I suspect practice will improve this result, as I hope to be able to be more consistent with the angle over time. This also affected the distance between holes. I noted if the thread twisted, it affected the overall look as well, which I hadn't expected. The lay is affected by "casting the stitch."© YinTx
-
From the album: Stitching Practice
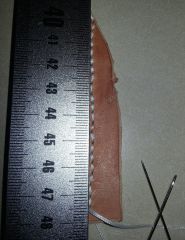
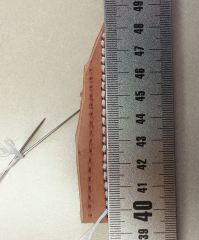
Some comments suggested that my stitching was not at all straight, and the distance between holes was improperly gapped.. I thought I'd lay a ruler up against it to see how far off it really was. While not perfectly straight, I did use just a rolling overstitch wheel to mark the leather initially, and free hand, so I don't feel it is all that crooked considering. Also, it appears the holes are fairly evenly spaced at 4 mm between centers. Will I actually be able to improve on this or am I expecting to much from a hand stitch to be even better? I am also not happy with the straight lay of the stitch. I have been studying how the knots form, and the direction they force the thread into using various techniques, and I am beginning to believe the shape of the awl has a lot to do with how the final angle of the stitch forms on each side. One side can be influenced by "casting the stitch," but I can not seem to figure out how to get the same influence onto the opposite side. It seems to me one side must remain dictated by hole shape, as any attempt to influence the lay negatively affects the opposite side, or results in forcing the thread into the wrong side of the hole. In this sample practice run, the front of the stitch became straight, the backside was influenced by casting the stitch, giving an angled lay. See "Back 2."© YinTx
-
From the album: Stitching Practice
The back of the stitch has a nice lay, although the awl doesn't pierce evenly. Would like to have the front and back similar.© YinTx
-
From the album: Stitching Practice
This is the front of my practice stitching. Leather is about 3/8" thick. Not getting the same lay on the front as on the back. Looking for suggestions to improve.© YinTx
-
Help! Wanted Techsew Stitching Nirvana, Got The Blahs Instead
YinTx replied to YinTx's topic in Leather Sewing Machines
I'll let the video speak for itself. Sorry about the volume, I'll work on speaking louder in the future. But if you turn it up, you can hear it pretty well. You can see I took it apart, tried to make adjustments, checked for free play, tried to find the binding area, etc. In the end, I think I have a general idea of what to do, but please take a look and make any inferences and suggestions based on what you see. JLS, I am thinking maybe if I can not rotate the shaft, maybe I can rotate the bushing. Next time I open it up I'll try that. Thanks to everyone helping me out here, it'll get fixed eventually! YinTx -
Help! Wanted Techsew Stitching Nirvana, Got The Blahs Instead
YinTx replied to YinTx's topic in Leather Sewing Machines
Wizcrafts, Thank you for the detailed suggestions. I did take it apart further, and took some video along the way. When I can get it uploaded, I'll post it. Suffice to say, I did remove the cover, the shuttle and race, and removed the link crank arms by removing the snap ring "c-clips", and lowered the block some (about 1/4") just to see what it would do. That only managed to keep it from feeding leather when in service, so I think I can rule that out as an issue. Nothing seemed to be out of alignment (the rods on the needle and presser feet never were contacting each other). The main issue I saw was the rear presser foot (with the spring) would not move freely. I loosened the set screw slightly on the bushing that is at the bottom of the casing as the presser foot bar exits the head, which seemed to help some. It appears that this bushing is causing most of the binding. I'll be looking for that part along with the shuttle and race so I can replace it if possible. The issue is not yet solved, but I am hoping this is narrowing it down! When I can get a video of the dissection uploaded, I'll post the link. YinTx