

YinTx
-
Posts
3,794 -
Joined
-
Last visited
Content Type
Profiles
Forums
Events
Blogs
Gallery
Store
Everything posted by YinTx
-
-
 Definitely something to be proud of! I can see a lot of work went into that. Well done! YinTx
 -
I guess the main part I was wondering about was the fact that the pricking irons in the photos from my post are made in China, and appear to be an exact replica of the Blanchards, minus the branding mark. I think they are claiming theirs will not rust as the Blanchards do. Thought perhaps this was the source/manufacturer for the Kyoshin Elle irons, as I got to this (Chinese) web page by following links on GoodsJapan's web site. YinTx
-
I am looking for some used European style pricking irons, 7 stitches/inch and 10 stitches per inch, not too particular on which, and would consider other sizes if the price is right. If you are looking for other tools or leather, perhaps we could work a trade. (I have caimen, ostrich pieces, veg tan, chrome tan, many tools) PM me if you have some you would like to be rid of! YinTx
-
Finished Another Archery Arm Guard
YinTx replied to dhaverstick's topic in Archery Quivers and Bow Cases
Dhaverstick, I can see you put a lot of thought and design into this. Very unique, and a lot of detailed work. I do wonder if it is useable in terms of having the bowstring hang up on any elevated details? I look forward to seeing what else you create! YinTx -
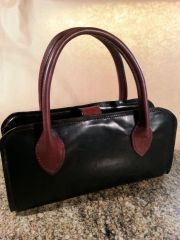
 Tugadude, Thanks for the comments. Yes, I would have liked to have added pockets, etc. but the request by the customer was simple and clean, good thing since this was my first purse! BTW, the dye was Fiebeng's Chocolate, reduced like 8:1 reducer:dye. Thread was Ashley Industries Mahogany braided polyester. YinTx
 -
Now those are cool. Very well done as well. Thanks for sharing! YinTx
-
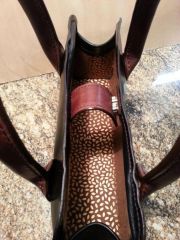
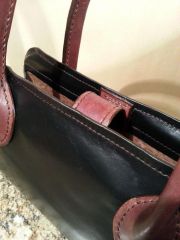
From the album: Black Purse
© YinTx
-
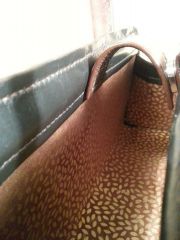
From the album: Black Purse
© YinTx
-
From the album: Black Purse
© YinTx
-
From the album: Black Purse
© YinTx
-
 Thank you leatherwytch! YinTx
 -
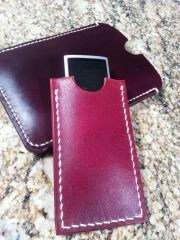
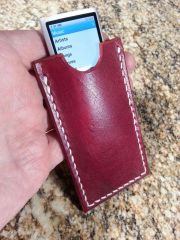
From the album: Practice Ipod cover
Two different colors I came up with mixing Fiebeng's dyes. Used machine thread on large phone case, Cambell Randal's waxed linen on the ipod cover. This was the first time I have used this thread, I liked it but I think maybe a bit large for such a small item. YinTx© YinTx
-
-

From the album: Practice Ipod cover
Playing around with mixing color dyes and used a scrap piece of leather. Also, tried out some waxed linen thread from Cambell Randal Machinery Co. This is their natural color hand sewing thread. Used an overstitch wheel to mark the spacing, and a large diamond awl. Overall, the thread is a bit heavy for such a small item, but I liked the way it sewed. YinTx -
 I did notice it did not have leather in the jaws, i was planning to use some thin soft veg tan belly attached with contact cement to the surfaces of the jaws that contact the leather piece I will be stitching. I may try to use it without at first to see if it leaves any marks on my working pieces. If I should be using something else there, it would be nice to know. The main piece I was wondering about is the belt/strap that goes from the clam to the foot pedal. I am presuming it can not be stretchy at all? What weight leather do folks usually use for that strap? Also, is the slant of the clam what differentiates it as a right handed stitching horse? Thanks! YinTx
 -
BTW, if anyone can tell me the right leather to use for the clam, I would appreciate it! YinTx
-
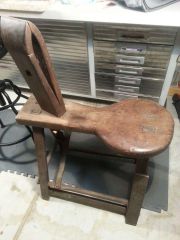
From the album: Tools
Picked this up today, will need to fix it up, but should be a good one! Came out of a leather shop in Tyler, Tx. YinTx© YinTx
-
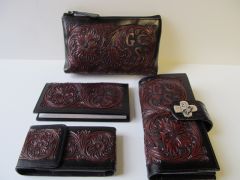 That is a great matching set! A lot of work in there. I really like the color combinations. Well done! YinTx
 -
 Thanks Ross! YinTx
 -
 I used Fiebings Pro Saddle tan. Thanks for the complement! YinTx
 -
Is this thread still available YinTx
-
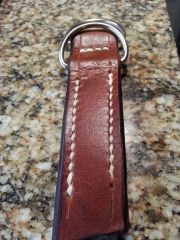 Andy, Thanks, you are right. On the final version, both D-rings are in the same area, and there is no "horizontal" stitch parallel with the straight section of the D. YinTx
 -
February Keep Making Stuff Challenge
YinTx replied to thefanninator's topic in Leatherwork Conversation
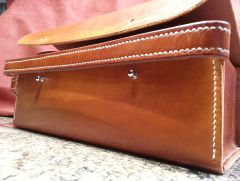
Monica, You are right on the lining needing stitching all the way around, and as you can see if you look closely, I have already marked the lid for the stitches, but I knew I wouldn't have it done in time, so I stopped where I could. I will finish it out soon. Thank you for the positive compliment on the stitch work, I have been really focusing on trying to improve it. I have a long way to go to reach any level of perfection, but I am happy with the progress I have made in two months since I started. And CharlieZ, nice work on the tooling! I also liked the color combination that rundogdave did. YinTx -
I'll take the awl.. YinTx