YinTx
-
Posts
3,794 -
Joined
-
Last visited
Content Type
Profiles
Forums
Events
Blogs
Gallery
Store
Everything posted by YinTx
-
I realize this post is a few months old, but I did want to mention a different style of sharpener that I've used with some success: https://www.amazon.com/TrueCut-TC-01-1345-TrueSharp-Linear-Sharpener/dp/B07ZWGX3DH/ref=dp_prsubs_d_sccl_3/133-5690165-7664204?pd_rd_w=zRq1I&content-id=amzn1.sym.be3a2f09-77ee-4ba3-b2da-1b73c76c3fe2&pf_rd_p=be3a2f09-77ee-4ba3-b2da-1b73c76c3fe2&pf_rd_r=DZ721CH81TF02JS63SM7&pd_rd_wg=WZGeF&pd_rd_r=63833c2a-5555-465e-8890-9635e3c15f1d&pd_rd_i=B07ZWGX3DH&psc=1 You pretty much just roll the blade through it as if you were cutting something, no need to remove the blade or anything.
-

Inadequate knife sharpness, or too much moisture. Ugly "drag line"
YinTx replied to LakeOtter's topic in How Do I Do That?
This! The sample you show looked a bit loose. Another trick I've learned is to make casing solution with some saddle soap, it really helps to lubricate the surface and allow for cleaner/smoother more controlled cuts. Give it a try. Also, sometimes I'll run a glass slicker over the surface a bit to help even the compression of the fibers. At any rate, after I've cut for a bit, almost inevitably material builds up on the blade and I will begin to feel a bit of drag, so strop again... and again. Casing solution done right can help prevent any mold forming. I live in a very humid environment, and have had work on the bench for days with no issues. Heck, the first thing I ever tooled got interrupted by a hurricane, stayed in a zip loc bag with no air conditioning in hot conditions for over a week before I could come back. It is now a 3 ring binder with an eagle. Do some experimenting with scraps to see if you have any issues. -
The image you show looks like a "T" pocket shape design, and the stitched edge is only 2 layers of leather thick: one pocket and the backing. Leather I've used for pockets is generally around 1.25-2oz. Edge skiving helps a lot.
-
Thanks, I'll start down that route. Technically it is a BGMC, but they are no longer around and have't been for some time now. I tried contacting them when I first started this thread, but they were already awol then.
-
Heads Up:I am going to sell most all my leather "stuff"
YinTx replied to Ferg's topic in Hand Tools-Leatherworking Tools
Ferg, Sorry to hear of your current situation. It has been a pleasure seeing your works and all, I pray for your improved health. -
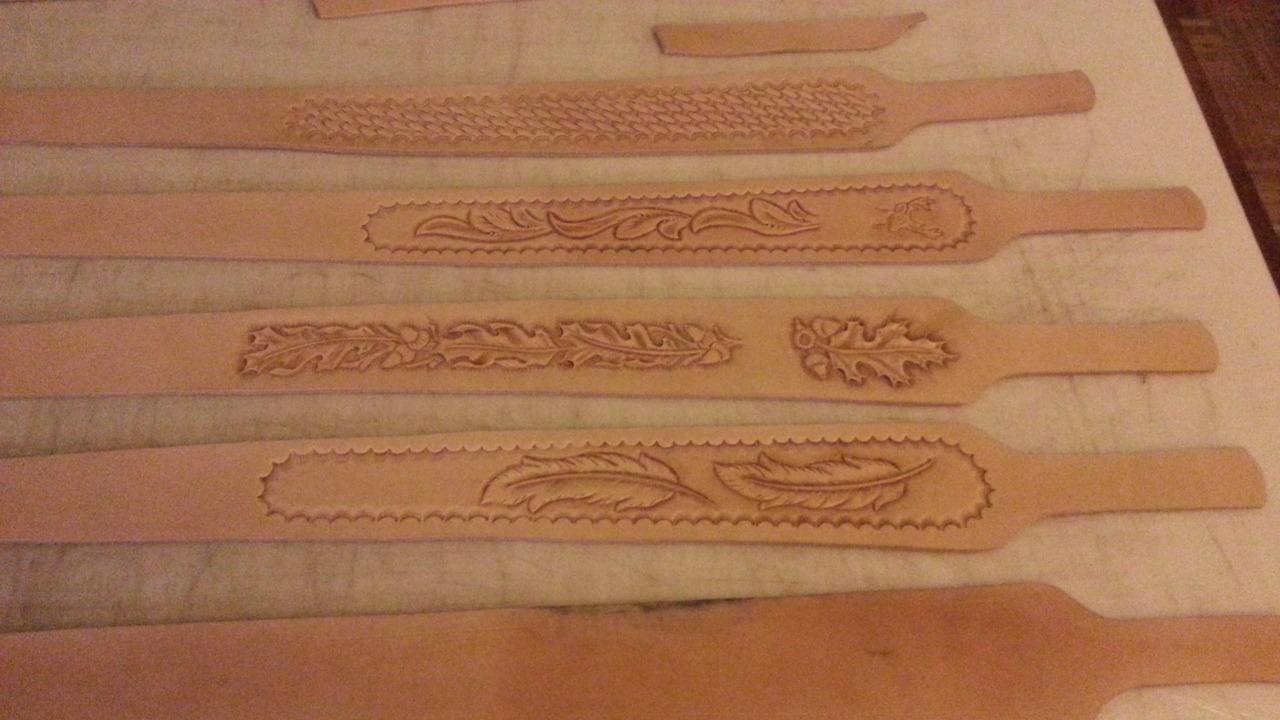
I did finally manage something, not entirely happy, and will adjust for any future designs, but it worked well enough.
-
That's an incredibly detailed design, well integrated! I really like the texture you used on the background for the perimeter of your floral work, and I can only wish my decorative cuts were as well placed as yours. Nice work!
-
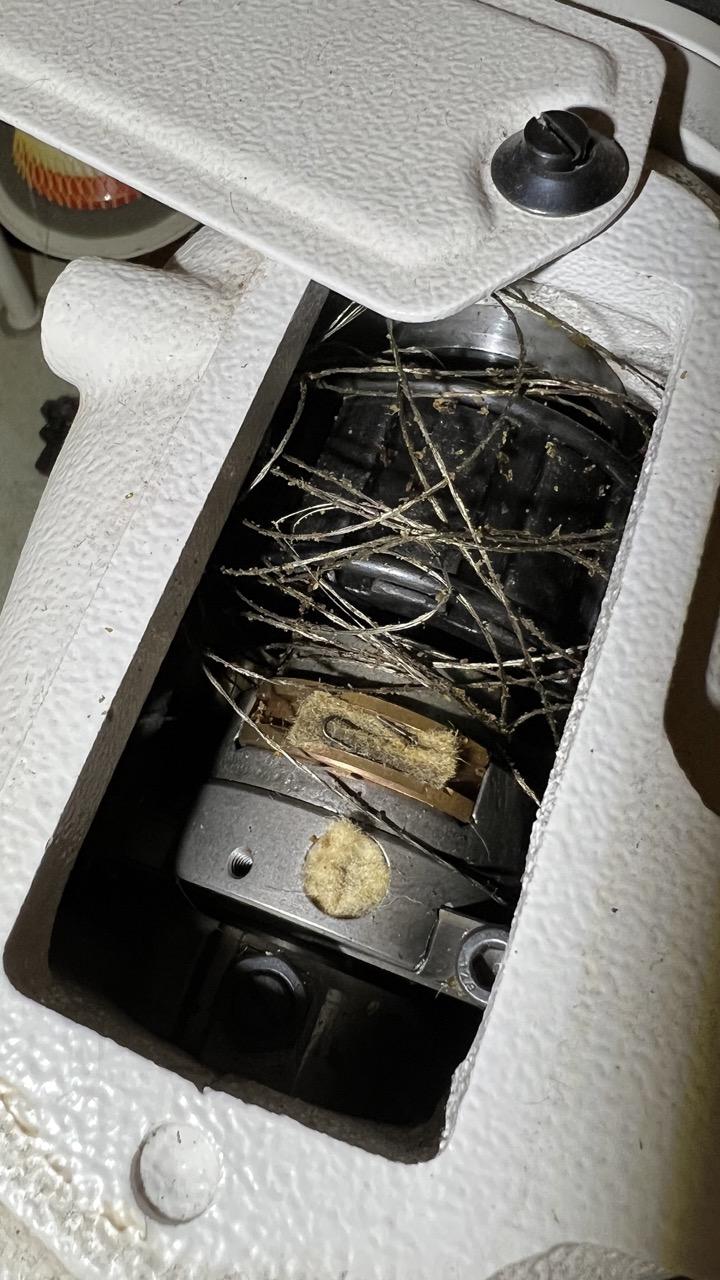
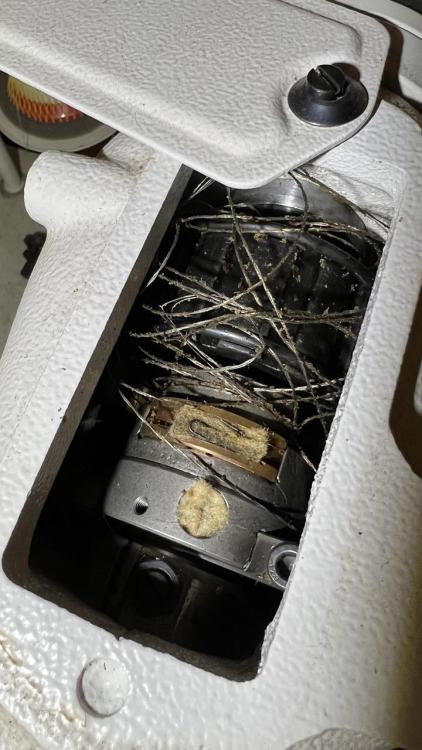
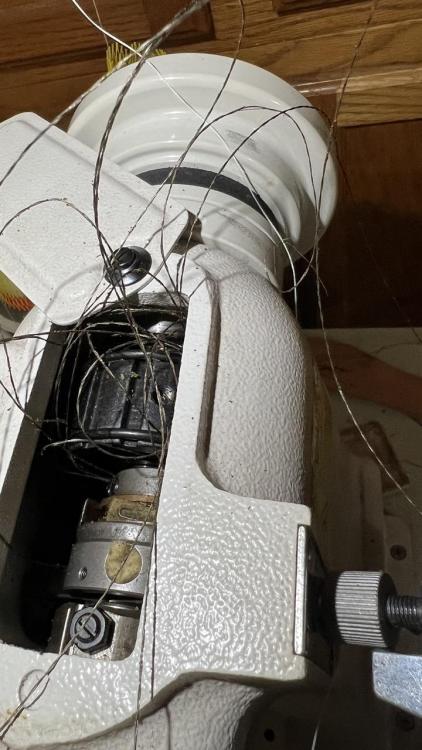
Well, been a long while since I posted here, life has a way of keeping you busy! I did finally clean up that rats nest, and have been trying to get the machine back in correct timing etc. which has been a real challenge. I feel like the timing belt is quite loose: anyone know how tight it is supposed to be, or is a large amount of slack normal? I have not found how you are supposed to adjust the feed dog timing (vertical timing is not quite right), so if anyone can point me in the right direction there I'd appreciate it. Only videos I've seen are for the 226, which this is not. The Techsew 2700 instructins have the following: 22. Adjusting the timing of feed (Fig. 19) Standard position: When the feed dog appears from the needle plate and begins to feed, the needle should move downward, and is nears the needle plate and aligns with the hole on the plate. Please adjust the position of feed cam and rock shaft crank to adjust the timing of feed. 2) Install the feed cam At first, adjust the stitch length to zero, and open the up. per cover, turn the balance wheel counter clockwise by right hand; divide two screw of the feed cam equally as the oil hold is bisector. Anyone care to translate what that even means??!!? Consew 227 instructions are not much better, and I am not sure they actually relate to the feed dog vertical timing: TIMING OF THE VIBRATING PRESSER FOOT This is the normal timing when, turn the balance wheel toward you, after lowering the presser bar lifter, the vibrating presser foot should reach the feeder earlier than the needle eye comes to, and when the needle raises, the vibrating presser foot should leave the feeder after the needle eye has left the feeder. This is due to the reason that the vibrating presser foot must tightly hold the goods while the needle is passing the goods for avoiding irregular stitches. To adjust this, set the lift of the alternating presser feet to equal, loosen the two screws (3, Fig. 27) and adjust the rotating position of the cam (4, Fig. 27) faster or slower as may be desired, and tighten the screw. Any help is greatly appreciated!!!
-
Metal zips mostly for aesthetics, but also my perception that they will last longer. I'll let you know what I finally end up doing, hoping for more opinions and suggestions before I dive in again.
-
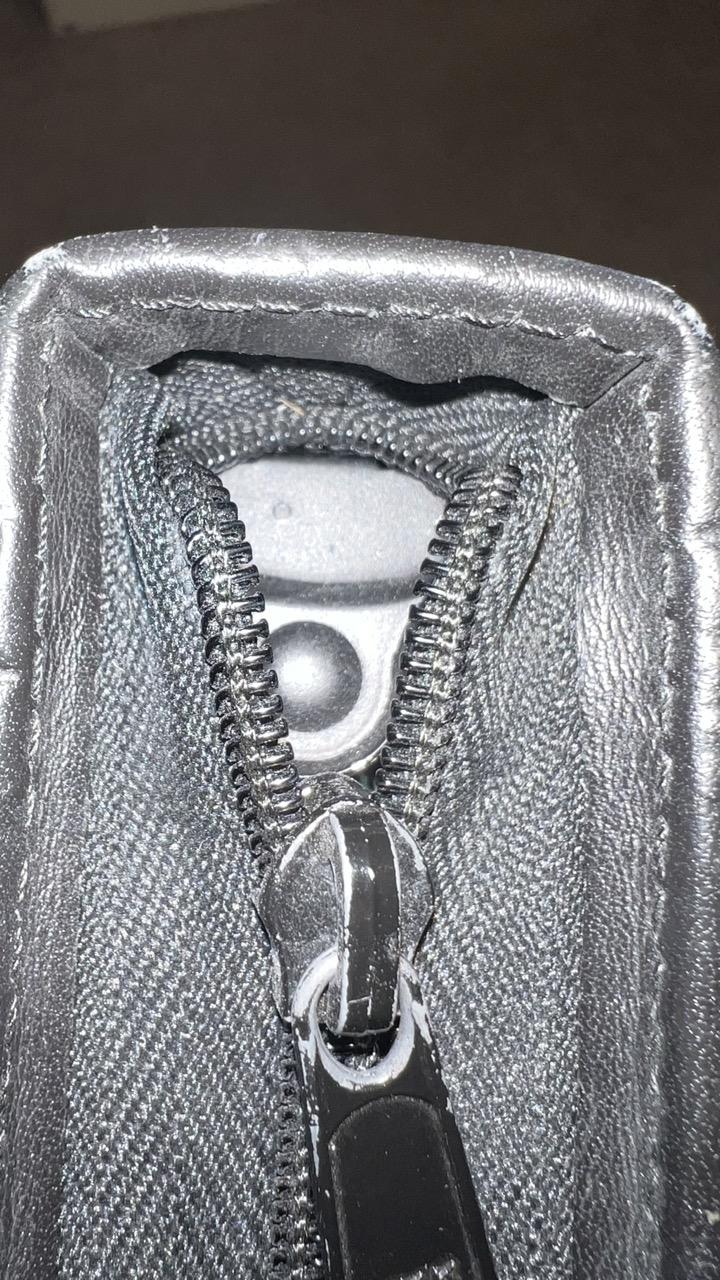
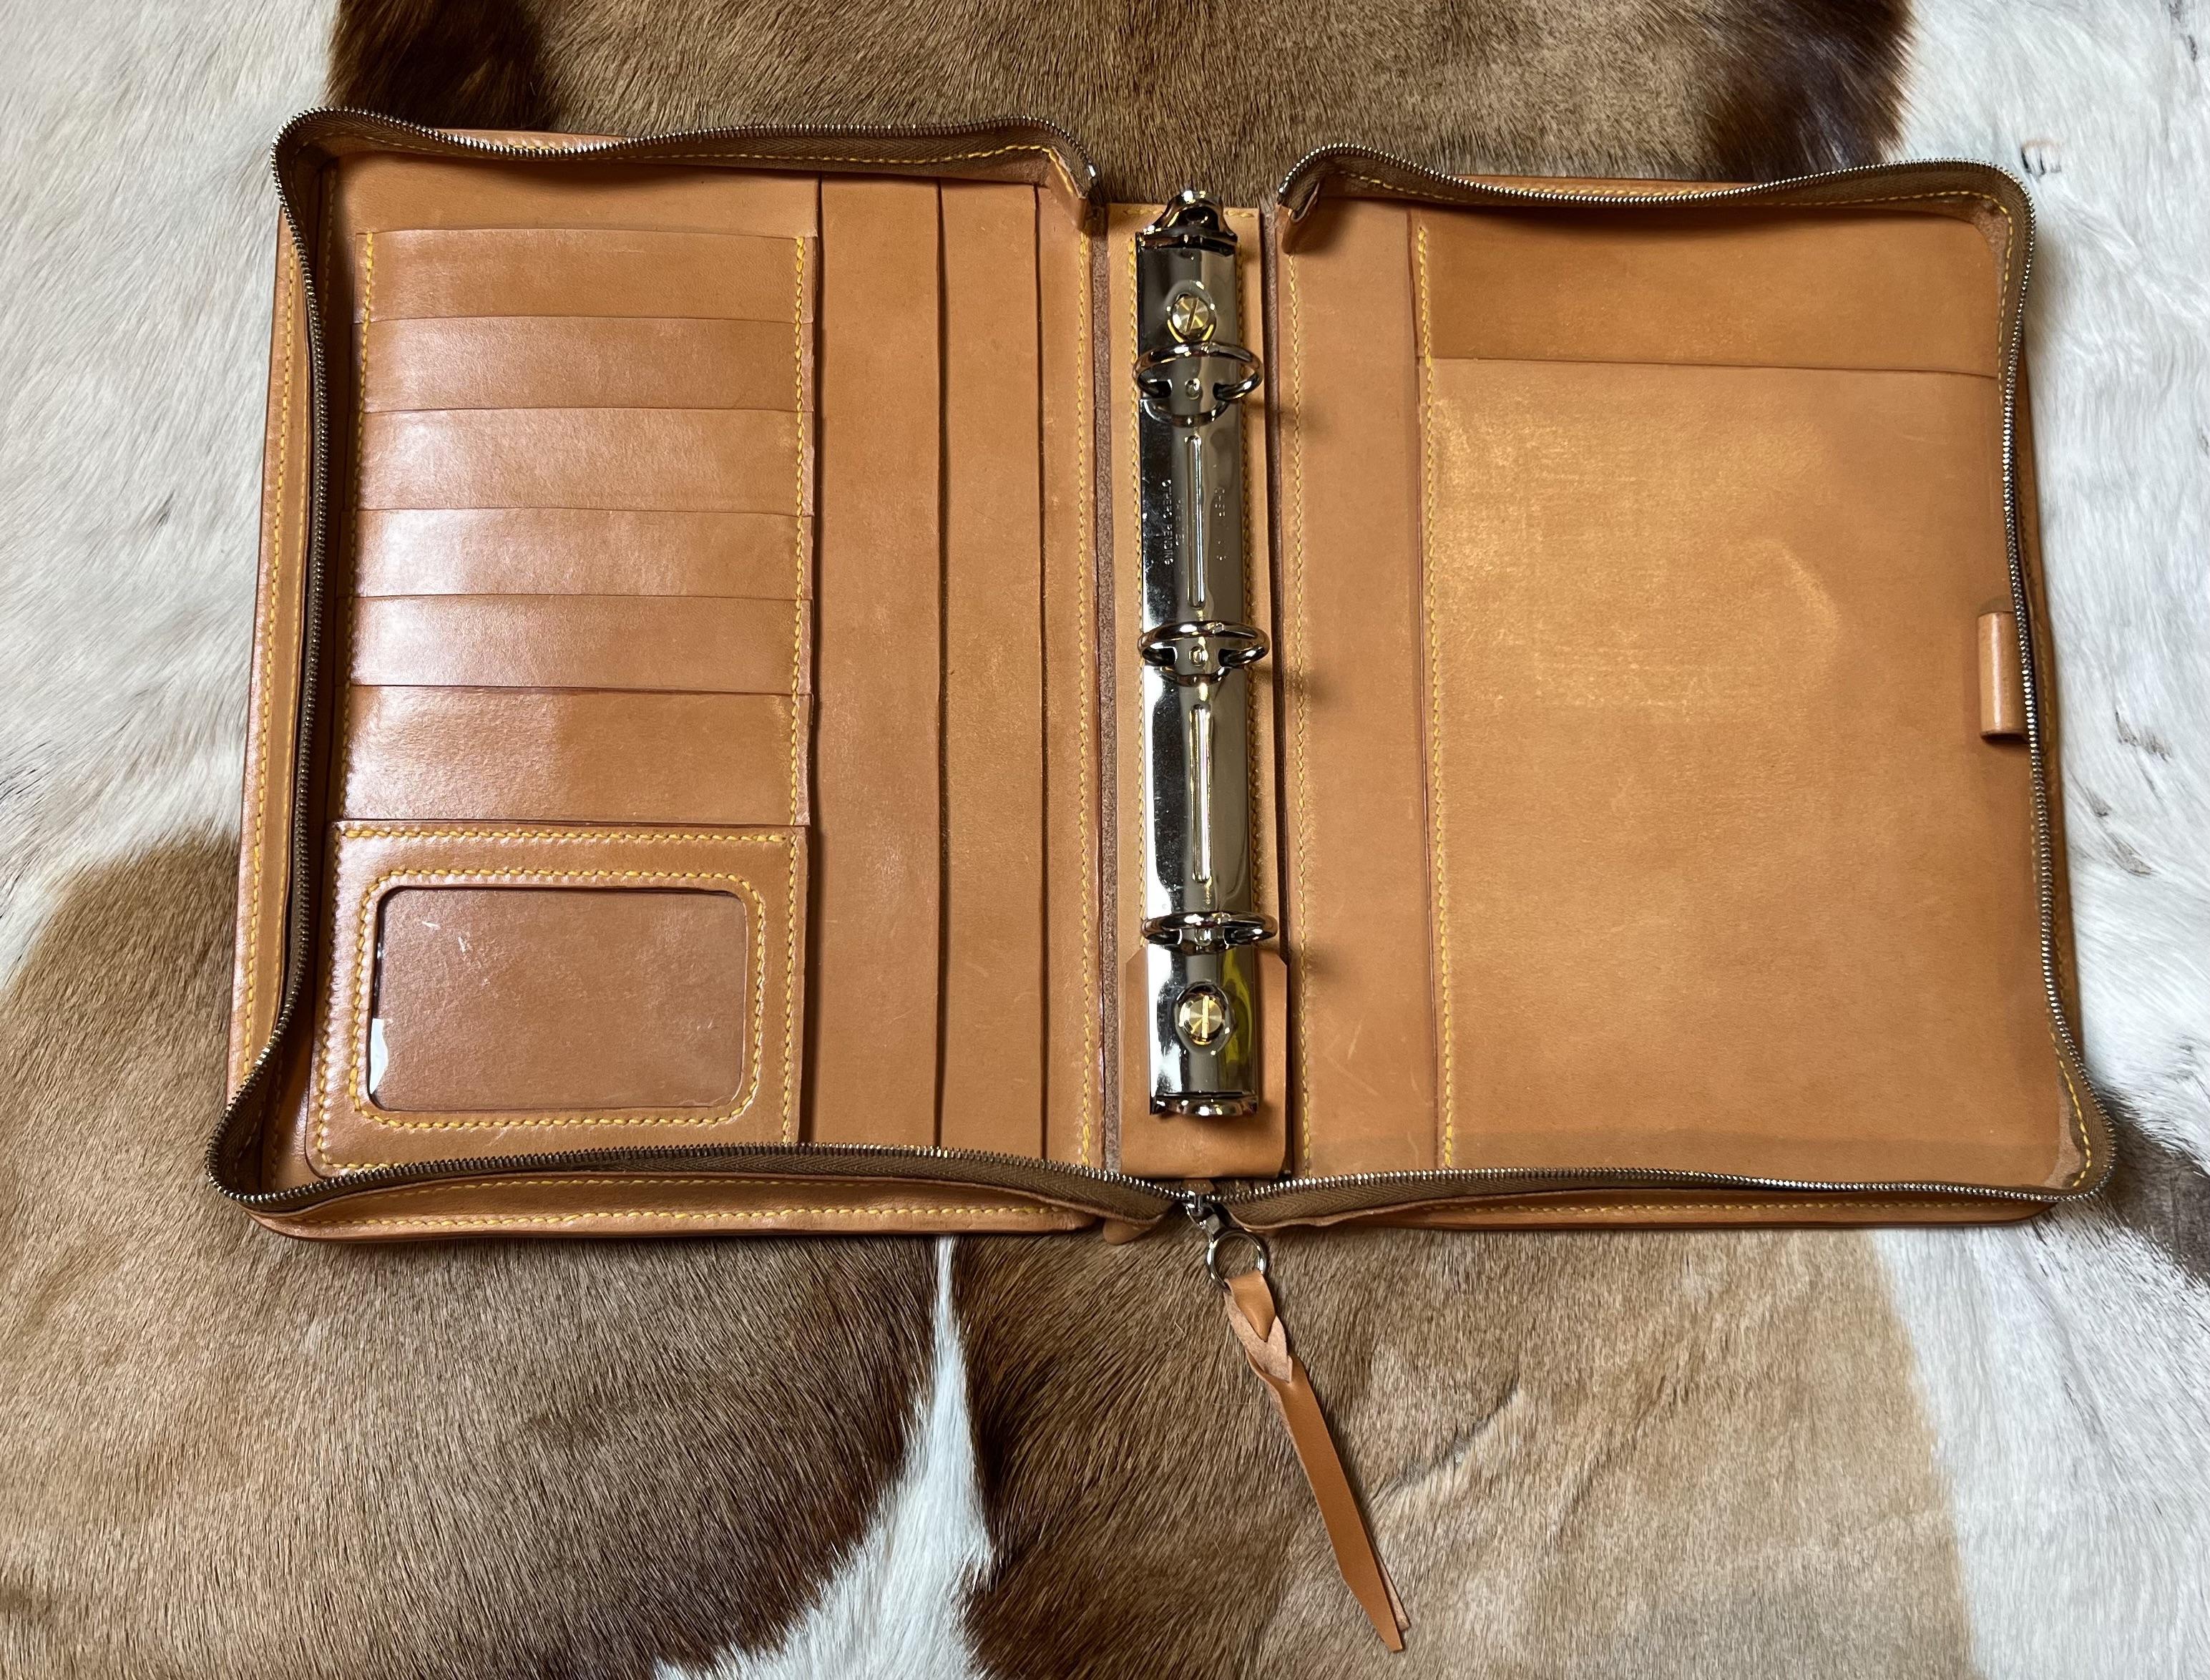
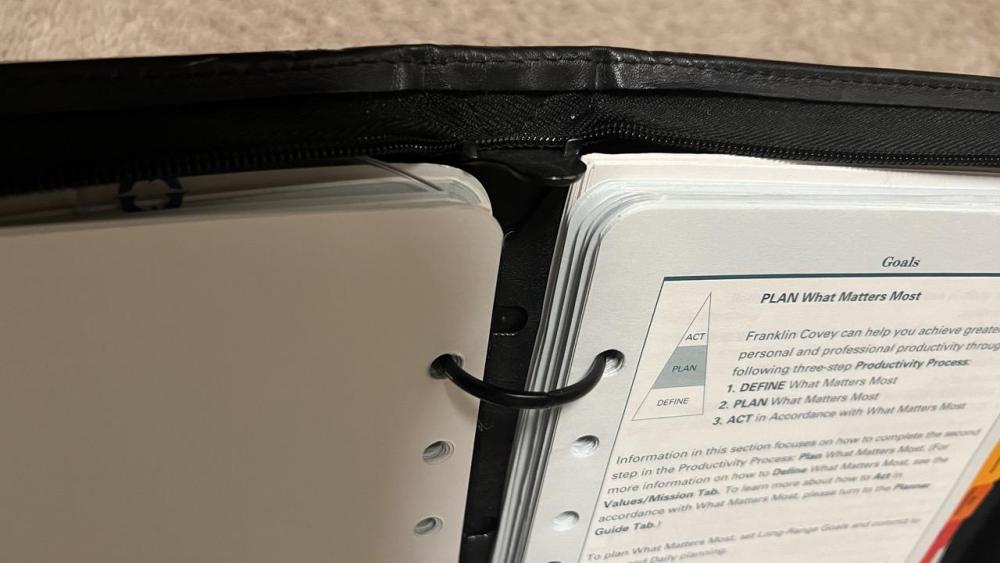
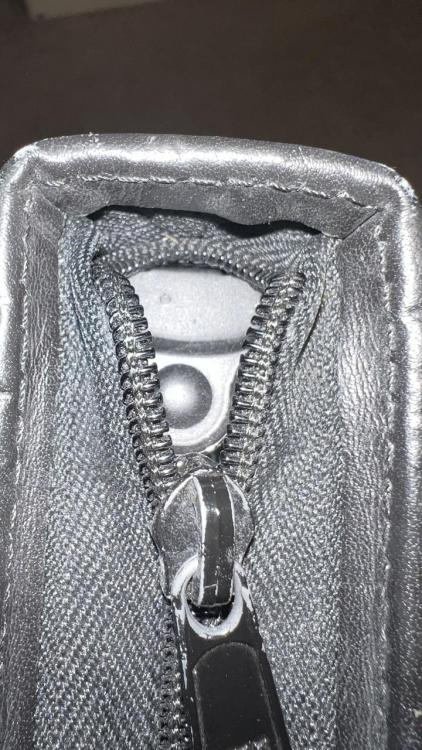
I've been trying to make a zippered portfolio gusset for a 3 ring binder, but have not been having luck. Tried using the instructions from the Making Cases by Stohlman, but it is resulting in really tall dimensions and a zippered gusset that just won't open all the way up. Most commercially available portfolios use a single side of the zipper tape, resulting in a "U" shape at the top. However, the metal zippers I have (riri) will not function with only one side of the tape, as the shape of the teeth will not mesh universally. What type of zippers are you all using to accomplish this, or is there a better way? It has been really frustrating for me, and resulting in a lot of wasted leather and a very late delivery for a customer. I've tried contacting Buckle Guy regarding the types of zips available, but they seem perplexed and fixated on the fact that the image I have is of a plastic zipper, which obviously I don't want for leather, but was the only thing I had around to illustrate what I am trying to do. Thank you all for some help! YinTx
-
Merry Christmas to you, Ferg, and to everyone else as well. I pray you have a full recovery. Each day is a gift, something I get reminded of all too often. YinTx
-
Also, I've probably stitched less than 10 yards with that machine in 10 years. Feeling like I didn't get my $ out of it, lol!
-
Sorry it's been a hot minute since I posted and haven't responded. Unfortunately, I have not been able to find any nameplate on this machine at all, only a sticker that says BGMC. It is a cylinder arm machine. The user guide I have been using is from a Cowboy 3200 and Techsew 2700, not sure if that helps. I'll give BGMC a call with the numbers you gave me when I get a spare minute. Thanks much for these resources, I'll check them out. Thank you guys for the info, when I get an opportunity to get the belt replaced, I'll let you all know how it worked out! YinTx
-
@DieselTech, I'm not sure but I'm on my way to check it out.
-
Impressive build, from tip to toe. A showcasing of many different skills in there, that most of us only hope to master one of! A tip of the hat to your, sir!
-
Your bag is really nice. Where did you get the hardware? I was debating getting some off of a wrecked bag...
-
Awesome work!
-
So, I think this is called an armshaft connecting belt, it is on a Bogle (Consew 226R style) sewing machine. I've looked on the Techsew page and Google, but have not found one. I see some on Ebay for what I think is a lot of money for a belt ($80+). Can someone let me know what this is, and where to get one? I'd like to get my machine functional again. Thanks! YinTx
-
Nice work! How many hours do you think that took?
-
Came out super clean! I like the edge wrap.
-
What an awesome presentation set! So many skills in all of this. Nicely done!
-
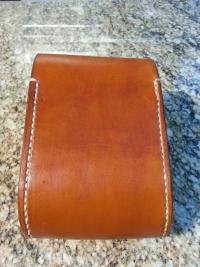
Created a wheelgun holster: Let me know what you think!
YinTx replied to YinTx's topic in Show Off!!
Thanks, I tend to overdo the gilding on leather work, and sometimes simpler is better. I just completed one with no stamping, no tooling, no dye work. Huh, kinda liked it! -
Just fantastic.
-
Created a wheelgun holster: Let me know what you think!
YinTx replied to YinTx's topic in Show Off!!
I did another, and shortened the strap just a bit, but wanted to be able to get a grip on it with gloves on, since this is going to a ranch hand in South Texas. He seemed happy. Will post a photo when I get some time on my hands, maybe next month! I like that style also, very simple design. Thanks for the compliment! I think maybe these were more popular in the past. I've altered the design a bit, and made a lined version that came out pretty well. Haven't deciphered adding a thumb break to the inside of this design, everything I've conjured up looks a bit awkward and a bit complicated to fabricate. I think that is more suited to a flatback or pancake style. Would be interesting to see this for the glock! -
Created a wheelgun holster: Let me know what you think!
YinTx replied to YinTx's topic in Show Off!!
I appreciate that. Lots of wrecked leather to get decent at stamping, still not the best, but it is passable! Thank you. Yea, this one I think would be mostly suited for ranch work, camping, hunting etc. I've done a few more designs with the suggestions, and tried my hand at thumb breaks, but I'm not sure this style works with a thumb break very well. Flat back and pancake holster designs seem work pretty well for thumb breaks, but I'll keep learning.