YinTx
-
Posts
3,794 -
Joined
-
Last visited
Content Type
Profiles
Forums
Events
Blogs
Gallery
Store
Everything posted by YinTx
-

Help! Wanted Techsew Stitching Nirvana, Got The Blahs Instead
YinTx replied to YinTx's topic in Leather Sewing Machines
Update just to show video of binding on the Techsew 4100. There are two videos since I had to make a second take to get the additional information in. I have also been able to get the smaller machine to handle the 69 thread, but not very well. Still looking for a replacement bobbin spring for a BGMC, a close variant to the Techsew 2700, so if anyone knows where I can get that part, please let me know. First Video of Techsew 4100 binding problems: Second Video of Techsew 4100 binding problems: YinTx -
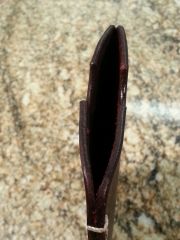
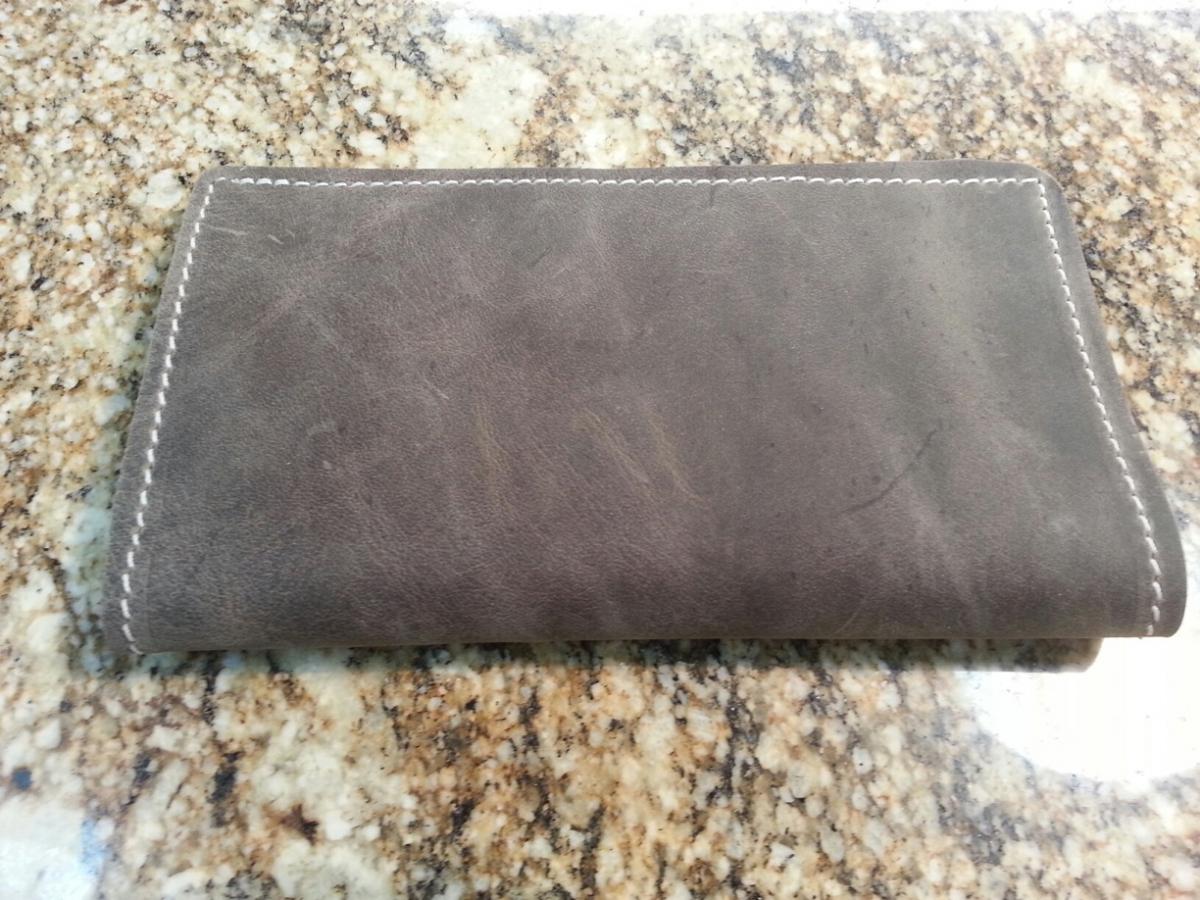
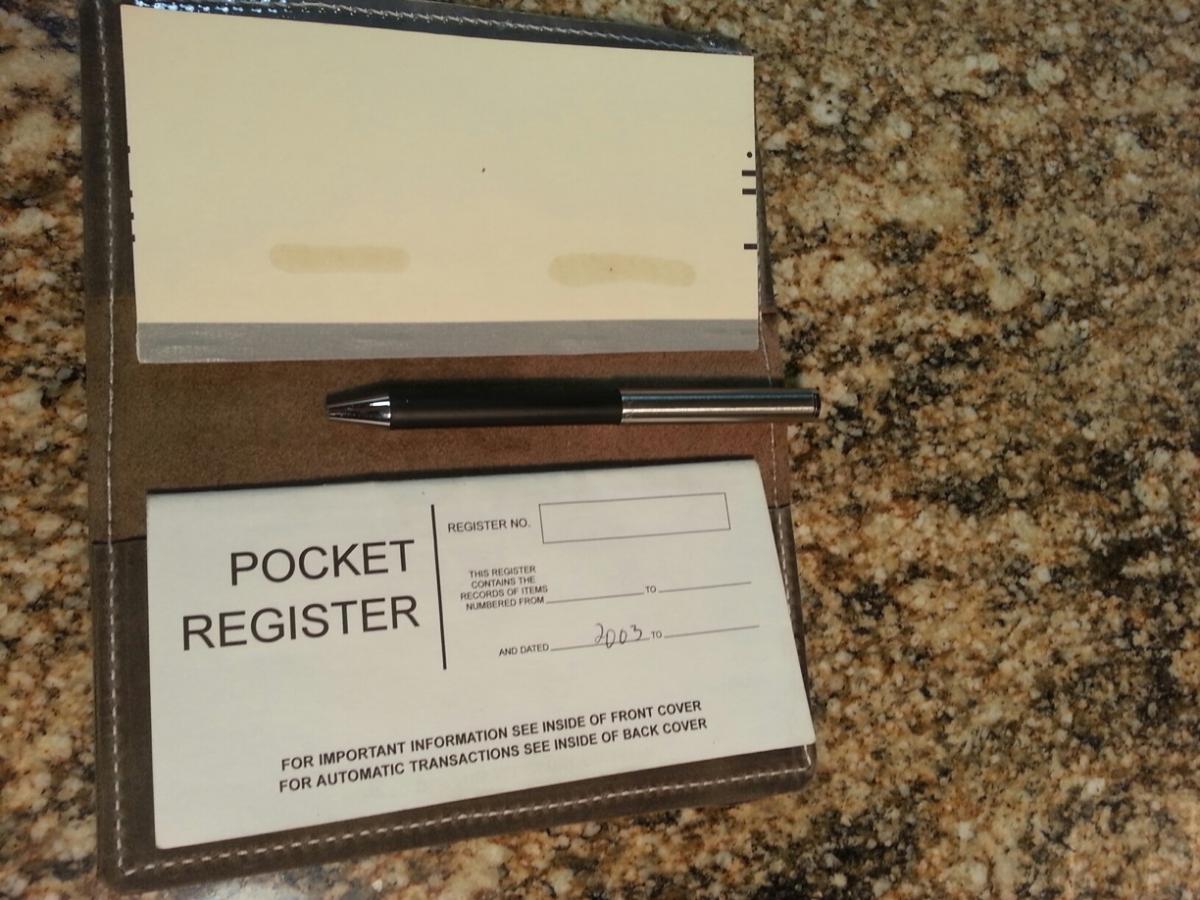
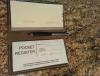
Check Book Cover
YinTx replied to YinTx's topic in Purses, Wallets, Belts and Miscellaneous Pocket Items
Thank you all for the positive comments! -
First thing I have ever completely stitched on the machine. Still need to replace the bobbin spring to deal with thread tension issues, and kind of messed up the plastic carbon copy cover, but for my daily use I think it will be functional. Debating putting edge coating. Open to suggestions for improvement as always YinTx
-
Consew 227 Needle Hitting Bobbin Case
YinTx replied to jessie1129's topic in Leather Sewing Machines
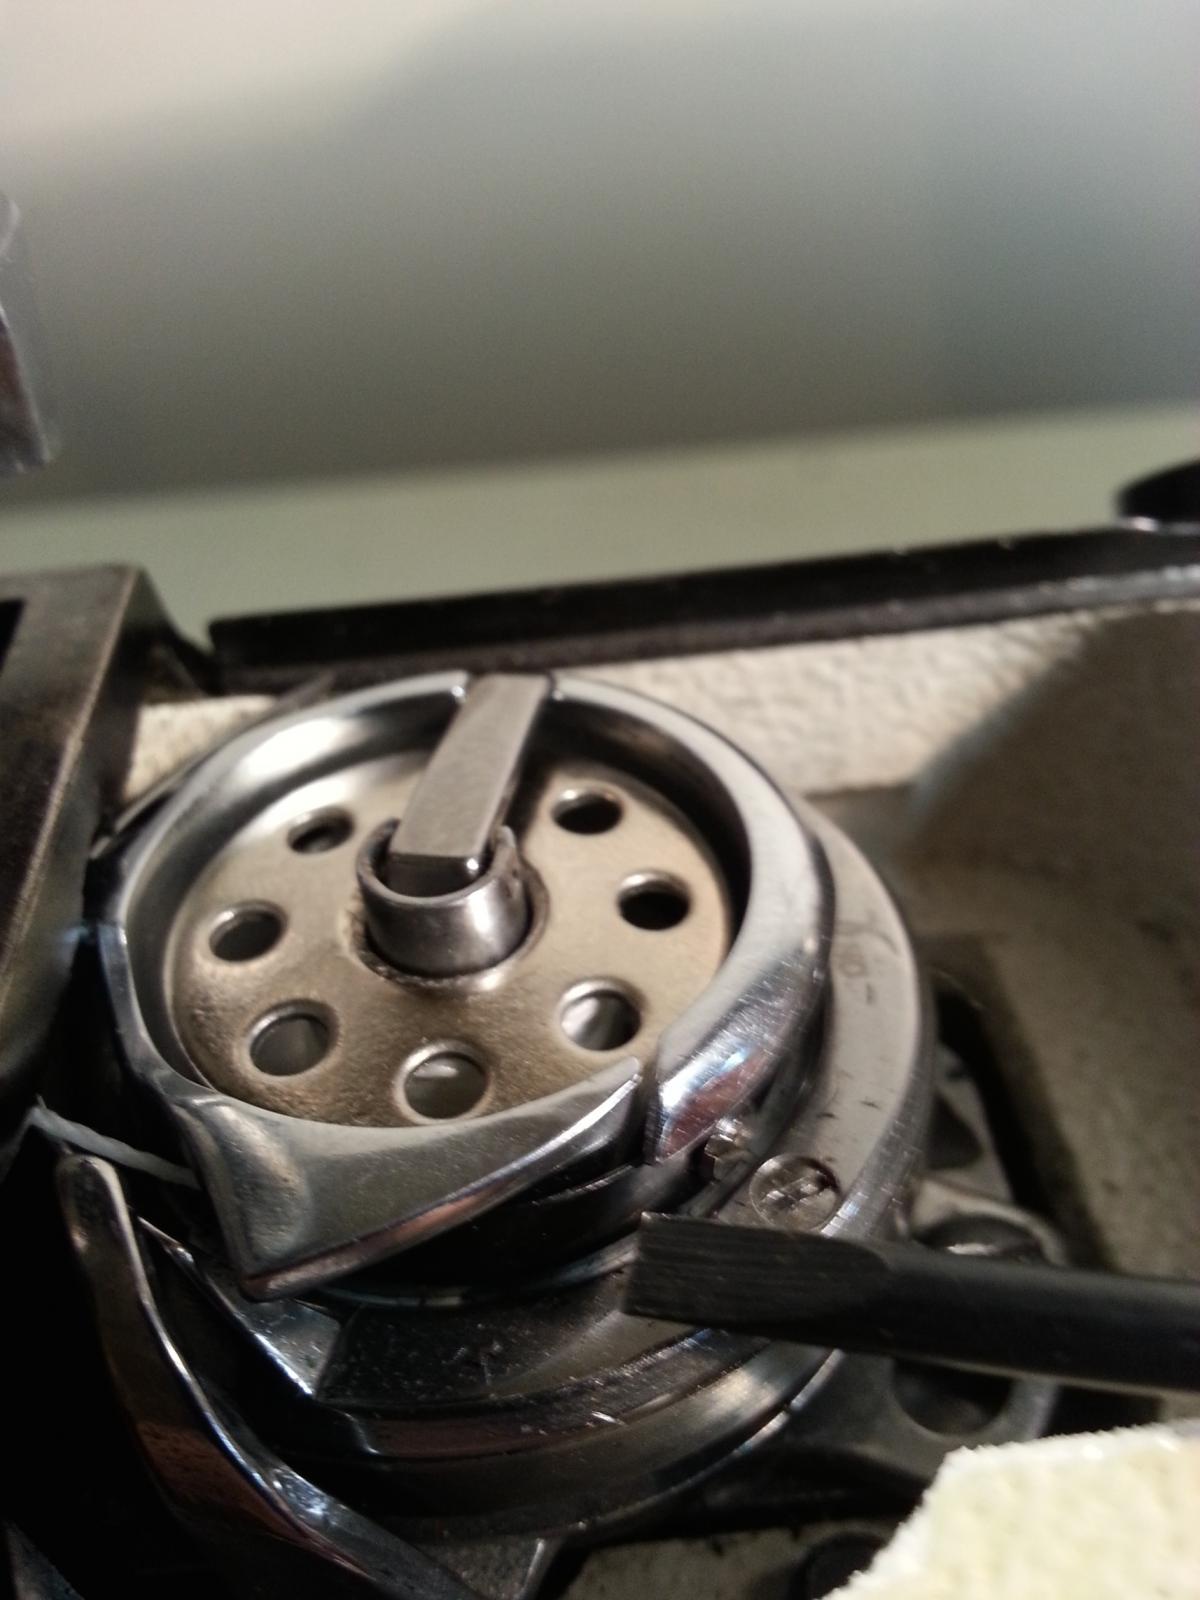
The more I looked at the machine in operation, the more I became convinced there was something wrong with the tensioner spring in the bobbin case, so I removed it and tried to flex it. Not really a spring steel metal as you might expect, since it bent easily. So I gave it a bit more of a curve, and reinstalled it. Voila, there was a bit of resistance on the bobbin thread once again, and I could adjust the tension by tightening/ loosening the screw. Success there! I feel the tension is still uneven as the knots don’t alway sit correctly on a single run of 2 foot stitching, but it is much improved. If I can find a new one to replace it, I will. Any ideas on further improving tension consistency would be appreciated. Thanks, YinTx -
Some Things Ive Been Doing
YinTx replied to broncobuster's topic in Purses, Wallets, Belts and Miscellaneous Pocket Items
Fantastic work! -
Help! Wanted Techsew Stitching Nirvana, Got The Blahs Instead
YinTx replied to YinTx's topic in Leather Sewing Machines
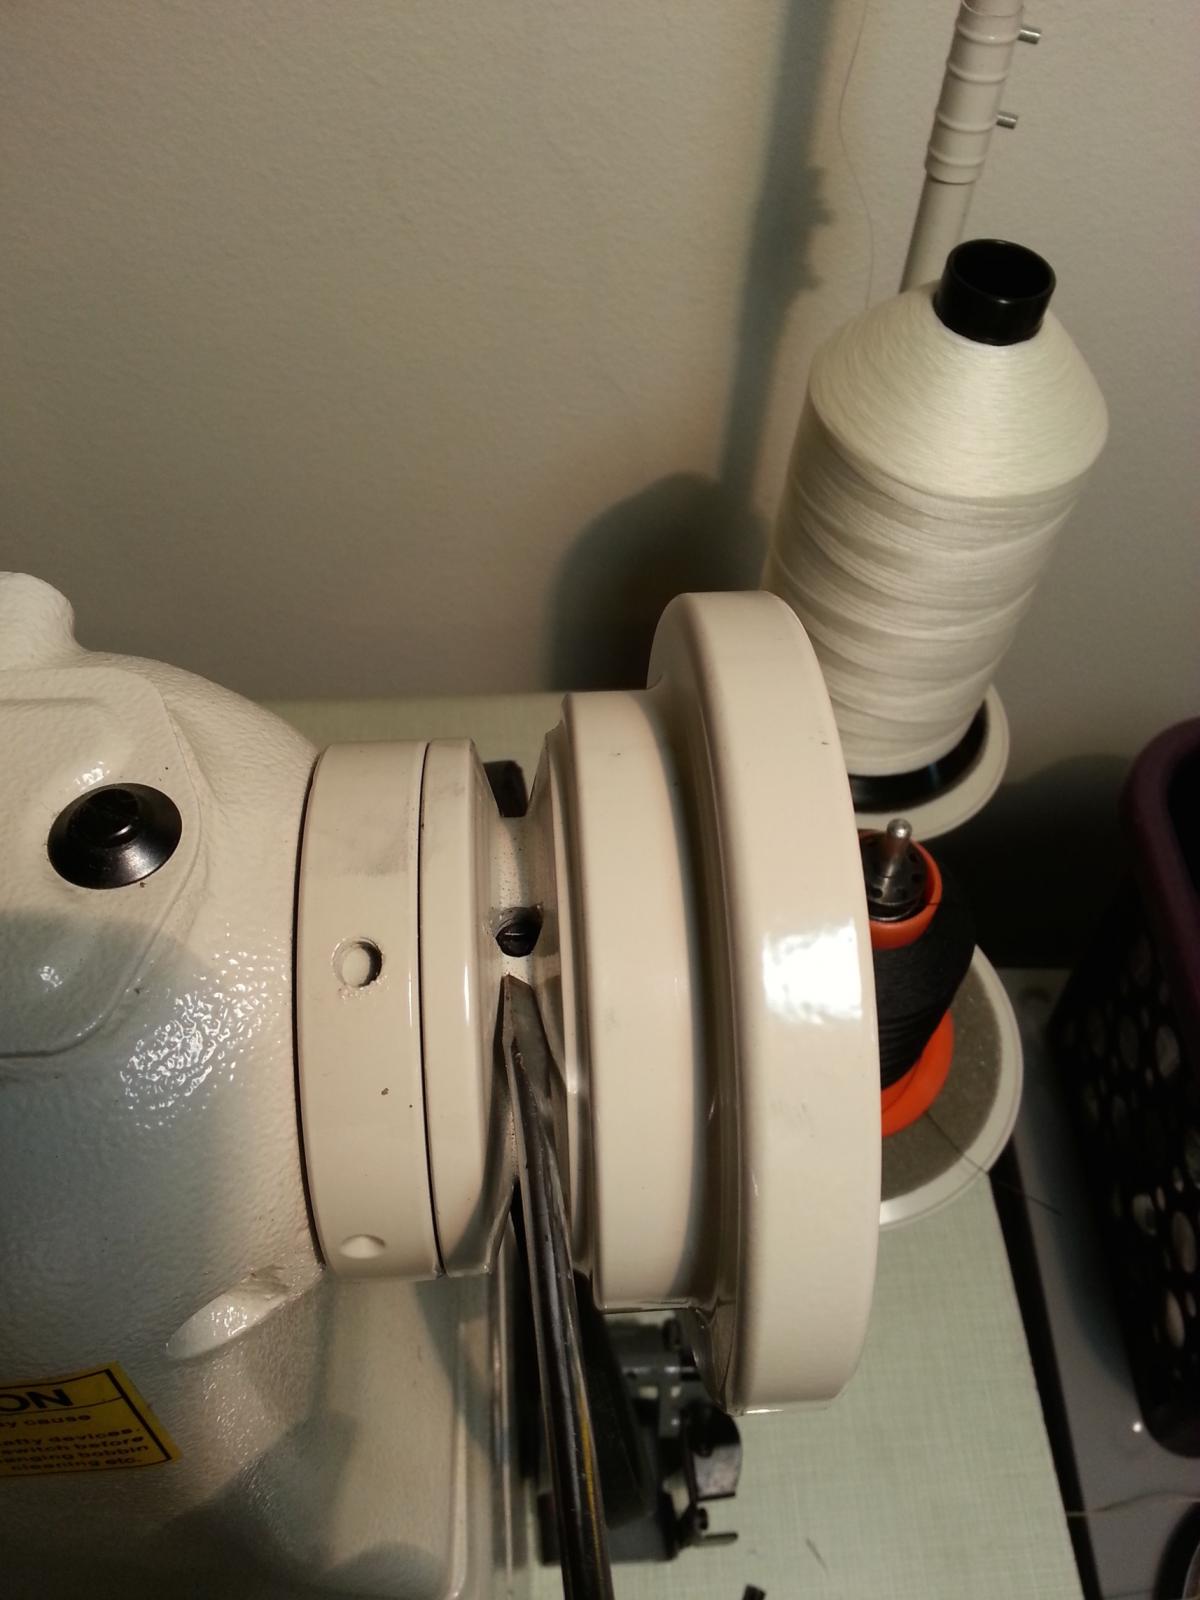
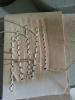
Update on the BGMC 2700 Variant (similar to Techsew 2700)! The more I looked at the machine in operation, the more I became convinced there was something wrong with the tensioner spring in the bobbin case, (photo, with screwdriver pointing it out) so I removed it and tried to flex it. Not really a spring steel metal as you might expect, since it bent easily. So I gave it a bit more of a curve, and reinstalled it. Voila, there was a bit of resistance on the bobbin thread once again, and I could adjust the tension by tightening/ loosening the screw. Success there! I feel the tension is still uneven as the knots don’t alway sit correctly on a single run of 2 foot stitching, but it is much improved. If I can find a new one to replace it, I will. Any ideas on further improving tension consistency would be appreciated. I also observed the shaft in the end of the handwheel while the machine was running and not piercing the leather. The handwheel was slipping on the shaft, and not at the safety clutch as I had originally presumed. So I removed the hand wheel, and noted the screws that secure it to the shaft (again, photo with screwdriver pointing it out) were not even aligned with the flat spot on the shaft. Realigned, tightened screws very well, and once again, voila, success! Punching through hard veg tan once again, no problem. I have also lowered the needle to change timing between the hook and the needle. So I seem to have the smaller machine running stitches with larger thread (135 is the only one I have tried so far). Will change out to a lighter thread tomorrow and see how that works, hopefully I have discovered most of the issues and can get back to work with this machine. Will try to take a video of the Techsew 4100 later as well, to illustrate where the binding seems to be occurring in there and update on that when I have done it. YinTx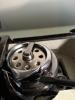

-
 Really really nice. I like it!
 -
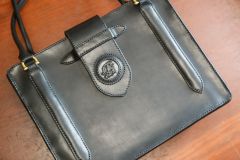
 Thank you all for the comments. I really like the color of the other one better as well, but this tan has been a soft spot for me as well. Plus I figured there will be preferences out in the real world when I try to sell. I plan to make one in a royal blue as well, to see how it turns out. YinTx
 -

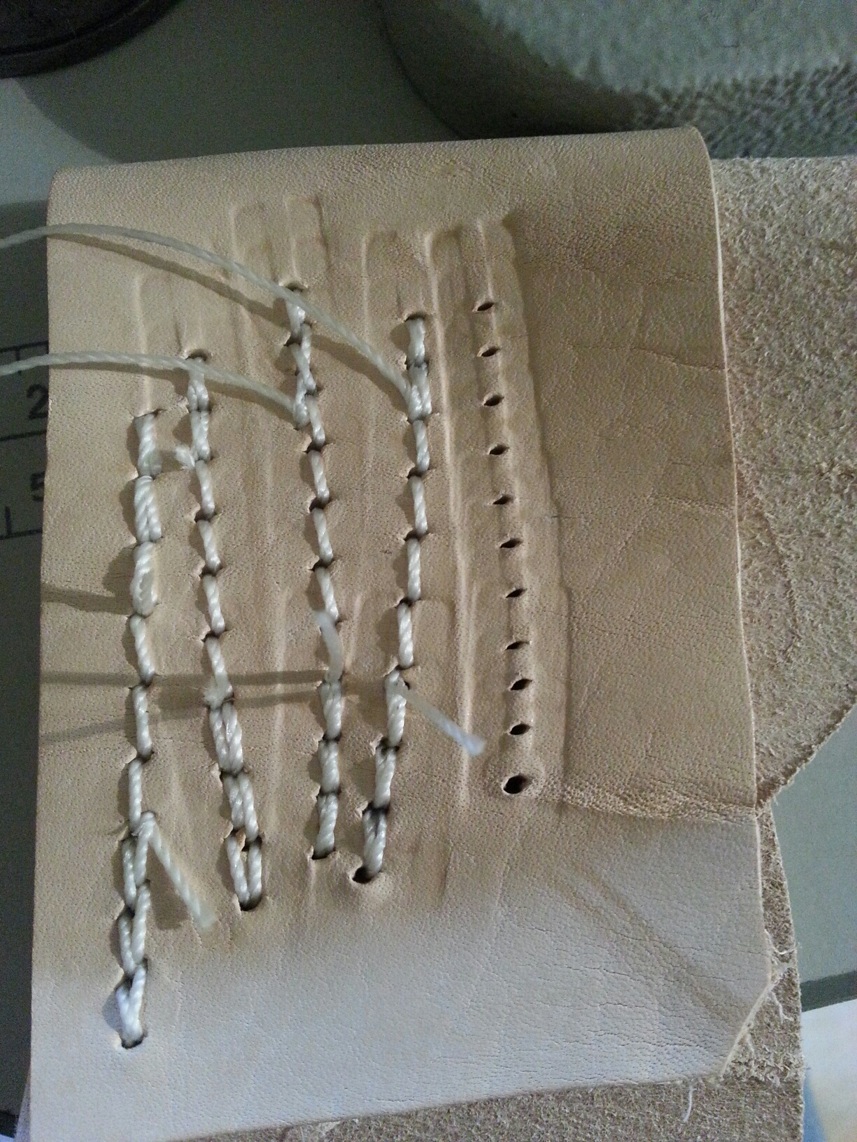
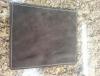
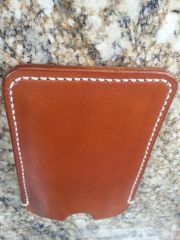
From the album: Second Attempt Cell Phone Slip Case
This is the backside of the stitch, which I am not happy with. I seem to be having issues keeping these stitches even. Any suggestions?© YinTx
-
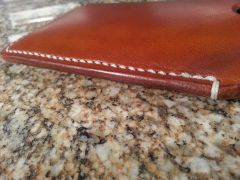
From the album: Second Attempt Cell Phone Slip Case
© YinTx
-
-
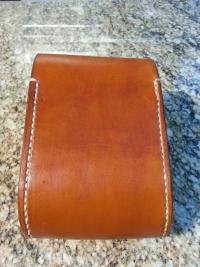
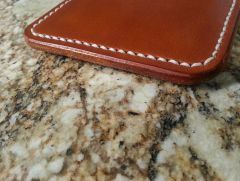
From the album: Second Attempt Cell Phone Slip Case
View of bottom and corner stitching, improved I think.© YinTx
-
-
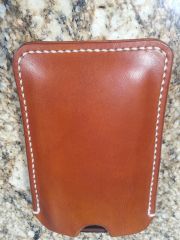
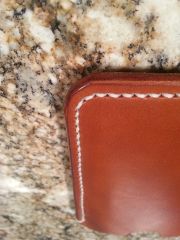
From the album: Second Attempt Cell Phone Slip Case
Second effort. Did not get too creative with the color, because I happen to like this one as is.© YinTx
-
Help! Wanted Techsew Stitching Nirvana, Got The Blahs Instead
YinTx replied to YinTx's topic in Leather Sewing Machines
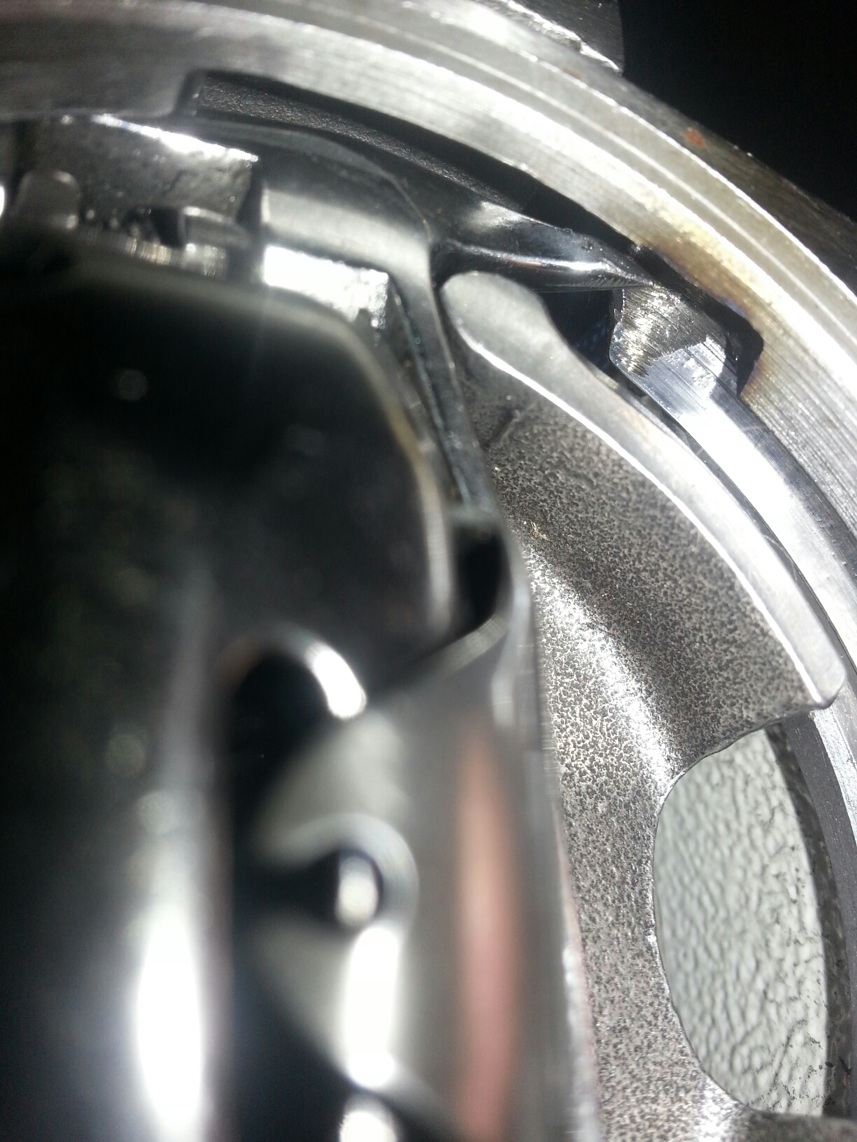
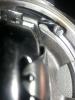
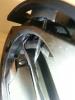
JLS, No offense taken at all. Unfortunately my newfangled laptop doesn't have software to let me draw arrows and numbers on photos, or I would. The clamp is actually above the collar, the collar pushes up on the clamp, which is where the spring resides. The roller I mention getting pushed into the casing is attached to that clamp. There is normally about a 1/64" gap between the roller and the case, and it generally never touches until it binds. The roller moves freely on its own until it is jammed into the case. The collar should go straight up and down, as the rod does not change angles. Any change will cause the bushing in the collar to bind on the rod, hence why only about 1/64" does it in. I have tried all the screws in the head to verify they are tight, unless I have missed one. I think the heat was generated by the hook impacting the race, as you can see clearly in the photo where it has chewed out a significant amount of metal from the race. It is possible this is a new shuttle, since I would expect the damage to the race would be more evident on the shuttle. On the Cobra diagram I have, the roller is part #21, the bushing/collar that binds is part #7. YinTx -
Help! Wanted Techsew Stitching Nirvana, Got The Blahs Instead
YinTx replied to YinTx's topic in Leather Sewing Machines
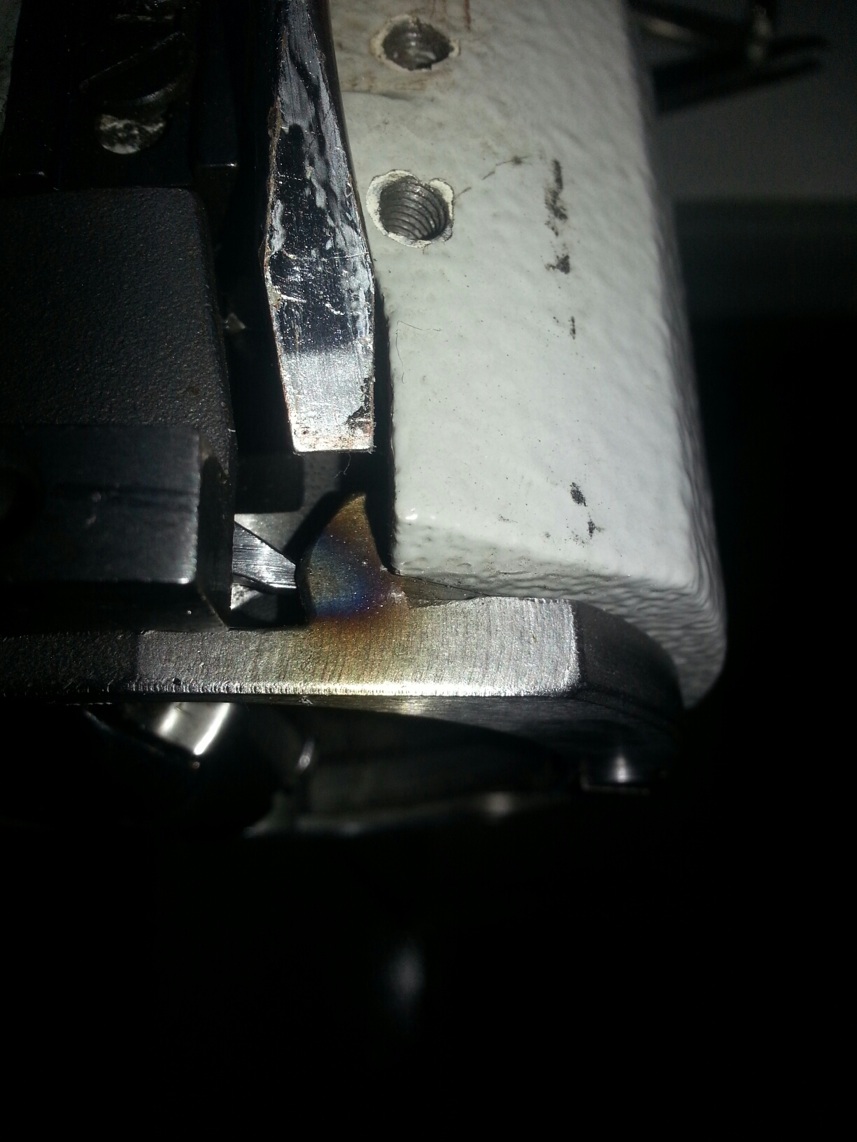
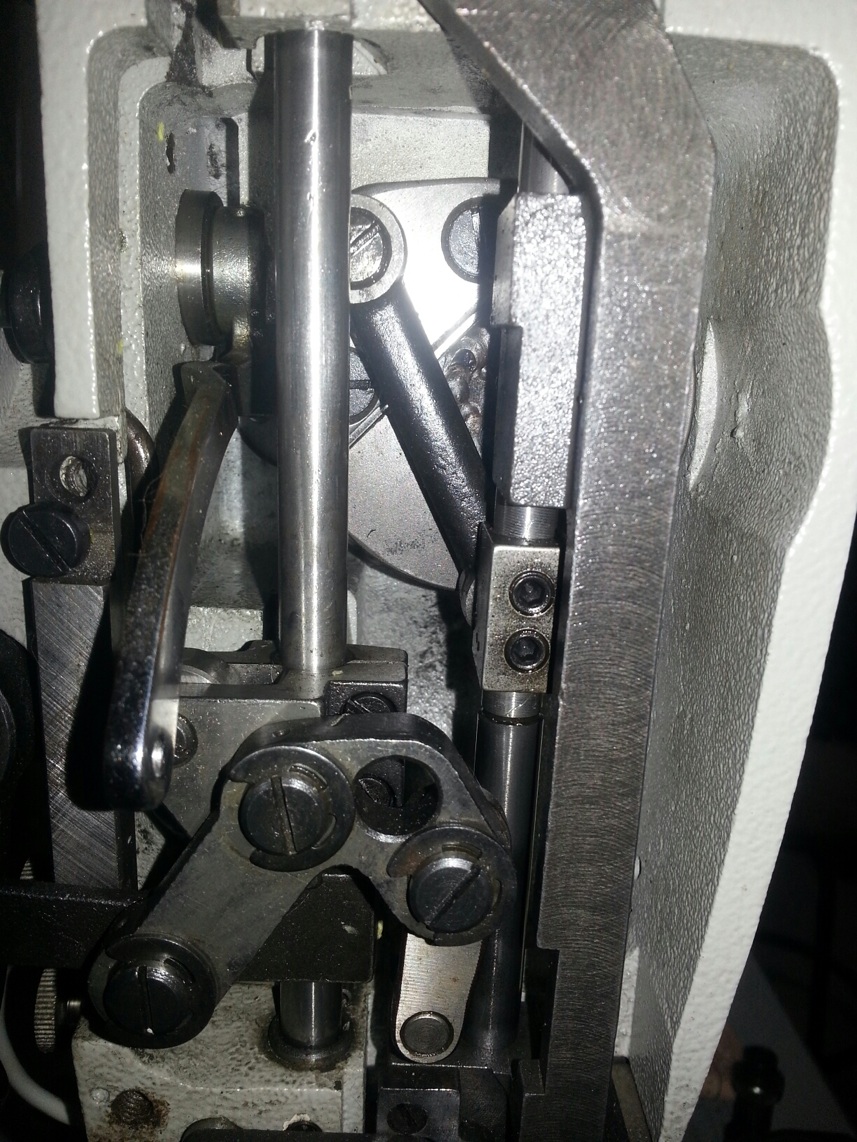
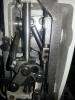
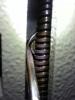
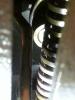
Around midnight last night, while working diligently to see where the issue may be in the Techsew 4100, came across this. There are apparently two main areas of rubbing/binding, one in the head area and one in the bobbin area. Bobbin area: When I pulled the plate off the top of the cylinder arm, noticed a heat mark on the guide around the bobbin. (see color marked steel that I am pointing to with tip of screwdriver). Looked underneath, and saw where the hook had been impacting and wearing metal from this guide (pointed to by tip of hook). This is not the only area rubbing down here from what I can hear as it turns, so something is out of alignment. Head area: Still not sure exactly what is causing this, but the collar that rides the presser foot tends to rotate about 1/64" every 3 to 5 rotations of the handwheel. This causes the roller to bind against the case and the presser foot rod to bind on the collar/bushing, and the foot jumps about as it binds/unbinds. If you lift the presser foot with the pedal, everything frees up and carries on for another 3 to 5 rotations. YinTx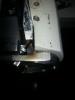
-
Consew 227 Needle Hitting Bobbin Case
YinTx replied to jessie1129's topic in Leather Sewing Machines
Northmount, Thanks for that. I did previously remove the strip entirely, it does appear to have a smooth/unbent shape, and does appear to clamp down properly when the screw is tightened. There was nothing under it to cause problems. I am tightening the one closes to the exit of the thread as it is the one that makes the strip flex. I had thought the thread was going under the tension strip, it was hard to see so I did verify, it is going under the tension strip. It is still freewheeling. YinTx -
Second Project: Phone Slip Case
YinTx replied to YinTx's topic in Purses, Wallets, Belts and Miscellaneous Pocket Items
Wild Bill: Great observation. I did backstitch on the end, but not the start. I will do so in the future to avoid the potential point of failure. Andy: You are right, I did not glue the pieces together, so resulting in the "crack" on the edges. I will do so in the future. Thank you all for the positive comments and suggestions! They will help me continue to improve my work - maybe I'll become an artist yet! YinTx -
Consew 227 Needle Hitting Bobbin Case
YinTx replied to jessie1129's topic in Leather Sewing Machines
I appear to have issues with the tension adjustment on the bobbin case as well. It does not seem to matter whether the screw is loose or as tight as possible, the bobbin free wheels as you draw the thread out. Any suggestions? YinTx -
Help! Wanted Techsew Stitching Nirvana, Got The Blahs Instead
YinTx replied to YinTx's topic in Leather Sewing Machines
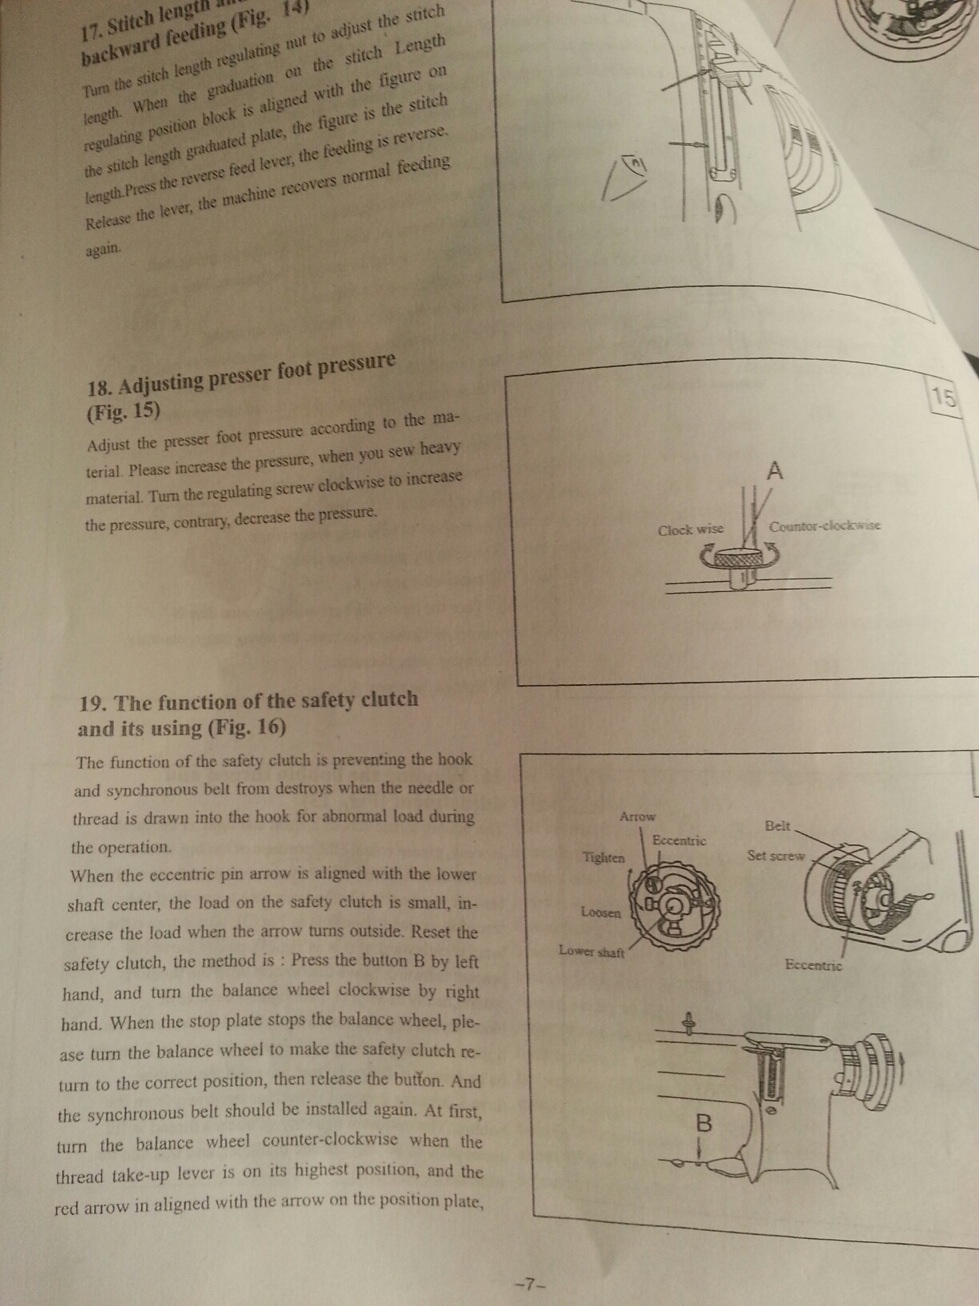
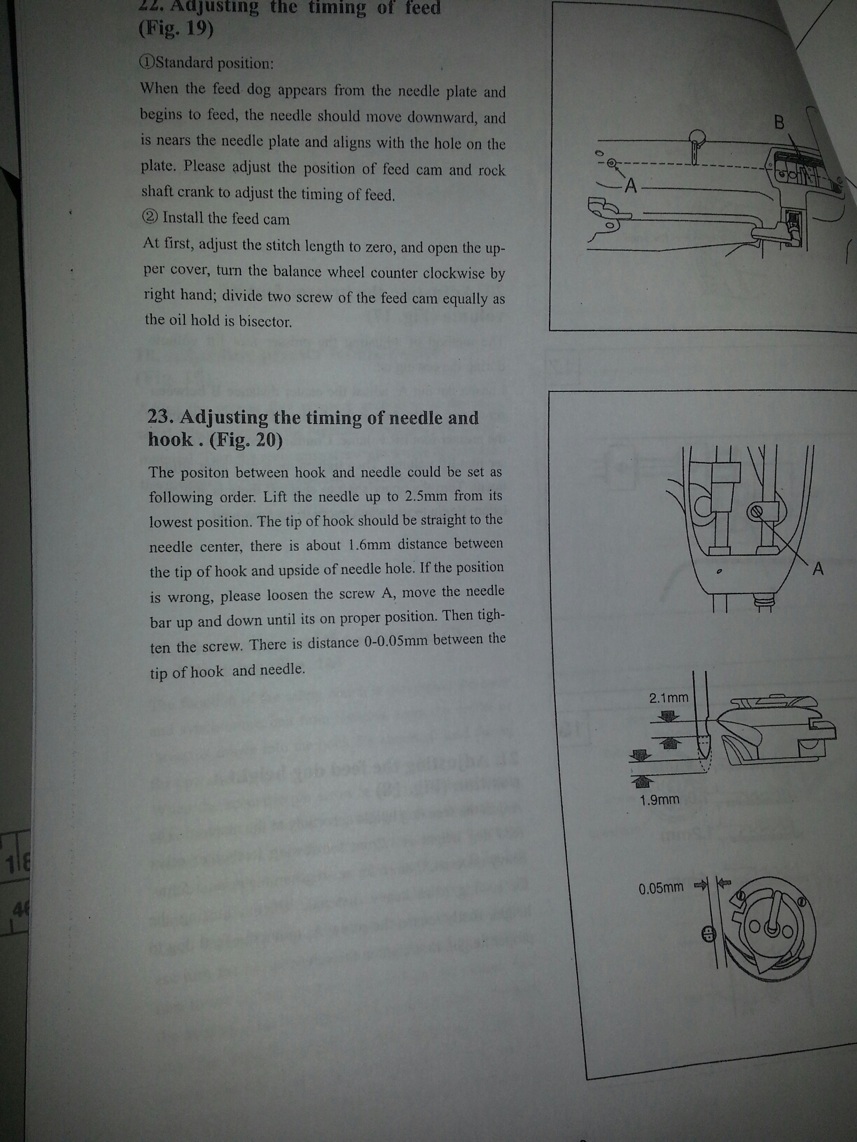
Here are the instructions for the safety clutch adjustment. If anyone understands this, please let me know and help clarify! Also, the instructions for adjusting timing, if anyone understands this, please let me know and help clarify!
-
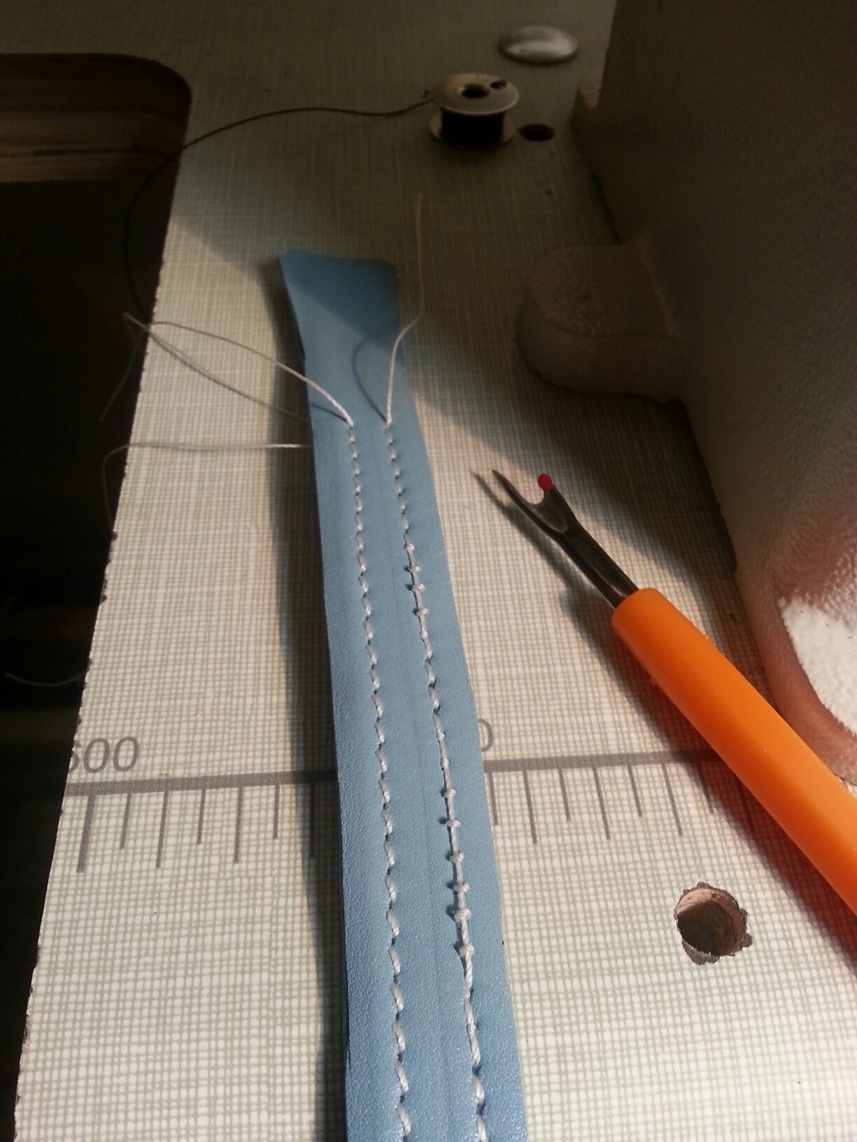
I seem to be having the same problem with a similar machine, see my post http://leatherworker.net/forum/index.php?showtopic=61016&page=2 with the photo of the blue strap done on a 2700 variant. Is this what you are experiencing? If so, when I figure it out I'll let you know why mine was doing it! YinTx
-
Help! Wanted Techsew Stitching Nirvana, Got The Blahs Instead
YinTx replied to YinTx's topic in Leather Sewing Machines
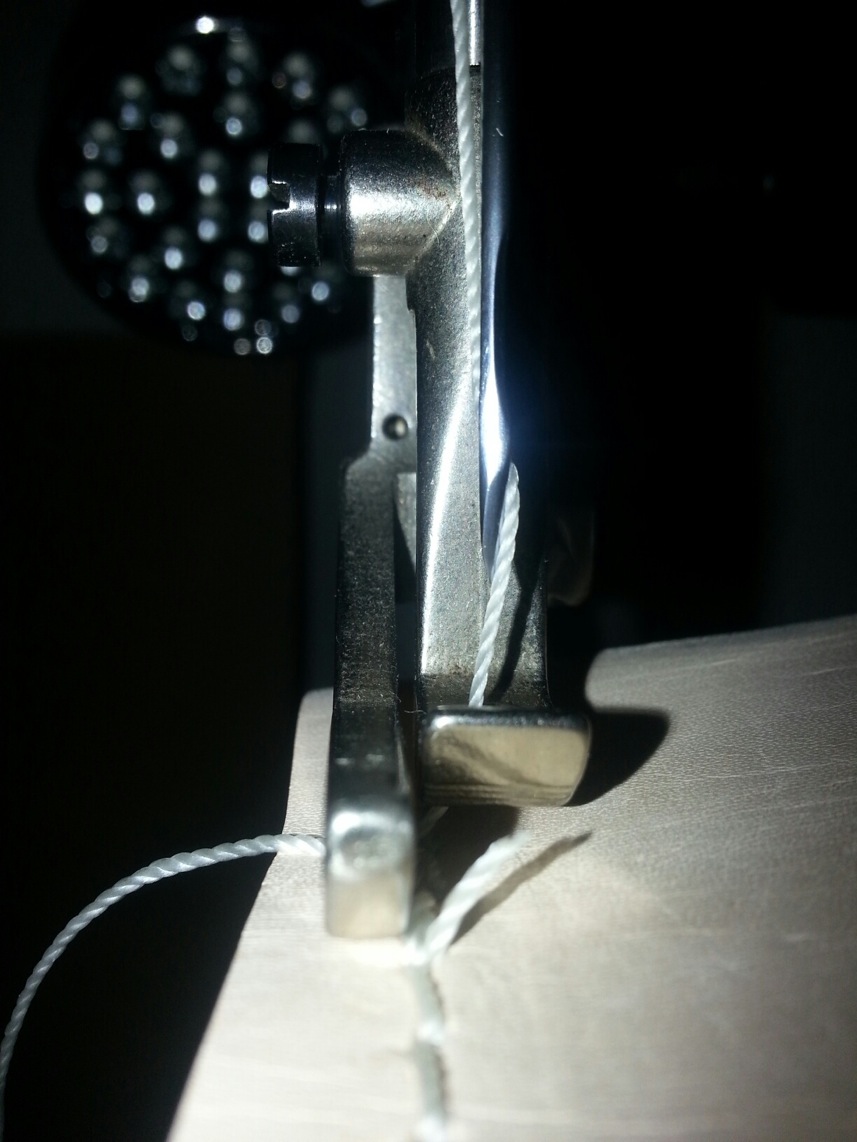
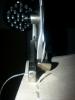
on the small machine: Fiddled around with it, since the bobbin was now spinning better. read the 227R-2 owners manual up to where they discuss the safety clutch. Very difficult to understand but I did what I could with it. Suddenly, the needle was going through the leather! I have no idea what I did. When I learn, I will type it up for sure. Since it seemed to be running a stitch, I went ahead and started on a strap. First 2 feet came out ok, so spun it around and started the second side. Not so good, results in the photo below. One thing I have noticed is that the presser foot pedal seems to bounce when the machine is running. Don’t know why. On the upside, I have some stitches now. So seeing improvement. Definitely more to go, so if any of this clues anyone on an idea, please share! Now on to the 4100: After opening, cleaning, oiling everywhere something was rubbing metal to metal, bearings, etc. I discovered a few things. While turning by hand, there is binding in the head and near the bobbin area. I discovered the presser foot spring was catching in the threads on the adjusting screw, so I turned it over, which seemed to help. Also found that a shaft is catching the same spring and binding it up randomly. This seems to lift the presser foot while stitching, in additition to making the machine hard to turn by hand. The outside presser foot jumps and jambs during the cycle when it should be down. If you hold the presser foot pedal slightly, this reduces the incidents of binding. When it does bind, the presser foot pedal is hard to push, and it releases very suddenly and everything runs fine again. Photos of the shaft binding with the spring attached. You can see slightly the spring is compressed on the top, and looser on the bottom. The round shaft directly in line with the take up lever and behind the spring appears to be what is binding. I have also attached photos of the needle position to verify it is installed correctly. The clearance in the bobbin area is so tight, I can’t imagine turning it without it binding and deflecting the needle. Perhaps I am wrong. I ran some new stitches over 4 layers of soft veg tan. Photos below. Still not entirely happy, and don’t like all the binding noises in the machine. The machine does stop itself and I have to push the presser foot lifter pedal to unbind before moving on. Because of this I have done very little practice/test stitching. Image of back of threads from 4100 on 4 layers veg tan.
-
Help! Wanted Techsew Stitching Nirvana, Got The Blahs Instead
YinTx replied to YinTx's topic in Leather Sewing Machines
Goldmine for me, thank you! I'll read them through so when I talk to Ron at Techsew, I can at least speak the same language. YinTx -
Help! Wanted Techsew Stitching Nirvana, Got The Blahs Instead
YinTx replied to YinTx's topic in Leather Sewing Machines
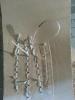
Regarding bobbin tension: that explains one thing. My curiosity got the better of me yesterday, and I decided to pull that screw out in the bobbin basket holding the flat metal strip as you can see in the photo, thinking maybe something in there was binding up the thread coming out of the bobbin. I blew it out, put it back in, and now the thread comes out much easier! I did not know that this screw adjusted tension. I have tried to search this site everywhere regarding bobbin tension, but always just says adjust bobbin tension. Everyone has photos of top tension adjustments, and how to, but never the bottom! lol. So I will put a picture on this post, you will see where I have pulled the screw out (pointing with the jewelers screwdriver), and I am presuming now that is a bobbin tension adjustment for the 2700 and variants. But I am still having issues with the machine punching through any leather without the clutch mechanism slipping where the pulley attaches to the machine. I put in a brand new size 23 leather point needle without thread in the needle, and it will not go through a single layer of 1/8" veg tan. It will run through thin thin leather though. Not sure why this is. Again, able to get some stitching with larger thread in nagahyde/pleather, still skipping occasionally, and no backstitching capabilities. No luck with the small thread and needle. I am installing the bobbin correctly, have even tried to install it backwards for assurance: nope, doesn't work installed backwards, so I have had it in correctly this whole time. Unfortunately, I have no books, drawings, DVD, instruction manuals or anything for these machines, so struggling as I go along. If anyone knows where I can get books for them, I would appreciate that info too! Also, I am in Texas. YinTx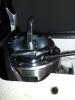
-