YinTx
-
Posts
3,794 -
Joined
-
Last visited
Content Type
Profiles
Forums
Events
Blogs
Gallery
Store
Everything posted by YinTx
-
I don 't believe you will be able to thicken a spirit dye: you will likely just get dark dye or crystals. I''ve not done it, but you can use the spirit dyes in the neutral Fiebing's antique paste, as shown in this tutorial, way down in the weeds: To save you some time reading CitizenKate's lengthy and fantastic tutorial, here is what she said: "Thanks for the kind words, all... I'm glad to know you are finding it useful. LeatherBum, for antiquing, I use the following recipe: 1/2 cup Tan Kote 1/8 cup neutral Fiebings antique paste 10 eyedroppers-full of spirit dye (any color you like); you can adjust this amount depending on how much color you want. Most of the time I use medium brown dye, but you can use different colored dyes to make just about any color of antique you want. I mix this up and put it in a squirt bottle; it makes a creamy liquid that I can just squirt onto my project and wipe into the tooled impressions with paper towels. When I wipe it off, I wipe flat over the surface, so that what is in the impressions stays there. I also try to make fairly deep impressions with the pair shader." I've also read others say never to mix Tan Kote with antique paste... so maybe just the paste and the dye? Best of luck. YinTx
-
Those look very sharp. What kind of leather did you use? YinTx
-
Also, to answer the original OP's question on leather drying out, as I had the same issue: it seems we should be rewetting the *backside* of the leather as we work to keep it from drying, not waiting until it is too dry to work. I experienced my leather tooling reversing when I added water to the front, just as this poster noted would happen. Live and learn! CowboyColonel, thanks for that info, it will help me out some. I have tried to organize tools etc before I start, but I do tool slowly as well. I have found I can do most of my backgrounding at once - should I not be doing that? YinTx
-
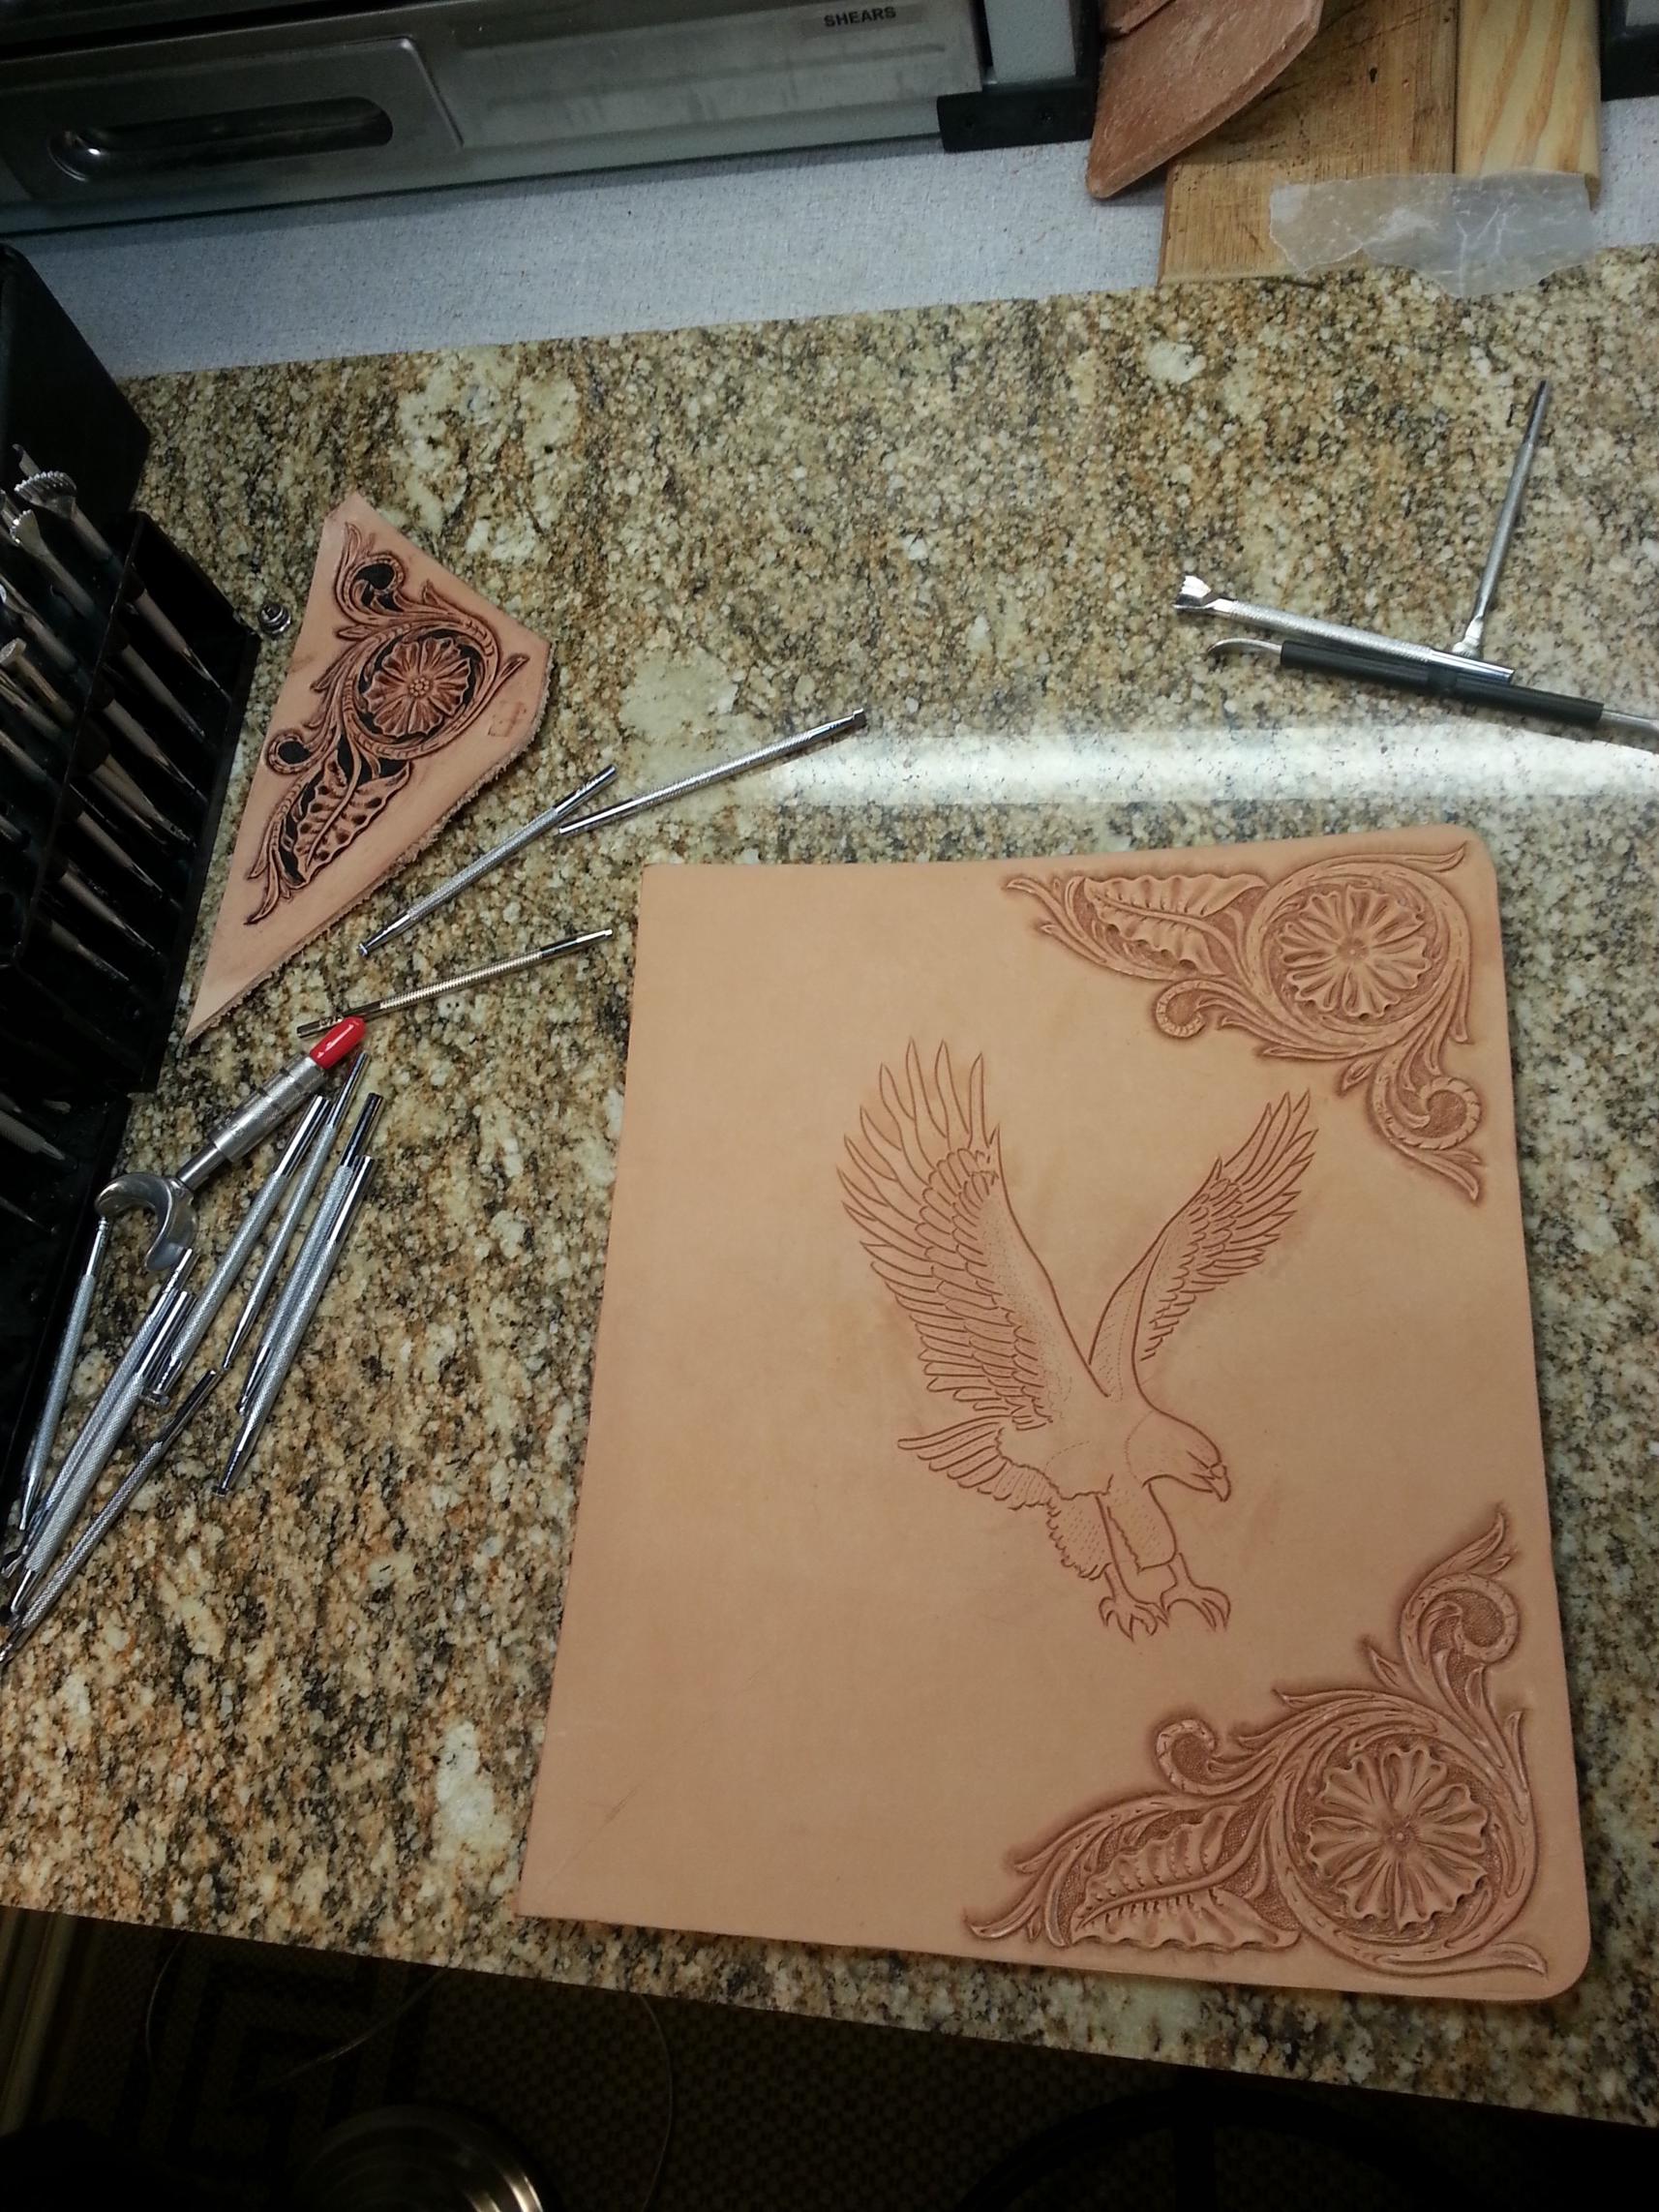
I think you might be a lot faster than me, if you can do a 6x6 piece in 2 hours. Its taken me 5 hours to get to this point, and I still have to do the eagle: YinTx

-

Saddle Lac Sadness
YinTx replied to YinTx's topic in Dyes, Antiques, Stains, Glues, Waxes, Finishes and Conditioners.
JD62, and NVLeatherWorx - Thanks for that! I have never been a painter or an artist, I suspect I'd get outside the lines if I had to color anything! Maybe in the future I'll get enough gumption to give it a try. I would like to see yours! might be some inspiration in there... But, now that I have finished up a couple of projects, I can get back to carving and tooling again. I am in the midst of the antique experiment, and I must say I am a bit surprised by the results I am getting. I am using the Tan-Kote with success, so much so I will probably be using it in the future. I think it was as I suspected, I was using it way too thick. I am pretty much wiping it dry after applying - this really cleans things up and keeps it from cracking or peeling. Still have the finish coats to put on the experiment, so I will probably post a separate thread to illustrate the differences. Even with the number of results I have, there are still a huge number of combinations that could be considered. For now, I am trying to master a couple before I branch out into new realms... i.e. learn to walk before I try to fly! (which is kinda the opposite of how I operate) YinTx -
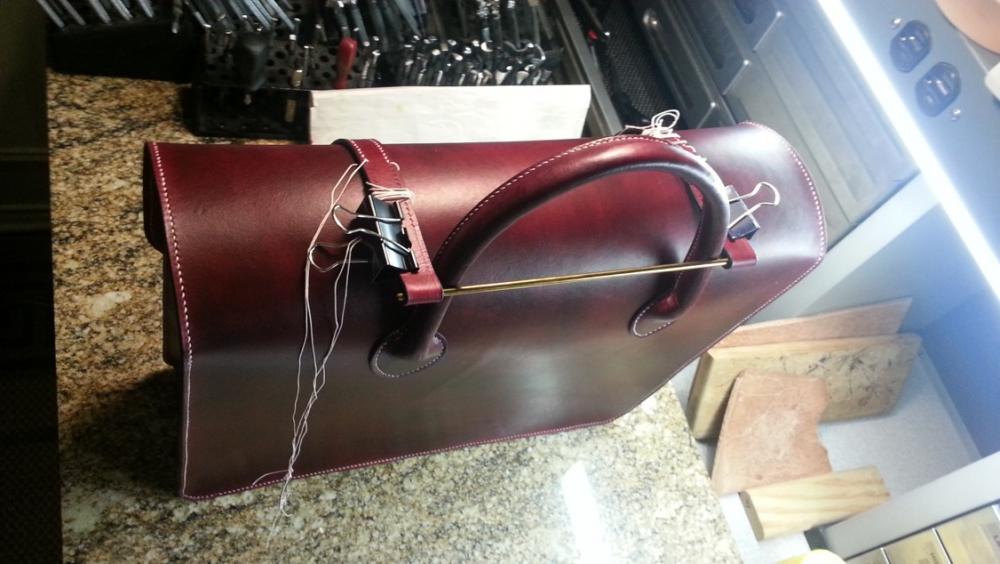
I may give the copper bar a tweak upwards to lift it off of the leather, not a bad idea. I debated putting it on the other way, but I wanted the uneven bit on the underside. Not entirely happy with the bar, since it didn't exactly come out even, and I think the music case design does not translate well to a large case like this one, so I may reserve music cases to smaller works in the future. If I tire of the bar design, I can alter the bag with a clasp or some such thing, or just replace the straps with longer ones and go with a straight bar. Thanks all for the positive comments! Now to decide on how much to price it, or to use it... YinTx
-
Yeah, I conveniently forgot about that detail! I'll see what this one does.. cold drinks tend to sweat a lot around here, so the potential is definitely there! I'll keep the "texturing" thought in mind for future creations. Your's look pretty nice, by the way. Spot on stitching. YinTx
-
 More info on build:
 -
 More info on build:
 -
From the album: Briefcases
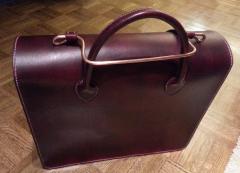
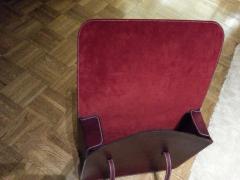
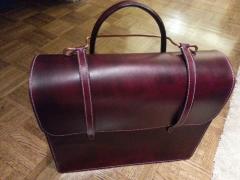
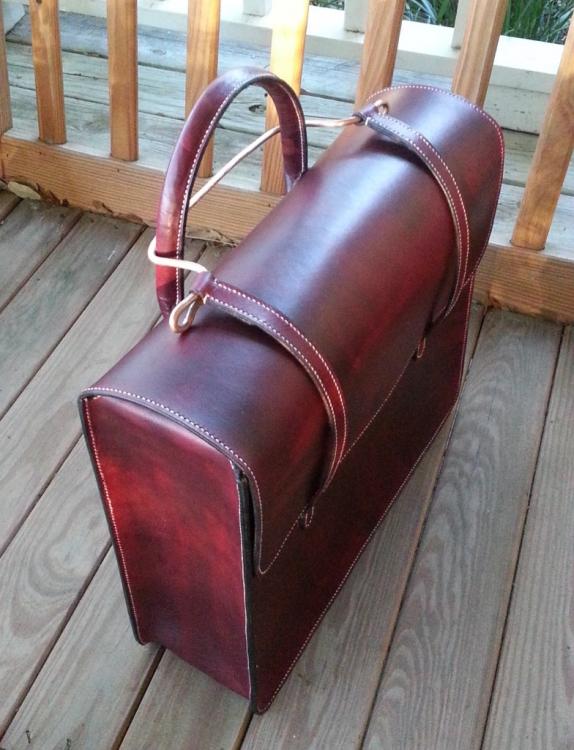
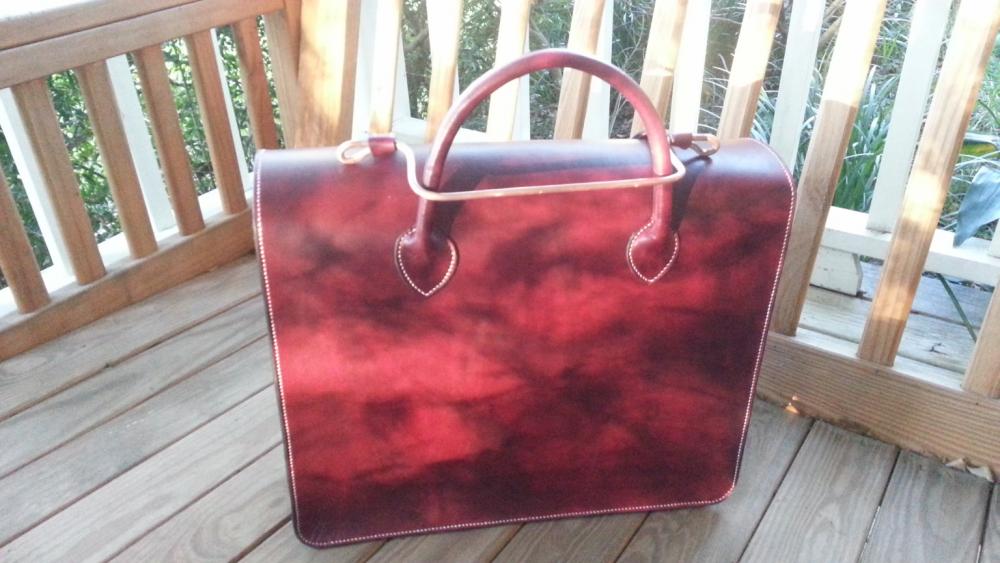
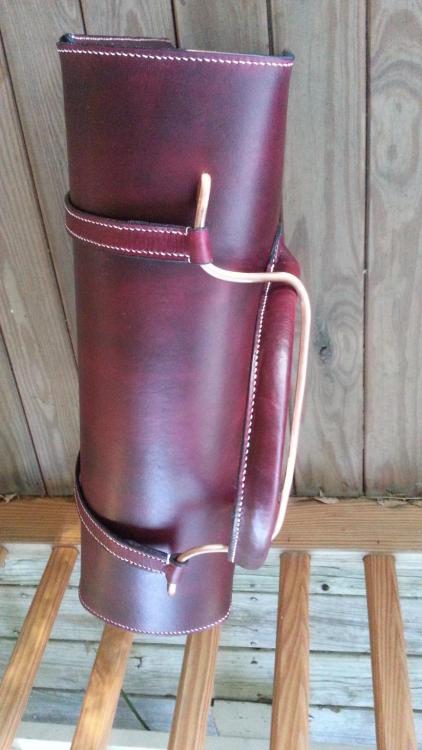
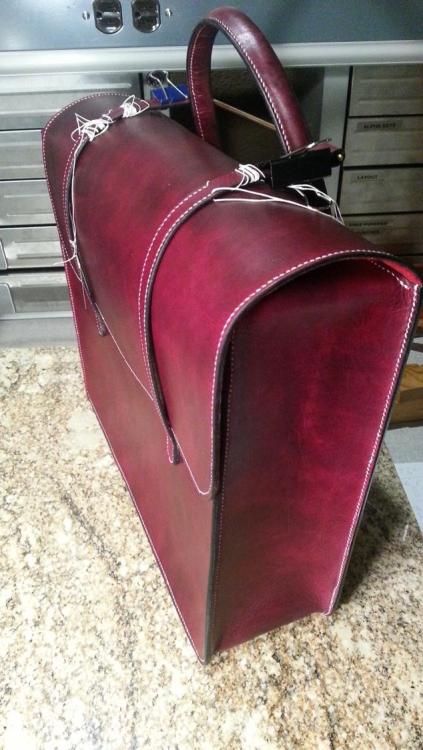
Finally finished my version of a music case. This one is significantly larger than what I have seen, designed to fit a 15" MacBook Pro, and other necessities. Hand stitched using Coats Barbour, fully lined, hand dyed veg tan body.© YinTx
-
From the album: Briefcases
Finally finished my version of a music case. This one is significantly larger than what I have seen, designed to fit a 15" MacBook Pro, and other necessities. Hand stitched using Coats Barbour, fully lined, hand dyed veg tan body.© YinTx
-
From the album: Briefcases
Finally finished my version of a music case. This one is significantly larger than what I have seen, designed to fit a 15" MacBook Pro, and other necessities. Hand stitched using Coats Barbour, fully lined, hand dyed veg tan body.© YinTx
-
From the album: Briefcases
Finally finished my version of a music case. This one is significantly larger than what I have seen, designed to fit a 15" MacBook Pro, and other necessities. Hand stitched using Coats Barbour, fully lined, hand dyed veg tan body.© YinTx
-
It is way too tight, this design it doesn't matter if there is anything inside or not, the lid fits down to the strap connection, and the bar is supposed to go across the back of the handle. But I have finished it anyhow, taking some liberties along the way to make it work. Here is the finished product. Sorry about the photo quality, whatever blood I had left from the stickin the mosquitoes were keen to acquire for their own, so I had a bit of a time holding still what with all their pushin and shovin to get at me. Thankfully none of the resulting splatter and gore got on the project. I tried to take one image inside as well, but this color just doesn't photograph as well as it looks in person. YinTx

-
Impressive work, and a good story to go with it! YinTx
-
Thanks, RockyAussie! and here I was thinking the 4 star was from my overactive typing personality! It has been delivered to the intended recipient, and is duly serving it's purpose now. I am curious to see how long it holds up... Thanks, Bodean! I think it was a stroke of luck, and not what I had in my mind when I started it, so we'll see how well I fare when I attempt another in the near future.... YinTx
-
Getting started: first handbag
YinTx replied to motocouture's topic in Purses, Wallets, Belts and Miscellaneous Pocket Items
Looking nice so far! And shouldn't be too hard to stay below my current thumb puncture record YinTx -
First card wallets
YinTx replied to Prusty's topic in Purses, Wallets, Belts and Miscellaneous Pocket Items
They look pretty good to me. I'd be tempted to try to start/stop the stitching at places that need a reinforcement, like a pocket top, instead of a corner that attracts the eye, but that is perhaps a personal preference. What did you use for a liner? YinTx -
Aren't the Artisan and Singers lockstitch machines, not saddle stitch machines? I don't think I've ever even heard of a saddle stitching machine.... saddle stitching kinda implies an awl and two needles and both hands with a single length of thread. Look forward to seeing more of your work on leatherworker, definitely nice stuff! YinTx
-
Impressive. And last I heard, genuine Panama hats are getting harder to come by as there are fewer and fewer makers. Also, this is driving up the $$, so that was a pretty expensive sacrifice for an experiment, but dang, well done! I like the idea of using different mediums as inlays.... going to keep that one in the back of my mind for future reference! YinTx
-
I really like your stuff. But I have a quick question: what machine are you using to do this? (quote from your Etsy page): "The holster is then put together with heavy bonded polyester cord in a saddle stitch with a commercial stitching machine. " YinTx
-
haha, ya I just give it a shake when I need to dye some leather red. latest greatest.. checking fit up.. not so great...will endeavor to do some artistic license to get better results... YinTx Tryin to get that edge to shine... time for some of that wine.
-
Was healing up just fine, and managed to send a needle into the same thumb yesterday. Interestingly, I don't tend to poke myself while actually putting the awl or a needle through the holes while stitching, but when something gets wonky and I am trying to untangle a thread or thread gets wrapped around something and snagged, that's when those lil buggers tend to inflict hatred into my digits. I use the cork method when I know I have a difficult hole to make, has worked well for me. Grey Drakkon, Thanks for that. I'm a bit concerned about the bar straps right now, they may be a wee bit too short. Time will tell when I get the bar installed. Might have to use some artistic license to accommodate it. Edges are all done, that bar is the last remaining bit... YinTx
-
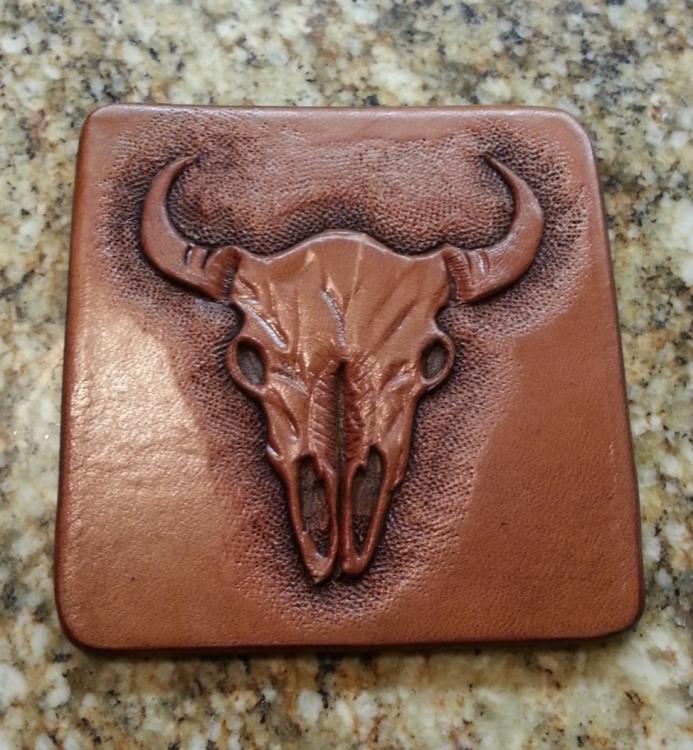
So I've never done a figure carving before, beyond trying my hand at Sheridan Carving, and I've been trying to work out antiquing/resisting etc. So I knocked this out to have something to try a different approach at antiquing. Figure it's just about the right size for someone to set their cold can of favorite beverage on. Just thought I'd show it here for comments. YinTx
-
Saddle Lac Sadness
YinTx replied to YinTx's topic in Dyes, Antiques, Stains, Glues, Waxes, Finishes and Conditioners.
JD62, I have seen several of his videos, and this one in particular I have watched like 4 times since I have been so frustrated with the Tan-Kote. He is one of the proponents of putting on copious amounts of Tan Kote prior to antiquing. I am suspecting other's perception and my perception of copious are two different things, which is why I experimented with -thin- coats. The outcome was closer to what I had envisioned. NVLeatherWorx, I have an "experiment" in mind that is quite similar to what you are proposing. The only things I have used as a "resist" have been Tan-Kote, Clear Lac, Saddle-Lac, Resolene, and Angelus Acrylic finisher. Per my studies of Al Stohman's books, internet musings, videos, etc, I had been expecting varying degrees of resist from each, and to use each with different antique products (such as Angelus Acrylic antique with the acrylic resists/finishes, and Fiebings paste antique with the Tan-Kotes, Clear-Lacs, etc). So I intend to lay them out side by side, and see what looks I can accomplish with different combinations, etc. I hammered out some basket weave on some scrap belly with some texturing, etc today as a test bed. We'll see how it goes! And thanks much for the compliment, I was pleasantly surprised at how it came out, considering my complete lack of artistic capabilities in other mediums. That is probably destined to sit under a cold beer in my brother's garage, at 3"x3" prolly 'bout the right size for the job. YinTx