YinTx
-
Posts
3,794 -
Joined
-
Last visited
Content Type
Profiles
Forums
Events
Blogs
Gallery
Store
Everything posted by YinTx
-

Booties for Miss Rodeo OK
YinTx replied to MendellLeatherOK's topic in Shoes, Boots, Sandals and Moccassins
Those look like a ton of work! so many details! I like it. YinTx -
Boxed in: Box stitching a tooled leather trunk
YinTx replied to YinTx's topic in Boxes, Clocks and Game Boards
Billybopp, This was something I had wondered about myself before I embarked on this effort. I made a small upright box before starting this one to sort of puzzle it out. A lot of judicious planning allowed me to stitch all sides with the box stitching clam I made, save one corner and one edge of the hinge. I managed to set it up so that only a short length corner had to be stitched without the clam - along the bottom of the short side of the last piece stitched in. At this point the box was a box, so i was able to just set it upside down on the work bench and carefully stitch it together. Keeping the awl at a good angle and pulling needles through was a bit uncomfortable on the wrists due to the angle, I suspect I could build something to hold it in place at a more convenient angle if this becomes an issue in the future. The last stitch on the hinge I just did with the box in my lap - each stitch required flopping the lid back and forth as I pulled the stitch tight - a bit annoying, but you get used to it after a few dozen times... The last side on the lid I was able to just clamp in catawampus and get to work. If anyone has a better way, sure would be nice to know it! YinTx -
I have had plenty of boots over the years that incessantly leach oil into my socks. White socks are out of the question when it comes to wearing steel toed boots in the heat of the summer here. YinTx
-
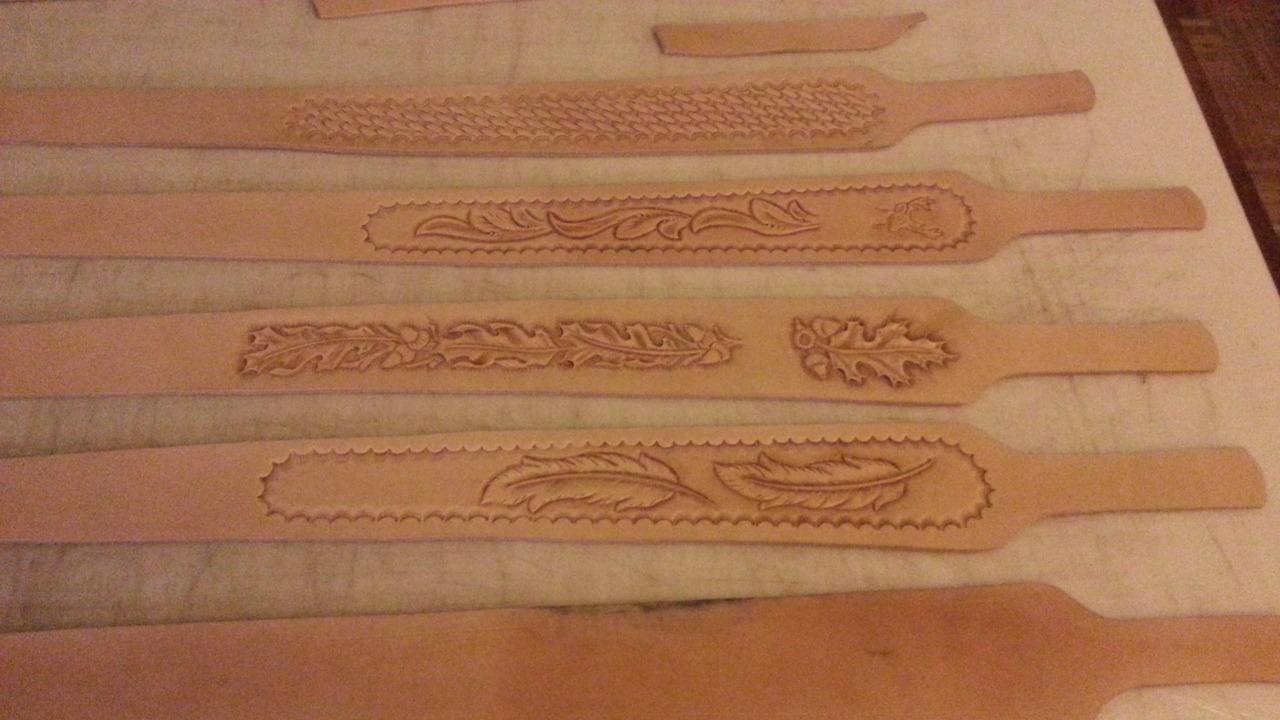
A 4" piece stretched to 24"??!!? That is some stretch! and apparently a way to increase your yields! YinTx
-
Boxed in: Box stitching a tooled leather trunk
YinTx replied to YinTx's topic in Boxes, Clocks and Game Boards
JNewkirkct, Thanks, this craft indeed takes a lot of patience. Next one might go a bit faster, since I have a better idea of what I am doing... but probably not much faster! YinTx -
hehe. Yeah, corsets probably out of my area of expertise for now, so mug sleeves... maybe some that look like corsets.. that'd be different. Yintx
-
Vinegaroon Fading
YinTx replied to Viking Queen's topic in Dyes, Antiques, Stains, Glues, Waxes, Finishes and Conditioners.
I have a black belt I used vinegaroon on almost 2 years ago, and it is still pitch black. I did a lot of research at the time on vinegeroon, and I never saw someone try to make it with 2 steel wool pads to 1 gallon of vinegar. I think I used almost 2 pads to 16 oz vinegar, and it set for over 2 weeks brewing. Strain, use, clean with baking soda mixture, rinse well, let dry, oil and finish. I happen to have a bunch of Fiebeng's Pro-Oil Black that I am using right now with great success, but for belt linings I like the vinegaroon since I don't worry about the rub off. Both approaches have been around for ages. As NVLeatherWorks said, tried and true is best to start with. Experiment if you desire after that, knowing where to go back to when needed! Speaking from some experience, the hard part of course is knowing what is actually tried and true amongst all the info out there... YinTx -
removing Tan kote
YinTx replied to Boriqua's topic in Dyes, Antiques, Stains, Glues, Waxes, Finishes and Conditioners.
Interested in this, as I have a Tan-Kote fail that I would like to clean up.... YinTx -
Now thats HOT.... or cool... or both! great action shot. Reminds me of a corset.. Gotta make me some now... YinTx
-
Also, interested in the Sig P238 if you don't sell as a set. YinTx
-
Boxed in: Box stitching a tooled leather trunk
YinTx replied to YinTx's topic in Boxes, Clocks and Game Boards
I am really close to Corpus, and the weather is exactly that. But then, that's why folks come here for vacation? YinTx -
I really like your designs on these, well thought out! Welcome to the forum, btw. YinTx
-
Alex, If you want to know exactly what is in it and in what proportions, that information is here in the wiki page: https://en.wikipedia.org/wiki/British_Museum_leather_dressing I have seen it for sale here, although I have never purchased any: https://www.restoration-materials.co.uk/product.php/british_museum_leather_dressing_-_125mls/?k=:::612290 (if you are in UK) http://www.archivalaids.com/rsm/6/products/leather-treatment/british-museum-leather-dressing-with-beeswax-lt01 (with and without beeswax) Brian, Considering the intended use, this may fit the bill for you. As discussed in another thread about making leather treatment, there is some controversy surrounding using leather dressings. National Parks Services has a write up here: https://www.nps.gov/museum/publications/conserveogram/09-01.pdf. If you are interested in conservation, here is a good write up, and it includes information on how to make the British Museum Leather Dressing: http://nautarch.tamu.edu/CRL/conservationmanual/File7.htm Perhaps try some out on a lesser piece in worse condition and see if you are happy with the results before utilizing it on the case? Hopefully all of this is somewhat useful... YinTx
-
Boxed in: Box stitching a tooled leather trunk
YinTx replied to YinTx's topic in Boxes, Clocks and Game Boards
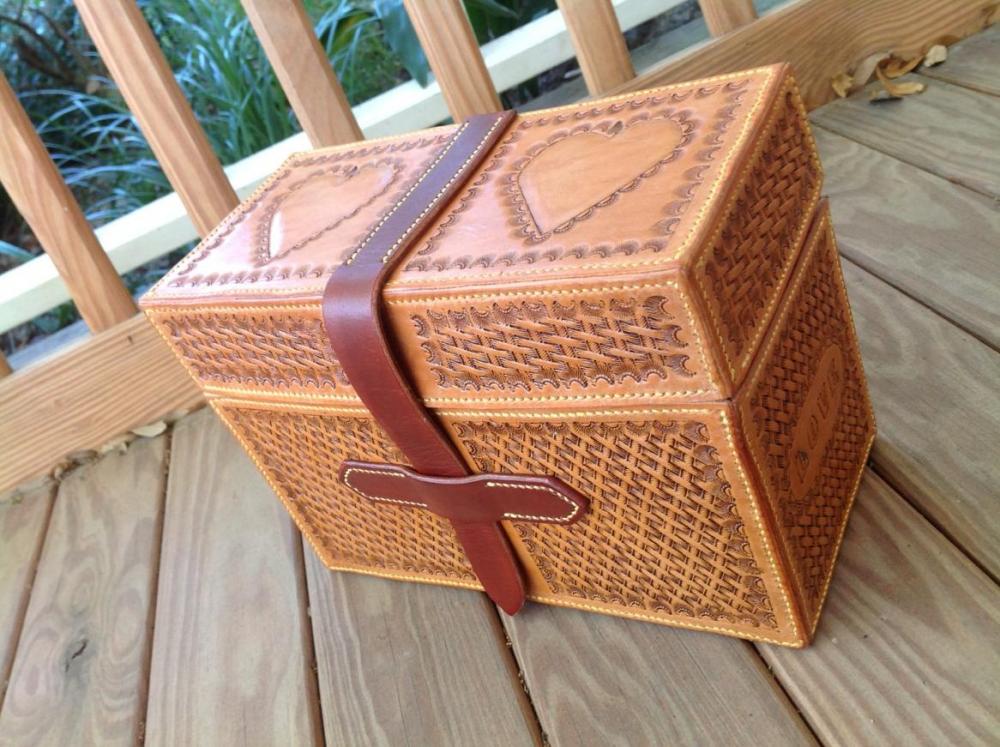
Thanks much, Kiwican! and I just noticed... the mosquito in the second photo... trying to cover up the entire "L" in the word "Love." I thought I deleted all the skeeter photos. Gotta love South Texas! You lose weight every time you step outside! YinTx -
Boxed in: Box stitching a tooled leather trunk
YinTx replied to YinTx's topic in Boxes, Clocks and Game Boards
Heirloom? I might be... now. And thank you for the compliment. And the fingers and arms... they do hurt. Ice on the forearms every night lol. Not sure how often I can do that! I can't imagine folks that do nothing but tooling all day every day for some of the large saddle makers, etc. The pain must be unbearable at night. YinTx -
Thats a generous and thoughtful gift! And a nice bag, to boot! YinTx
-
How about an action shot with the end product in it's native environment instead? I like the grommet idea, I was planning to make a few to get the feel for some of my stamping tools, but worried about getting them to fit various sized cans/cups/mugs/etc. YinTx
-
Boxed in: Box stitching a tooled leather trunk
YinTx replied to YinTx's topic in Boxes, Clocks and Game Boards
All I can say is give it a go! I put this off for some time too, now I have a few more planned. I think I'll try a simpler one with a binder strip to reinforce the corners. Yours may have come out better than you think if you are anything like me. I was hesitant to even share photos, since I can see all the flaws, but it appears at least some people like it! YinTx -
Boxed in: Box stitching a tooled leather trunk
YinTx replied to YinTx's topic in Boxes, Clocks and Game Boards
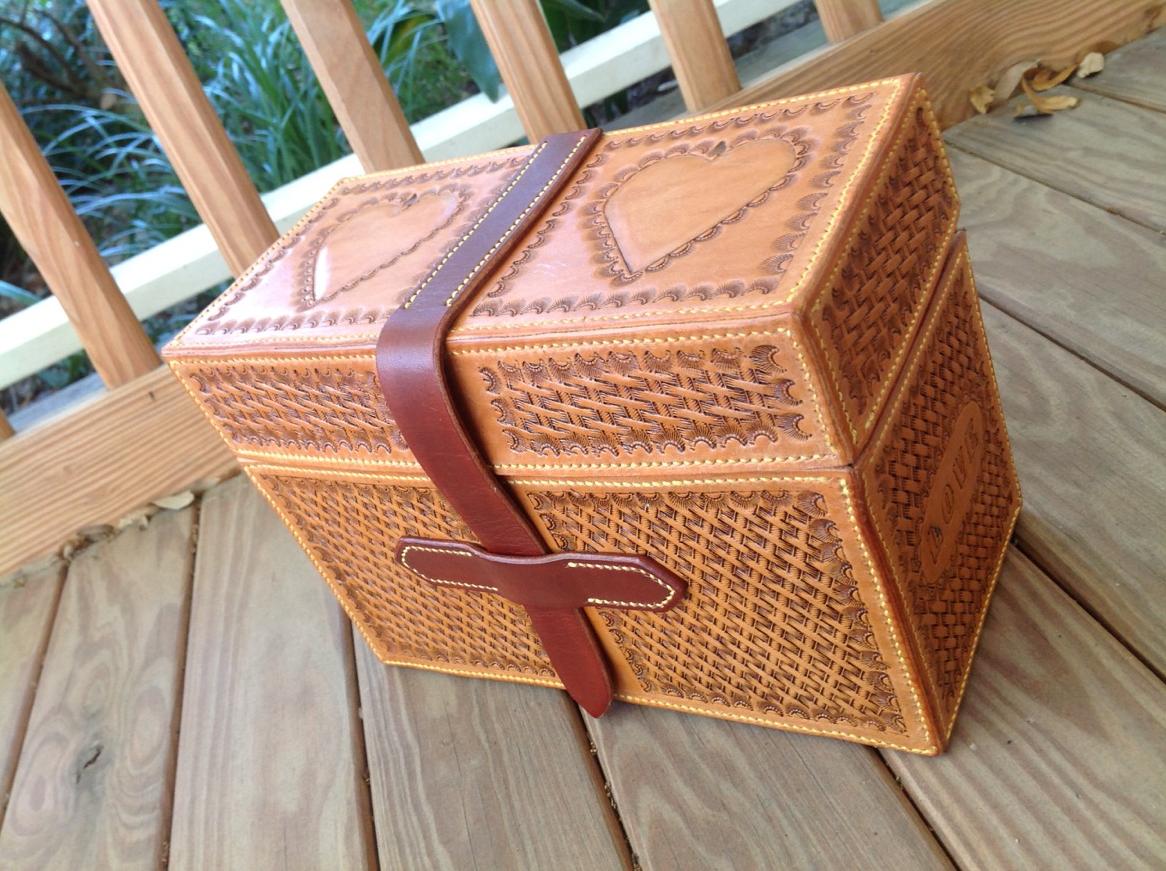
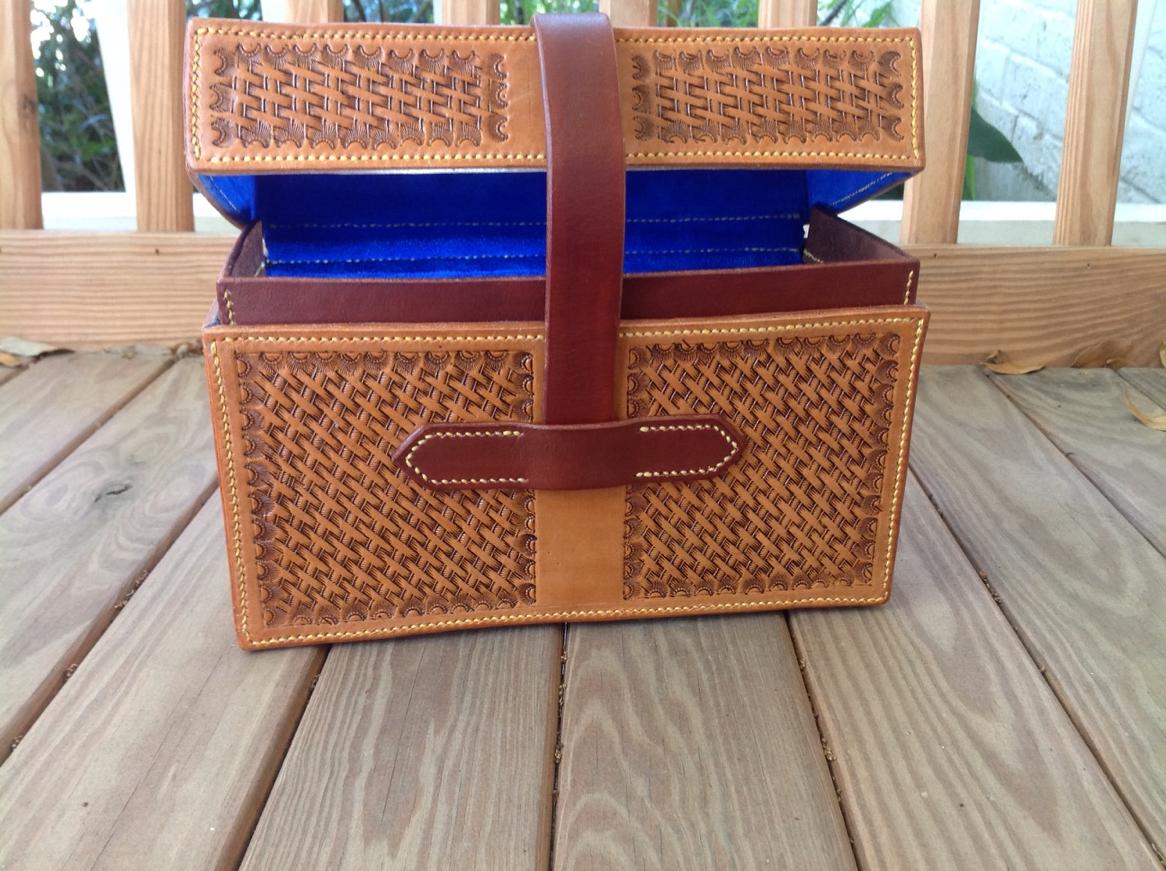
Bikermutt, It was a bit of an undertaking, more than I had expected. Thanks for the compliment! Rohn, At the end, I was wondering if I had enough patience! Was glad to see the last stitch go in. Bill, A new skill for me, along with the tooling. Something about using high contrast stitching and tooling that makes you focus more intently, see errors more easily, and seek improvement more readily! Sheilajeanne, As I have mentioned in another thread, I can barely draw recognizable stick figures... so I am happy to have accomplished something that someone finds artistic! The box measures 10"x7"x4.5" Thanks! The hinge is a strip of suede, which you can see on the inside back. That is one part I was not happy with. It tends to push the back of the box lid up, instead of letting it sit flat. I won't repeat that technique in the future. The closure belt across the top and front is not integrated with the hinge. Rick, Thanks for that! _____________________________________________________________________________ I really appreciate all the positive response to this work. Truth is I was a bit down and out about it, since as usual I am my worst critic. I was happy to have learned the new skills, but I see so much room for improvement, and wonder if the quality I achieve on my pieces is something folks will be willing to pay good money for. So again, thanks for the emotional lift! YinTx -
Boxed in: Box stitching a tooled leather trunk
YinTx posted a topic in Boxes, Clocks and Game Boards
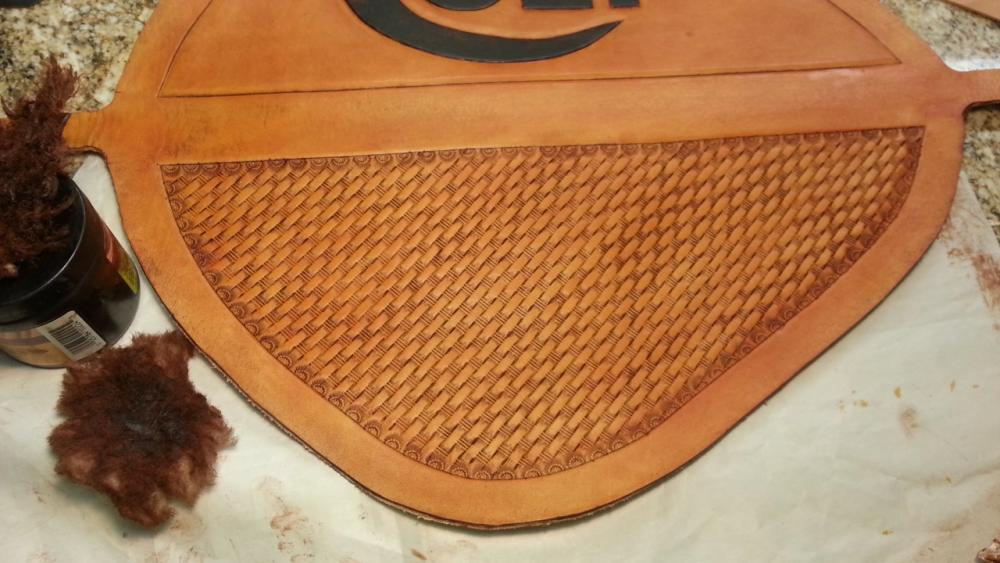
Not sure how I feel about this one, now that I am finished. Over 1 month in the making. I debated putting it in the "critique my work" section for a while, since this is the first box stitched trunk I have made. For sure, a learning experience, many things I would change on a next piece. Not too happy with the back "hinge," so I am off to the drafting board again for that design bit. Also picked out a different basket weave, and it was an entirely different beast to manage! And oye, the wayward camouflage tool! I'll get it under control some day! Took me three different types of awl blades and about 14 hours of stitching to put this together. Thread was heavier than what I normally use, 332 Campbell's Satin Laid Linen in yellow. Blue suede lined, very heavy veg tan - I think 10 or 12 oz. This little box is pretty stout and heavy. So.. many.. corners... so. many. stitches... ! Anyhow, hope you all enjoy..comments welcome as always! YinTx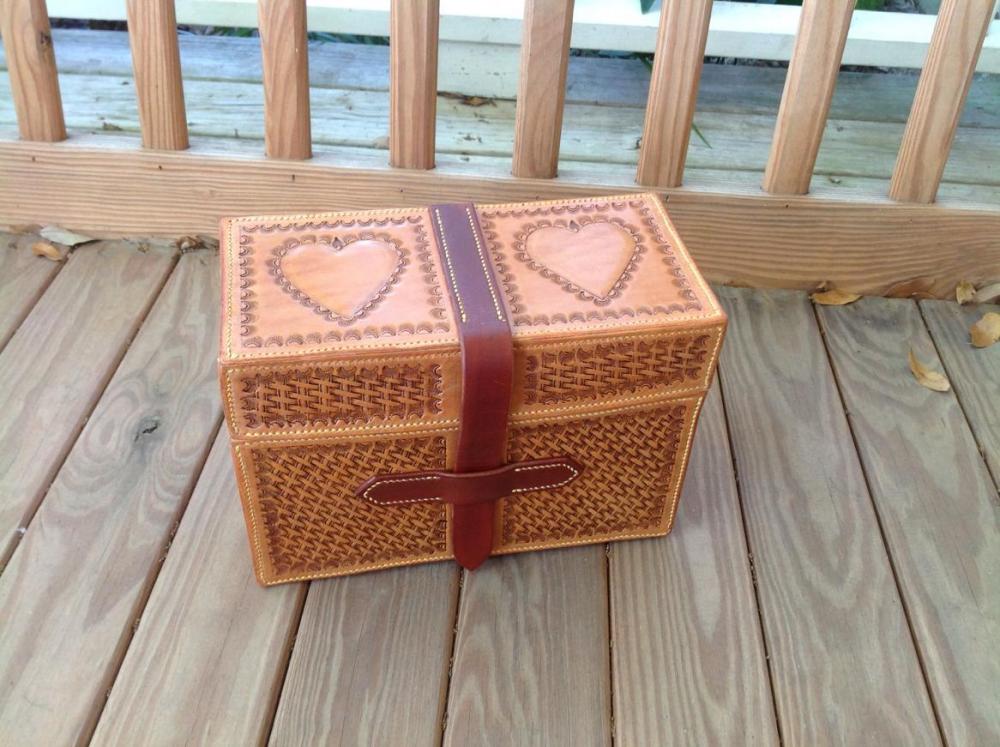


-
I think if it's suffered dry rot, its past the ability to be rejuvenated. However, before you go about eviscerating it, might be worth a go at with some British Museum Leather Dressing. It's designed for just this type of situation. Not sure how you would go about cleaning it, perhaps just some water with a soft toothbrush? I'm currently making a box, and I've seen others like yours, and I wanted to see how it went together, would be cool if you could share more close up images, and shots of the inside? YinTx
-
Big belt for a big boy!
YinTx replied to Sanch's topic in Purses, Wallets, Belts and Miscellaneous Pocket Items
Nice job not getting any of the edge dye on the back! YinTx -
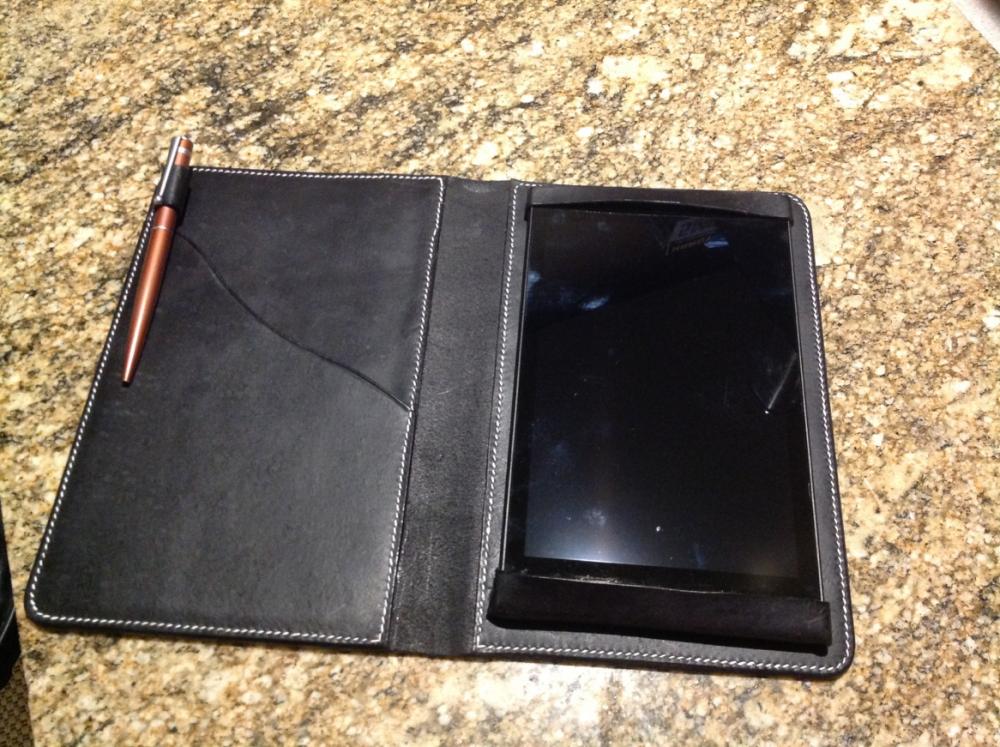
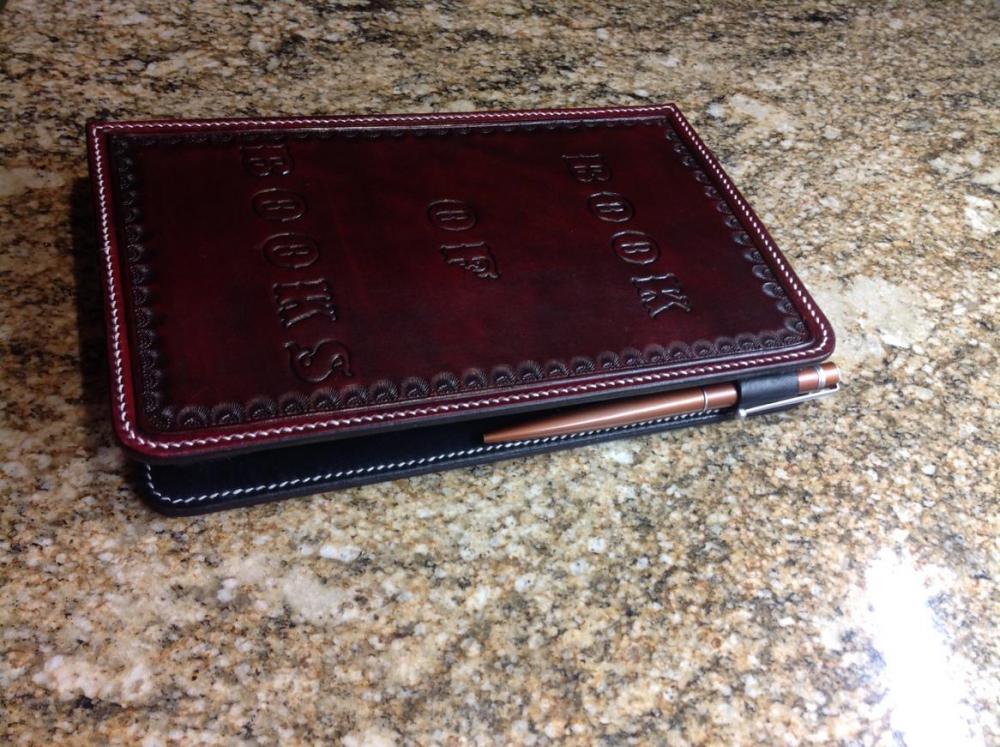
Kindle Book Cover
YinTx replied to YinTx's topic in Purses, Wallets, Belts and Miscellaneous Pocket Items
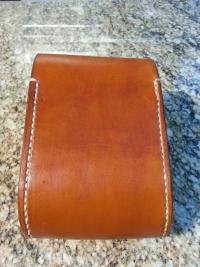
Version 2 is completed, I made it to match a cell phone slip case I carry... also added a pocket to the inside, and a pen holder (for the paper in the pocket...), complete with a bad stitch to make sure it is clearly hand stitched.... Enjoy, comments welcome!

-
So if I read this right, you used the Bordeaux water stain, then the Mahogany antique to get this color effect? Not just Mahogany antique? YinTx
-
Saddle Lac Sadness
YinTx replied to YinTx's topic in Dyes, Antiques, Stains, Glues, Waxes, Finishes and Conditioners.
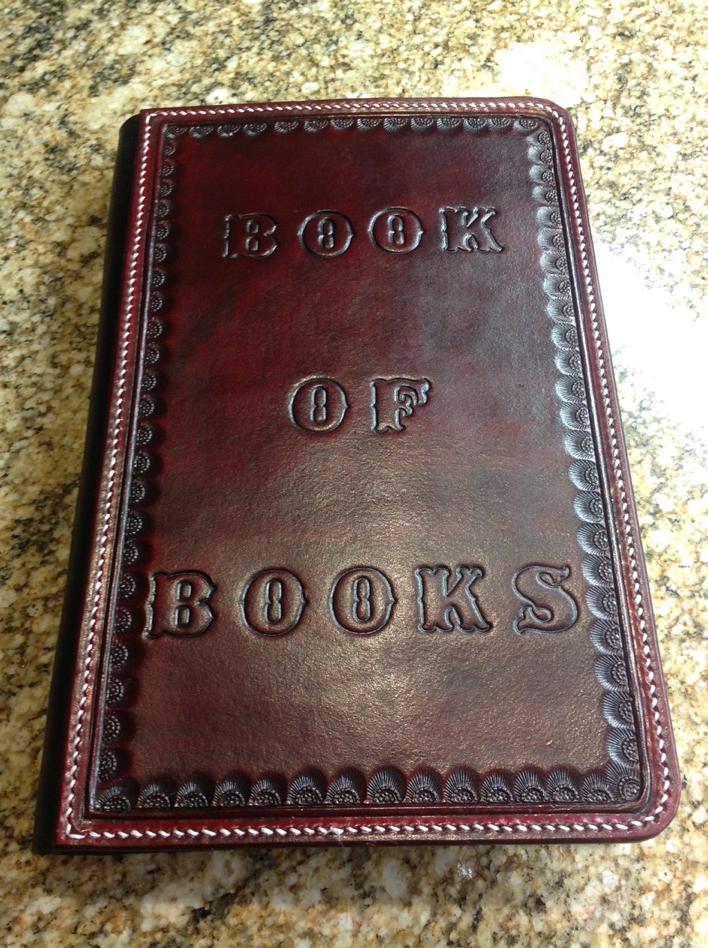
Got the book, got the paint brushes, and did some work with only Clear-Lac. Worked almost too good- couldn't keep the antique down in the stamping from coming out when I lightly wiped the piece down after antique! So I supposed you could call that success. Now to try Clear-Lac on parts of un-dyed leather, then antiquing the whole piece for that "two tone" look! anyhow, here are some images of the results, much improved, thank you everyone for alleviating my frustrations! For anyone reading this trying to figure out why they can't get antiquing to work how you think it should, here is the process I've landed on, tried and true by so many others in the past as mentioned: DOPCAC: Dye (Fiebeng's Pro Oil), Oil (Neatsfoot), Paint (decorative - Angelus Acrylic paint), Clear-Lac, Antique (Fiebeng's Antique paste, Angelus Acrylic), Clear-Lac. (Tan-kote does not work well on top of clear lac: peels off later and looks horrible. Don't ask...) I've also successfully used Aussie after the Neatsfoot oil (or paint, if you are using it), without issue. Using resolene or bag kote or Tan kote or Eco-flo super sheen, or Angelus Acrylic finish, etc all met with less than stellar results. Do-able, but not great. This item used Angelus dye, Clear-lac with Angelus Black Acrylic antique, Clear lac top coat. I also have a small pistol case I am working on that was done with Fiebing's dye, and Fiebing's Sheridan brown Antique that worked out really well. YinTx First wipe down, no top coat yet.