Chief31794
-
Posts
1,801 -
Joined
-
Last visited
Content Type
Profiles
Forums
Events
Blogs
Gallery
Store
Everything posted by Chief31794
-
I use tape as well but also use self adhesive shelf paper for wallets, Bible Covers, etc. I buy it by the roll and it lasts a long time, make sure it's the "permanent" adhesive one. They are not permanent but the stick well, protect the leather from stretching and peel off very easily. Chief
-
X2, the only thing I do a little different is that I always add the length needed so that when the belt is in the first hole the tip goes through the keeper and covers the chicago screws it comes to a little over an inch so still in line with Dwight's comments. I don't like the chicago screws showing while the belt is being worn. Chief
-
X2 I would get a medium size and Small size beveler to start then a middle size Thumbprint (you can walk it to make it wider, the length is irrelevant), then a medium camo tool, then a medium veiner, by then you will kind of know where you need to go next. Keep in mind that the tools you have work so you can replace them one at a time as opposed to trying to rebuy the entire set at once. Chief
-

Waist To Belt Size
Chief31794 replied to Pounder's topic in Purses, Wallets, Belts and Miscellaneous Pocket Items
There are several things that affect this problem for leather workers: 1. No real standard on sizing belts anywhere. 2. No real standard on where people wear pants or belts, some on the belly button, some below the belly, some loose, etc. 3. Most customers don't know what size belt they wear and some won't admit what they should be wearing. That's why I make belts in multiple sizes (non personalized) in 2" increments, then if a customer thinks he wears a 32 I have him try it on if it's too short I give him a 34 or 36 as the case may be. I don't permanently mark the size on the back of the belt for a couple of reasons; 1) People are more apt to buy a 36" belt without marking than a 34" belt with 36 marked on it, just vanity I suppose, it doesn't matter what the belt is marked the main goal is to have a belt that will go around the waist where the customer wears it and buckle into one of the three most central holes. Chief -
Waist To Belt Size
Chief31794 replied to Pounder's topic in Purses, Wallets, Belts and Miscellaneous Pocket Items
I went to several clothing stores with a tape on my pocket and measured belts from the buckle tang to the center hole compared to the size on the belt, it averaged about 1-1-/2" longer than the size on the belt. That means that a 32" belt would measure usually about 33 inches and sometimes 33.5. I was pretty satisified but then I started getting other measurements depending on brands. My overall opinion was that 1.5" would be good. I normally make belts custom and measure an old belt or I have a belt marked in inches from 22 to 50 in 1" increments, in my craft shows I have belts in 28 - 44" in 2" increments 28, 30, 32, 34, etc. I normally put 5 holes in a belt so there is an overall adjustment range at the buckle of 5", howver, as you said that can play havoc with centered names on belts in that they will be off center if the belt isn't in the center hole. Best I can do, suggest you take a tape measure to penny's, sear's, Walmart, Macy's, etc and check some of them out, I never had anyone question me. Chief -
Gum Tragacanth On Leather Handle?
Chief31794 replied to HiddenStar's topic in Leatherwork Conversation
Leather will wear regardless, however, I think the difference between leaving it raw and burnishing it will be slight the main difference is in the aesthtics. The raw should last for many years, and it looks more rustic, the burnished will last for many years and look a little more "dressed". Just my opinion, others probably have better ideas than I. I normally do this on the back of instrument straps and the purpose is when the customer wants a "slick" surface so it won't drag on their shirt or blouse and don't wan't to pay the extra for me to make them a lined strap. Some of that depends on playing styles, many players on slide the instrument around much, some do. I use Hermann Oak and that back is always tighter than what you see on some of the imported hides and hides that haven't been finished well. I also split my own straps so that the back is very smooth, then I normally sand them as well. Only a few have had me burnish the back for them. Chief -
Gum Tragacanth On Leather Handle?
Chief31794 replied to HiddenStar's topic in Leatherwork Conversation
I use gum tragacanth on the back of straps from time-to-time and have had no problem, you might want to try sanding the back of the strap first it may give you what you want. It will be a little tough since the strap is already attached, gum trag works best when you apply it then burnish the back of the strap with a glass burnisher. Whichever you decide on I would try it on a piece of scrap first. I haven't noticed any detectable hardening on straps that have been smoothed. Chief -
Or it could be that I'm just real cheap!!! Chief
-
Newb From North Florida (U.s.)
Chief31794 replied to Ulfberht Leather Works's topic in Member Gallery
Welcome to the forum. Great folks here and lots of good information. I'm just up the road from you in Tifton, GA. Chief -
In pricing, I use a parametric of 10% in cutting loss. I use Hermann Oak and that works out pretty good. I tend to cut multiple pieces from the same cut line when possible to keep waste to a minimum. I use the edges for things like straps on holsters and even belt loops on the back of cases, etc. Minimizing waste should be a priority in any shop. Chief
-
Traditional Basketweave Stamp...
Chief31794 replied to Fullmetalsam's topic in Leatherwork Conversation
Barry King has a website and his stamps are very high quality. One other note, if the leather is cased properly, you shouldn't have to be hitting the stamp hard enough to bend even the Tandy ones. My complaint with the Tandy Stamps are that they are inconsistent from end to end and the tooling is very poor quality. None of those problems will occur with Barry King Stamps. Chief -
How Do I Put A Cap On A Socket Straight For A Snap
Chief31794 replied to leathervan's topic in How Do I Do That?
Thanks Todd, I must'a bent a million of em' before I figured it out. I wish we'd of had a site like this in 1972 when I started, I'd be a master leather crafter today. Chief -
How Do I Put A Cap On A Socket Straight For A Snap
Chief31794 replied to leathervan's topic in How Do I Do That?
One more thing that might help. Start the set by "tapping" the setter with the hammer and rotating it around to get the stem to start a good roll over all the way around, you can get increasingly harder as it sets, but it doesn't take a lot to set snaps. Posts will bend in the leather even when they're the correct length if you try to smash it with the hammer. Another solution if you set a lot of snaps to get a snap setter, they set the snaps perfectly every time. Chief -
A picture or example of what you're trying to do would help to determine a solution. Any mark however light will probably have an effect on the leather, there are no perfectly erasable lines. The best way is to only use lines that will be eradicated by the stamping or tooling. in the examples below, I always layout on dry leather, then I case it after the marks are on. The reason for that is that even with cork backed tools cased leather is very easy to "mark" by sliding the rule, touching inadvertently with a tool, etc. So I'll list a couple of scenarios. 1. Aligning lettering. I use a T-Square with a cork bottom, I put it against the side of a wallet for example, layout my letters on the slab touching, then measure them to determine the true center of the set, I then start stamping the letters from the center out to each end. Two reasons for that, the letters will be perfectly aligned and centered and there is less deviation from the center to each end than there would be if you started at one end and progressively stamped to the other. One note, make sure the spelling doesn't get mixed up. 2. To lay out a border, say with a veiner. I used to scribe a very light line in order to keep the veiner aligned, I learned a better method years ago. I use a pair of dividers instead. First I make three impressions of the veiner spaced end-to-end in a piece of scrap leather. I then set my dividers so that one leg is on the beginning of the first impression and the other divider point is on the beginning of the second impression. This allows me to set the veiner on the first mark (which will be under the stamp and cannot be seen) and align it up to the side of the second mark. I then use my T-Square again, align it on the edge, determine the starting point and make a small mark with the divider then use the ruler on the T-Square (I normally set the marks on the veiner I use most often to 1/4" from the edge) and keep moving it and aligning the next mark against the 1/4" (for example) mark on the ruler. This gives me a very straight line of veiner impressions exactly 1/4" from the edge all along the item (I do this a lot on Instrument Straps guitar, dobro, banjo, mandolin). On the straps I do, I want the line of veiners aligned with each other so I turn the strap around and use a scratch awl and the T-square, I move the T-Square to the first mark on the far side of the strap and then make a small dot aligned on the T-Square at the 1/4" mark in my example. 3. To do basketweave, I scribe a line lightly and that line is "removed" by the stamp as I tool the beginning line alignment after that is with the tool itself on the existing impressions, so there will be no remaining alignment marks. Hope this helps some, Chief
-
You need harness needles, they are available at most suppliers. The sewing needles that Tandy sells with the large eyes are very inferior and break easily. Harness needles are stronger and they hardly ever break. They are available in multiple sizes, I would get a pack of 0, 00, and 000 they come in a 5 pack for $2.99 per pack. You won't be disappointed with harness needles. Hope this helps, Chief
-
Here is one I used before, however, Joyce over at Black River Laser has very nice guitar patterns in a couple of different styles, this being one of them. Chief guitar Strap pattern 3.pdf
-
Most of my cradle straps go on gibsons, stellings, hubers, deerings, etc. Hard to explain at christmas time when a customer wants to buy a strap for her boyfriend, husband, father, etc. that mostly the more expensive banjos will take ( and really need) a cradle strap. I try to get them to get me the name on the "top of the banjo". I made a lot of them last year for Christmas (cradle and attachment types) but this year I sold more mandolin straps than Banjo straps. I have a Deering but I should sell it, my main instrument is a Dobro and I haven't picked the banjo up in about two years. Thanks for commenting. Chief
-
Cova Dye?
Chief31794 replied to BuckarooBob's topic in Dyes, Antiques, Stains, Glues, Waxes, Finishes and Conditioners.
Cova is not a dye, it's a paint. Cova is acrylic paint and works very well for coloring leather, other types of acrylic paint work as well. Cova is specially formulated for leather. Use light coats till you get the effect you want. Then let dry for 24 hours or so then cover with a good sealant, clear lac, resolene, etc. Test on scrap leather before applying the paint or the finish to a project. Chief -
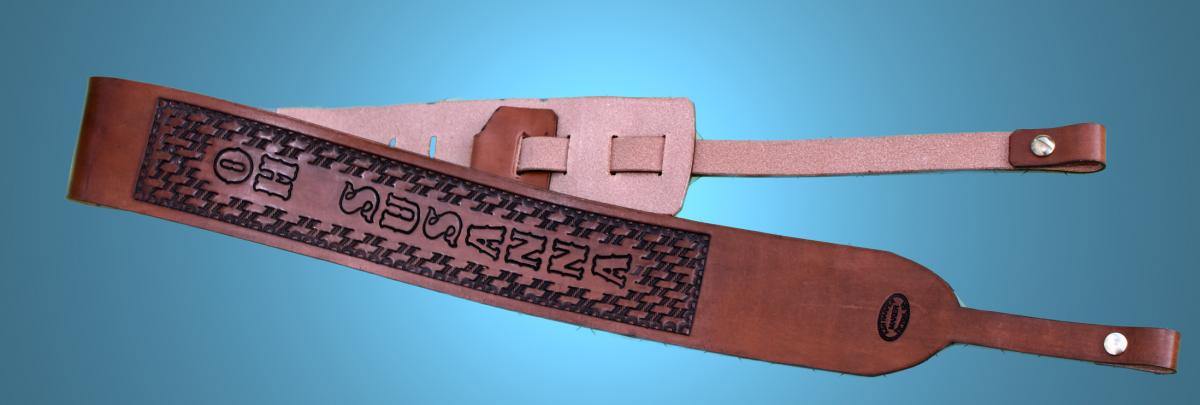
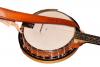
Here is the pattern for both kinds of Banjo Straps. I annotated it as best I could to assist you in measuring out the strap. I use Hermann Oak, 2-1/2" straps split to exactly 6oz. I buy a 2" strap as well for the back piece and have it split to exactly 6 oz. You can buy them in the 6-7oz range if you like, I like them completely consistent throughout the strap. If I'm going to line the strap, I replace the 2-1/2" strap with a 2-1/2" strap split to 4oz and a 3" strap of 2-3oz for the liner. I get them from Springfield Leather and they charge me $1.00 each for splitting the two straps so that adds to the cost which I pass on the the customer. Unlined actually works better in that it drapes much better and is easier to get in the case. The 2nd and 3rd page of the PDF is a diagram of how the two different straps attach to the banjo. For the cradle strap I tie them off with leather shoe lace material and I use Chicago Screws on the attachment type but the customer has to either get an attachment kit from a music store or 3/4" plastic snap hooks for the other type. Let me know if you have any questions. I'm enclosing a picture of each type of strap as well as the pattern. Hope this helps, Chief Banjo Strap Both.pdf

-
I have a template for a cradle type strap and an attachment type strap, I had them made into an Acrylic Template by Joyce at Black River Laser. I have the diagrams I sent her and will send a pdf of them, you can make it by using a 2-1/2" strap and cutting it to the specs in the pdf. It will take me a little while to put the measurements on the pdf. You need to know which strap she wants, an Attachment Strap works on any Banjo and can be easily removed to put the banjo in the case, a cradle strap is desired by high end banjo players, ie. Gibson, Stelling, Deering (not the goodtime), Huber, etc. Most imported Banjos including Fenders don't have the clearance under the j-hooks to attach a cradle strap and it cannot be easily removed and is stored in the case with the Banjo. Some folks don't like storing the strap in the case. I'll post directions for both. Chief
-
Most awls need to be sharpened before using them, particularly Tandy Awls, they are notoriously dull and not very well made. Chief
-
I can't believe Tandy tools would be an incentive to any experienced leather worker. Chief
-
I use one as well and like King's X, I changed out the blade. Very smooth action, feels good in my hand. I have no complaints with it. Chief
-
The pro oil series is just better dyes. They penetrate better, have more consistency, etc. The Pro Oil Black still gives you the deep shiney black that USMC does, it just does it better, don't know how to explain it, but I get much more consistent results with the Pro Oil dyes than with the Normal Fiebings dyes. Buy a small bottle and try it. You may like the USMC better, most people that try the pro oil dyes seem to stay with them as opposed to going back the the normal dyes. Chief Chief
-
You could try re-sanding the edges thoroughly, then burnishing them again with just water, redye, then burnish normally after the belt is completely dry. Might work. Chief