Chief31794
-
Posts
1,801 -
Joined
-
Last visited
Content Type
Profiles
Forums
Events
Blogs
Gallery
Store
Everything posted by Chief31794
-

What Is A Fair Price For Old Craftool Stamps
Chief31794 replied to rlpullman's topic in Leatherwork Conversation
One note, lots of time when you see "old" tools, many of them may have come from sets, those start with a "Z" and although the look old, they may not be old. "Z" marked tools are very low quality and should be avoided. Chief -
I use 3/8" on the 1/4" Jack/End Buttons, it works on the ones I've done which both were Martins with Fishman under the saddle pickups installed. Hope that helps, Chief
-
I use the Tandy ones as well, they work great and are super strong. Chief
-
What Kind Of Material Do You Use For Templates?
Chief31794 replied to cantankerously's topic in How Do I Do That?
I buy a lot of templates or have them made for me by Black River Laser, however, when I do make one of my own I use: Temporary Patterns: Poster Board (Walmart or Dollar Store) Permanent Patterns: I go to Lowes or Home Depot and try to find smooth vinal floor covering (the cheap stuff with no padding), I can buy one yard for less than $10.00 and it is normally about 12 Ft long. That gives me 36 sq ft for a very reasonable price, it is very pliant, but stiff enough to cut around and holds up for a long time. Chief -
Tandy Solid Brass Chicago Screws Not So Solid
Chief31794 replied to aaron61032's topic in Hardware and Accessories
Another source is Weaver. They sell quality hardware including chicago screws. Chief -
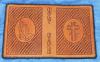
Another Bible Cover Going Out Today
Chief31794 replied to Chief31794's topic in Books, Journals and Photo Albums
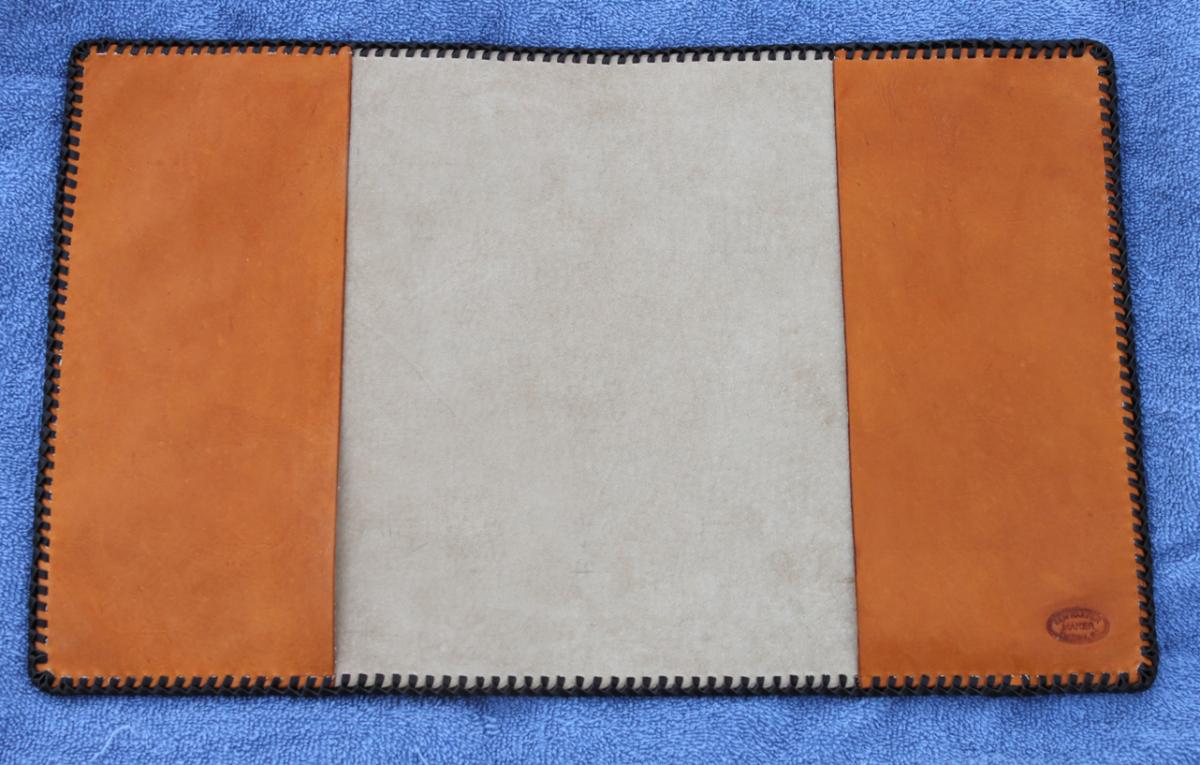
LederRudi, First I've visited Austria in the 1980's, beautiful country. I was stationed in Germany for 11 years of my 22 years in the Army. We did the salt mines, visited Salzburg, and Vienna as well. Anyway, I first make sure that the cover and the frames within the cover are square by laying them out carefully and measuring from corner to corner. I then center a Oval I have in several sizes traced on tracing film and center the ovals in the frame. I then transfer the designs and carve them, then I measure from side to side of the frame to get the exact middle at the top and bottom, I then scribe a very light line from top to bottom stopping about 1/2" from the top of the oval and starting back at about 1/2" from the bottom. I then set my dividers so that they are the exact distance apart as what ever basketweave stamp I'm using. I then mark a series of measurements on both sides of the line at the top and bottom and scribe all the lines very lightly skipping over the oval as before so that when I have them finished the lines will go from top to bottom on the sides of the oval and skip over the oval several times. I then start on the left side of the oval at a line that goes cleanly from top to bottom and still has another complete line to the right of it. I start at the bottom of that line and stamp my first set of basketweaves up that line. I then start working the basketweave as usual making sure that the stamp stays lined up with the lightly scribed lines, the scribed lines are obliterated from the stamping. I work all the way around the top and bottom keeping close to the oval and when I get on the other side of the oval I continue up one of the complete lines until i join the bottom and top, from there it is normal basket weaving except I stay on the scribed lines to keep it as uniform as possible. Hope that helps. Chief -
Another Bible Cover Going Out Today
Chief31794 replied to Chief31794's topic in Books, Journals and Photo Albums
Thanks to both of you, Chief -
Seems like these days folks are asking for either a Bible Cover or a Holster or both! Chief
-
X2 on Block dyed. Chief
-
Tap it slowly at first while leaning the tool slightly all around 360 degrees, once the bevel starts to form then you can start to hit a little more firmly and I never hit hard unless it's the final set tap. It takes a little practice, but if you're bending the post, you're hitting it too hard. It will bevel very easily. Alternatively you could invest in a snap setter they have a pin that comes up inside the post and is pressed down against a spring as the bevel is made, comes out perfect every time. They are pricey though with a press costing well over $100.00 on sale and the die sets costing about $80.00 each. The tools you're using will do the job just practice and don't hit so hard. Hope that helps, Chief
-
Holster Help
Chief31794 replied to benlilly1's topic in Gun Holsters, Rifle Slings and Knife Sheathes
benlilly1, X2 on Stohlman's book on holster making, I have one recommendation that no one mentions much but I'm completely emphatic about. I make quite a few custom holsters and I always use the customer's weapon for measuring, molding if it's gonna be molded, and final fit. The rule I have is NEVER, NEVER, NEVER bring a loaded weapon to my shop. I've had a couple of folks who have carry permits want to show up with the weapon loaded and then proceed to unload it in my shop, they had to find another source for their custom holsters. I actually had a retired LEO come to my booth at a craft fair, unholster his loaded weapon and start trying it in holsters that I had as demos to see how it fit. I'm a firm believer in self protection, have a CC permit, but when working with a weapon or exchanging it from person to person, it should be unloaded, locked and cleared, no exceptions!!! Chief -
For hand powered I recommend the Tippman Boss. I agree with the other two posts. I have a Boss and use it from time-to-time, I still mainly hand sew as a personal preference, but when I need a lot of sewing done in short time, the Boss handles my requirements. If I sewed a lot on a machine, I would probably get a good quality leather sewing machine. So if you aren't sewing every day then the Boss is excellent, if you are sewing a lot, then get a good machine like Trox recommended. Be prepared, either one you get is going to require a learning curve, adjustments due to different thickness of leather, and Maintenance. Chief
-
Wanted: Western Name Belts With A Vintage Style
Chief31794 replied to richardhperry's topic in Old/Sold
Mr. Perry, This is something that I do, and the price would be under $50.00 each. Chief -
When I do these, I don't glue them but after reading Glendon's post I might try that. I trim the leather until the tip fits nice and snug, then I mark the location of the set screw through the tip, remove it, make a small hole deep in the leather (at least half way through), then I use Loctite (sp?) on the set screw and tighten it up well. I've never had one come off. Chief
-
? Rifle Sling
Chief31794 replied to WELSHMAN's topic in Gun Holsters, Rifle Slings and Knife Sheathes
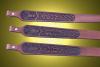
Mine are solid, so I can't help with the upper piece, however, most Rifle Slings are 44" from tip to tip with adjustment available. This will fit most large rifles, .30-06, 7MM, etc. I also make one that is 37" for .22's etc. I offer them in 44, 40, and 37 but 44" is the standard and usable on most rifles. That would make the longest available from swivel to swivel of about 42". I normally put 4 or 5 adjustment holes on the bottom end at 1" increments. Of course you can always make a strap custom to a particular weapon. Hope that helps, Chief -
That's the only reason I stopped by, I could use a good thong cutting tool, LOL. On a serious note, I've never cut lace I always buy high quality lace from suppliers, I'm pretty sure they can make a more consistent and usable lace than I ever could, that being said, kid lining is a little to "supple" for lace I think, not sure what would be best, maybe someone who does a lot of braiding will chime in. Chief
-
Guys, this web site will not let me post links to the youtube videos, it tells me that I've uploaded more media files than I am authorized to do, although I'm a contributing member and have unlimited file upload, I don't know what's going on. The best thing to do is search Youtube for chief31794 or Mexican Round Braid the first will bring up all my leather videos and the second should just bring up the four volumes of this topic. Chief
-
The videos are back up and running, sorry for any inconvenience. I'll post the addresses in a separate post, this one is giving me fits. Chief
-
I didn't think anyone was still watching them. I got a couple of very negative comments about this particular set so I thought they weren't doing any good. I can put them back, sorry for the inconvenience.
-
A cli A clicker is a press that is predominately used in the Shoe industry although it is used in some garment manufacturing as well. It normally has a flat plate on the top side, leather is placed on the table and then cutting dies are placed on the material and the machine "Clicks" down on the die, die cutting the pieces.
-
I assume from your post that you are trying to "block" an area. Spirit and Oil dyes aren't sufficiently resisted by Super Sheen. A better resist for that is Clear Lac. It will block just about anything. Chief
-
I've been getting more and more orders for matching rifle slings for the groomsmen at weddings. I did one a little while back for seven (I think the groom got one also), then this order for the groomsmen for a wedding in California. I had never heard of rifles at weddings other than here in the south in the "old" days. Chief
-
On Sheridan, I predominately use checkered, on figure carvings I use smooth a lot. Since your question was concerning Sheridan Style carving, I would suggest checkered. Chief
-
X2, the bevelers are the most important, then the thumbprints, next would be camo and veiners for me, followed by seeder, etc. Chief
-
No Problem, glad it helped. Chief