Sheilajeanne
-
Posts
2,753 -
Joined
-
Last visited
Content Type
Profiles
Forums
Events
Blogs
Gallery
Store
Everything posted by Sheilajeanne
-
kgg, need a heavier thread to sew the pockets. This is a tool roll, and some of these wrenches are pretty big. Leather is a golden color, like gold deer hide.
-
Okay, called the store, and they have 8 oz. spools and 16 oz. (1 pound) spools. Those are both pretty big spools, and I'm not sure I will be using this color (gold) again once this project is done. I have some artificial sinew in the color I need, and have been hand-sewing so far, but the sinew begins to separate as you sew, and becomes a real PITA to work with. Because it splits, piercing it with the needle to keep the thread from pulling out of the eye doesn't work. And I still have 20 compartments to sew... sigh!
-
Thanks, Legion! Those look like pretty big spools though. Any idea how many yards are on them? One thing I like about that thread is it's the first time I've seen exactly the colour I'm looking for!
-
Thanks, Spyros and kgg!
-
Speaking of thread, Tandy sells exactly THREE colours of machine thread! That SUCKS! Where can I get a wider variety of colours for a leather sewing machine?
-
I'm Canadian - we use both 'chalk and cheese' and 'apples and oranges'. No doubt there's more of a British influence here - the Queen is still on our currency! I also have never had a problem erasing the Tandy marker pen from veg-tan.
-
I got a couple of modelling tools at 1/3 off. They were right opposite the cash register. I managed to refrain from going any further into the store... And of course, now, just 2 days later, I find I forgot to look for sewing thread to match my current project!
-
I use my Tandy marker A LOT! Helps me cut straight lines, mark stitching lines for either hand sewing or machine sewing, etc. etc!
-
Gotcha, Fred. So in that case it COULD be some fancy leather tooling, just not as pronounced as the statue shows. Back to Monty Python: Sorry, couldn't resist:

-
Okay, my knowledge of Monty Python is mostly from The Holy Grail! If you'd mentioned a shrubbery or 'it's only a flesh wound' I would have gotten it right away!
-
Ummm...WHAT?? Spyros, you got THAT right!
-
Transporting Industrial Sewing Machine
Sheilajeanne replied to LePoisson's topic in Leather Sewing Machines
Ferg is one of the older members here, and confesses he's slowing down a bit with age. He doesn't post often, but when he does, he's always helpful. -
Transporting Industrial Sewing Machine
Sheilajeanne replied to LePoisson's topic in Leather Sewing Machines
Something else Ferg did that was really smart: He detached the machine from its base, then used the screws or bolts that held it to the base to attach it to the bottom of a box he'd built that exactly fitted the machine. Even if the machine fell over, there was no way it was going to get damaged because everything was protected, and couldn't move. Wish I'd taken a picture of it. The box wasn't solid, and he assembled it around the machine after attaching it to the base. You could tell he's been moving heavy machinery for a lot of years, and knows how to use his mind over muscle. -
Transporting Industrial Sewing Machine
Sheilajeanne replied to LePoisson's topic in Leather Sewing Machines
Oh, that's not too far away from me! (Actually, I lived about 20 minutes from that shop for about 10 years.) Will keep them in mind! When it comes to moving machines Ferg had this amazing stair climber cart that will be a huge help in getting it downstairs. It also has a lift mechanism that will help you get it into the back of your vehicle! Walmart sells them. https://leatherworker.net/forum/topic/86190-roman-shoes/ Scroll down to see his post! -
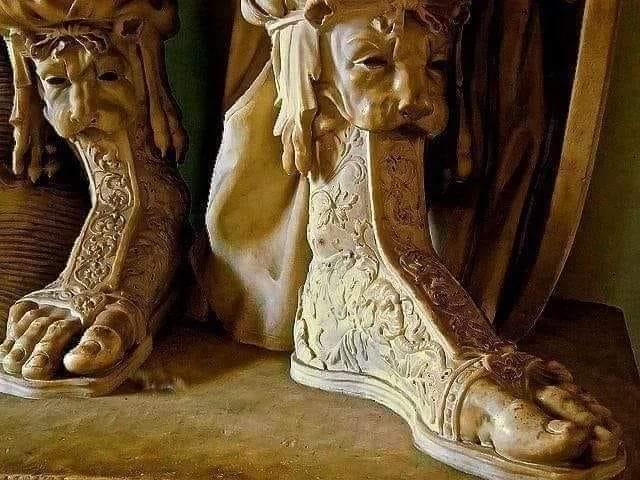
Speaking of which - when I googled the statue, hoping for a better look at the legs, I found out it's frequently misidentified. It's actually a statue of the Roman God of war, Mars.
-
Chuck, guess who originally posted that shoe on this site? Yes, it certainly looks very modern! https://leatherworker.net/forum/topic/86190-roman-shoes/
-
I was thinking that might be made of some sort of metal, maybe gold or silver. The guy was a king, after all!
-
Lots of different styles of Roman sandals if you google on the net, but nothing with embroidery, at least not from that period and culture.
-
Do you know where I could find pictures, Fred? This is an area that really fascinates me!
-
Wow, if this statue is accurate, the Romans certainly knew a thing or two about carving leather!! https://www.facebook.com/photo/?fbid=1606773432988293&set=gm.631730784643480&__cft__[0]=AZWjkPvfqsDQVr3EqB6V5xPdfKrDhUrtuTWfu3hMP5OUxdtG1MeQswA7HNlm9iH5WhyZpr87r-DxC99c-BypBM_2zb0YUu1FoQDq0qqBzufpDkx-QIHxKTeNMfsMzyg8TGfX0mWgmeD6vY1Pm6Bg0xu5dn7OaH8JSeZCJpqgEcaQVXloGdieUpQjnv9xcnH8Wjw&__tn__=EH-R
-
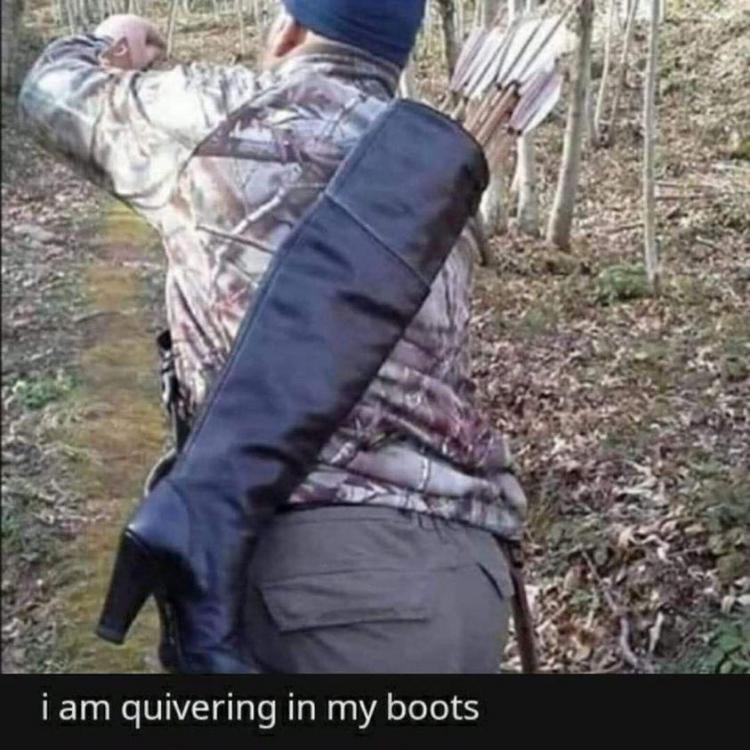
When You're Not That Into Leatherwork...
Sheilajeanne replied to Sheilajeanne's topic in Archery Quivers and Bow Cases
LOL! You know, this isn't such a bad idea! The guy is obviously hunting, so must have some razor sharp arrows in that boot. The boot sole and heel counter would prevent them from piercing the 'quiver'. The one drawback might be the arrows going down into the toe of the boot. I imagine he's put something into the boot to prevent that. Wouldn't want an arrow coming through and sticking him in the butt! -
...but need a new quiver! Let's hope his wife broke a heel on the other boot, otherwise he's going to be in BIG trouble!
-
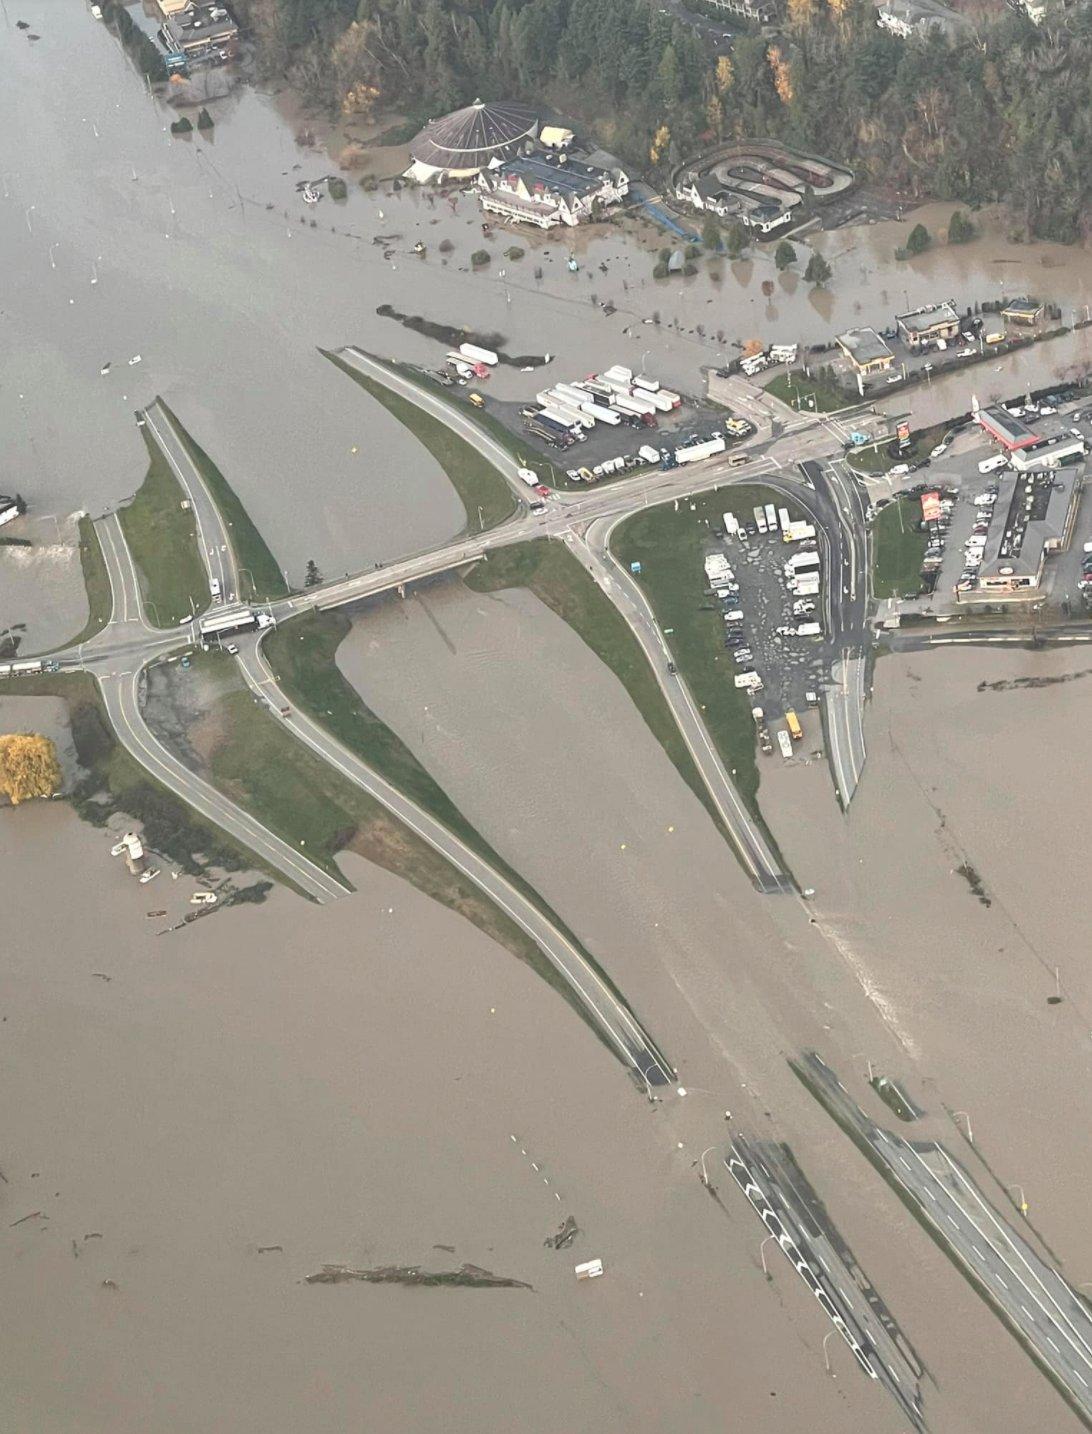
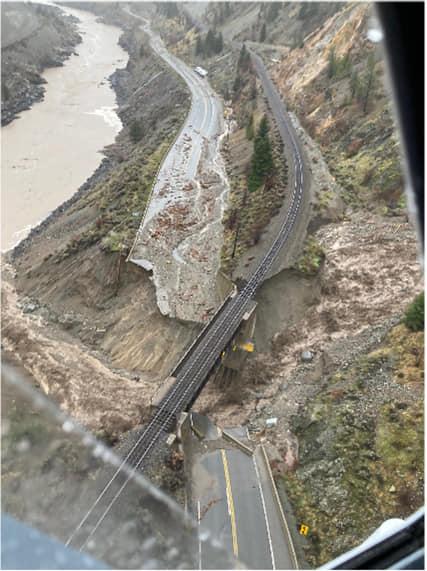
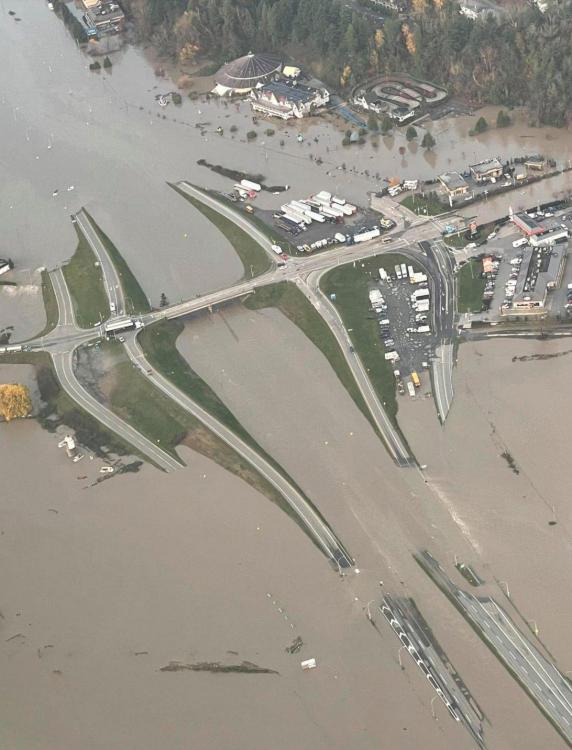
Just a shoutout to those of you affected by this. The pictures I've seen from B.C. boggle my mind. Many areas a totally cut off due to roads being washed out or buried by mudslides and blocked with fallen trees. Both the Trans Canada and the Coquihalla highways have huge sections of them washed away. Rail lines have been destroyed, too. Over 300 motorists had to be evacuated by helicopter from one section of highway. And remember, this is the Rocky Mountains - there aren't a lot of alternate routes available!! THIS is Hwy # 1, the Trans Canada, near Lytton, B.C. It's going to take months to fix this: Next picture is the town of Abbotsford, which is right next to Vancouver. Both Abbotsford and Merritt are under evacuation orders: The video shows the damage to the Coquihalla highway, the other major highway serving the area: https://globalnews.ca/video/8378266/b-c-s-coquihalla-highway-seen-from-the-air-shows-extent-of-the-damage I haven't seen pictures from Washington, but I understand it's really bad there, too! Anyway, if you're the praying sort, these people could use a few!
-
If you are running Windows, you will have Microsoft Paint. Right-click on the photo, and you'll get a popup that includes 'the option 'Open with'. Click on that, and select Paint. When the photo opens in Paint, the tool bar at the top includes a 'resize' option. Click on that, select 'pixels' and enter a figure of around 500 for the horizontal dimension. The vertical dimension will resize automatically to keep the picture in correct proportion. If you want to save the original non-resized picture, select 'save as' from the menu bar, and give the resized photo a new name. If I'm dealing with a cell phone picture, I e-mail it to my desktop computer. When I attach it to the e-mail, it gives me the option to resize it.
-
CELL PHONE COVER
Sheilajeanne replied to Ferg's topic in Purses, Wallets, Belts and Miscellaneous Pocket Items
Have met Ferg in person - he's amazing!