Sheilajeanne
-
Posts
2,762 -
Joined
-
Last visited
Content Type
Profiles
Forums
Events
Blogs
Gallery
Store
Everything posted by Sheilajeanne
-
I was thinking that might be made of some sort of metal, maybe gold or silver. The guy was a king, after all!
-
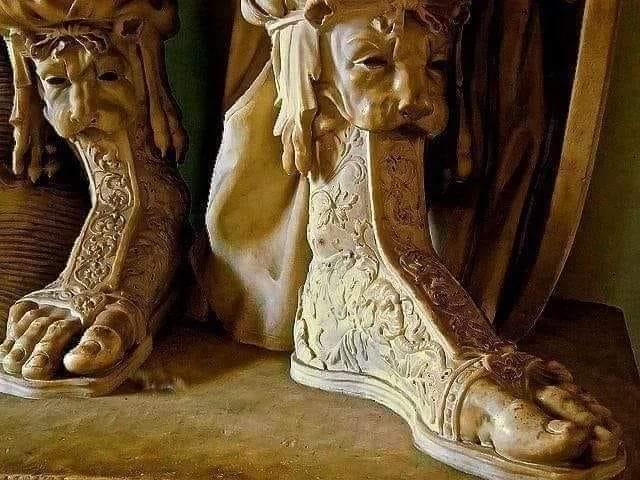
Lots of different styles of Roman sandals if you google on the net, but nothing with embroidery, at least not from that period and culture.
-
Do you know where I could find pictures, Fred? This is an area that really fascinates me!
-
Wow, if this statue is accurate, the Romans certainly knew a thing or two about carving leather!! https://www.facebook.com/photo/?fbid=1606773432988293&set=gm.631730784643480&__cft__[0]=AZWjkPvfqsDQVr3EqB6V5xPdfKrDhUrtuTWfu3hMP5OUxdtG1MeQswA7HNlm9iH5WhyZpr87r-DxC99c-BypBM_2zb0YUu1FoQDq0qqBzufpDkx-QIHxKTeNMfsMzyg8TGfX0mWgmeD6vY1Pm6Bg0xu5dn7OaH8JSeZCJpqgEcaQVXloGdieUpQjnv9xcnH8Wjw&__tn__=EH-R
-
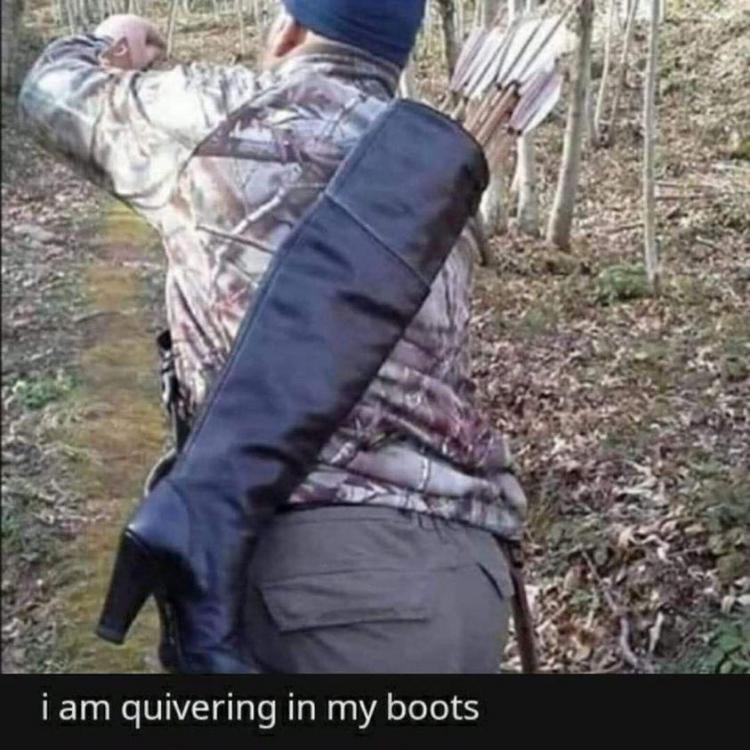
When You're Not That Into Leatherwork...
Sheilajeanne replied to Sheilajeanne's topic in Archery Quivers and Bow Cases
LOL! You know, this isn't such a bad idea! The guy is obviously hunting, so must have some razor sharp arrows in that boot. The boot sole and heel counter would prevent them from piercing the 'quiver'. The one drawback might be the arrows going down into the toe of the boot. I imagine he's put something into the boot to prevent that. Wouldn't want an arrow coming through and sticking him in the butt! -
...but need a new quiver! Let's hope his wife broke a heel on the other boot, otherwise he's going to be in BIG trouble!
-
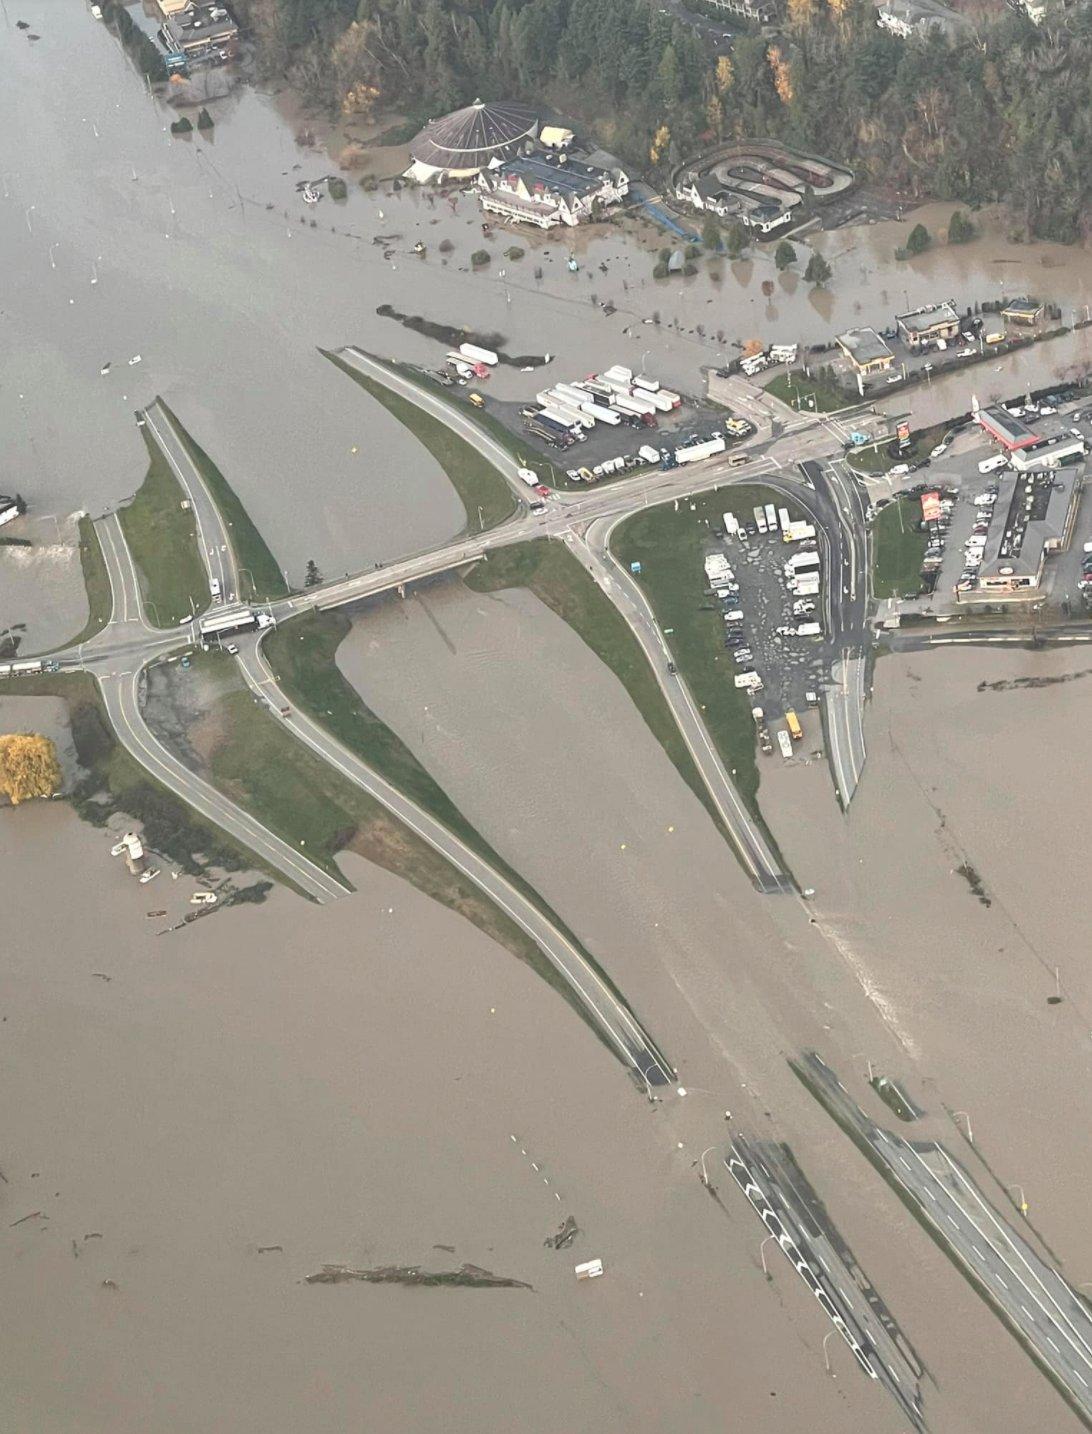
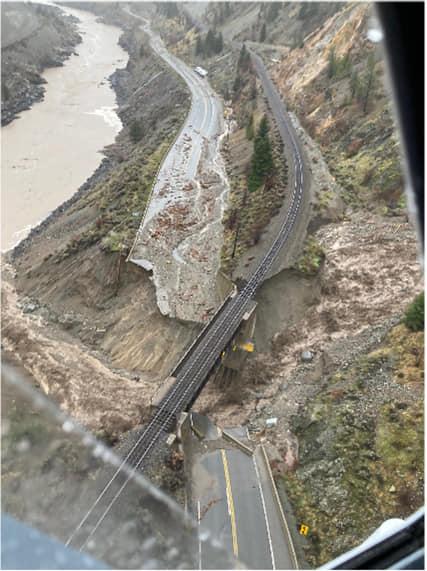
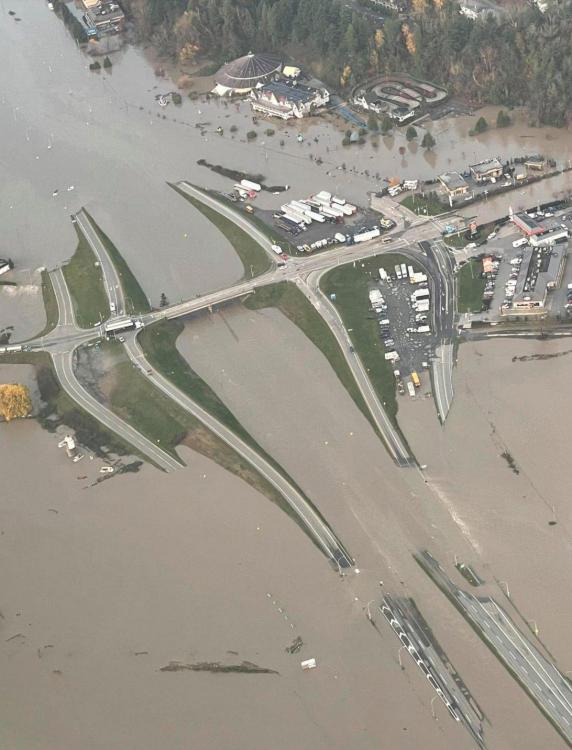
Just a shoutout to those of you affected by this. The pictures I've seen from B.C. boggle my mind. Many areas a totally cut off due to roads being washed out or buried by mudslides and blocked with fallen trees. Both the Trans Canada and the Coquihalla highways have huge sections of them washed away. Rail lines have been destroyed, too. Over 300 motorists had to be evacuated by helicopter from one section of highway. And remember, this is the Rocky Mountains - there aren't a lot of alternate routes available!! THIS is Hwy # 1, the Trans Canada, near Lytton, B.C. It's going to take months to fix this: Next picture is the town of Abbotsford, which is right next to Vancouver. Both Abbotsford and Merritt are under evacuation orders: The video shows the damage to the Coquihalla highway, the other major highway serving the area: https://globalnews.ca/video/8378266/b-c-s-coquihalla-highway-seen-from-the-air-shows-extent-of-the-damage I haven't seen pictures from Washington, but I understand it's really bad there, too! Anyway, if you're the praying sort, these people could use a few!
-
If you are running Windows, you will have Microsoft Paint. Right-click on the photo, and you'll get a popup that includes 'the option 'Open with'. Click on that, and select Paint. When the photo opens in Paint, the tool bar at the top includes a 'resize' option. Click on that, select 'pixels' and enter a figure of around 500 for the horizontal dimension. The vertical dimension will resize automatically to keep the picture in correct proportion. If you want to save the original non-resized picture, select 'save as' from the menu bar, and give the resized photo a new name. If I'm dealing with a cell phone picture, I e-mail it to my desktop computer. When I attach it to the e-mail, it gives me the option to resize it.
-
CELL PHONE COVER
Sheilajeanne replied to Ferg's topic in Purses, Wallets, Belts and Miscellaneous Pocket Items
Have met Ferg in person - he's amazing! -
I didn't ask. He was working on my old riding mower, which was pretty dirty and rusty. The bearings needed replacing.
-
Come on now, no one twisted your arm and made you watch it! Yeah, the popsicle sticks look like mini tongue depressors. And, as the song says, kids can use them to build things.
-
Yeah, just giving that clarification for those in the U.K. And round N. American lollipop sticks would suck as glue-spreading tools... . So, popsicle sticks for the win... Edit: if you remember the Jan and Dean version of this song, you are OLD!!
-
I save popsicle sticks for spreading glue, so the sandpaper sounds like the best way to go. Popsicle is actually a brand name that's become generalized, like Hoover for vacuum in the U.K. In N. America, lollipops are hard candy on a stick, popsicles are frozen flavoured water or ice cream.
-
Cool idea! I think I have some paraffin blocks, as someone recommended them for finishing edges. I have some small files, but they aren't as fine as jeweler's files. Will see if I can find some. And, of course, nearly all women own that type of nail files. Wonder if jeweler's rouge would also work for the final polishing.
-
Chisels have arrived! The prongs are thinner than the Tandy black chisels, and therefore should be sharper/easier to punch through the leather! They also match the 8 stitch per inch width I need for this project. Fred, how did you sharpen yours?
-
Wow, with the price being that cheap, I'm willing to give this a try! I really need something so I can finish my project, and if I use Chrisash's tip, hopefully they will last a long time. I would pay much more than that for a single one of Tandy's Pro Diamond Chisels!
-
When I look at the tines under high magnification, it's not so much bending as it is they've become blunt. VERY blunt - to the point the metal has spread out sideways from the points. You'd think I'd been pounding it on a rock... Yeah...Springfield. Unfortunately I'm in Canada. Shipping and duty costs, plus really slow shipping is why I prefer to deal with a Canadian seller, if possible. The Canadian postal service is MUCH better than the USPS. Last time I ordered something to be shipped from Tandy's, it arrived within 3 days!
-
Good idea, Crisash!
-
Tugadude, thanks. I have two of the above Tandy chisels, but need one with the teeth slightly farther apart for the current project - 8 stitches per inch, while the diamond chisel I have is 9. And I am NOT satisfied with the black ones! They are supposed to be the higher quality 'pro' chisels, but in spite of me never having used them without a poundo board beneath them, they are pretty much ruined. And, of course, this happened in the middle of a project, so I want to get something quickly so I can finish it. Are the poly boards easier on punches and chisels than the poundo boards? Just wondering what I could have done to have gotten a longer life from these chisels.
-
For small caps that give me trouble, I pull out the old nutcracker that's been in my family for generations!
-
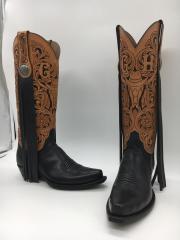 I vaguely remember you talking about dancing boots, but I must have only seen them before they were fully put together. This is definitely the first time I've seen the final product Awesome work! Your daughter must be very proud, struttin' her stuff!
 -
I once made the mistake of putting cayenne pepper in an Italian seasoning bottle and not removing the label. I knew what was in there, and even if I forgot, the colour of the contents should have been a dead giveaway. Then, my diabetic friend who has poor eyesight was doing some cooking in my kitchen... Fortunately, I caught her before she put too much into what she was cooking!
-
You don't live in Canada, battlemunky! They are all too common here! At least my pharmacy has designed a bottle for the medication caps that allows you to disable the child-proof feature by removing a small tab on the cap, or I'd likely be leaving my pills sitting in the cupboard WITHOUT a cap on them! Unfortunately, can't do that with liquids...
-
Me too, Squid! We have them in Canada, and they are a terrible PITA! Glad to know that trick with the inner cap, will give it a try! One way I've tried to avoid trouble with opening them is making sure I wipe both the threads on the bottle and the cap before closing the cap. If the buildup of dye doesn't come off with a simple wipe, I'll wipe them down with alcohol. Another really annoying thing about them is they are supposed to be childproof, but they sure aren't LEAKPROOF!! And you'd think that would be one of the most important features of a bottle that contains dye! To deal with the leakage, I keep them in plastic sandwich bags, inside a clear plastic storage container with a lid. You can get bottles suitable for dye storage at craft stores. Michal's has dropper bottles with caps, and also larger clear plastic bottles with a spout that flips up. I bought some of the latter, but have never gotten around to using them for some reason.
-
Looks like he's plotting his revenge!