


Sheilajeanne
-
Posts
2,753 -
Joined
-
Last visited
Content Type
Profiles
Forums
Events
Blogs
Gallery
Store
Everything posted by Sheilajeanne
-
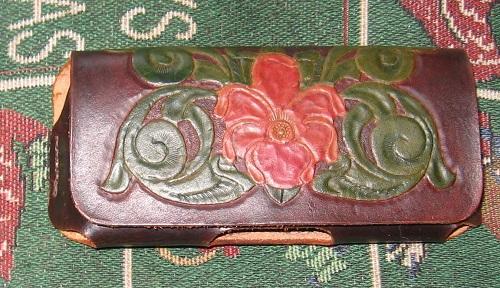
I managed a half-decent job of them on that phone case, but believe me, I was sweating bullets! Not going to show you my first efforts which were on a wallet...
-
Six basic strokes does it all? Um, yeah how do you do those tight curves that so often show up in Sheridan carving? You know, like the ones on this cell phone case? If anyone's got some tips on how to do these smoothly, I'm all ears! I found I've had the best luck with keeping the knife more or less stationary, and turning the leather.
-
maxdaddy I posted something similar, but from a different source, earlier last week: As Rahere says, it would work fine, but only if your foot was a good fit for the outsole that comes with the kit. https://leatherworker.net/forum/topic/96539-making-shoes/
-
Bette Midler made it famous:
-
Did you make that rose, Frodo? Well done! I love roses, and have planted them in the garden of every house I've owned I've also used part of that song as my signature on another website for many years, since losing my husband to cancer. When the night has been too lonely, and the road has been too long, And you think that love is only for the lucky and the strong, Just remember in the winter far beneath the bitter snows, Lies the seed, that with the sun's love, in the spring becomes The Rose.
-
Pstt, Bondjunior, this thread hasn't been posted to in 10 years. I doubt anyone is still around that posted in it. Too bad the photo links no longer work. I would have liked to have seen the OP's work, though I imagine it is one of the shoulder bags on his website.
-
Latest work
Sheilajeanne replied to DustinSmith's topic in Purses, Wallets, Belts and Miscellaneous Pocket Items
You are an inspiration, sir! So, those belts are all hand-tooled? Wow, i was thinking it was done with a Craftaid, or maybe an embossing machine! -
Thought this was interesting! They provide the template and soles, you do the sewing! Could certainly be adapted to using leather rather than cloth! https://www.facebook.com/OESHshoes/ I think this would be great for someone who had never made shoes before, but wanted to give it a try!
-
Thanks, Mulesaw, that's beautiful! Euthanasia is always a hard thing to do.
-
Chapman's pack for Renn-Faires and markets
Sheilajeanne replied to fredk's topic in Historical Reenactment
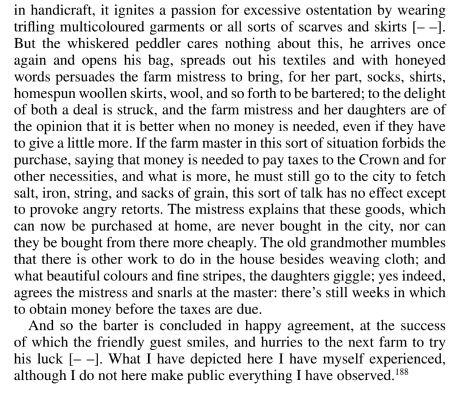
Continuation of article on peddlers: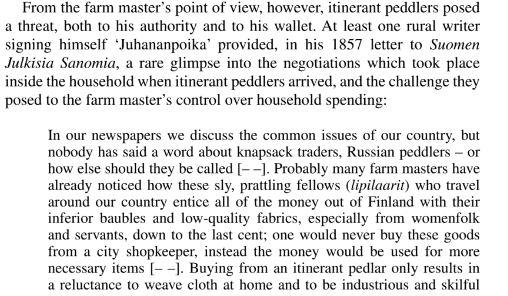
-
Chapman's pack for Renn-Faires and markets
Sheilajeanne replied to fredk's topic in Historical Reenactment
One advantage of being retired - lol - kind of went down the rabbit hole with this. There's one group of people who made a living at peddling, the Karelians. They are Russians, who live on the border between Finland and Russia. A lot of their trade was in textiles, so their packs had to be wide enough to carry bolts of cloth. The packs could be collapsed/rolled down as goods were sold. The majority of their trade was with farm women, who did not have easy access to stores, and wanted the new, colourful fabrics woven by automated looms, as an alternative to those they had to laboriously weave and spin themselves. This is what their packs looked like: https://en.wikipedia.org/wiki/Peddler#/media/File:Kiestinki_”laukkuryssä”_peddlers.jpg From: The Limits of Patriarchy Paperback – Jan. 22 2019 by Laura Stark (Author)
-
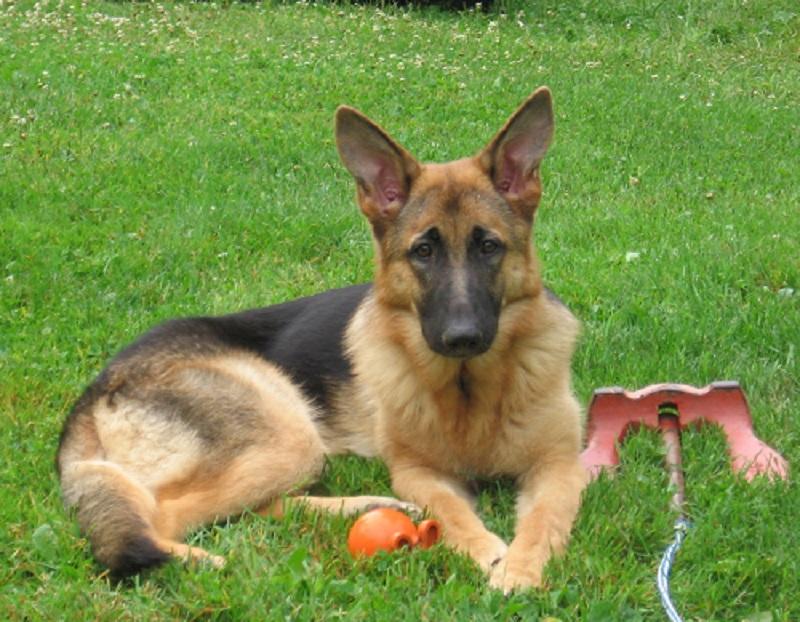
Lost my old girl May 31st. She was 14 1/2 years old but that doesn't make it any easier. First time in 14 1/2 years I've only had one dog, and during those 14 years, I sometimes had 3, all German shedders. RIP, Star of Hope vom Bayou Land! You were one of the best1
-
Chapman's pack for Renn-Faires and markets
Sheilajeanne replied to fredk's topic in Historical Reenactment
I'm toying with the idea of making a packsack or tote I could use for taking my leatherworking tools with me if I'm going on vacation somewhere and have a project I want to work on! But first, I need to get that tool roll for my metric and SAE wrenches done... -
Chapman's pack for Renn-Faires and markets
Sheilajeanne replied to fredk's topic in Historical Reenactment
Fred, too bad you don't have actual photos of the pack! Edit: found a picture, but not a great one for detail: https://mysteriesofcanada.com/canada/syrian-peddlers/ -
Chapman's pack for Renn-Faires and markets
Sheilajeanne replied to fredk's topic in Historical Reenactment
Very cool to know, Fred! Thanks for the info! -
I'm sure he found LOTS of stuff with that metal detector, but it wouldn't have been money! Nuts, bolts, and bits of scrap for sure.
-
Always a pleasure to see your work, Mike! Remind me again: what do you use inside the leather to make the weight?
-
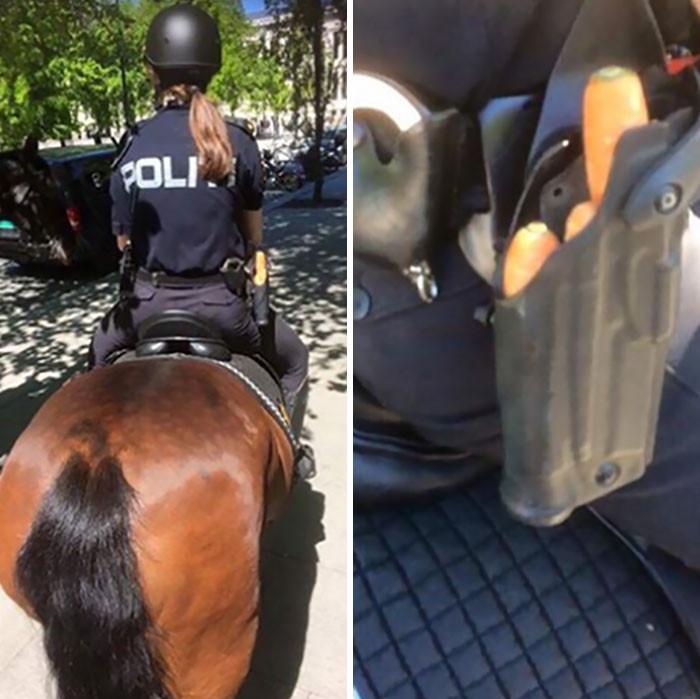
Another Use For a Holster...
Sheilajeanne replied to Sheilajeanne's topic in Leatherwork Conversation
Yup!! -
Glad I Picked Up A Few Pieces Of Leather
Sheilajeanne replied to AzShooter's topic in Leatherwork Conversation
You need to get yourself a window AC unit!! I'd never be able work in those temps! -
Had to share this - as a horse lover, it REALLY cracked me up! If you're a mounted police officer, you may find an alternate use for your holster... This picture was taken in Norway.
-
Fly swatter
Sheilajeanne replied to Klara's topic in Purses, Wallets, Belts and Miscellaneous Pocket Items
As for the advantage of holes vs. no holes, I've found rolled up newspapers and magazines seem to work just as well as the fly swatters I bought at the store, with all the holes in the business end of them. Their one disadvantage is they never seem to be around when I need them, but a magazine or even a piece of mail still in its envelope is read to grab on my desk, and often gets the job done. -
I used to work at a riding stable, and have watched the blacksmiths shoe many, many horses. Every hoof knife I've seen has a plain blade, not a serrated one. It is used for whittling away the horse's hoof, not sawing it. And a serrated blade can't whittle. I've never seen a knife like that before, but I like what someone said about it being used to cut string. I sure could have used something like that for cutting tight string on hay bales when feeding the horses!
-
That's sad, Fred.
-
Fred, one of these days, I'm going to get around to making that portfolio I've been wanting to do, and the Cheerios cereal box cardboard will be the stiffener for the covers!
-
Cool idea! And you can always use the impression as a guide, and tool it to deepen it and make it stand out better. Glad to know I'm not the only one who uses cereal box cardboard in my leatherwork...except I make templates out of it!