


JoeSnuffie
-
Posts
382 -
Joined
-
Last visited
Content Type
Profiles
Forums
Events
Blogs
Gallery
Store
Everything posted by JoeSnuffie
-
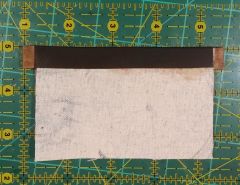
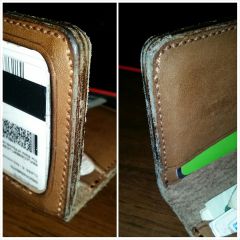
From the album: Wallet Cloth Lined Card Pocket Process
-
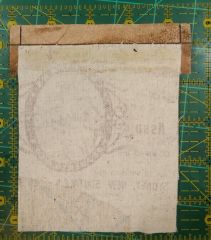
From the album: Wallet Cloth Lined Card Pocket Process
-

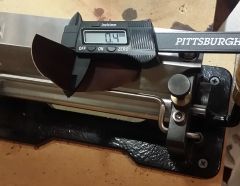
From the album: Wallet Cloth Lined Card Pocket Process
-
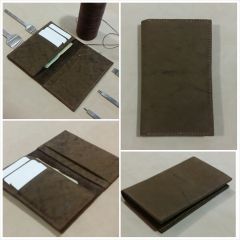
From the album: Wallet Cloth Lined Card Pocket Process
-
From the album: Wallet Cloth Lined Card Pocket Process
-
From the album: Wallet Cloth Lined Card Pocket Process
-

From the album: Wallet Cloth Lined Card Pocket Process
-
From the album: Wallet Cloth Lined Card Pocket Process
-
From the album: Wallet Cloth Lined Card Pocket Process
-

Another Wallet Done
JoeSnuffie replied to JoeSnuffie's topic in Purses, Wallets, Belts and Miscellaneous Pocket Items
I got $60 for it. -
I got in some oil tanned scrap yesterday and found a few square feet of this really neat looking leather. Customer loves it and it more than paid for the 13 pounds of leather I received.
-
From the album: Leather Things
-
Vegetable Tanned Calfskin "kip" From Waterhouse
JoeSnuffie replied to JanC's topic in All About Leather
I've bought 4 of these hides from them and they skive it to .75mm for me for free. Makes great wallets and while 2 had areas with a lot of imperfections, I was able to cover them with wallet pockets. I usually airbrush these hides because they're so thin and the dye just soaks right in. This is all .75mm hide from them. -
Passport Case
JoeSnuffie replied to JoeSnuffie's topic in Purses, Wallets, Belts and Miscellaneous Pocket Items
I got some steel lettering stamps from Harbor Freight and a 5x8 bronze sheet from Hobby Lobby (conveniently located across the street from each other). I hammered in the letters on a piece of steep plate with a sheet of paper between to give the letters some depth. Then I colored over a few times with a black Sharpie until the insides of the letters were soaked. After it dried I used some 800 grit sandpaper to remove all the black that wasn't in the letters. After sanding I used the little ball end of my chasing hammer to ding up both sides to make it look, well, hammered. And thanks for the compliments. This shows that even really messed up and scarred leather can still be exactly what the customer wants. I didn't think this piece would ever be used. -
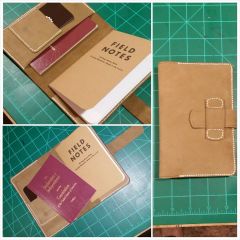
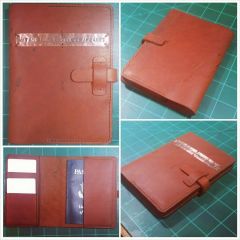
Good reading and you can take notes while you're at it. I need to find a good, sturdy pen to pair with this. Any suggestions?
-
Customer wanted leather with marks and imperfections. She found the perfect spot on one of my hides. She also requested the Tolkien quote and since she wanted it on one line I did it on bronze with a little sloppy lettering to go with the imperfect hide. It's hard to see with the glare of all my lights on my bench but the letters are all clear and blackened. I'm hoping this bronze will patina nicely.
-
From the album: Leather Things
-
From the album: Leather Things
-
From the album: Leather Things
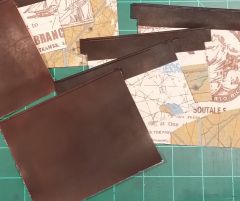
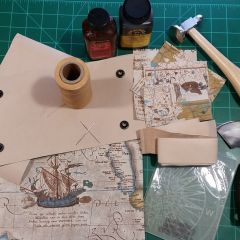
I'm starting another nautical wallet. It seems merchant marines are everywhere. This is for the wife of a merchant marine who saw the last nautical wallet on Facebook. My brother-in-law also ordered one for his dad who was a merchant marine in India. These are almost all the pieces that go into the wallet, with the cover two pieces for the pockets waiting on a new calf skin hide. -
From the album: Leather Things
-
Baseball Glove Wallets
JoeSnuffie replied to JBLeatherworks's topic in Purses, Wallets, Belts and Miscellaneous Pocket Items
I've had 2 friends ask me to do this with their kids' old gloves. I may need to revisit this idea. These look great. -
From the album: Leather Things
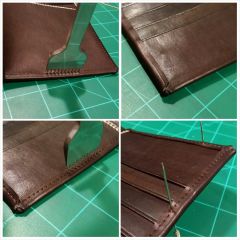
After 6 months the edges are still together, though not as slick as they were. -
And thank you for the compliments. This project didn't make me any money after all the time I spent in coming up with the ideas for it but I think it was my most enjoyable project to date. And as a bonus, I get to make 3 more which will definitely make me a little Christmas spending money. Unfortunately, my wife will probably find out and want her cut.
-
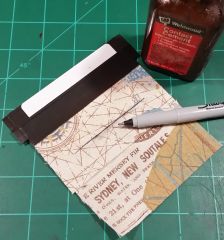
Sona, I used en embossing folder that I got from Hobby Lobby. It works well on leather. Im Joe, I but strips of 2.5oz calf at 2" wide and ran them through my splitter to get them to .3mm. The calf is still really tough at this thickness. After splitting, I trim them to be straight and 1.25". I cut them to 4.5" pieces, flip them over and draw a line from end to end .75" from the nicest edge (this will be on the front). I cut the fabric 4" wide and 2.5" tall. I apply contact cement to the back of the leather and a little extra on the .75" area where the cloth will attach. I lay the cloth, face down, right up to the line, but not covering it. This allows me to fold the .5" section over at the line without bunching up. I apply a little more contact cement to the back of the cloth, only coming .5" from the line so that all the cement is covered by the leather fold over. When it's nice and tacky, I carefully fold it over and hammer it with my chasing hammer. With this done, I stack them for stitching. I decide how tall I want the wallet and how far the cards should stick out. I draw a line on each piece of fabric where the stitch will me and then glue the leather at the tabs to set them in place. The next step is stitching and after that I attach the last pocket, line it up on the liner, glue it in place, poke some holes and then stitch. After this is done I trim the excess from the edge of the liner. If this isn't clear enough let me know and I'll try to explain better. The contact cement is stronger than the leather and attempting to remove the cloth after 48 hours results in torn leather. Also, the cloth is stitched in place at both sides so it isn't going anywhere.
-
The customer asked me to "come up with something nautical" so I did. He liked it so much that he ordered 3 more when he picked it up and got some business cards to hand out on his boat.