-
Posts
382 -
Joined
-
Last visited
Content Type
Profiles
Forums
Events
Blogs
Gallery
Store
Everything posted by JoeSnuffie
-
From the album: Leather Things
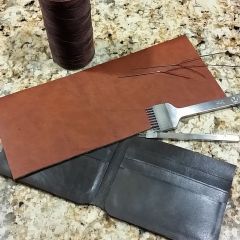
One more fitting then I'll round the top corners, glue and begin stitching. -
-
How Do You Store Your Pricking Irons?
JoeSnuffie replied to 3wunder's topic in Leatherwork Conversation
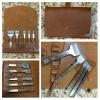
I got them from eBay. I searched and compared for a couple weeks and decided on these. I didn't get them because I think they're the best money can buy, but I believe they're the best I can afford at the moment. I purchased from this eBay seller. He promptly answered questions about his items before I bought. http://www.ebay.com/usr/2002memory This was the item: http://www.ebay.com/itm/111348511344 "High Quality White Steel / Diamond Stitching Chisel 3mm, 1 + 2 + 4 + 6+10 prong" I can't speak for their quality compared with the high dollar models, but these are a vast improvement over the Tandy models and are actually a little cheaper per chisel than the Tandy when purchased as a set. On the model I purchased, the steel is much harder and it's also polished, making it much easier to remove from the leather. This is a close up. You can see the holes this one makes compared to the Tandy chisel labeled 3mm. -
From the album: Tools and Supplies
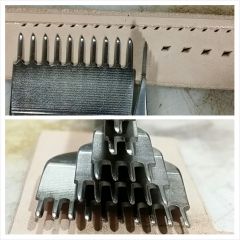
3mm Stitching Chisels. This is 3mm point to point, not space between prongs (like the Tandy measurements). They are a drastic improvement over Tandy quality. You can see that they're polished and the steel is very hard when compared with Tandy. I purchased from this eBay seller. He promptly answered questions about his items before I bought. http://www.ebay.com/usr/2002memory This was the item: http://www.ebay.com/itm/111348511344 "High Quality White Steel / Diamond Stitching Chisel 3mm, 1 + 2 + 4 + 6+10 prong" -
I've had aluminum react with wet veg tan and leave a mark but I can't think of any other reason as long as you are careful to remove the sharp edges. I had 2 templates made for wallet pockets by a professional and it was cheap and fast. They laser cut an acrylic sheet and you can add holes and slots for reference points.
-
1. I'd like to make a nice bag to carry both of my sons' iPad mini's and chargers at once. Hopefully I'll get to do this soon. 2. I'm a software developer by day. For years I'd come home and unwind by watching TV or playing a video game, but I never felt relaxed. Then I stumbled upon leather and fell in love with the complete lack electronics involved. I can design and create something, start to finish, and use nothing more than my ancestors might have used 200 years ago. 3. My flag, and I suppose you mean my home, is planted in Northwest Florida.
- 2 replies
-
- leather
- leatherworking
-
(and 3 more)
Tagged with:
-
Lots of us use smaller pieces of leather. I've had great success in buying scraps that are 2sqft and larger and turning them into wallets, small bags, etc. Donate as much as you can and sell the rest. There are plenty of people like me interested in scraps of different sizes.
-
From the album: Leather Things
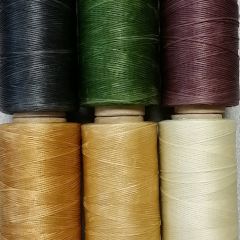
New thread. 250 meter spools of .8mm braided waxed thread. Dark blue, green, purple, two shades of light tan and an almost white. I get them here: http://www.ebay.com/usr/verybeststore -

Embossed Card Wallets
JoeSnuffie replied to rosiart's topic in Purses, Wallets, Belts and Miscellaneous Pocket Items
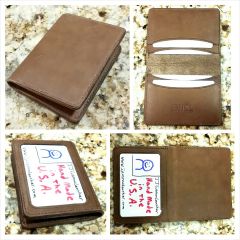
Hey, these are really nice. I'm thrilled that I could inspire someone after all the inspiration I've gotten. -
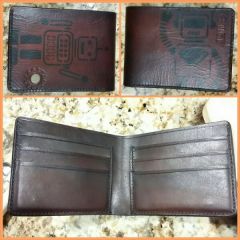
Distressed vintage looking robot wallet. I guess that's how I'd describe it.
-
From the album: Leather Things
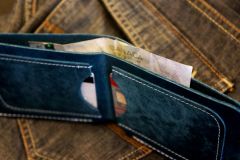
A distressed, vintage looking robot wallet. -
Thank you. It's all 2.5oz calf skin. I order the skin split to 1.75 oz now because that's a much better thickness for the liner.
-

Request For Belt Holster Pattern
JoeSnuffie replied to warrior193's topic in Leatherwork Conversation
This is a really good video that shows you start to finish, how to measure and make a knife case. http://www.youtube.com/watch?v=yZKxHdNIiP4 There are a number generous leatherworkers out there who do a great service in sharing what they've learned. -
Calf skin is typically pretty soft compared to the same weight skin split from an older, more experienced cow. I guess all those years of hard life toughen them up. This is 2.5oz calf skin and it's pretty soft and pliable. You can tool it but you won't get crisp and well defined impressions.
-
It looks like veg tanned that's been dyed, buffed really well, oiled and finished with some sort of wax. This is veg tanned. So is this.
-

How Do You Store Your Pricking Irons?
JoeSnuffie replied to 3wunder's topic in Leatherwork Conversation
Thanks and you're welcome to the design. It's pretty simple. The loops hold the top part in place and under the folded bottom I have some veg tanned spacers that have just enough space between to hold the bottom of the handle snug. I tapered them a little at the shoulder to make it easier to insert. -

How Do You Store Your Pricking Irons?
JoeSnuffie replied to 3wunder's topic in Leatherwork Conversation
Thank you! It really turned out a lot nicer than I was expecting even without doing any finish work. -

How Do You Store Your Pricking Irons?
JoeSnuffie replied to 3wunder's topic in Leatherwork Conversation
I store my Crafttool chisels in a wooden rack but my new favorite chisels got a case made from a scrap piece of oil tanned leather. They're 3mm point to point or about 7.5 spi, not 3mm between prong edges like the Crafttool chisels measure. I didn't work too hard to keep it neat and clean because time is money and this isn't making anyone any money. -
Welcome and I wish you luck with leather. I'm looking forward to seeing some pictures and I really hope this turns into a source of income for you.
-

Lapis Blue Wallet...part Ii.
JoeSnuffie replied to Hi Im Joe's topic in Purses, Wallets, Belts and Miscellaneous Pocket Items
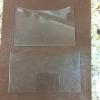
This is a beautiful wallet. The color is what really stands out for me. I use these acrylic templates. I made them in a CAD program and had a company laser cut them. These cover all of the card wallets and full sized wallets I make. The holes allow me to mark cut and stitch lines. I can use the curve or flip it over for a straight line. -
I understand what you mean about the mess but water based haven't held up for me. I use DAP contact cement in the 32 oz container. It costs me about $12 at the hardware store and I pour it into a smaller 4oz glass bottle with a small brush. Since I'm making small items, I use a cotton swab to apply it. Once dry, it wipes off just about any oiled or waxed grain side so as long as I don't make too much of a mess, clean up is easy. You have to remember to scuff up any finished leather or it just won't hold well.
-

Bi-Fold
JoeSnuffie replied to AndyL1's topic in Purses, Wallets, Belts and Miscellaneous Pocket Items
The curve of the card slots makes your wallet seem really 'happy'. This is a great looking wallet. -
Try a shoe repair shop. Mine has a good selection of dye and has been happy to show me how the dyes look when I've asked. You may have to set your sights on 'pretty close' rather than 'exact match'.
-
Are you buffing before you apply the wax? Black usually leaves a lot of extra dry pigment on the surface. Sometimes the black doesn't seem to sink in much at all and it rubs off a little when I buff it.


