-
Posts
46 -
Joined
-
Last visited
Content Type
Profiles
Forums
Events
Blogs
Gallery
Everything posted by stormdevil
-
Show me your wallet
stormdevil replied to Joseph1836's topic in Purses, Wallets, Belts and Miscellaneous Pocket Items
-
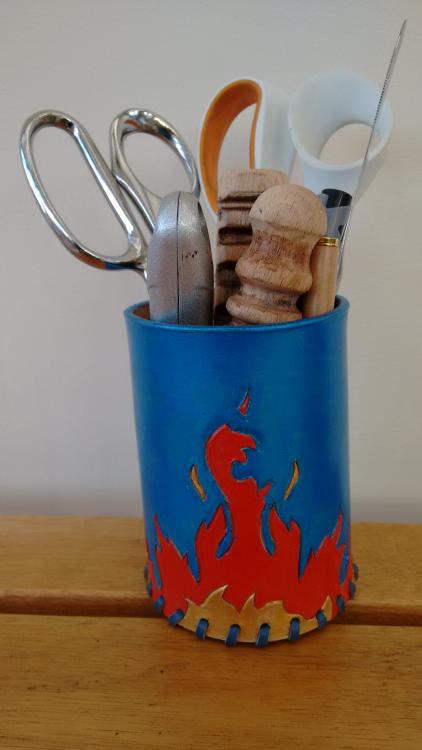
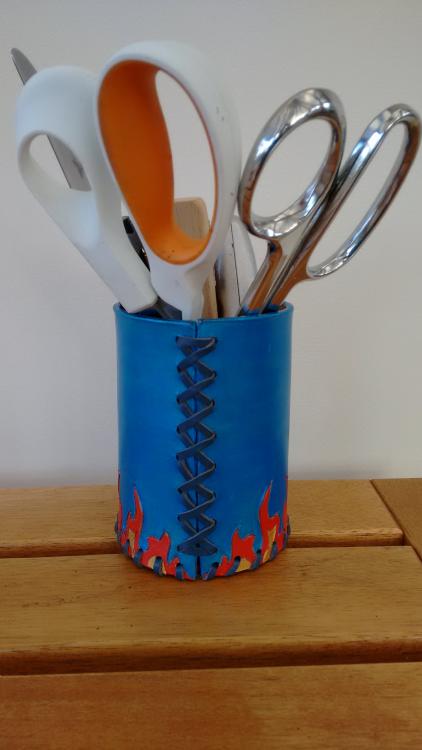
I'm trying out a couple of Angelus paints I got for Xmas. Here is a tool pot - really useful to get tidied up :-) I carved the flame design then just painted. It does the job anyway.
-

My first triweave belt bag
stormdevil replied to stormdevil's topic in Purses, Wallets, Belts and Miscellaneous Pocket Items
They are called swing locks, or swing bag clasps - you can find them on ebay or Amazon. I think Tandy have them too. -

My first triweave belt bag
stormdevil replied to stormdevil's topic in Purses, Wallets, Belts and Miscellaneous Pocket Items
It's not wet moulded. It's one piece with folds and stitching. I've attached a pdf - You'll get the idea from that. beltbag2.pdf -
Hi Ferg Thanks for your suggestions, I'll definitely try that the next time. What I did was: - Soak in warm water. - Left overnight in plastic bag in work room (cool) - Still too wet to work. - Left out without plastic bag for rest of day - Still too wet - Left over next night - Trid to carve - not good, though did get a bit better with more time I have 2 swivel knives - one is a cheap and cheerful one, the other is Japanese. They both have a similar blade. I don't have an angled one, and I probably don't strop enough while I'm working - will need to get one. Toni
-
Yes - It was a cheaper Tandy leather. It seems to stamp reasonably well, but it's definitely difficult to carve. Will try from somewhere different next time, but there's still a lot of this hide to use up yet.
-
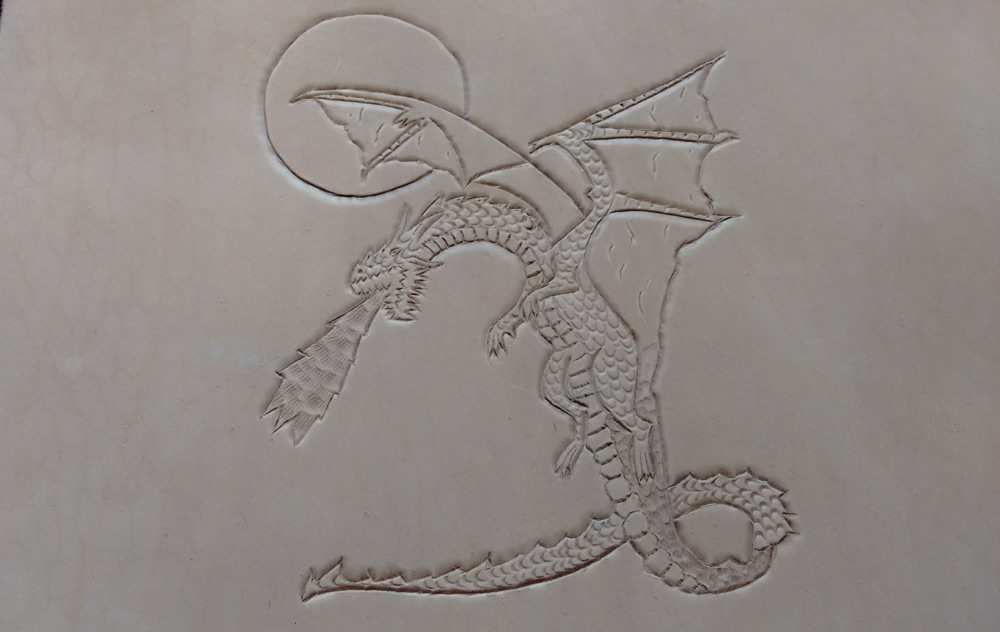
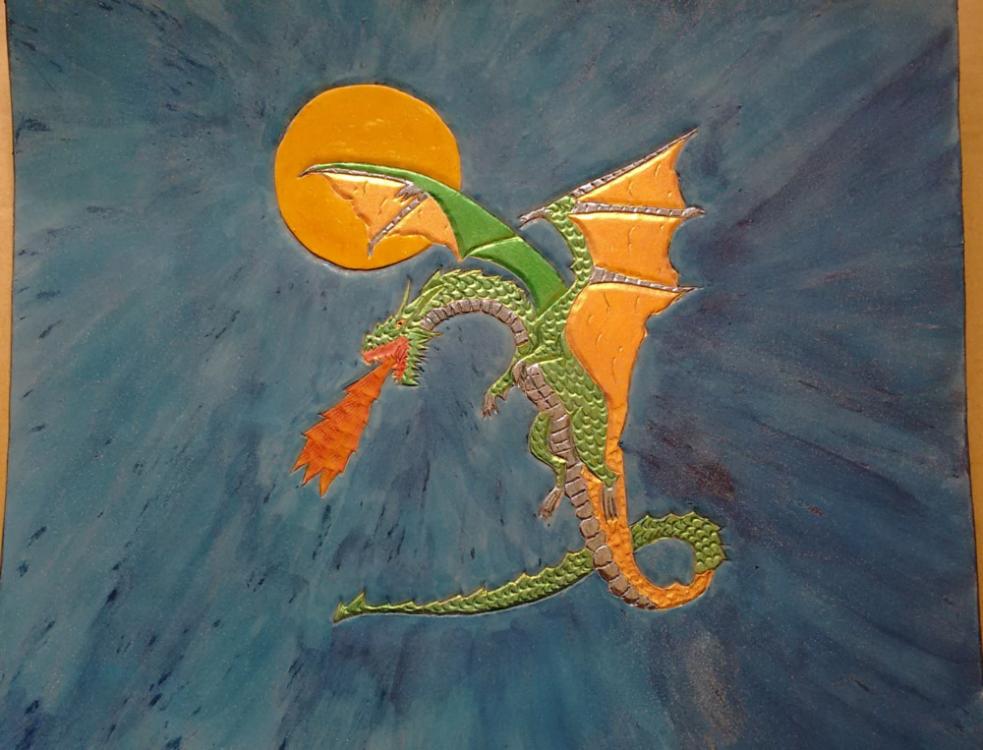
Hi This is my most difficult leather carving to date. I tried really hard to get my leather cased just right, but I still found if difficult to work with. I stropped the swivel knife, but I keep thinking it should be a bit easier than it was. How sharp does the knife need to be? Should I be able to slice paper with it or something? Anyway - after trying out some different dying and painting techniques, I'm quite pleased with the result. Any hints or tips?
-
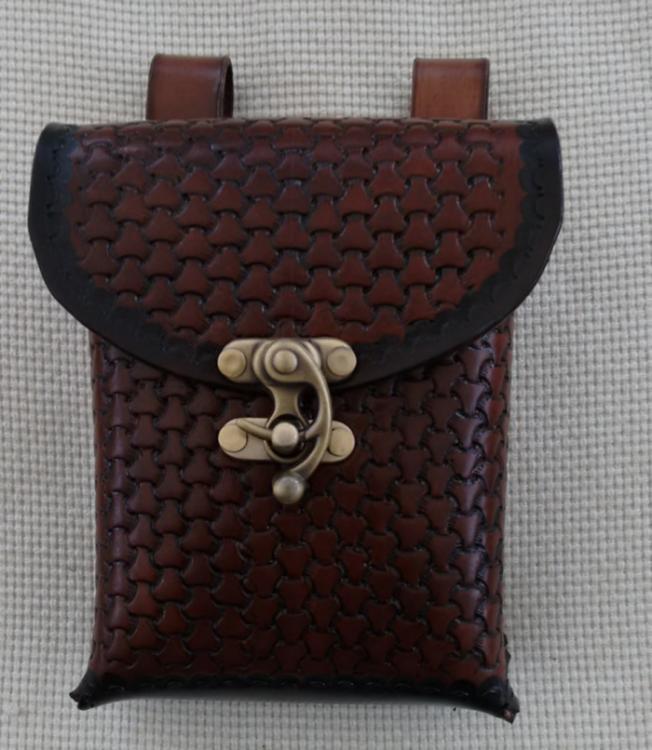
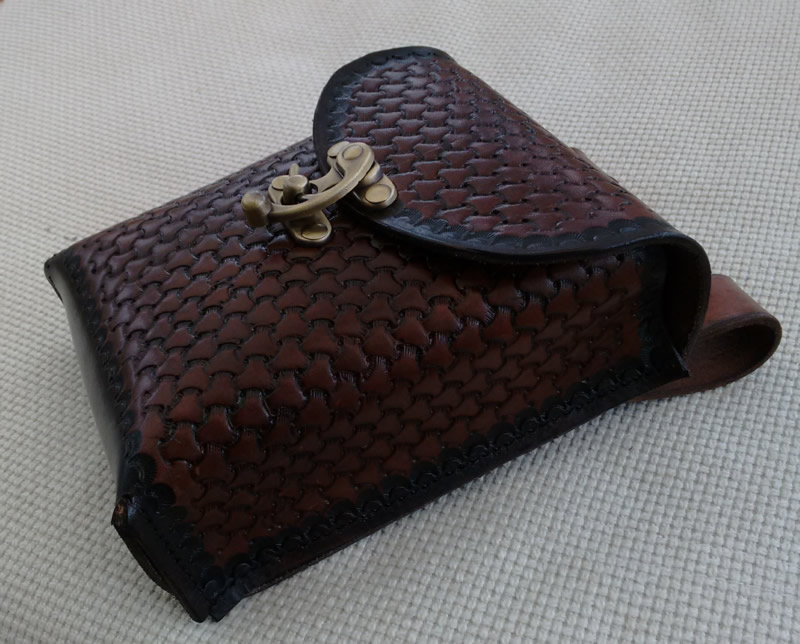
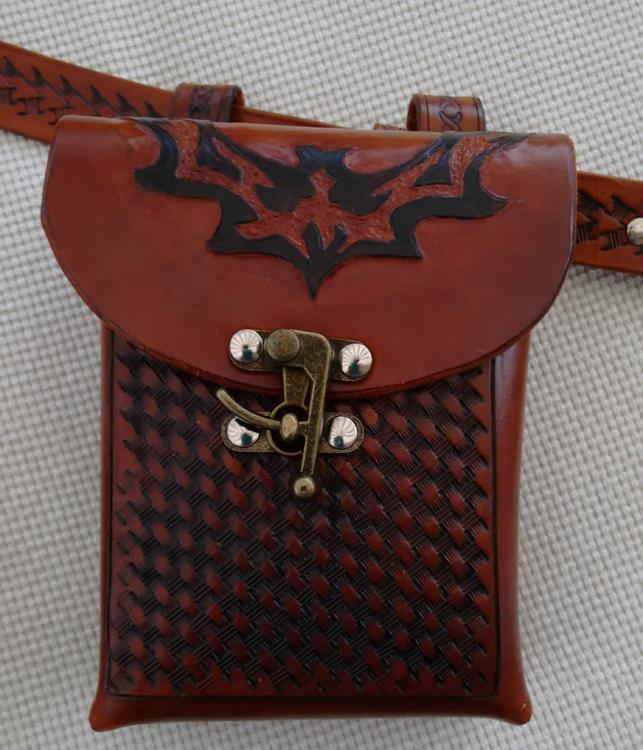
I've just completed my first tri-weave stamping project - a belt bag. I got the stamp for Xmas, so had to try it out. The dyeing, antiqueing and finishing went a lot better this time round - I'm learning what works and what doesn't, - and YES - this time I have matching rivets for the swing lock. So what I've got working for me is: 1. Tool 2. Oil - (olive oil) - a very light one that came from Tesco 3. Fiebings oil based dye (Show brown) 4. 1 coat of super shene 5. Antique with hilite stain (briar brown) - dry for at least a day 6. Dye edges with Fiebings oil based dye (black) 7. 2 coats of tan kote leaving a day between each. Yes is takes some antique with each coat, but just enough to even everything out. 8. 1 coat of resolene since I need to give it water resistance. I don't know if anyone else uses resolene on top of tan kote. The first time I tried went badly since I hadn't left enough time to dry and I tried to rub the resolene in. Now I know to leave enough drying time and just to wipe on the resolene and leave it. I'd love to use one of the laquers like Saddle Lac, but you just can't get it here in the UK.
-
Yes It's the Tandy eco flo gel antique. You are right - the only time I've had an OK result with it is when my leather wasn't pre-dyed. I've given up with it. Tandy Hi-Lite stain seems to work well for me. I've done a few pieces using it.
-
Just using a paper towel folded.
-
Hi I'm trying to use antique gel but it doesn't seem to work. I've got a test piece I'm using. I stamped the leather with a few stamps, then I dyed with a water based dye and allowed to dry overnight. Now I follow the instructions on the eco-flo antique gel: Apply liberally, rub in, wipe off with a soft cloth. (I didn't resist because I didn't mind if colour overall colour changed) I know the gel is supposed to stay in the impressions, but when I wipe everything comes off. Tried again, applied, waited 1 minute, wiped off, and again it all wipes off. It's not a heavy tool impression, because it's a thin piece of leather and I didn't want to go through. Any thoughts?
-

Xmas presents: Sporran, Campaign stool, Belt
stormdevil replied to stormdevil's topic in Historical Reenactment
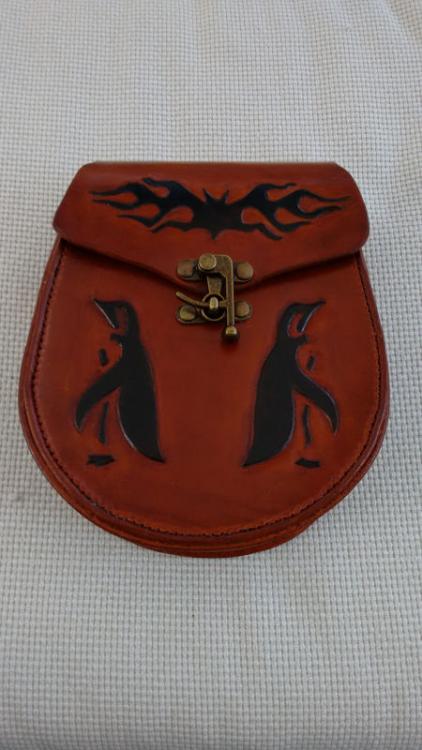
It wasn't meant to be batman and the penguin, though I'll admit it does look like it :-) My son has a "penguin" email address, so we keep giving him things with penguins on. The other part was a flame motif that I put an arrow through, but it now looks like a bat! At least it will be unique.- 9 replies
-
- 3 legged stool
- belt
-
(and 2 more)
Tagged with:
-

Xmas presents: Sporran, Campaign stool, Belt
stormdevil replied to stormdevil's topic in Historical Reenactment
And here's the completed stool with the legs on. It's very difficult to find tribolts in the uk. Tandy ones were too small, since I wanted 30mm legs. I tried to make a tribolt, but it broke as soon as I sat on the stool (ouch). I eventually found one, but relatively expensive.- 9 replies
-
- 3 legged stool
- belt
-
(and 2 more)
Tagged with:
-
So I've been busy making things for Xmas. Hope my family are happy Please give me feedback on my creations - I'm still a novice. (Hoping for some better tools for Xmas ) I'm not completely happy with the campaign stool top - maybe I was a bit ambitious with the carving and the antiquing didn't work as well as I'd hoped (watched the videos, but maybe the tooling is not up to scratch). I kind of regret leaving the circle natural - but you learn as you go. Got my husband working on the legs, will post a photo when the whole things is done.
- 9 replies
-
- 3 legged stool
- belt
-
(and 2 more)
Tagged with:
-
Agreed - though the rivets don't look too bad in real life - the photo makes them look really shiny. The rivets supplied with the clasp were useless, so this was what I had. I have now got myself some matching rivets, so my next project doesn't have the shiny ones.
-
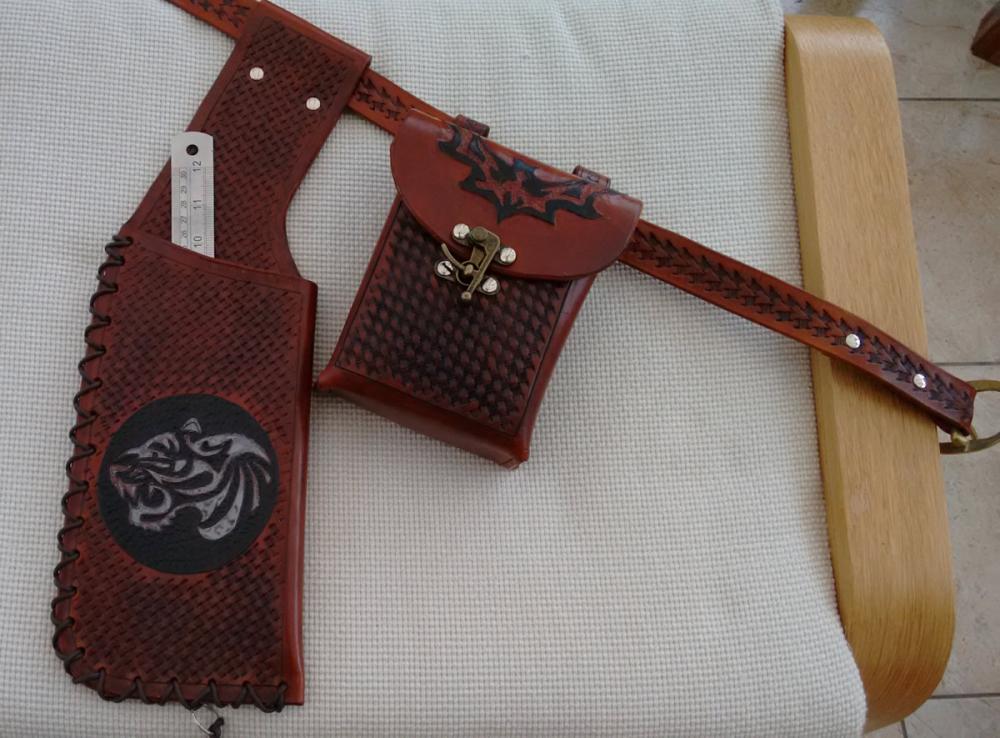
Just finished my first belt bag to go with my archery set. I'm quite pleased with it. Got a better tool for the basket weave, and the antiquing went a lot better than first time round. Lesson learned there is waiting for a day between each step. Photos show the belt bag and the completed archery set, which I'm already using :-)
-
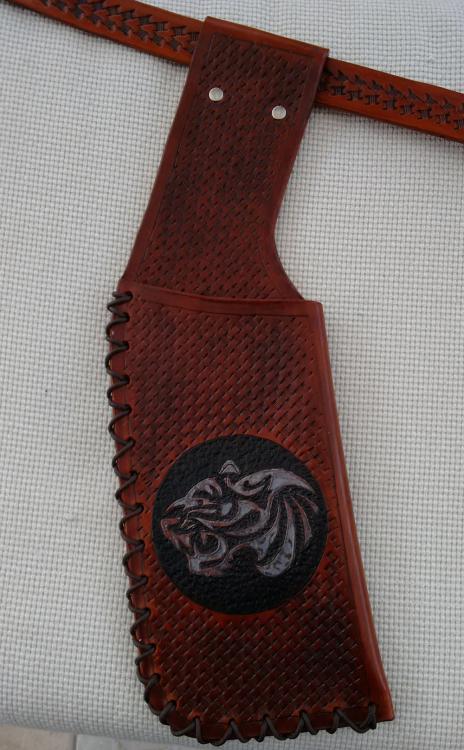
Here is my first big leatherwork project. I think its turned out OK. I'm quite pleased with the arrow basketweave on the belt, that worked really well. The tiger on the quiver could be better, but quite pleased with the overall appearance. Maybe I need better tools! The basketweave on the quiver bent the cheap ebay tool - now I have a much better one! I took the pattern off my existing quiver, so I'm happy that worked out. I did have some problems with the finishing after antiqueing, but did manage to recover. What do you think? I'll have to see how it stands up to actual use.


