Bree
-
Posts
770 -
Joined
-
Last visited
Content Type
Profiles
Forums
Events
Blogs
Gallery
Store
Everything posted by Bree
-
I'll start. Pay attention to the simplest things first. Sewing machines love oil. Make sure that your machine has oil. It is very easy to forget to oil her. Also make sure it is the right kind of oil. Don't pour motor oil into your expensive sewing machine! I use Lily White or Juki Defrix #2 in all of my machines. Another simple thing is needle placement in the needle bar. Your needle wants to be inserted all the way up and facing in the right direction. This is essential for the hook to pick up the thread. If you don't get your needle in right, the result is missed stitches. Take your time and get it right... the right size needle inserted in the right way. Another simple thing really isn't the sewing machine at all but is essential for good sewing... proper light. Make sure you can see what you sew. Get some good light on that needle. I like to flood the area with light from all directions. My favorite light is the Verilux Shop Light with full spectrum lamp. It has tons of beautiful white light. I supplement it with spot lights from several directions. That should be enough of the simple things to get your thread started.
-
Problem with stitches on the back....
Bree replied to hidepounder's topic in Leather Sewing Machines
Bob... I wonder if this isn't a problem that is unavoidable with any sewing machine sewing leather. If you think about what is happening there is a difference between the top and bottom because of what the needle is doing. On the top it punches a hole going down or into the leather. The edges of the hole are smooth and well defined. The thread looks good coming out or going into the hole. On the bottom it's a different ball game. The needle punches through and pushes the leather OUT versus IN. The edge of the hole is more ragged. It's like the difference between a bullet going through front and back. The back is a lot messier so it won't ever look as good. That's my thought on it. I have the same problem and could never get tension to fix it. You don't see the problem when sewing fabric because the needle is not cutting and pushing through, it is finding an opening in the warp and woof of the fabric... parting it. -
For all you Belt makers - Gluing edges
Bree replied to ABC3's topic in Purses, Wallets, Belts and Miscellaneous Pocket Items
Bob... there are a ton of tampers out there. Some of them are pretty cool and expensive. But I found this one at Premier Gourmet Foods in Buffalo. It was packaged with some European company's label. I can't find that anymore but I did find it under the Copco label in Canada. Forget their description in the ad... it is all metal... aluminum I think. Some copywriter messed up. http://www.kitchenniche.ca/espresso-tamper...ml?currency=USD It is inexpensive and it has three features that make it perfect for my belt making activities. 1) Size of 1 7/8" in diameter so it fully covers a 1 1/2" belt 2) Smooth, flat bottom 3) Rounded edges so it can't catch and mar the leather creating a line. It is strong, simple, and for $10, I thought it was the best deal in town and snapped it up. I have never been sorry. I use it for a lot of smoothing operations. I like the way it is designed. It may not be the best espresso tamper but it is a killer smoothing and glue tool. -
Distressed Dee-Ring Belt
Bree replied to NoahL's topic in Purses, Wallets, Belts and Miscellaneous Pocket Items
That's Now Generation! -
For all you Belt makers - Gluing edges
Bree replied to ABC3's topic in Purses, Wallets, Belts and Miscellaneous Pocket Items
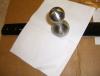
Your wish is my command! It is incredibly simple as you can see... I use my drill press fence and a Calo clamp guide. The blank is fit between the two and they are clamped down forming a channel of the exact width of the blank. I apply the contact cement and let it dry. Then I carefully start one end. I use canned air to make sure everything is super clean. The lower blank hangs off the edge and the upper blank is rolled backwards so the cemented portions can't make contact until I want them to. I roll the top blank onto the bottom and periodically move the bottom blank back until the belt is completely glued up. Then I take my tamper and some lintless cloth and press down the blanks so there are no voids. The bottom PIX show a belt that I had already dyed the top blank black for a two tone. The tamper is just that... an expresso tamper... that is the perfect size and shape for the job of tamping down 1 1/2" belts to make sure the glue all bonds yet doesn't mar por scratch the belt surface.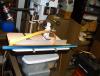

-
GREAT WORK! Just BEEUTEEFUL!! And Bob Park rocks the country with his work and techniques... none better.
-
Looking for the ideal sewing machine to stitch thin/soft leather
Bree replied to UKRay's topic in Leather Sewing Machines
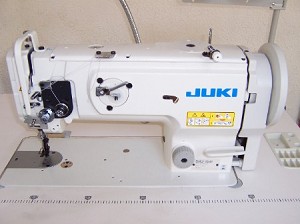
I swear by this machine... Juki DNU 1541-S It is a GREAT sewing machine for light to midweight leather. Best machine that I own and the workhorse for my business. http://www.juki.co.jp/industrial_e/downloa...g_e/dnu1541.pdf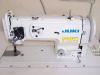
-
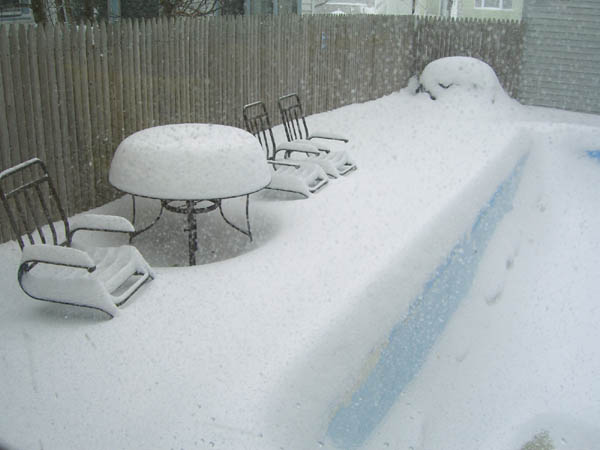
I live in Buffalo, NY. The Buffalo area is famous for two things shown below.


-
Tormek's are the cat's meow of wet grinders. But they are mucho expensive. So what I did is to stop at Grizzly in Muncie, PA and picked up their 10" wet grinder clone of the Tormek T7. Then I bought Tormek jigs. Most fit the Grizzly fine. The Grizzly cost me $169 vs the T7 at $589. Works like a charm especially with the Tormek jigs. I basically got the jigs free and had some $$$ to boot.
-
Who has time to be creative any more?? Steal what works for someone else.
-
Great job! Killer mauls. Sharp sharp tools does smooth, easy turning make!
-
I have about two dozen different colors of industrial thread which I got from the Thread Exchange. Good quality thread at a reasonable price.
-
KILLER work.
-
Pocket Holster - LCP
Bree replied to JeffGC's topic in Gun Holsters, Rifle Slings and Knife Sheathes
Pretty clever idea! -
I have a big Toro machine. Too bad methinks cuz I would have snapped that deal up in a heartbeat. Good machine... excellent service behind it.... the very nice price.
-
I have never heard of this machine. Have you got some PIX or a link describing it? I have a DNU 1541. It certainly can do what you ask.
-
Hey Steve! I'm having fun watching you grow! LOL! I had a guy over today who wanted some patches sewn on his vest and wanted them over some pockets. It was that old Singer 29K60 that got the call!! My big modern Juki and Toro 4000 just can't go there. But that old Singer built in Clydebank, Scotland in 1945 is still purring like a kitten with its treadle, long thin cylinder arm, and universal top feed. They just don't make em like that anymore! Machine is going to outlive me for sure. And it will still be sewing long after I am dead and buried.
-
It's a kind of HDPE board. Campbell Bosworth sell them. Other Clicker Press suppliers do as well. http://www.campbell-bosworth.com/catalog/p...roducts_id/2291
-
Let's talk about the consumer end. Paypal is all about EBay and if you use Paypal as a consumer for purchases outside of EBay you're probably nuts. Use a credit card. I bought a GPS from an outfit named eSC Stores. I was in a hurry and didn't do my homework. I used Paypal thinking that they would protect me. BIG MISTAKE!! ESC Stores turns out to be a bunch of thieves. They took the money and that's about the last I heard from them. No replies to communication... no goods shipped. I file a Paypal claim and they don't reply to Paypal. Paypal rules in my favor but they say that they can't recover any money from eSC Stores so I won't be getting any money. Bottom line... I am out $424.22. Thanks thieves at eSC Stores. Thanks Paypal. Take my advice use your Visa card and forget Paypal. You may get protection for EBay purchases but nothing else.
-
In that other thread Billy P was talking about his daughter punching through and wiping out a tool on the slab. So I was talking about "tooling" in the broad sense which includes punching, cutting, stamping, and other stuff. If you are ONLY stamping, you don't need the poundo board and may not want it. Quite frankly I don't think it makes a lot of difference one way or the other. The cased leather is going to give before the poundo starts to give. But I do more punching than stamping so mine isn't the last word on the matter. I suppose that you get a bit more compression stamping on the stone rather than on the poundo on the stone.
-
Continue stitching after running out of thread
Bree replied to dbusarow's topic in How Do I Do That?
How about a PIC of the whole belt now that you got us interested in it? -
I don't want to punch through and have the tool hit the stone. The stone is a solid stable flat surface... good base for tooling operations. The poundo board absorbs any punch throughs. If I am only stamping, I wouldn't need the poundo but I do a lot of punching so I tend to use it all the time. I think I was speaking of tooling in the broader sense where punching is tooling as Billy P was describing with his daughter. Quite frankly I found that a 1" Resolene board is great for both kinds of tooling. I have a large one in the shop and I do all my shop punching on it. Upstairs I have a marble base with poundo glued to the bottom to keep it from scratching the table and a poundo that I can remove or put on top as I wish. I don't have a poundo of the same size as the new granite plate as it is a little smaller than the marble. I guess I could use the oversize poundo if I need it.
-
Last week in the home workshop
Bree replied to Lobo's topic in Gun Holsters, Rifle Slings and Knife Sheathes
Sorry for the late reply. Somehow I lost track of this thread. LOL! Sometimes my shop looks just like that! I drag stuff over to the kitchen table and start whacking away or put the newspaper out so I don't dye the table. But I am supposed to keep my stuff in the real shop or in the sewing room. Now as far as the Bud goes... those days are over for me. I certainly had my share of tall frosty ones and many other insane concoctions. But I gave it up some years ago and don't drink alcohol anymore. Watch out or you might get a TWI... Tooling While Intoxicated! Super Glide is a great Glide. I almost bought one. I am riding a Wide Glide and I do love it so. Just had new Progressive shocks put on along new motor mounts and floating rotors. Bike rode very very nicely down through the mountains of Central PA on my vacation. PS... that belt is still pretty cool. EZ to eliminate the vertical stitch. Not surprised that you are selling a lot of them. BTW... I took some bullhide and cut a pattern to make myself a replacement for my Desantis Nemesis holster for my P3AT. I extended the pattern so I can slip in an extra mag and make it fit a little more snugly in the pocket. I'm going to vinegaroon it and maybe tool it to give the grain a little more traction. I'll post a PIC when I get finished. Not sure when that will be but it is a project in queue. I have been busy fooling around with my new lathe making pens and stuff. Just built a new pen press last night. Wood and leather go together somehow though I'm not totally sure exactly how! -
Continue stitching after running out of thread
Bree replied to dbusarow's topic in How Do I Do That?
Apart from making changes to the backstitch technique as others have suggested, you might have moved the top and bottom backstitches so they are uniform and directly atop or under the peaks of the interior pattern. That would be 3 and 4 stitches back respectively. Then you could have backstitched the interior 2 1/2 stitches back right at the intersection. Those changes might have made the backstitches less obvious due to optical "illusions". Quite frankly I think you did real well at making the thread changes fairly well hidden. Good job! -
Old Singers most often have metal parts internally. They are capable of some serious sewing. That's why they last so long. OTOH... they are not industrial machines. They are not designed for that kind of heavy duty sewing. They are home sewing machines designed for moderate garment sewing. Usually for leather applications an industrial machine is the better choice. Leather is a tough material to sew. It takes its toll on home machines fairly quickly. This is especially true as you start pushing the envelope and doing thicker and thicker leather. The Singer home machine will almost certainly sew the things you mention but it is not designed for those applications. I would invest in an industrial machine. They are not as versatile but they are reliable workhorses designed to handle tough work. I have both kinds and I always use my heavy industrial machines to sew leather. My $.02.